
Roles and permissions
Last updated: 7 November 2026 · 4 min read
A role is a set of permissions that you give to users. A cashier role might only sell, while a store keeper role handles products and purchases but cannot see reports. You make a role once and give it to as many people as you like.
Before you start: You need permission to open Roles. Changes to a role apply to everyone who has it the next time they sign in.
Built-in Admin and Cashier roles#
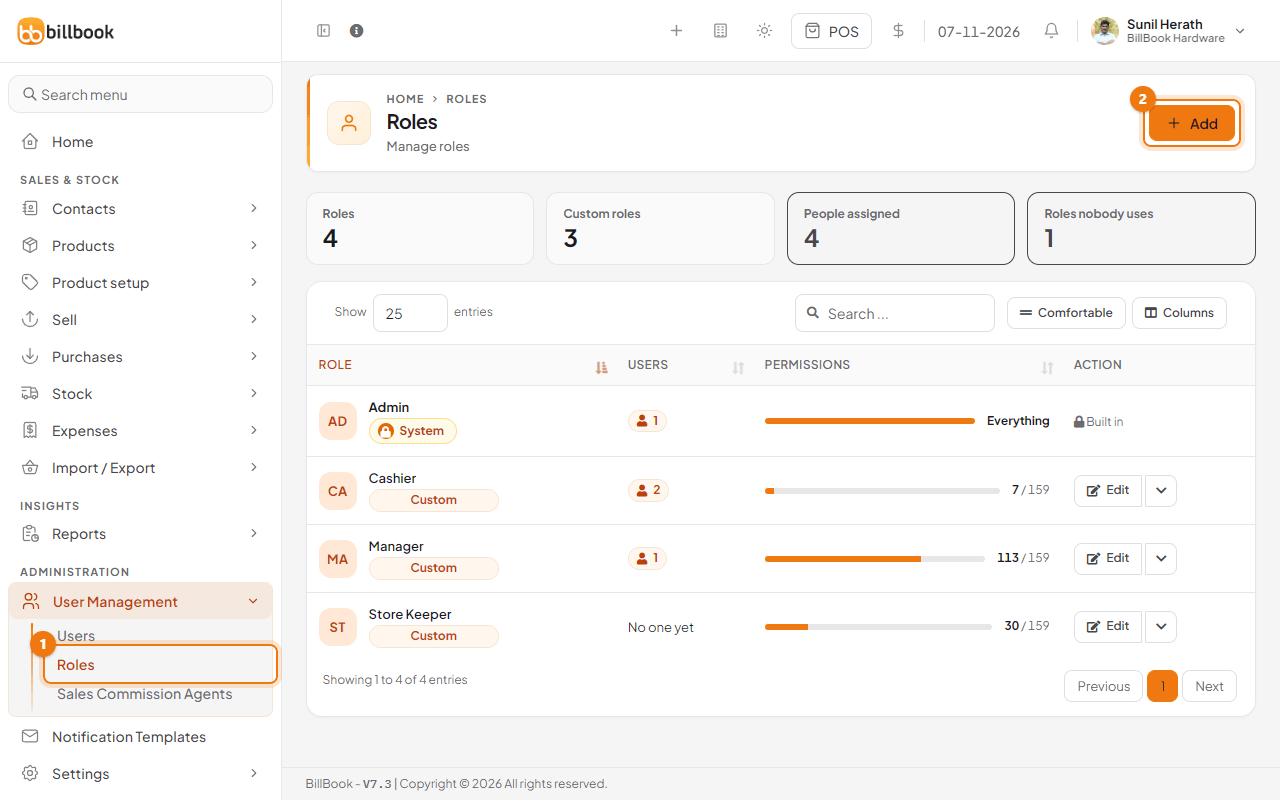
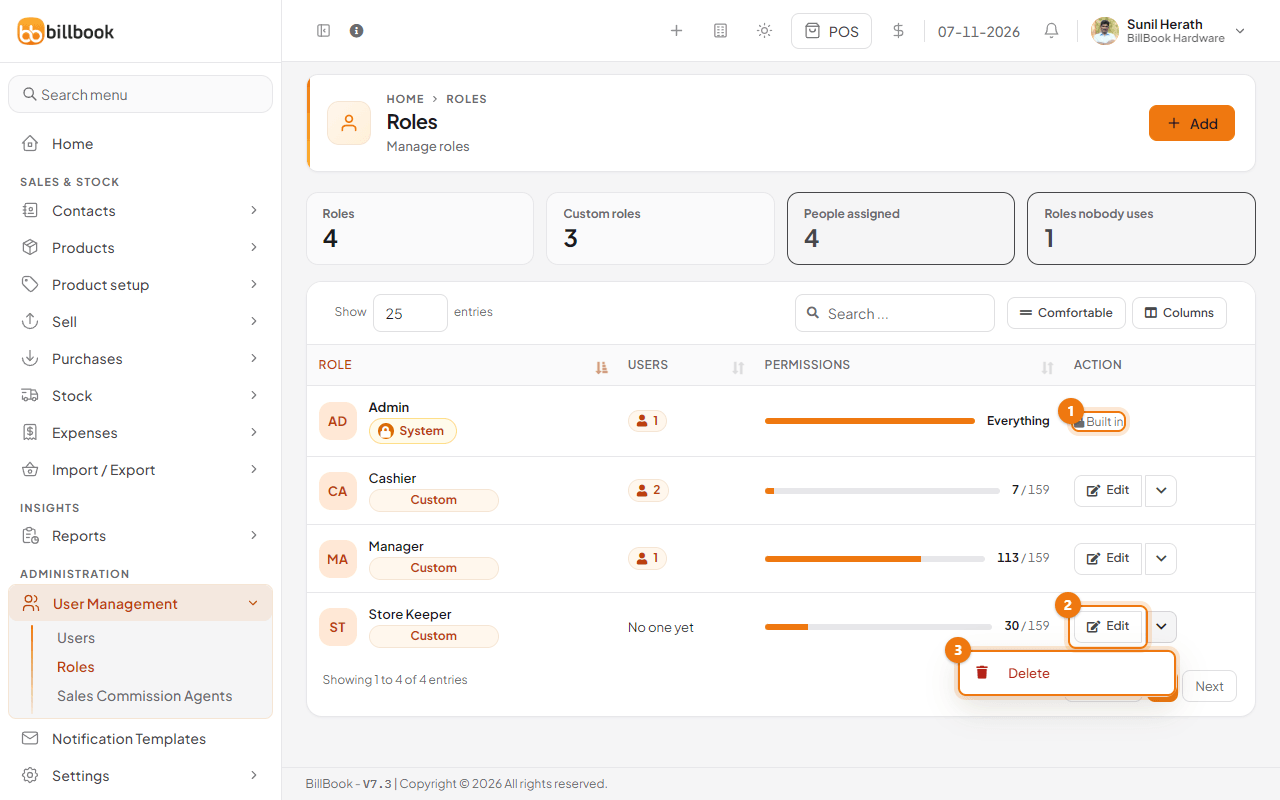
Go to User Management > Roles (1). Every business starts with two roles:
- Admin is built in. It is marked System and Built in, has Everything, and cannot be edited or deleted. The owner uses it.
- Cashier is a starter role for counter staff. You can edit it like any role you create. The demo business also has a Manager role.
The cards at the top count your roles, Custom roles, People assigned and Roles nobody uses. The Permissions column shows how many permissions each role has, for example 113 / 159. The numbers depend on the modules you have switched on.
Create a custom role#
- On the Roles list, select Add (2).
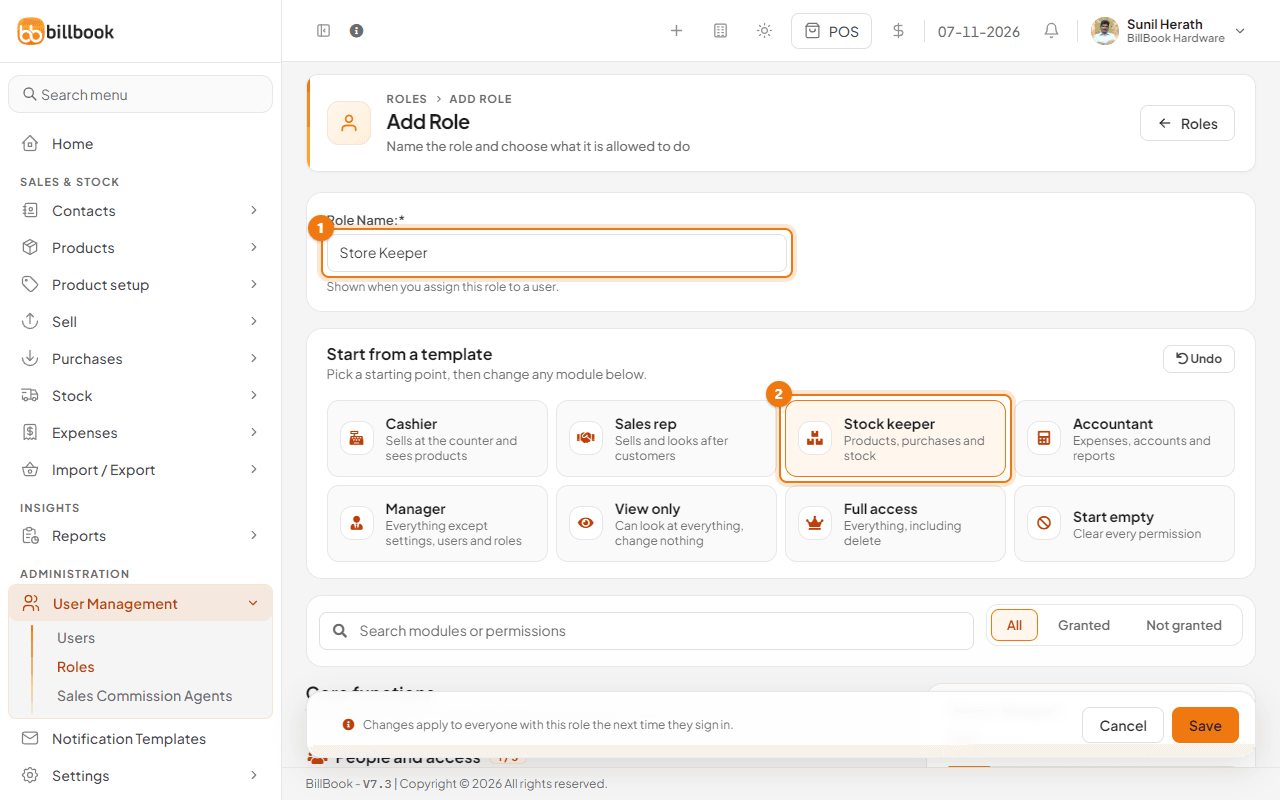
- Enter the Role Name (1), for example Store Keeper. This name appears when you give the role to a user.
- Under Start from a template, choose the closest match (2). The templates are Cashier, Sales rep, Stock keeper, Accountant, Manager, View only, Full access and Start empty. Select Undo if you picked the wrong one.
- Change any permission you need (see the next section).
- Select Save at the bottom of the page. BillBook shows Role added successfully.
Now give the role to a person under User Management > Users. See Add and manage users.
Permission groups explained#
Below the templates, Core functions groups the permissions by job:
- People and access: Others, User, Roles, Supplier and Customer.
- Products and purchasing: Product, Purchase, Stock Adjustment, Stock Transfer, Purchase Requisition, Purchase Order, Brand, Tax rate, Unit, Category and Report.
- Selling: POS, Sell, Sales Order, Draft, Quotation, Shipments, Cash Register and Access selling price groups.
- Money and reports: Expense, Home and Account.
- Settings and store: Settings.
A Modules group appears when you turn on more modules in Settings > Business Settings > Modules.
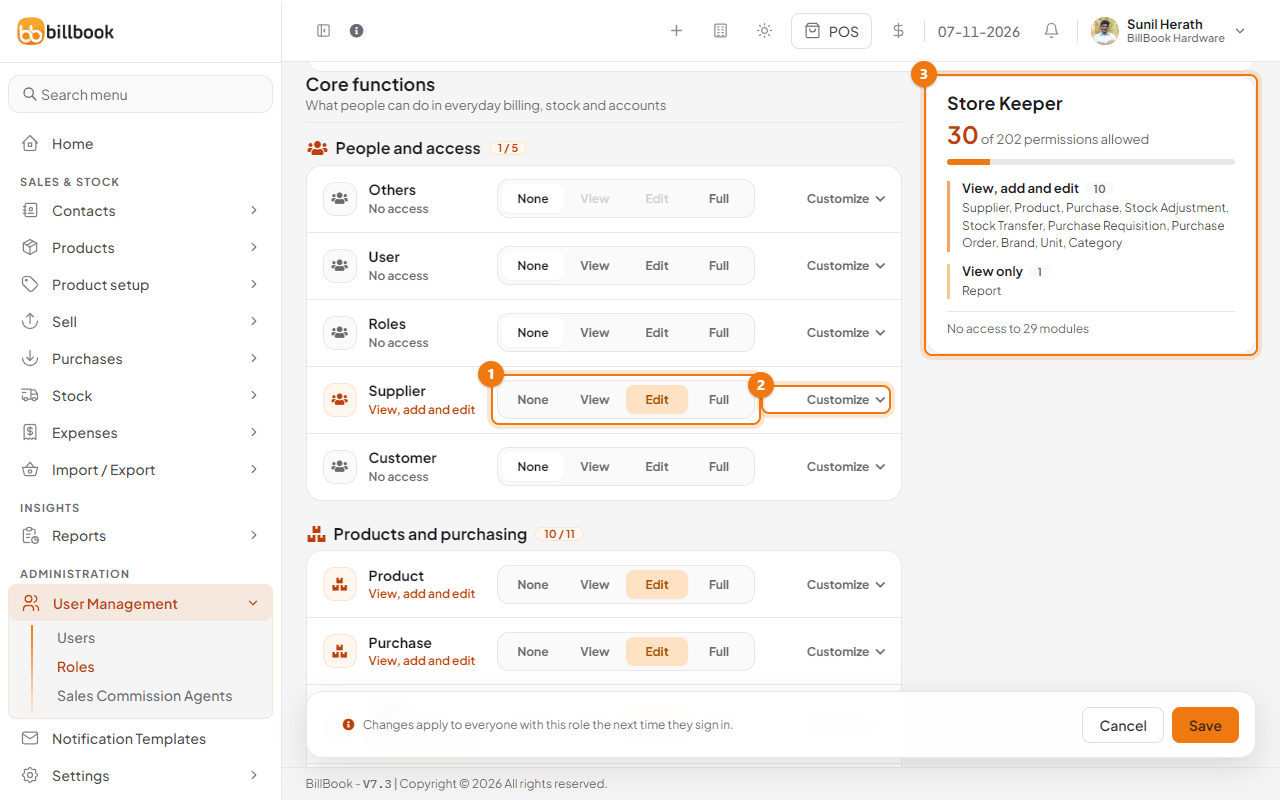
Each row has four levels (1):
- None: the person cannot open it.
- View: they can look but not change.
- Edit: they can view, add and edit.
- Full: they can also delete.
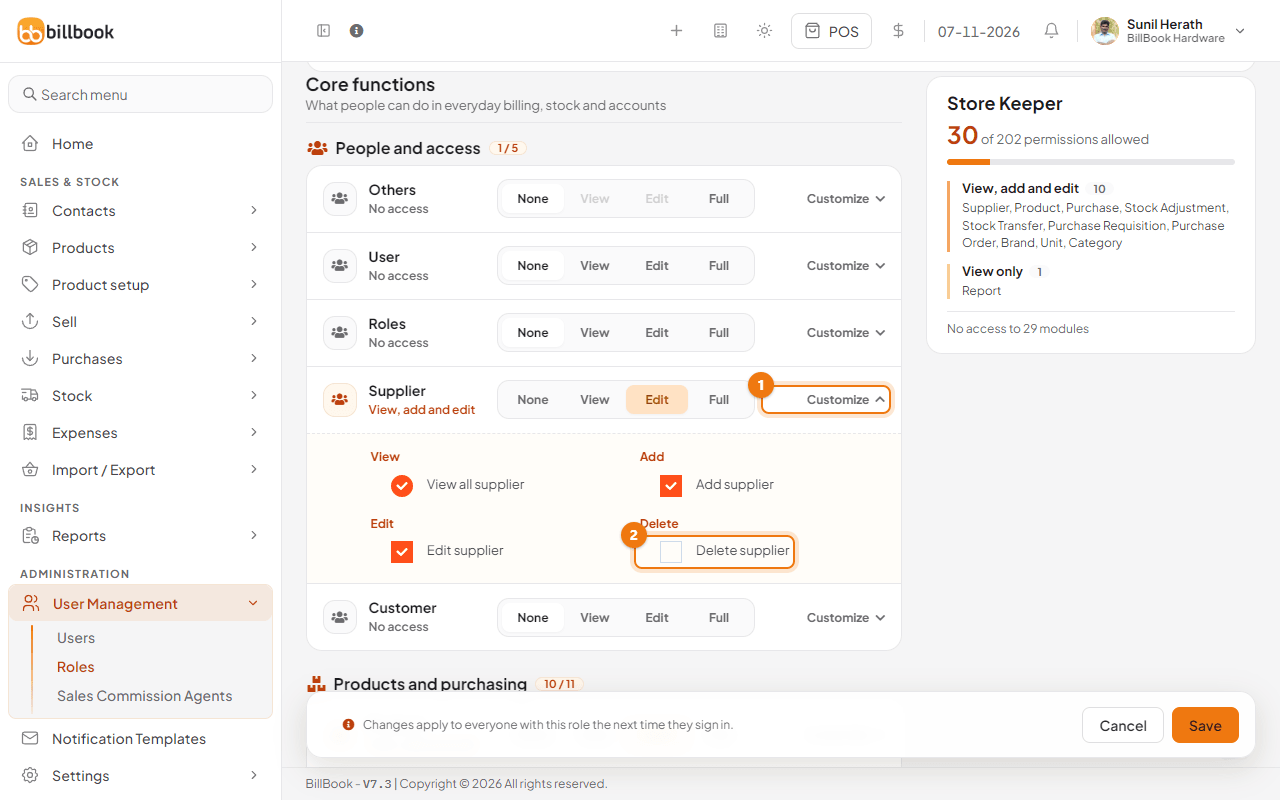
For finer control, select Customize (2) on a row and tick exactly the permissions you want, for example Edit supplier but not Delete supplier. The box on the right (3) shows the role name and how many permissions it has, and lists the areas by level. Use Granted or Not granted above the list, or the search box, to find a permission quickly.
Send to kitchen / reprint KOT#
Restaurants have one more permission. Under Selling, select Customize on POS and look under Other permissions for Send to kitchen / reprint KOT (1).
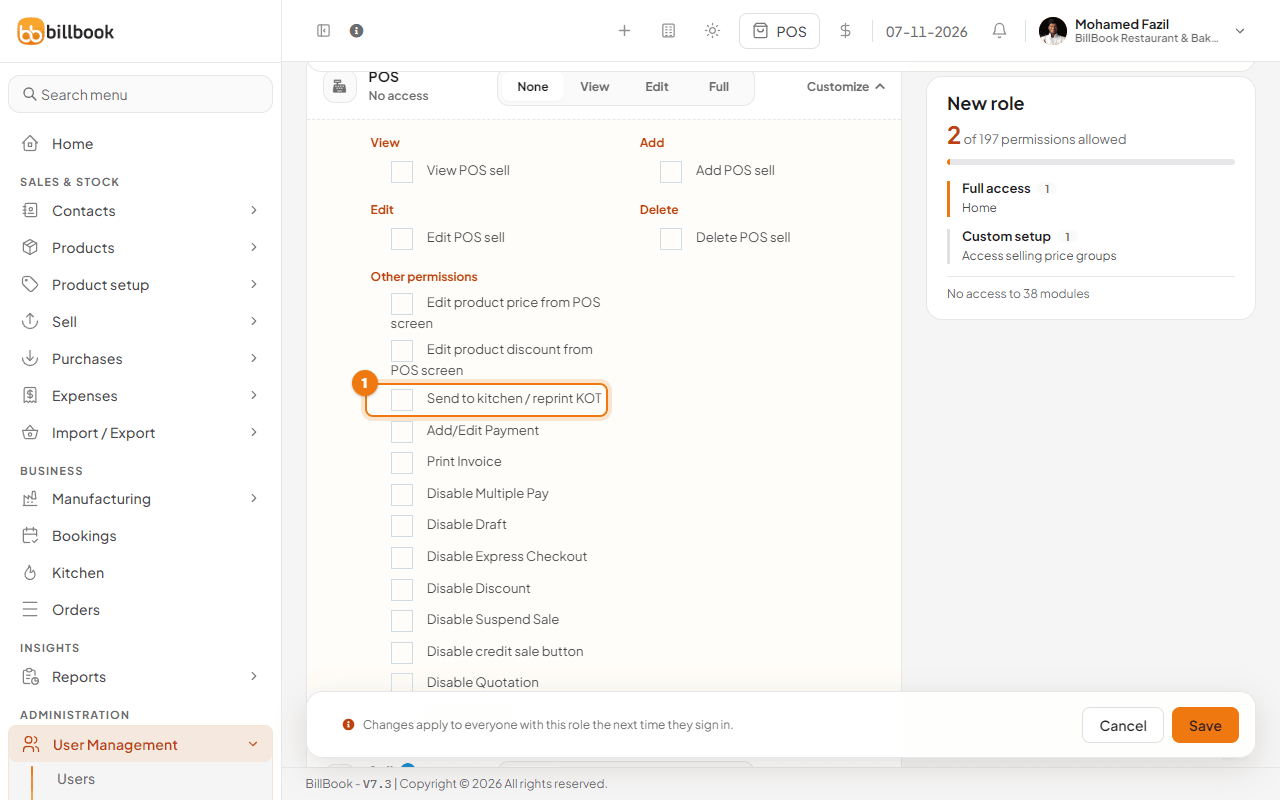
People with it can select Send to kitchen on the POS and Reprint KOT in the sales list and on the Kitchen screen. The Admin role always has it, and so does the Cashier role of a new business. Without it, the Send to kitchen button is hidden. The KOT of a paid sale still prints at payment, because the location settings decide that. A person who is limited to their own sales can only send or reprint the KOT of their own sales. See Kitchen order tickets (KOT) and token numbers.
Tip: Start from a template and remove what you do not need. It is quicker and safer than building a role from Start empty.
Location-based access#
A role does not choose locations. You set the locations for each person on their user form, under Access locations: tick All Locations, or only the shops that person works in. So two cashiers can share the Cashier role and still see different shops. See Add and manage users.
In Selling, Access selling price groups lets you choose which selling price groups the role may use on a sale.
Edit or delete a role#
- On the Roles list, select Edit (2) on the role's row, change the permissions and select Update. BillBook shows Role updated successfully.
- To remove a role, select the arrow next to Edit and choose Delete (3). BillBook shows Role deleted successfully.
Admin shows Built in (1) and has no Edit or Delete.
Note: Before you delete a role, check the People assigned number. Move those users to another role first.