Selling price groups
Last updated: 7 November 2026 · 3 min read
A selling price group is a separate price list. You might sell to the public at one price and to contractors, hotels or other shops at a lower one. Create the group once, then give each product a price for it.
Before you start: You need permission to open Product setup. The products must already exist. See Add a product.
Create a price group#
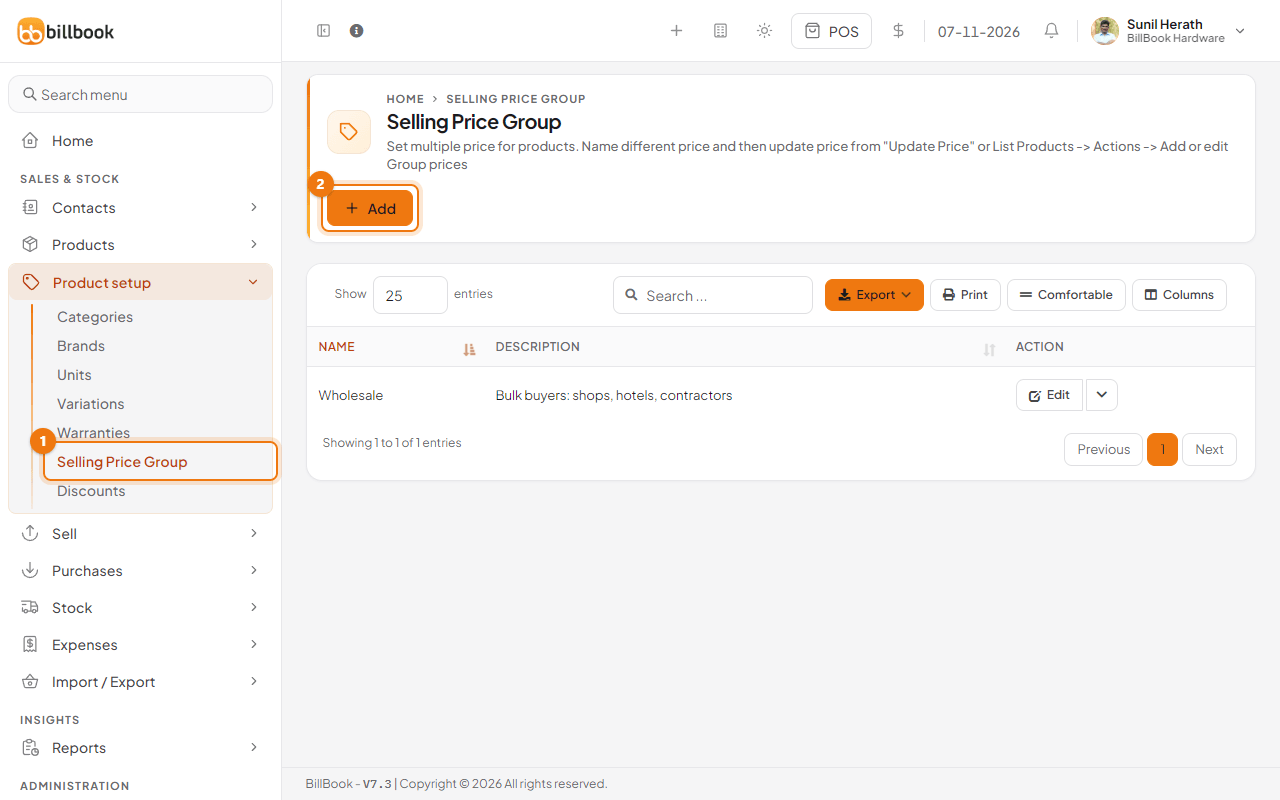
- Go to Product setup > Selling Price Group (1). The list shows each group with its description. The demo business already has Wholesale.
- Select Add (2).
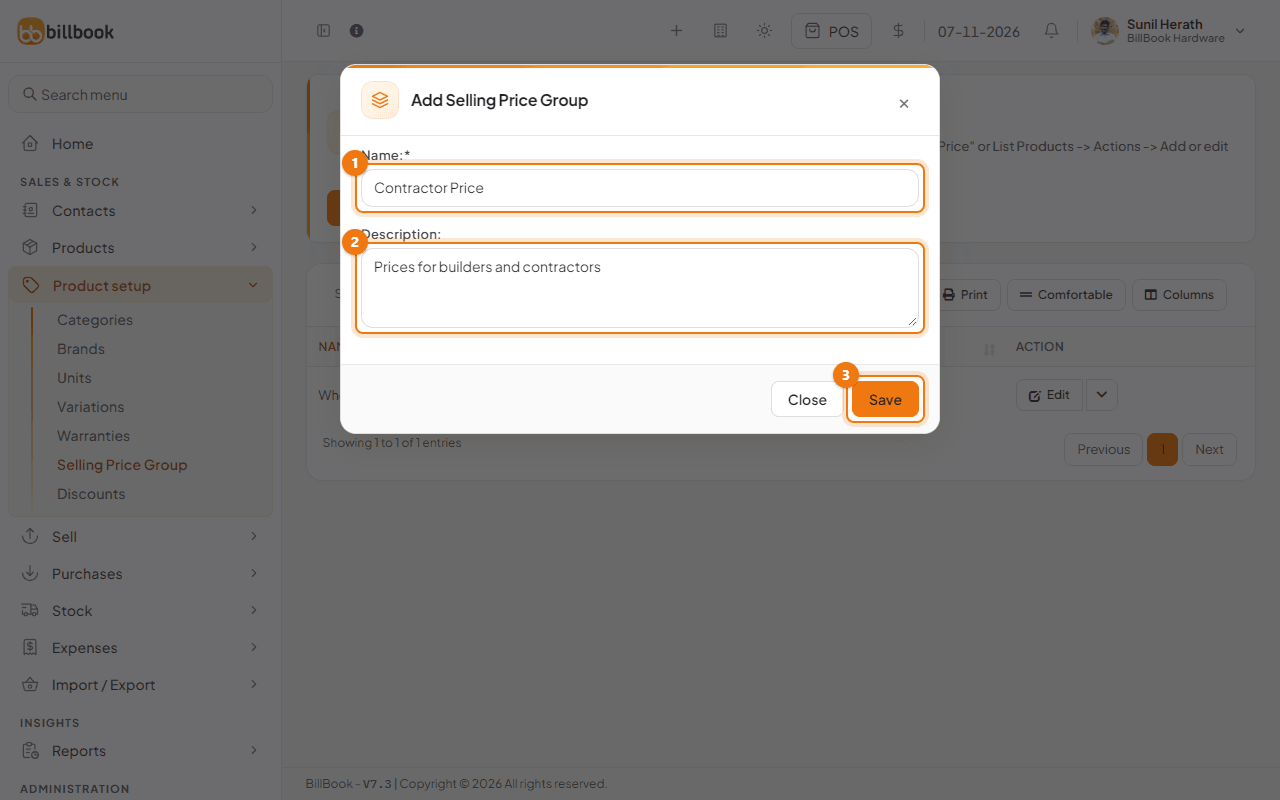
- Enter the Name (1), for example Contractor Price, and a Description (2) to remind you who it is for.
- Select Save (3).
A new group has no prices yet. A product keeps its normal selling price for any group you have not priced.
Set group prices per product#
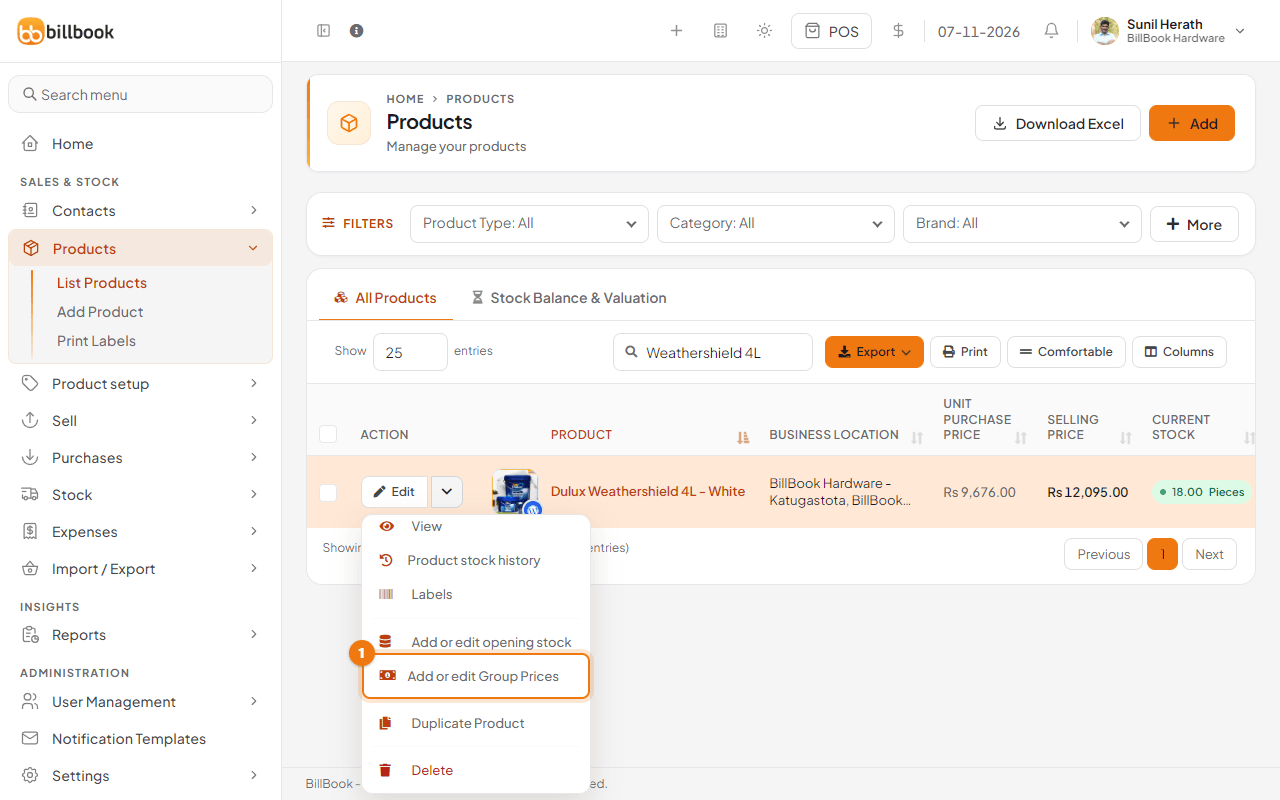
- Go to Products > List Products and find the product.
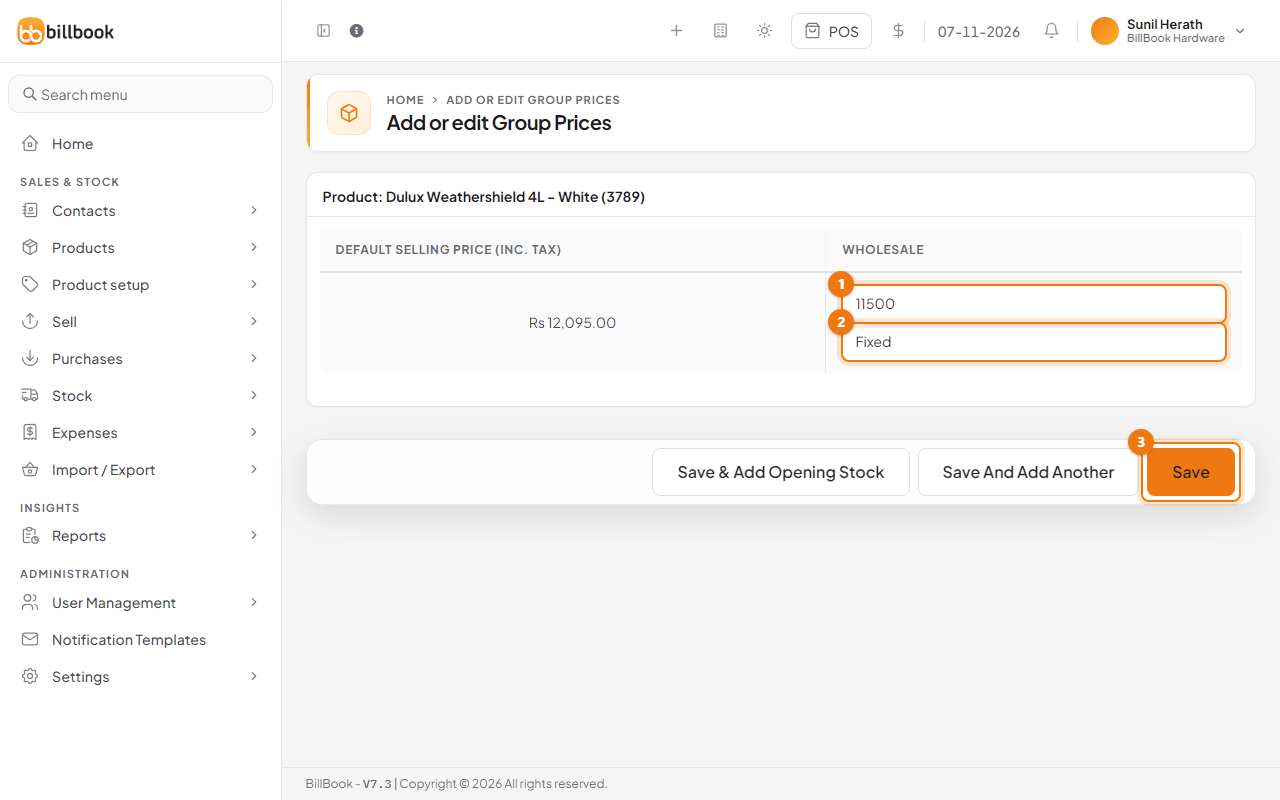
- Select the arrow next to Edit and choose Add or edit Group Prices (1).
- The page shows the Default Selling Price (Inc. Tax) and one column for each group. Enter the group price in the box (1). For Dulux Weathershield 4L - White, the default price is Rs. 12,095.00 and the Wholesale price is 11500.
- Choose Fixed or Percentage (2) under the price. Fixed is the price itself. Percentage is a percentage of the default price.
- Select Save (3). BillBook shows Updated Successfully.
You can also reach this page from a new product: on Add Product, open Save and and choose Save & Add Selling-Price-Group Prices. That choice only shows when you have at least one group.
Import and export prices#
To change many prices at once, use a file.
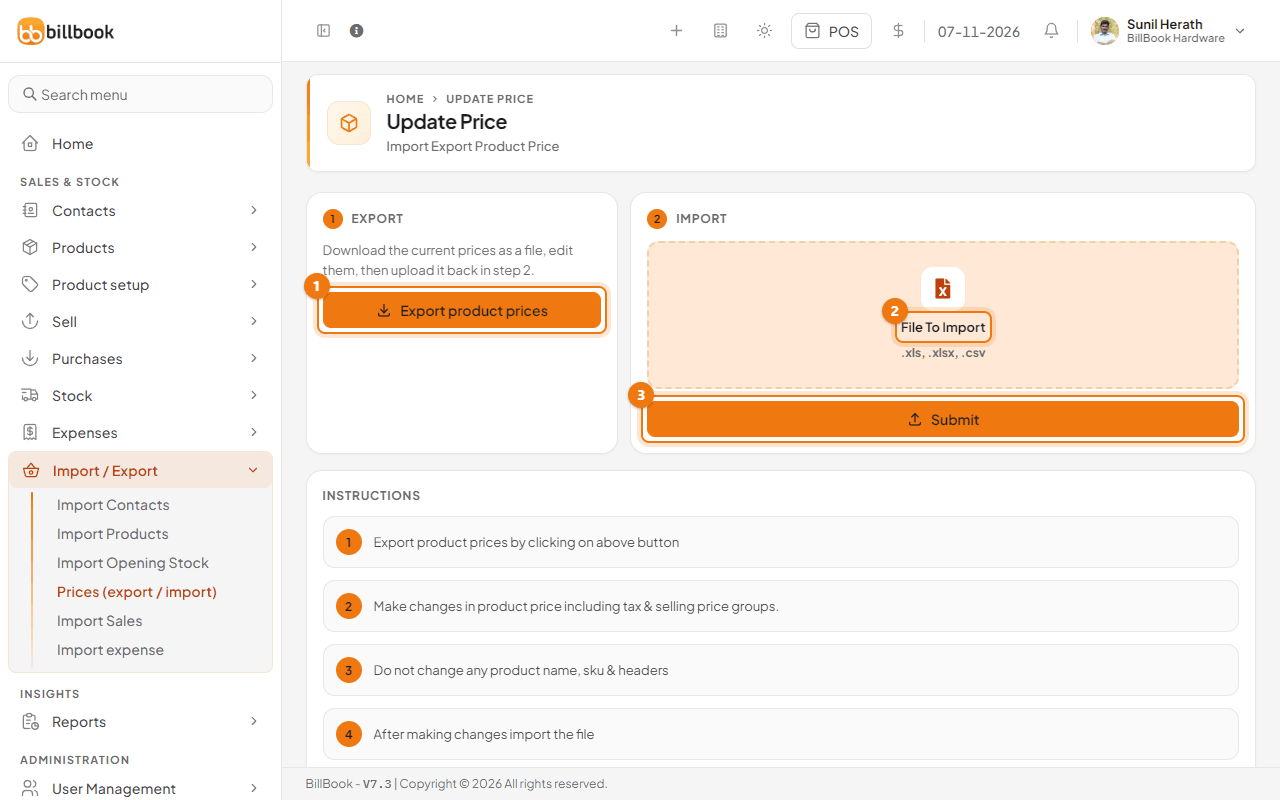
- Go to Import / Export > Prices (export / import).
- Select Export product prices (1). BillBook downloads product_prices.xlsx with one row for every single and variable product.
- Open the file and change prices. The columns are product, sku, Selling Price Including Tax and one column for each active group, named after the group, for example Wholesale. Type a percentage as 10%, or a plain number for a fixed price.
- Do not change the product names, SKUs or the column headings.
- Under File To Import (2), choose the edited file (.xls, .xlsx or .csv).
- Select Submit (3). BillBook shows Product prices imported successfully.
Note: If one row has a SKU BillBook cannot find, or a Selling Price Including Tax that is empty or not a number, BillBook stops and shows an error. No prices from that file are saved, so fix the row and import again.
Use a group per location or customer group#
- Per location: go to Settings > Business Locations, edit the location and choose a Default Selling Price Group. Sales at that location then start with that group. See Set up business locations.
- Per customer group: in Contacts > Customer Groups, set Price calculation type to Selling Price Group and choose the group. See Customer groups and group pricing.
Activate or deactivate a group#
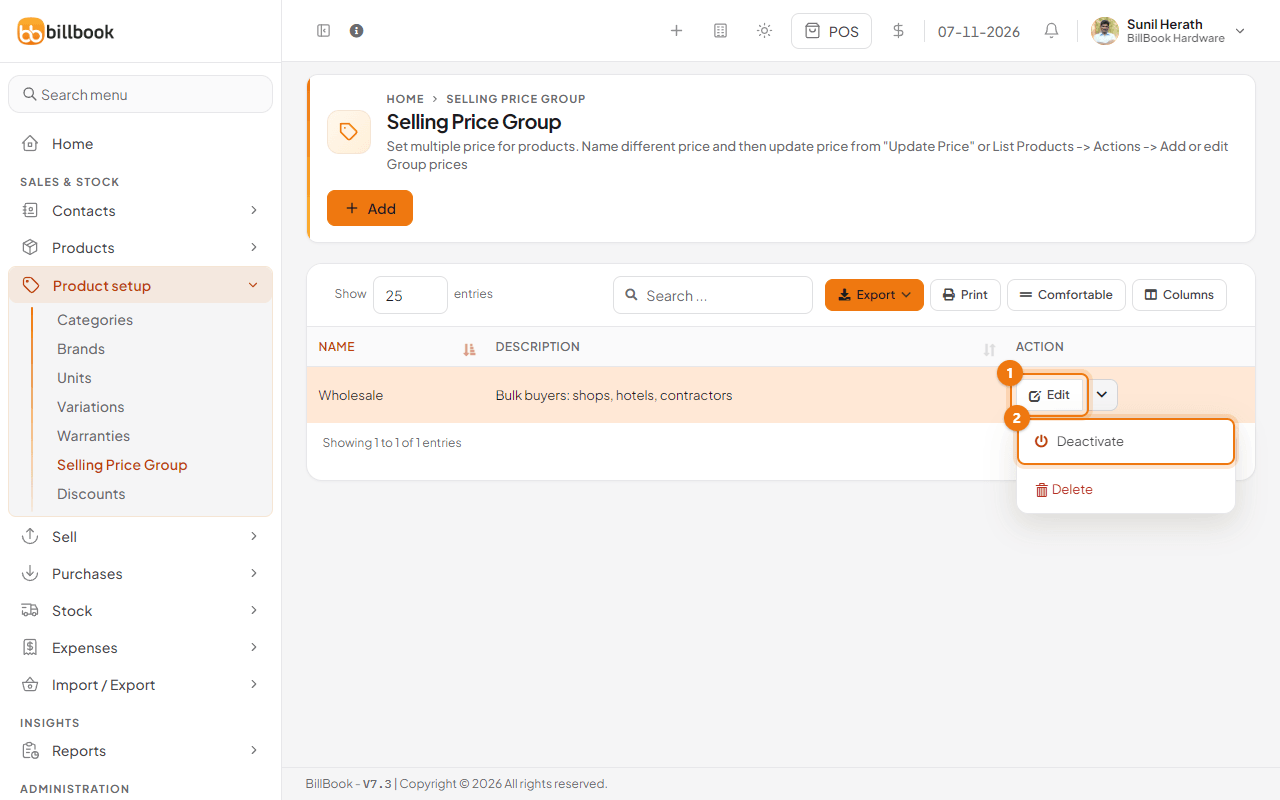
- On the Selling Price Group list, select the arrow next to Edit (1).
- Select Deactivate (2). A deactivated group is left out of the price export and the group price pages, but its prices stay saved.
- Open the same menu and select Activate to bring it back.
The menu also has Delete.