Import past sales
Last updated: 4 November 2026 · 4 min read
If you kept your sales in a spreadsheet or another program before BillBook, you can load them in one go instead of typing each invoice. The imported sales show in All sales so that customer history and reports stay complete.
Before you start: Your products must already exist in BillBook, and the stock must be enough for the quantities you import. If not, add the stock first. You need permission to add sales, and to delete sales if you want to undo an import. See Create an invoice (Add Sale).
Download the template#
- Go to Import / Export > Import Sales.
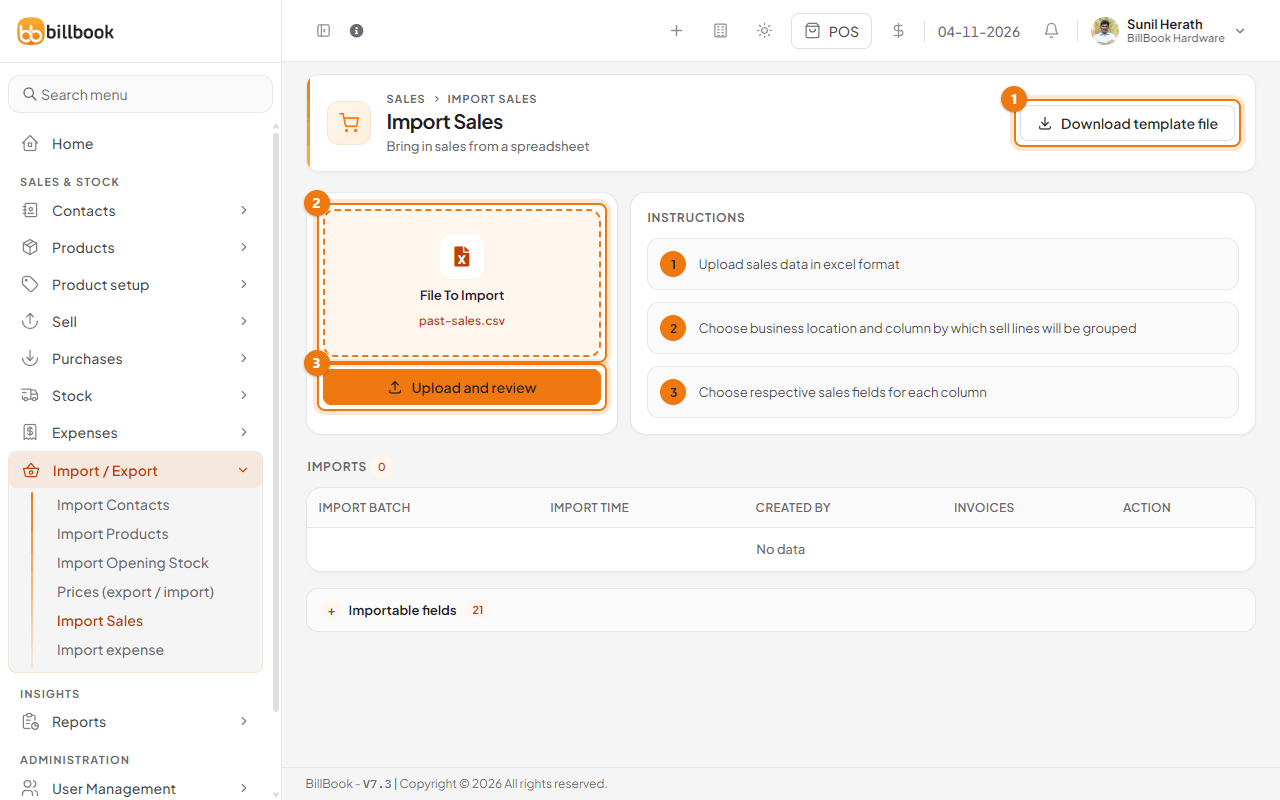
- Select Download template file (1) and open it in Excel or Google Sheets.
- Fill one row for each product on a sale. A sale with two products takes two rows with the same Invoice No..
The first columns are Invoice No., Customer name, Customer Phone number, Customer Email, Sale Date, Product name, Product SKU, Quantity, Product Unit, Unit Price, Item Tax, Item Discount and Item Description. The template also has Types of service, Custom Field 1 to Custom Field 4, Paid amount and Payment method. Select Importable fields on the page to see every field with its rule. Rules to remember:
- Give Customer Phone number or Customer Email. BillBook finds the customer with it, and adds a new customer if none matches.
- Give Product name or Product SKU. The SKU is safer.
- Quantity and Unit Price are required on every row.
- Write Sale Date as year-month-day and time, for example 2026-09-12 10:15:00.
- Paid amount is optional. Type what the customer already paid, from 0 up to the invoice total, on the first row of the invoice. Leave it blank and the sale is Due.
- Payment method is optional. Type one of your payment methods by name, for example cash, card or bank_transfer. Blank means cash.
Save the file as .xlsx, .xls or .csv. Select File To Import (2), choose the file and select Upload and review (3).
Preview before importing#
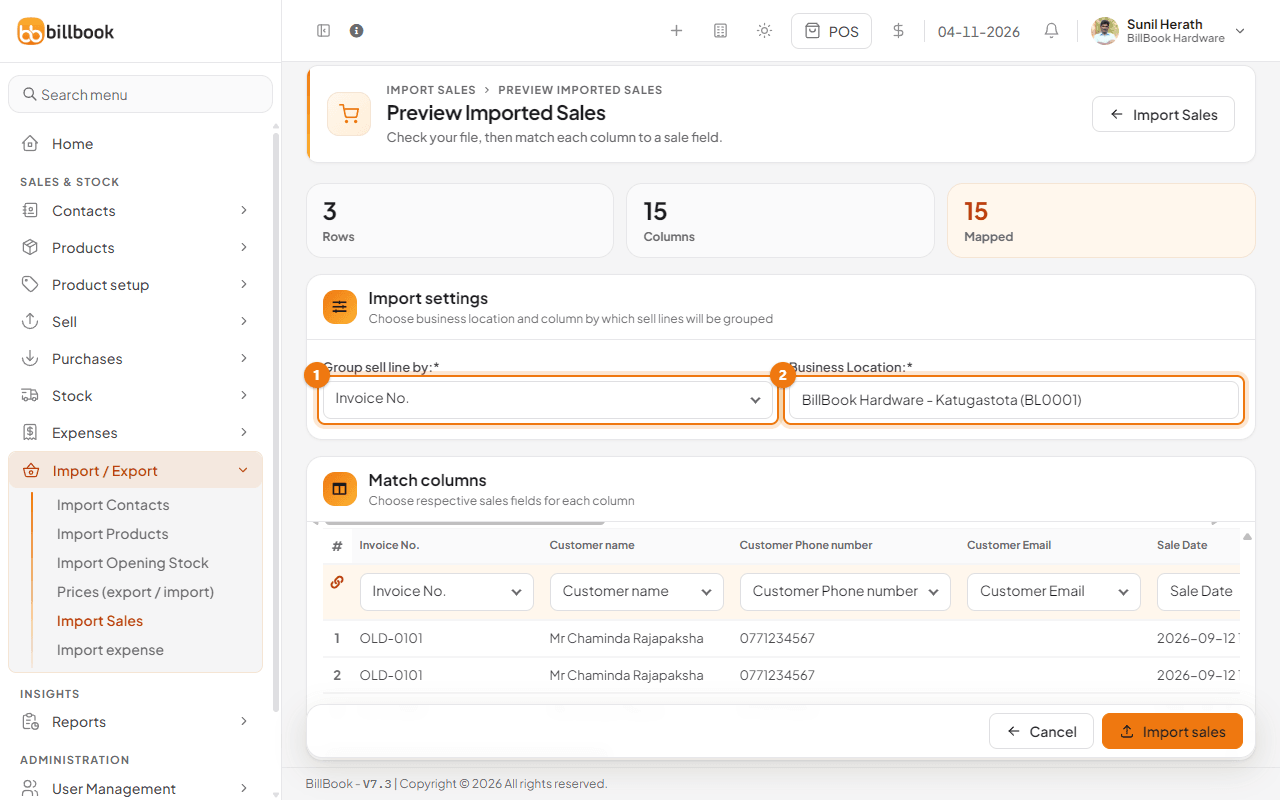
BillBook shows how many rows and columns your file has, and how many it could match. Nothing is saved yet.
- Under Group sell line by, choose Invoice No. (1). Rows with the same invoice number become one sale.
- Choose the Business Location (2) the sales belong to, for example BillBook Hardware - Katugastota (BL0001).
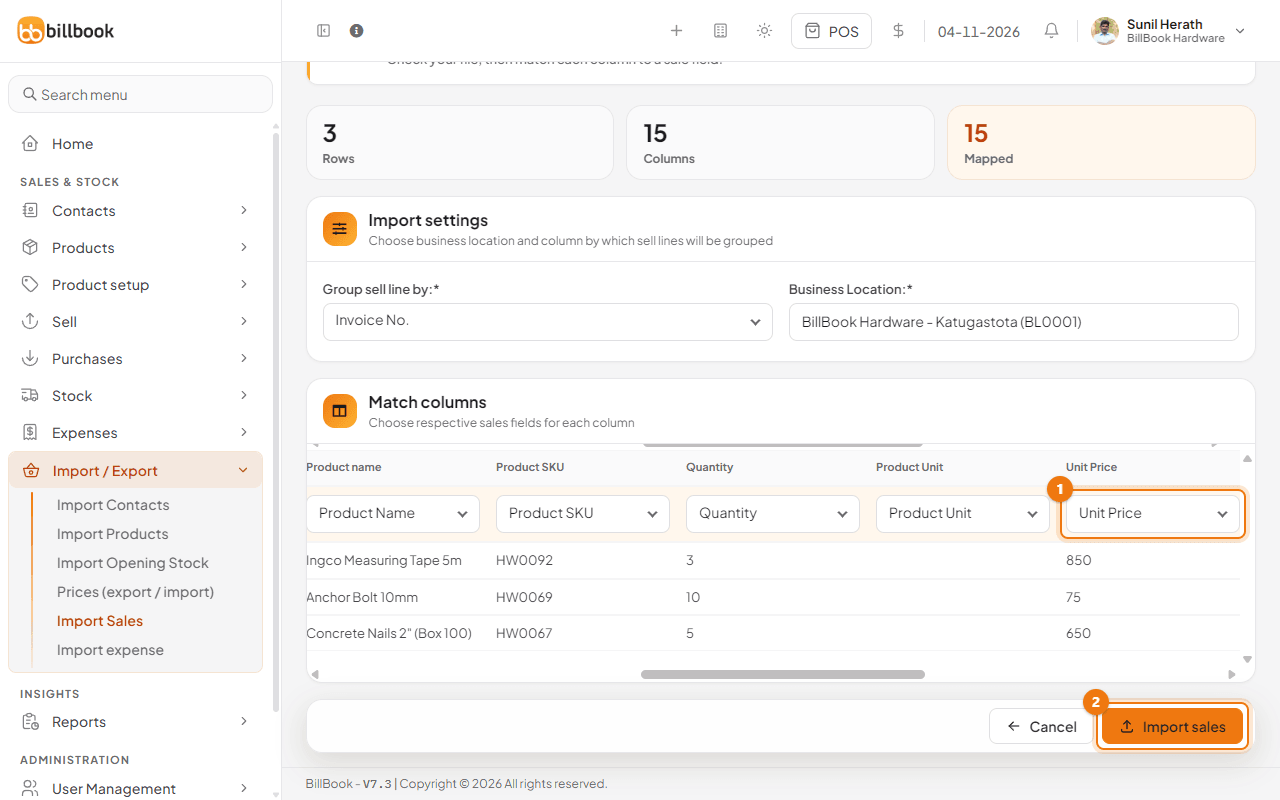
- In Match columns, check the list above each column. BillBook picks the matching field by the heading, for example Unit Price (1) over the price column. If a heading is different, choose the right field, or SKIP to ignore the column.
Import#
Select Import sales (2).
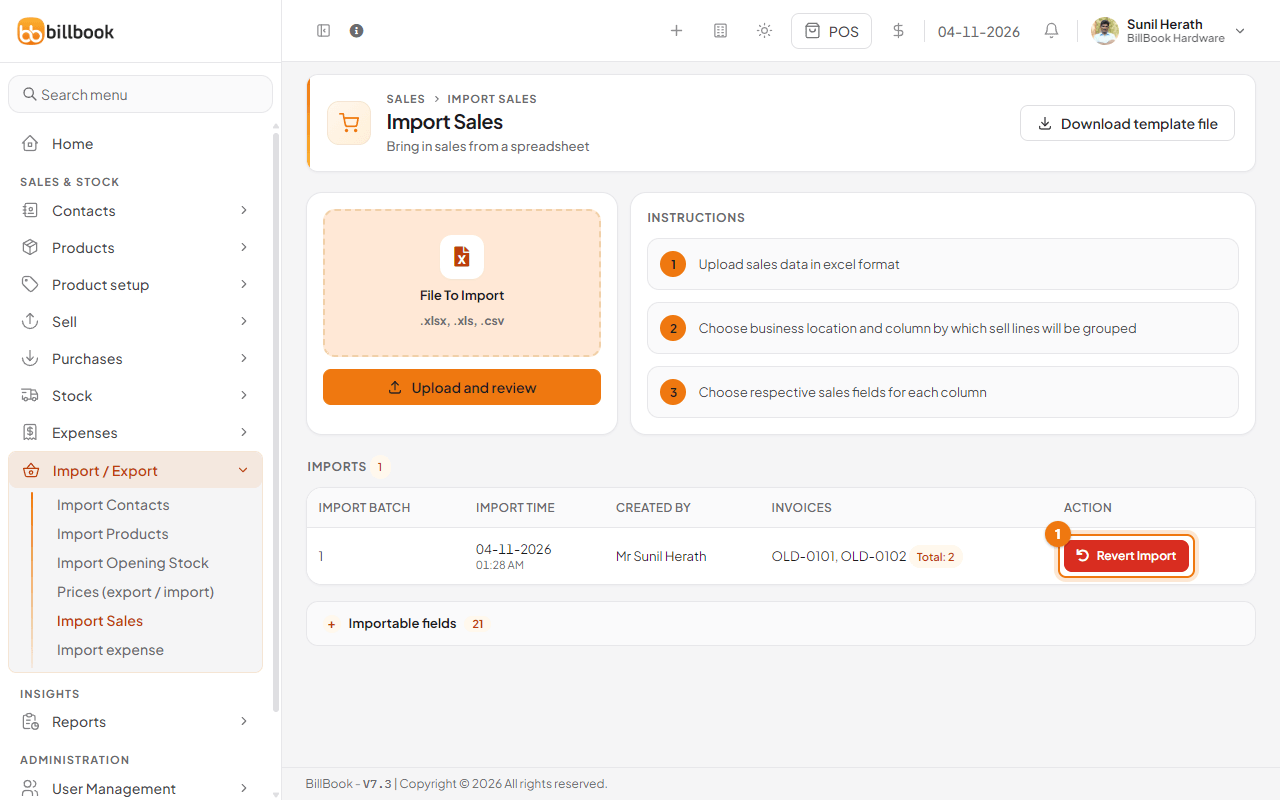
BillBook returns to Import Sales and lists the batch under IMPORTS with its time, who imported it and the invoice numbers. Select Revert Import (1) here to undo it.
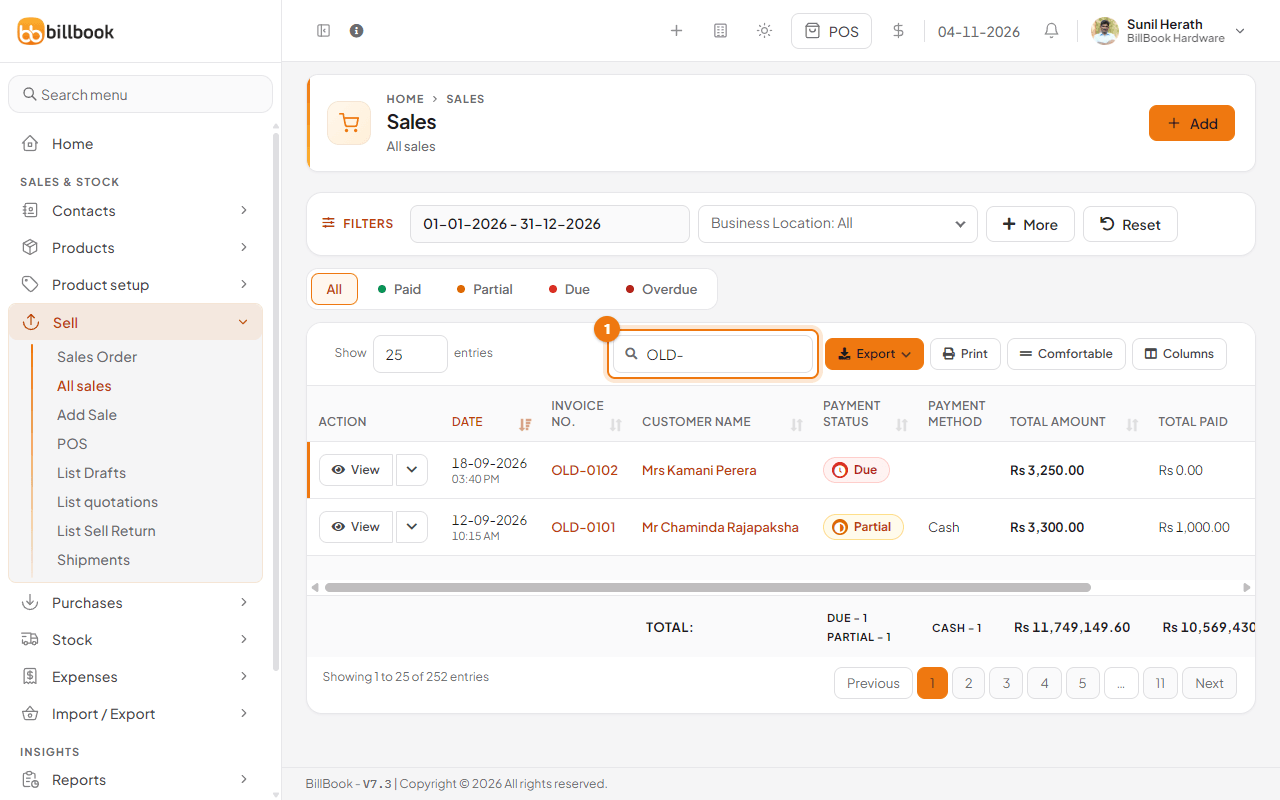
Go to Sell > All sales to see them. In our example, a search for OLD- shows both invoices: OLD-0101 is Partial with Rs. 1,000.00 paid in cash, and OLD-0102 is Due. A sale with a Paid amount shows as Partial or Paid. A sale without one shows as Due until you add payments. See Credit sales and partial payments.
Note: If the file has a problem, BillBook imports nothing and shows a red message with the reason. For example, Mismatch between sold and purchase quantity means the stock is lower than the quantity in your file. A bad Paid amount or a Payment method that does not exist also stops the whole import, and the message names the row. Fix the file or the stock and upload again.
Undo an import batch#
- On Import / Export > Import Sales, find the batch and select Revert Import.
- BillBook asks Are you sure ? Select OK.
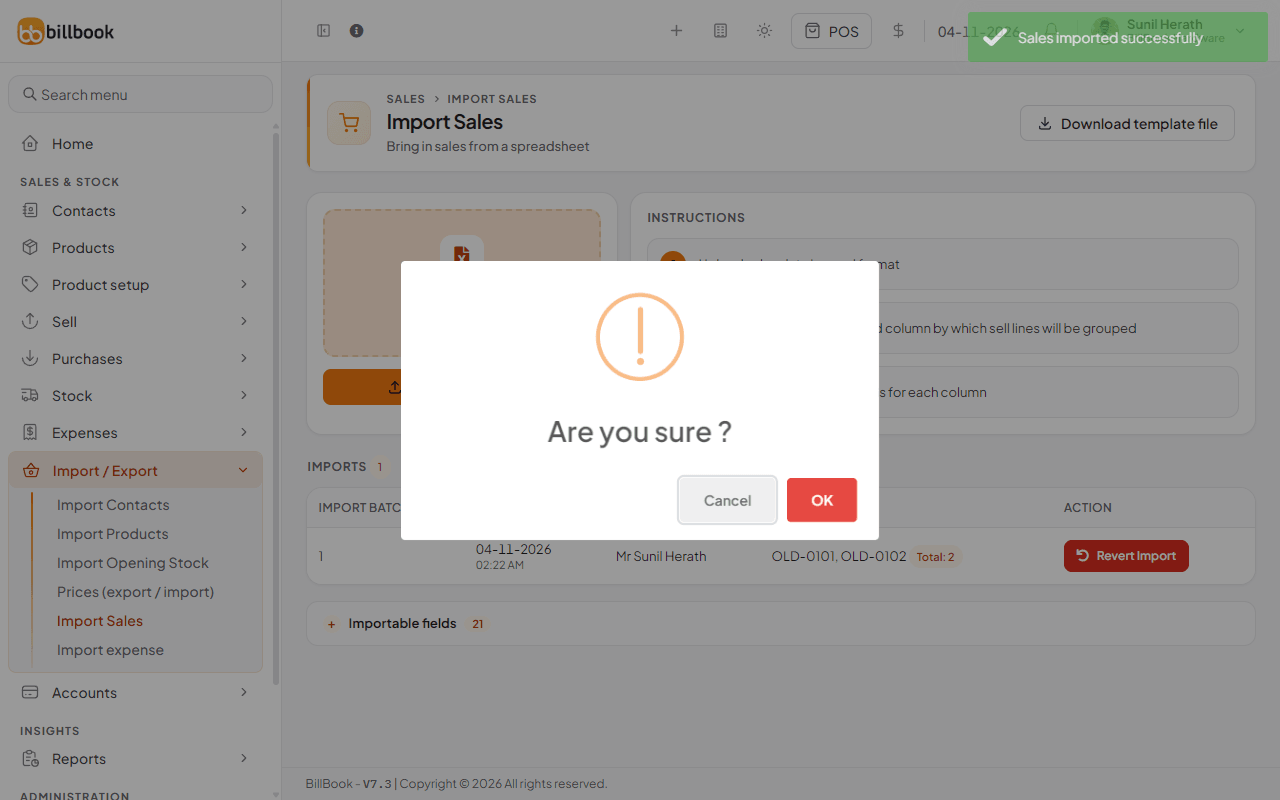
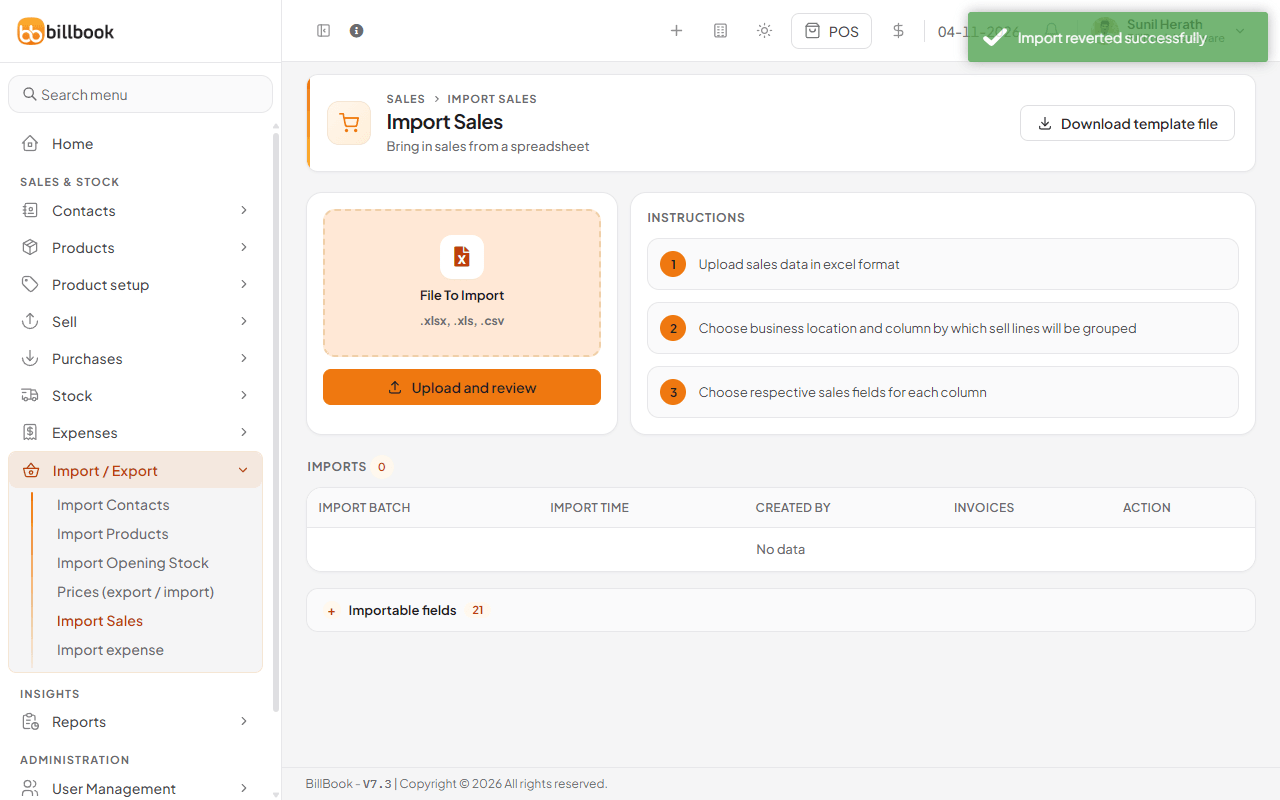
BillBook shows Import reverted successfully. All sales in that batch are deleted and the batch leaves the list. Reverting removes every sale in the batch, so you cannot undo a revert; import the file again if you need them back.