
Discounts and promotions
Last updated: 7 November 2026 · 3 min read
A discount is a price cut that BillBook applies by itself at the till while it is running. Use it for a promotion such as a paint brand's sale week or a clearance on roofing sheets. You set it up once, and cashiers do not have to type anything.
Before you start: You need permission to add and edit discounts, and the Brand or Category you want to use must already exist. See Categories, brands and warranties.
Create a discount#
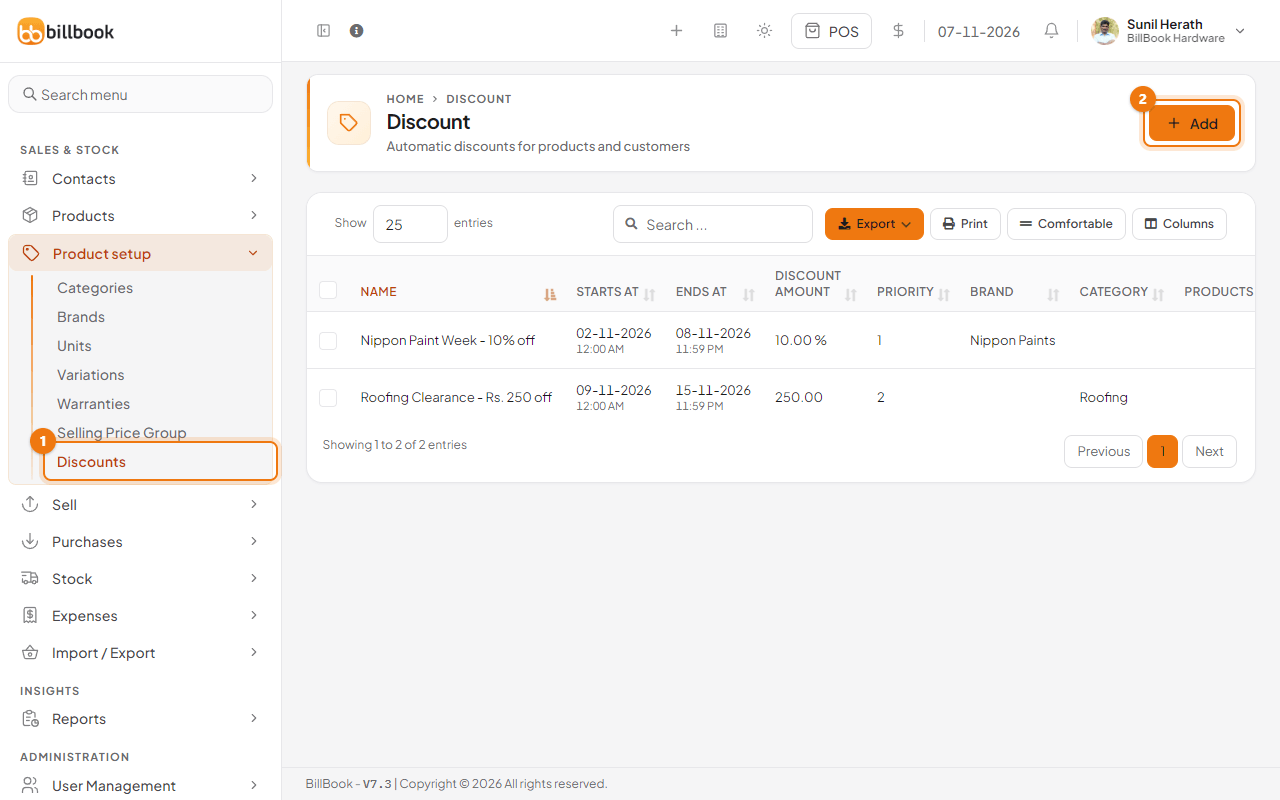
- Go to Product setup > Discounts (1). The list shows each discount with its dates, amount, priority, brand, category and location.
- Select Add (2).
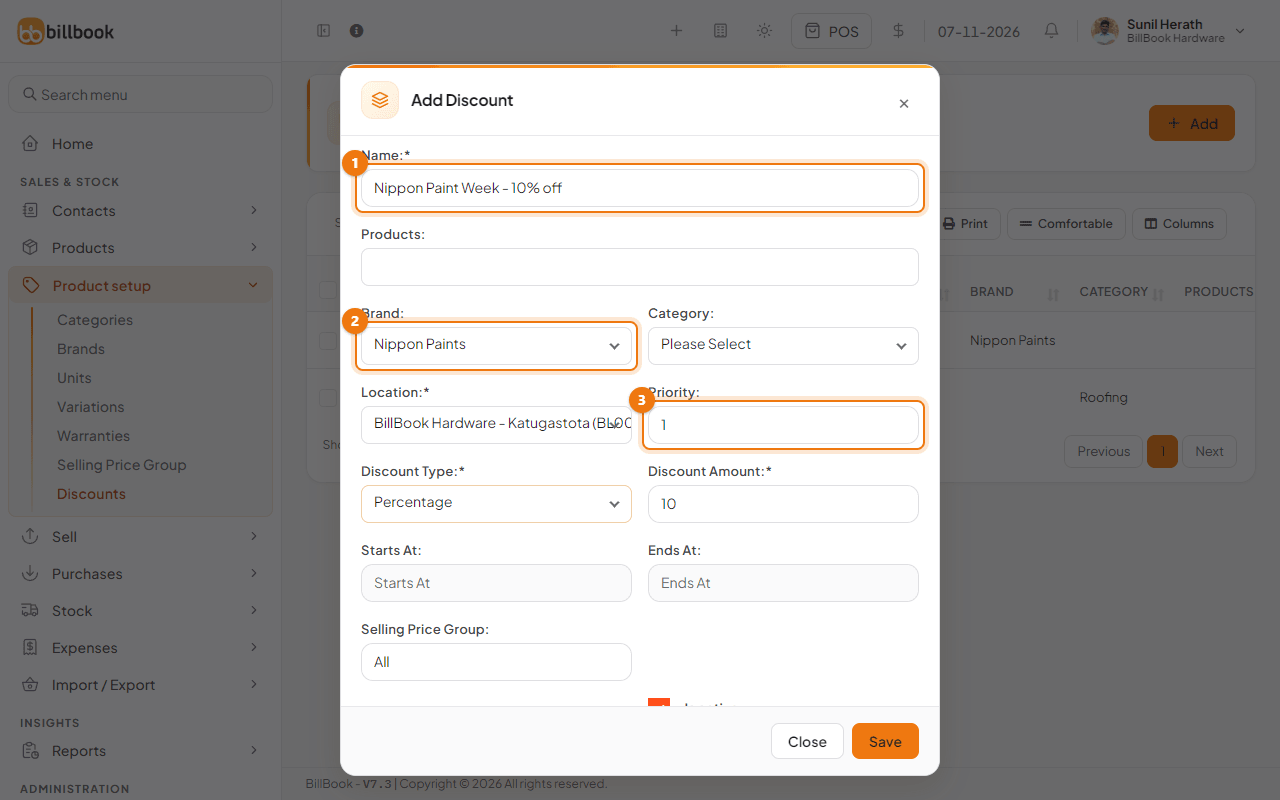
- Enter the Name (1), for example Nippon Paint Week - 10% off. Cashiers see this name when the discount is applied.
- Choose where the discount applies, as the next section explains.
- Choose the Location. Each discount belongs to one location, so add a second discount if you want the same offer at your other shop.
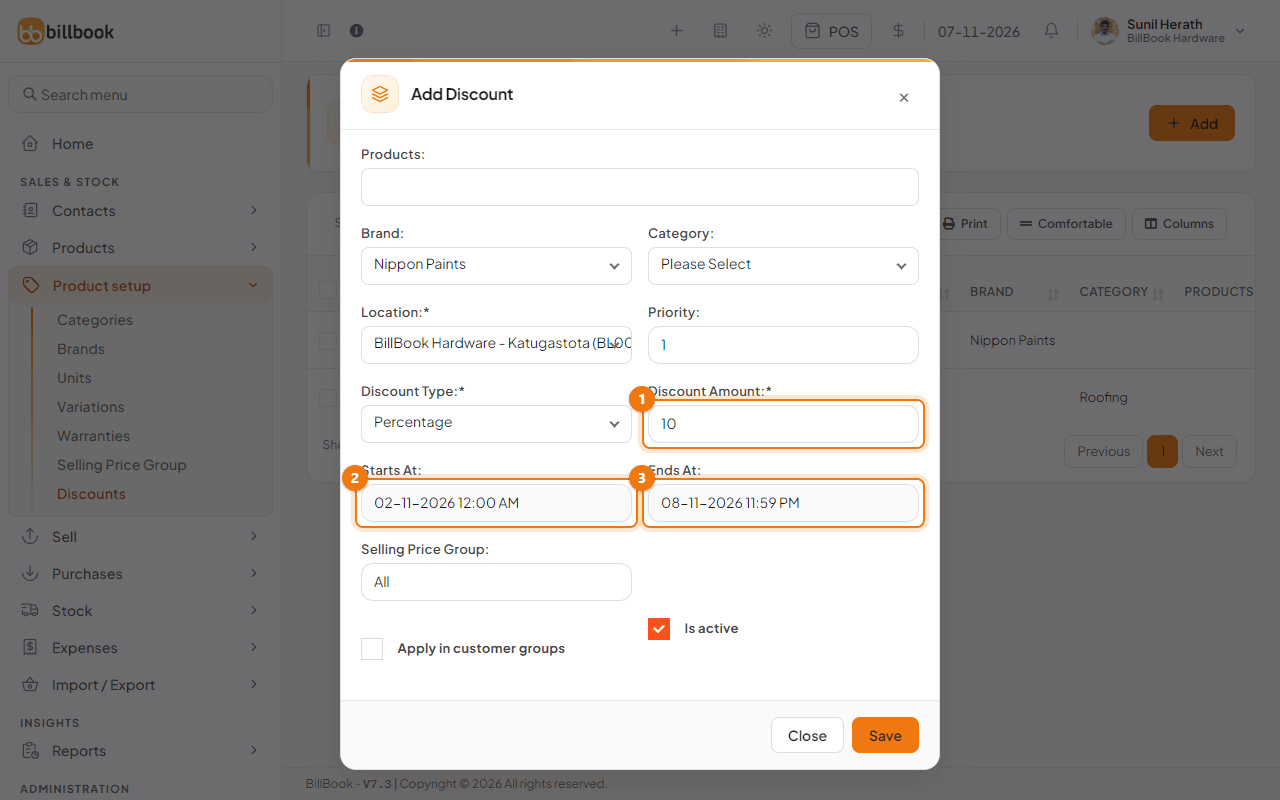
- Choose the Discount Type: Fixed takes a fixed amount off the price, Percentage takes a percentage off. Enter the Discount Amount.
Apply to brand, category or products#
Choose what the discount covers. You can use one of these or combine them:
- Brand (2): every product of that brand, for example Nippon Paints.
- Category: every product in that category, for example Roofing.
- Brand and category together: only products that match both.
- Products: pick individual products or variations in the Products box. Use this for a single item.
Fill in at least one of these, or the discount has nothing to apply to.
Dates and priority#
- Enter a Priority (3), for example 1. A number is required. If two discounts match the same product, the one with the higher priority wins. Priority is not used when a discount is for the exact product, because an exact match always wins over a brand or category match.
- Select Starts At (2) and Ends At (3) to choose the first and last moment of the promotion, for example 02-11-2026 12:00 AM to 08-11-2026 11:59 PM.
The discount is applied only between these two times, so fill in both. Outside the dates it stays in the list but does nothing.
Limit to price groups#
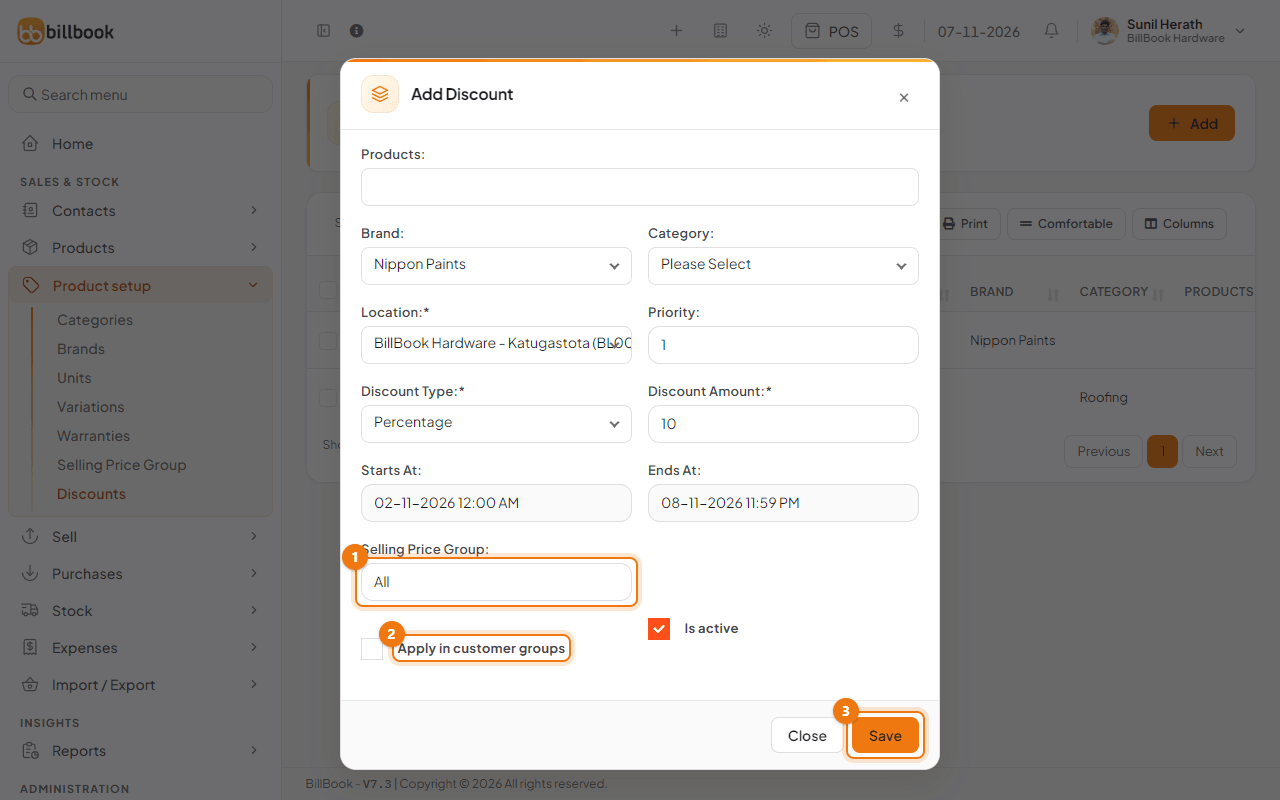
- Under Selling Price Group (1), leave All to use the discount for every price list, or choose Default Selling Price or a group such as Wholesale to limit it. See Selling price groups.
- Tick Apply in customer groups (2) if customers who belong to a customer group should get this discount too.
- Keep Is active ticked, then select Save (3). BillBook shows Added Successfully and the discount appears in the list.
To change a discount, select Edit on its row. The arrow beside Edit has more actions, such as deleting it.
Deactivate discounts in bulk#
When a promotion ends early, or you want several discounts off at once, switch them off together instead of editing each one.
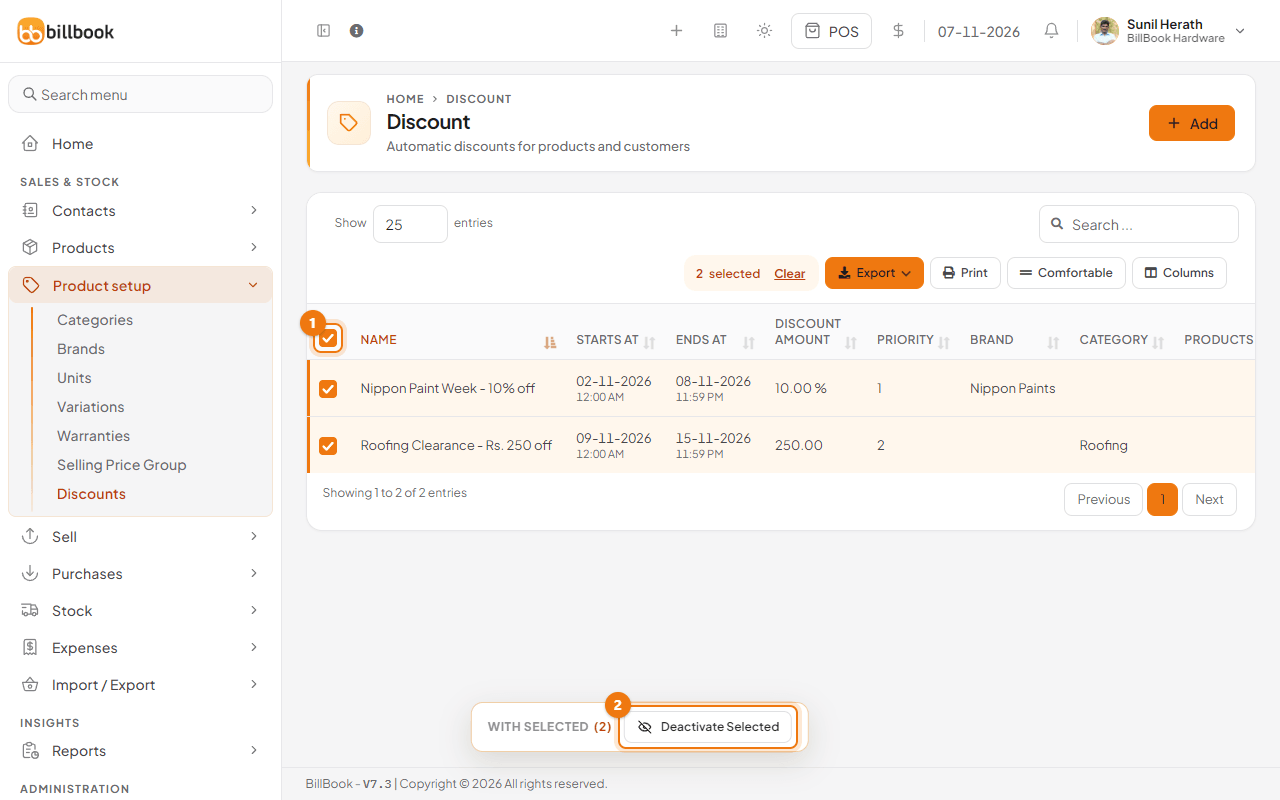
- On the Discount list, tick the box at the top of the table (1) to select every discount, or tick single rows.
- Select Deactivate Selected (2) in the bar at the bottom of the page and confirm with OK.
- BillBook shows Deactivated successfully, and each discount now has an INACTIVE tag beside its name.
Tip: To switch a discount back on, select Edit on its row and tick Is active again.