
Shipments
Last updated: 31 October 2026 · 3 min read
When you deliver goods to a site or a customer's shop, BillBook can keep the delivery with the sale: the address, who is driving, and where the load has got to. You do not need a separate delivery book.
Before you start: Add your drivers as users under User Management > Users. They then appear in the Delivery Person list.
Add shipping details#
You can fill in shipping details while you make the sale, or add them afterwards.
While making the sale: in Sell > Add Sale, fill in the Shipping and delivery box. See Create an invoice (Add Sale).
After the sale:
- Go to Sell > All sales.
- On the sale's row, open the arrow next to View and select Edit Shipping (1).
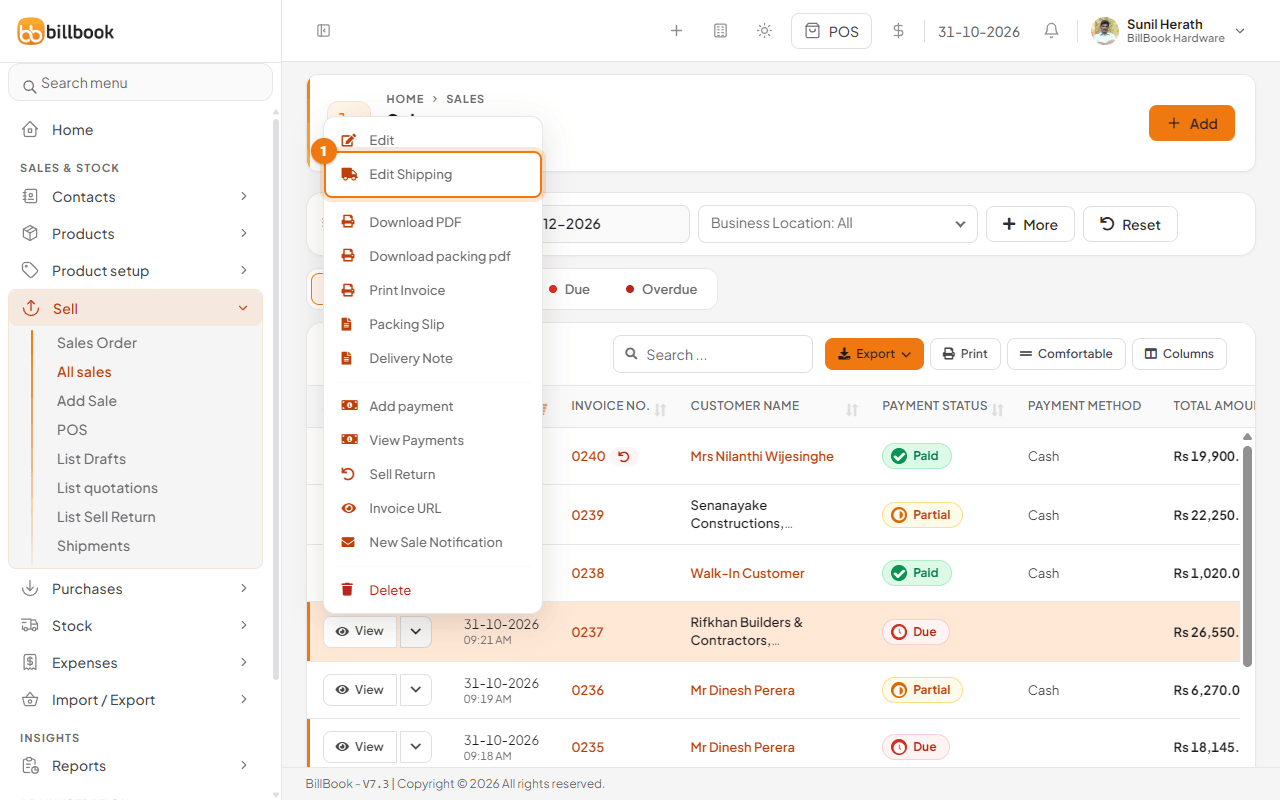
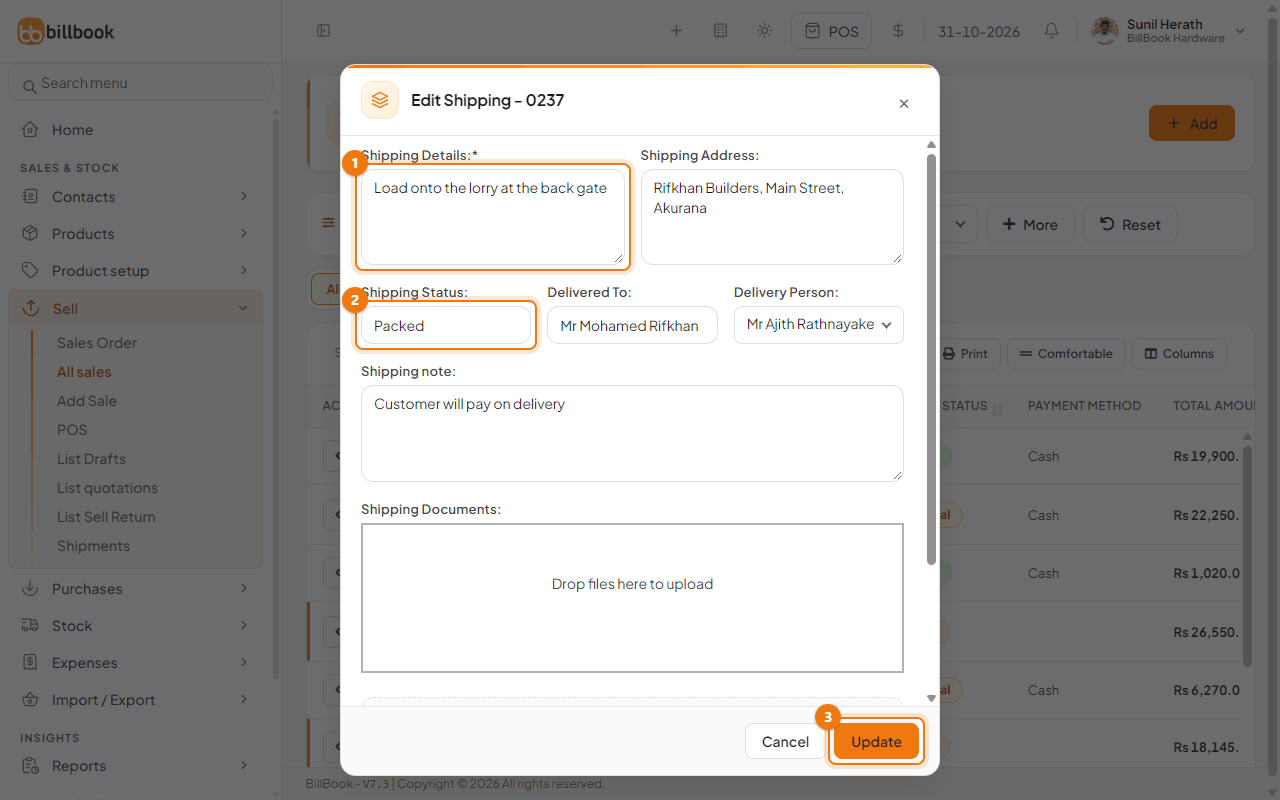
- Type the Shipping Details (1), for example Load onto the lorry at the back gate. This box must be filled in.
- Fill in the Shipping Address, Delivered To and the Shipping note if you need them.
- Choose the Shipping Status (2), for example Packed, and the Delivery Person.
- Under Shipping Documents you can drop a file, such as a signed delivery slip.
- Select Update (3).
The sale now appears in Sell > Shipments. If you charged for delivery, enter the Shipping Charges on the sale itself, not here.
Update shipping status#
A delivery goes through these statuses: Ordered, Packed, Shipped, Delivered and Cancelled. Change the status as the load moves.
- Go to Sell > Shipments and open the arrow next to View on the sale, or use the same menu in Sell > All sales.
- Select Edit Shipping.
- Choose the new Shipping Status (1), for example Shipped.
- Select Update (2).
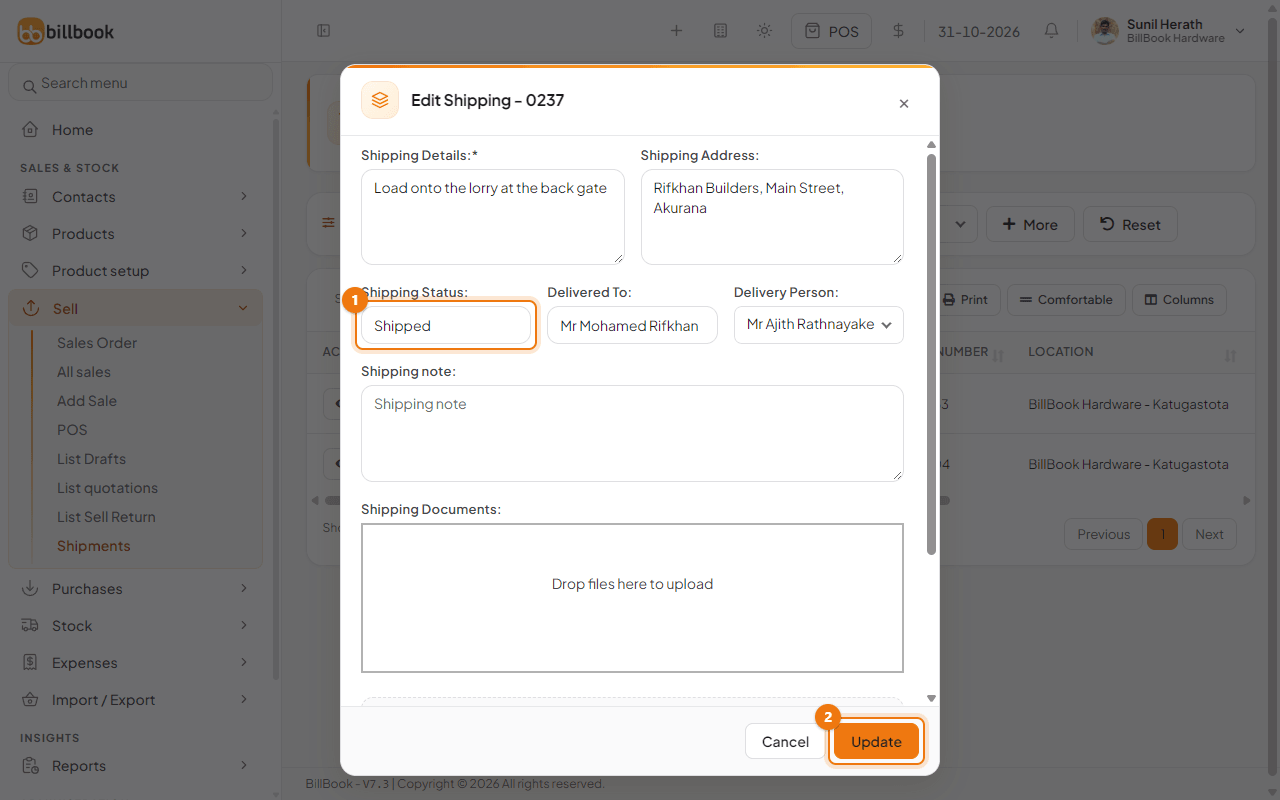
Use Delivered To to note who accepted the goods. Change the status to Delivered when they arrive, or Cancelled if the delivery will not happen.
Shipments list#
Sell > Shipments (1) lists only the sales that have shipping details, so your dispatcher sees the day's deliveries without the counter sales. Use Date Range and Business Location at the top. Select More (2) for Customer, Payment Status, Shipping Status, Delivery Person and User.
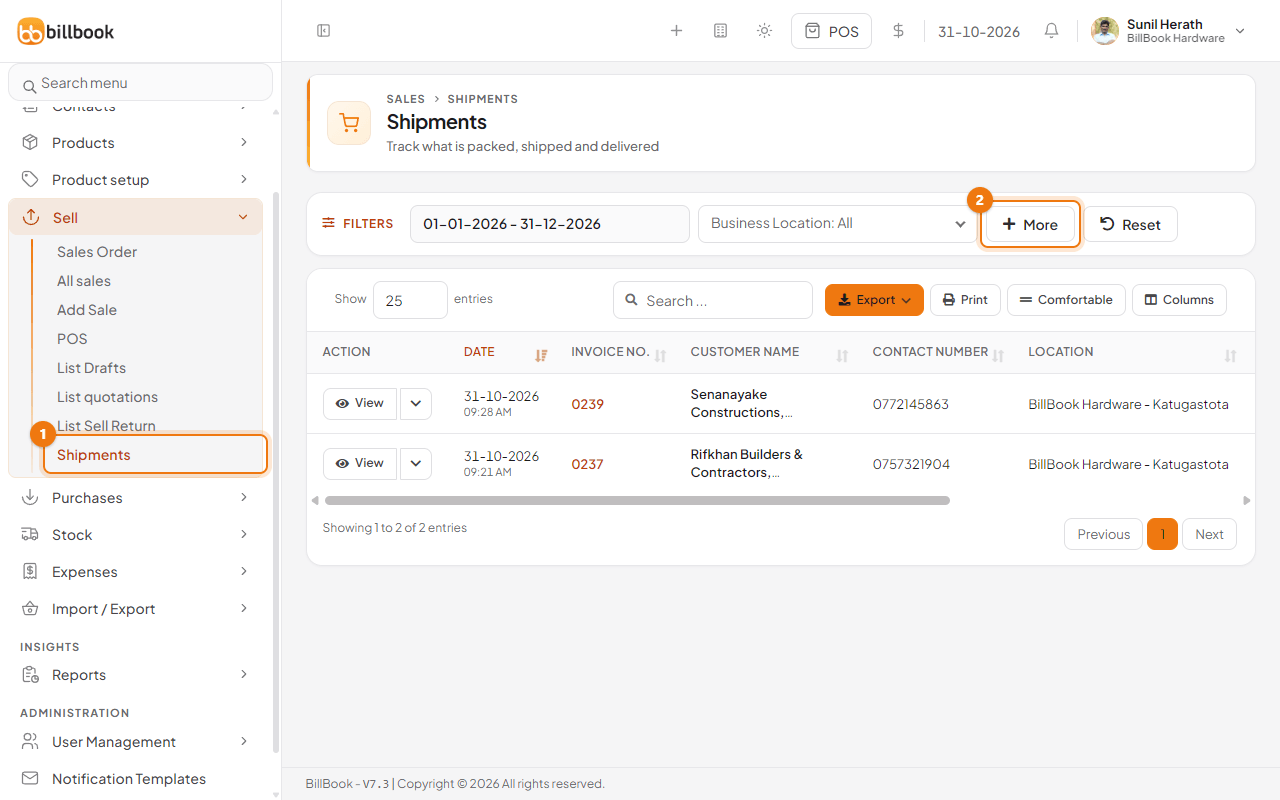
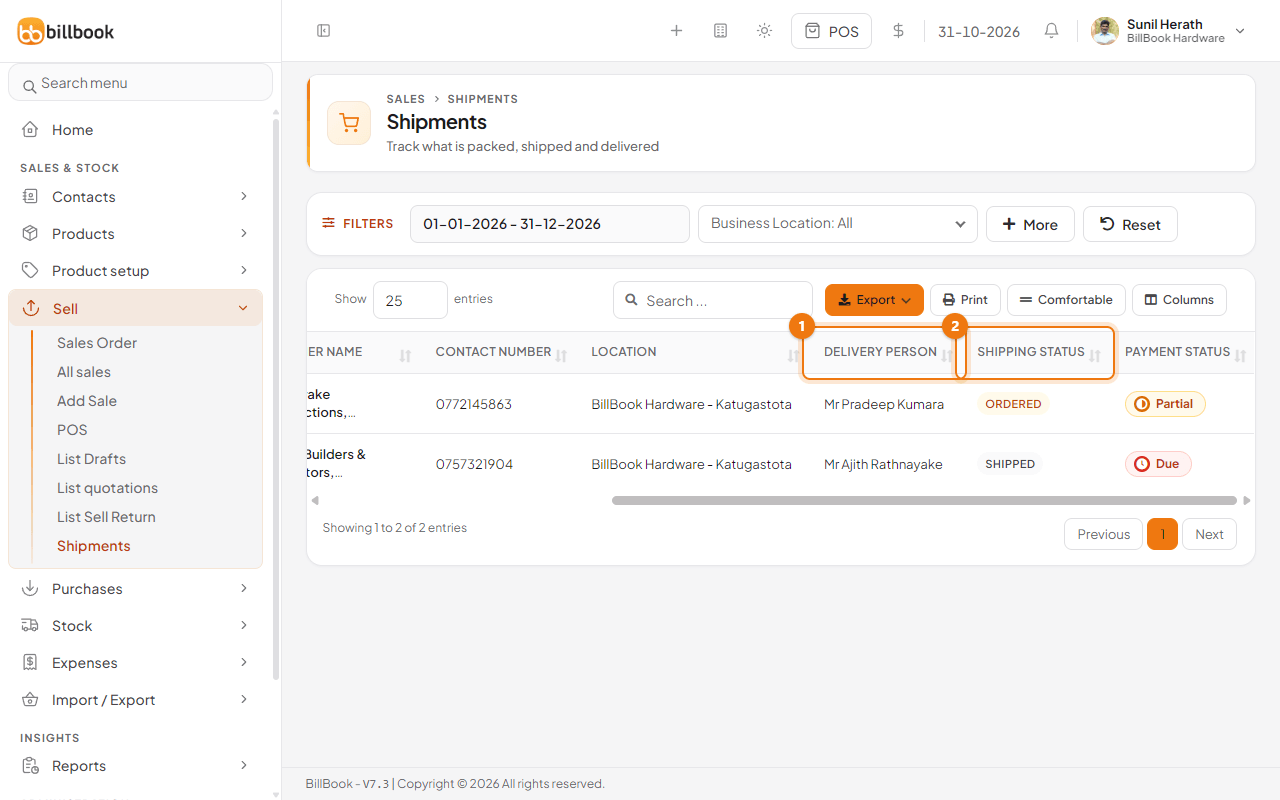
Scroll the table to the right to see the Delivery Person (1) and Shipping Status (2) of each sale, with its Payment Status. Filter by Shipping Status to see everything still to be packed or on the road.
The row menu in the list also has Packing Slip and Delivery Note for the driver, and Print Invoice to print the invoice again.