
Contact ledger and statements
Last updated: 6 November 2026 · 3 min read
A ledger is the full account of one customer or supplier: what they owe from before BillBook, every invoice, every payment and what is still due. Use it to settle an argument about a balance, or to give a customer a statement at the end of the month.
Before you start: To email a ledger the contact needs an email address, and your business must be able to send email. Printing and saving as PDF need neither.
Open a contact's ledger#
- Go to Contacts > Customers (or Suppliers).
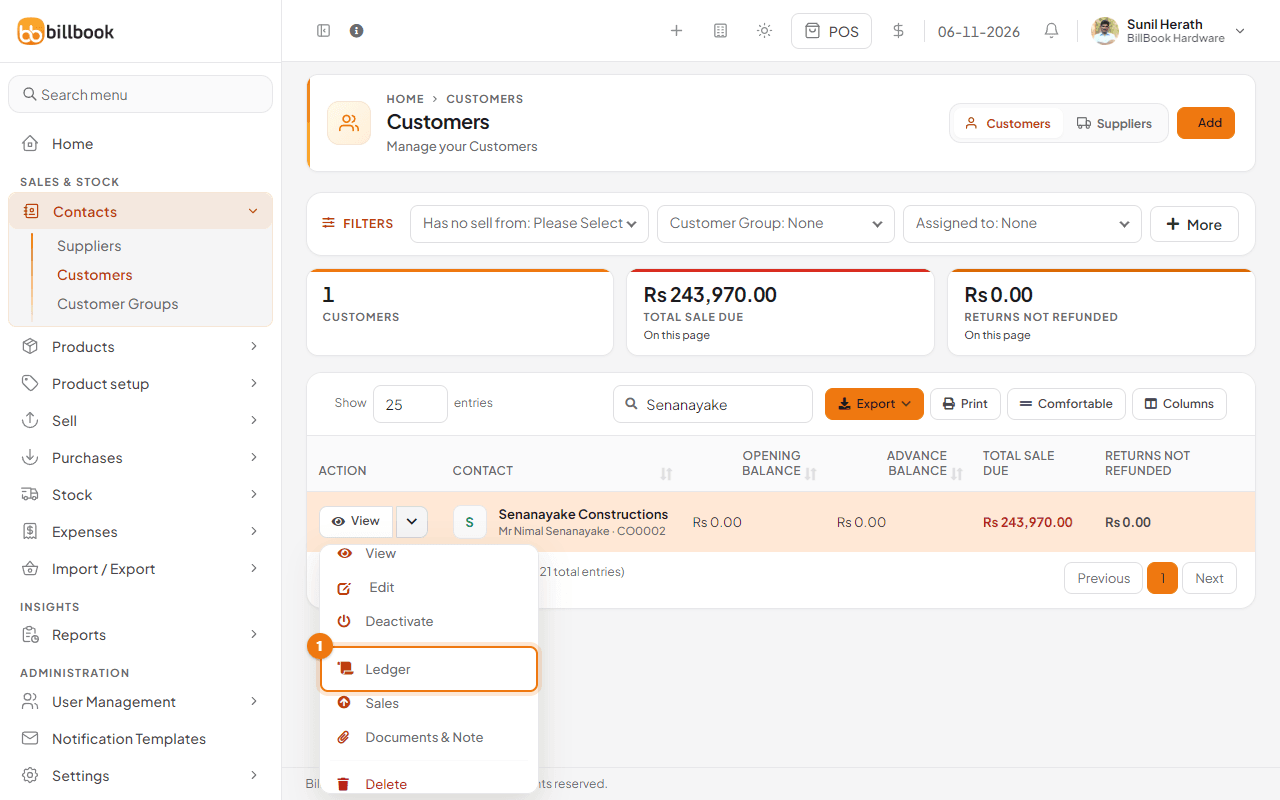
- On the contact's row, open the arrow next to View and select Ledger (1).
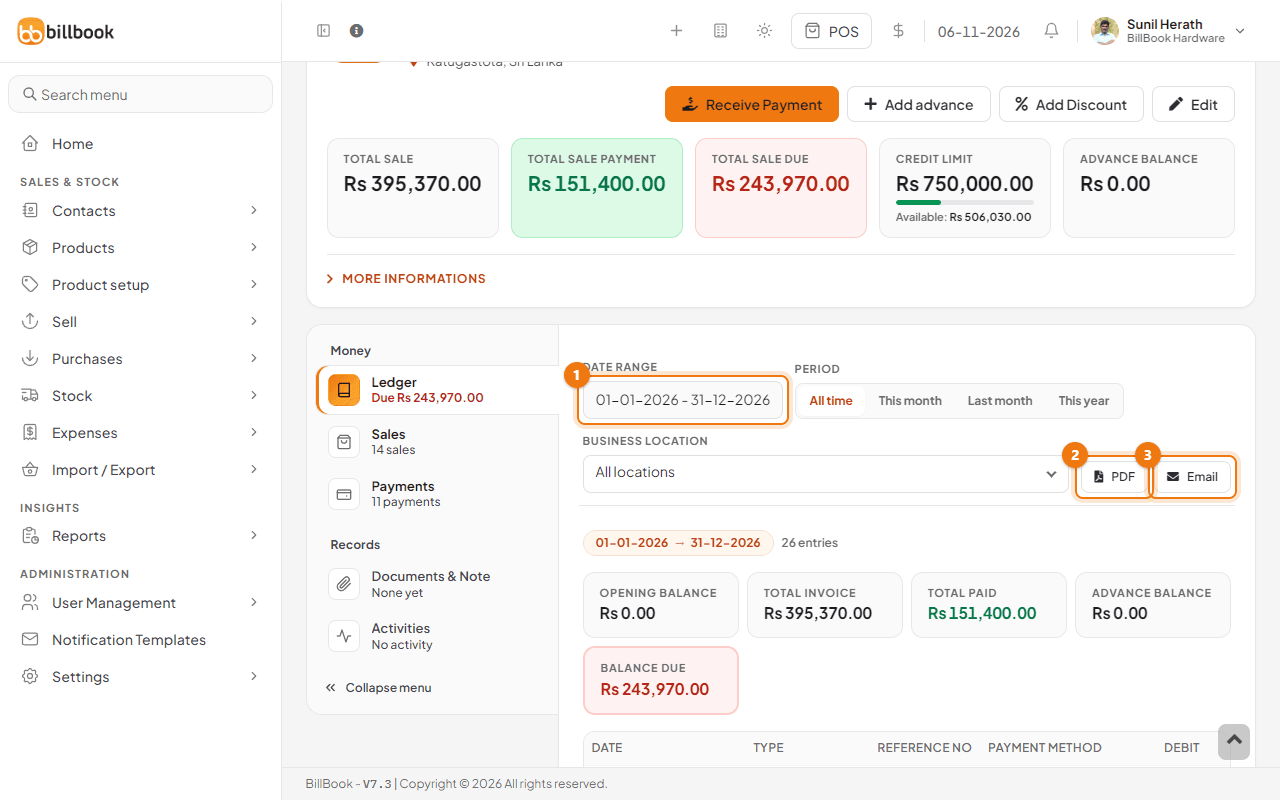
The contact page opens on the Ledger tab. You can also select View and then Ledger in the list on the left, which has Ledger, Sales and Payments under Money, and Documents & Note and Activities under Records. The cards at the top of the page show the contact's Total Sale, Total Sale Payment, Total Sale Due, Credit Limit and Advance Balance. Below them, the ledger lists the period you chose, with these cards: Opening Balance, Total Invoice, Total Paid, Advance Balance and Balance Due.
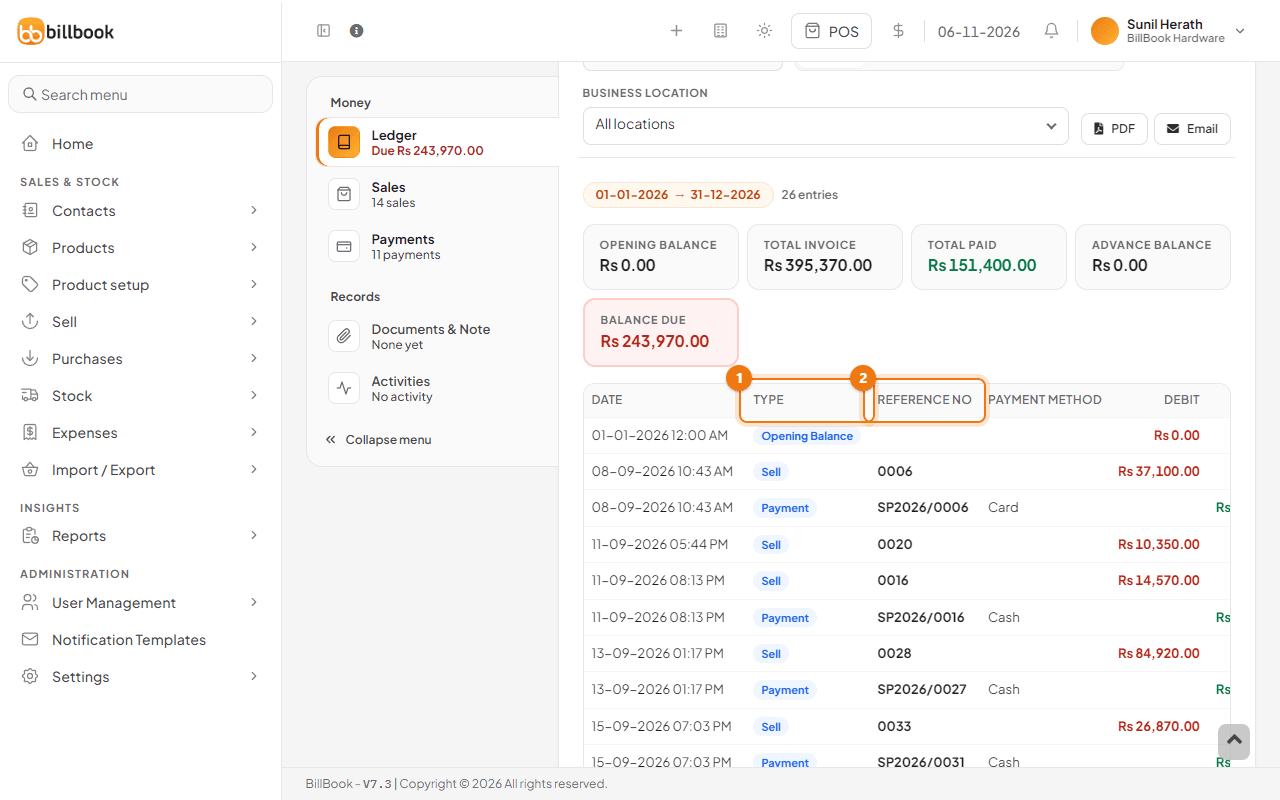
Further down, each line of the ledger shows its Date, Type (1), Reference No (2), Payment Method and the Debit, Credit and running Balance, with any extra detail under Others. The types are Opening Balance, Sell for an invoice, and Payment. An Aging report under the table shows how much of the balance is current and how much is 1 to 30, 30 to 60, 60 to 90 or over 90 days past due.
Filter by date#
- Select All time, This month, Last month or This year under Period. The ledger opens on All time for the whole year.
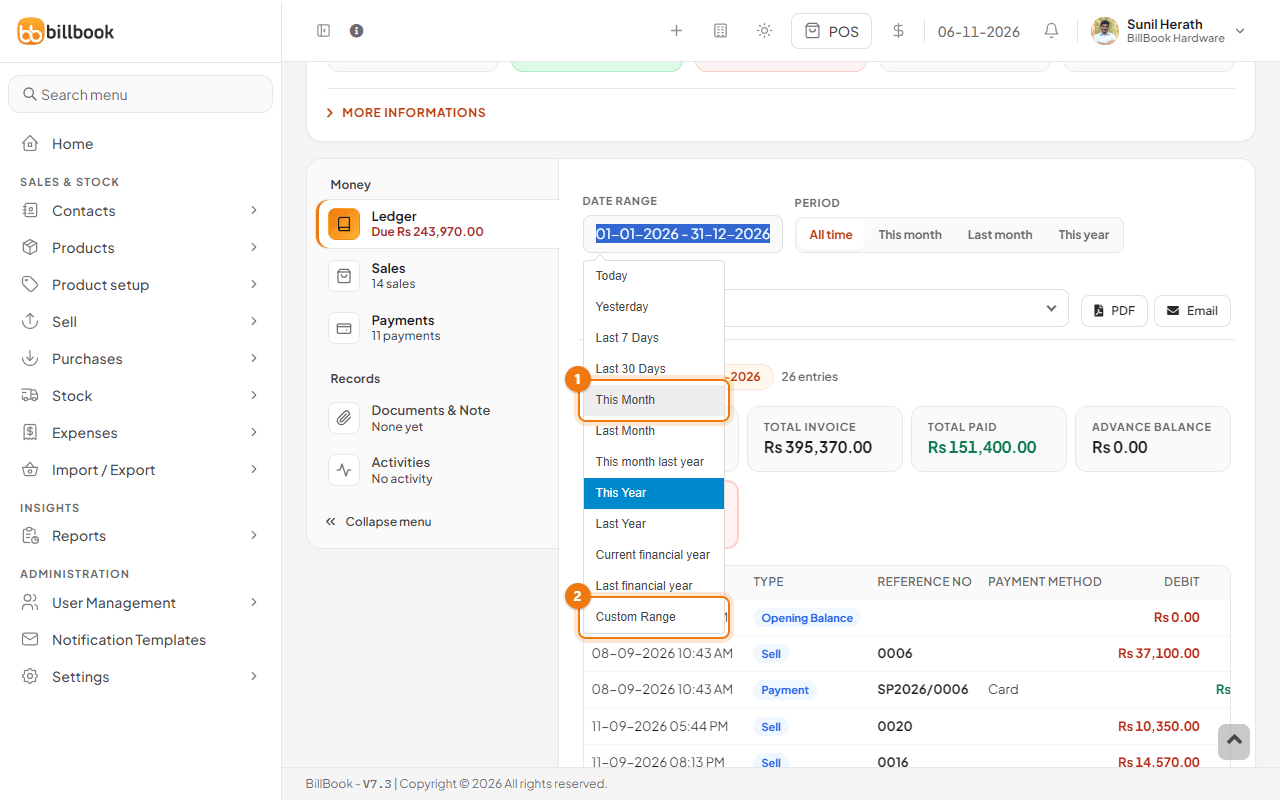
- For other dates, select the Date Range box (1 in the earlier picture of the Ledger tab) and choose a ready-made range such as Today, Last 30 Days or This Month (1 in the next picture), or Custom Range (2) to pick your own start and end dates.
- To see one shop only, choose it in Business Location. The default is All locations.
The ledger, the cards and the PDF all follow the range you pick.
Email the ledger#
Select Email (3 in the picture of the Ledger tab) to send the ledger to the contact as a PDF attachment.
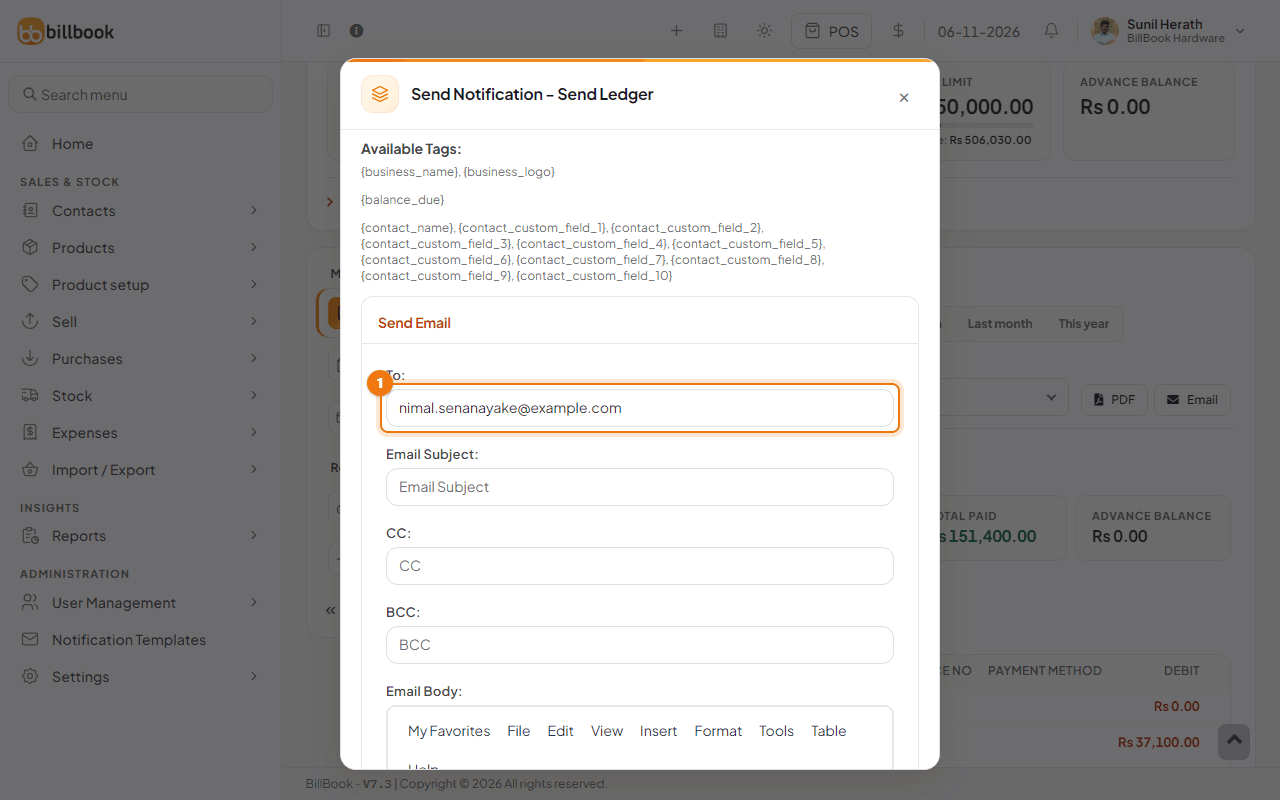
- In the Send Notification - Send Ledger pop-up, enter the contact's address in To (1). Add Email Subject, CC and BCC if you want them.
- Write the Email Body. You can use the tags listed at the top, such as
{contact_name}and{balance_due}, and BillBook fills them in for each contact. - Select Send. The note under the message says Ledger will be attached in PDF format with this email.
Note: Send emails a real person straight away. Check the address and the date range before you select it.
Print or save as PDF#
- Set the date range and location you want on the statement.
- Select PDF (2 in the picture of the Ledger tab). The ledger opens as a PDF in a new browser tab, for the range you chose.
- Use your browser's print button to print it, or its download button to save the file. Keep the file to send by WhatsApp or hand to the customer.