Manage the product list
Last updated: 7 November 2026 · 4 min read
The product list is where you look after the products you have already added. You can find an item quickly, change many products in one go, switch products off, and see how a product's stock has moved.
Before you start: What you see depends on your permissions. Without permission to edit or delete products, the matching buttons do not show.
Filter and find products#
- Go to Products > List Products.
- Type a name or SKU in the search box above the table.
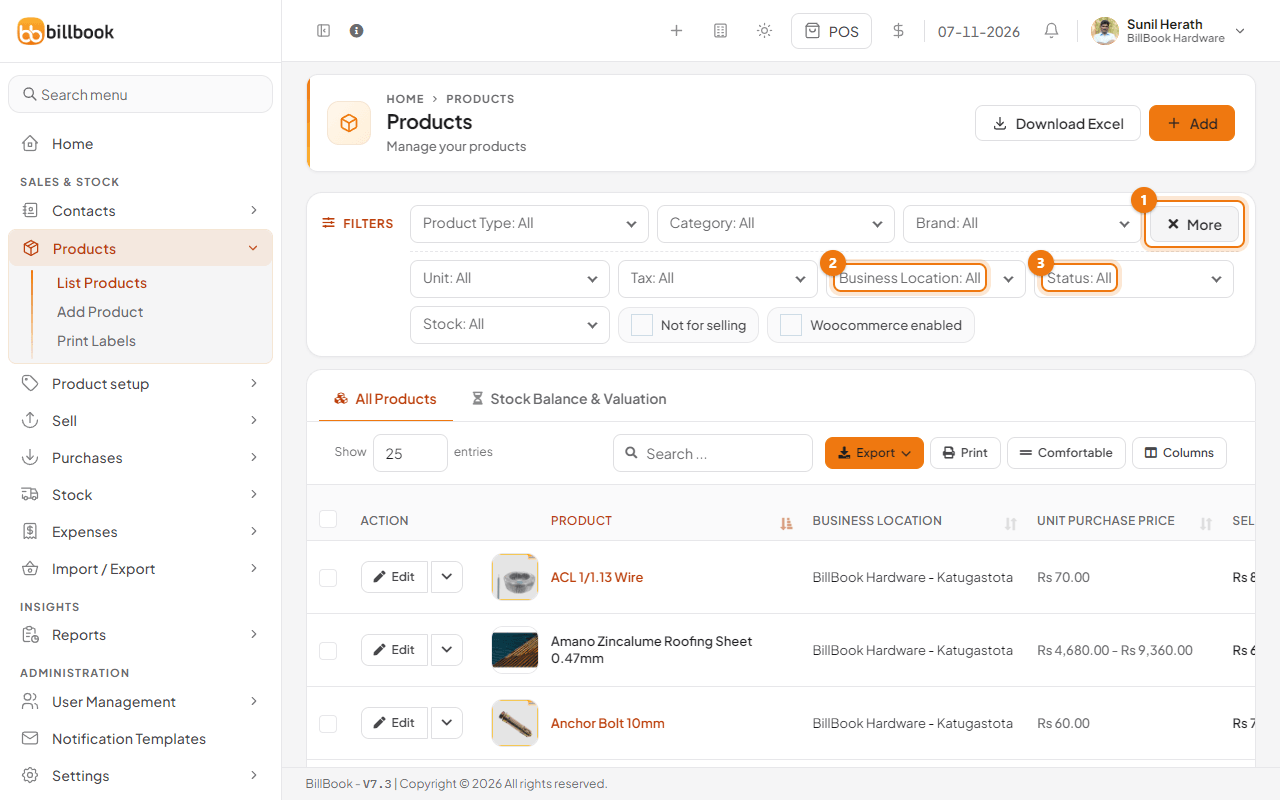
- Use the filters above the table: Product Type, Category and Brand. Select More (1) to open the rest: Unit, Tax, Business Location (2), Status (3) and Stock. There are also Not for selling and Woocommerce enabled tick boxes.
- Filters work together, so you can find, for example, inactive paints at Colombo 06.
The Columns button above the table lets you show or hide columns, and Export and Print save the list as it appears. See Import and export products.
Bulk edit#
Some versions of BillBook offer a Bulk Edit button for changing category, brand and tax on many products at once. It is switched off in the current version, so you will not see it in the bar of bulk actions. To change many products at once, use the bulk location update below, or export the products, edit the file and import it with the option to update existing products. See Import and export products.
Bulk location update#
Use this when a product should be sold at another shop, or stop being sold at one.
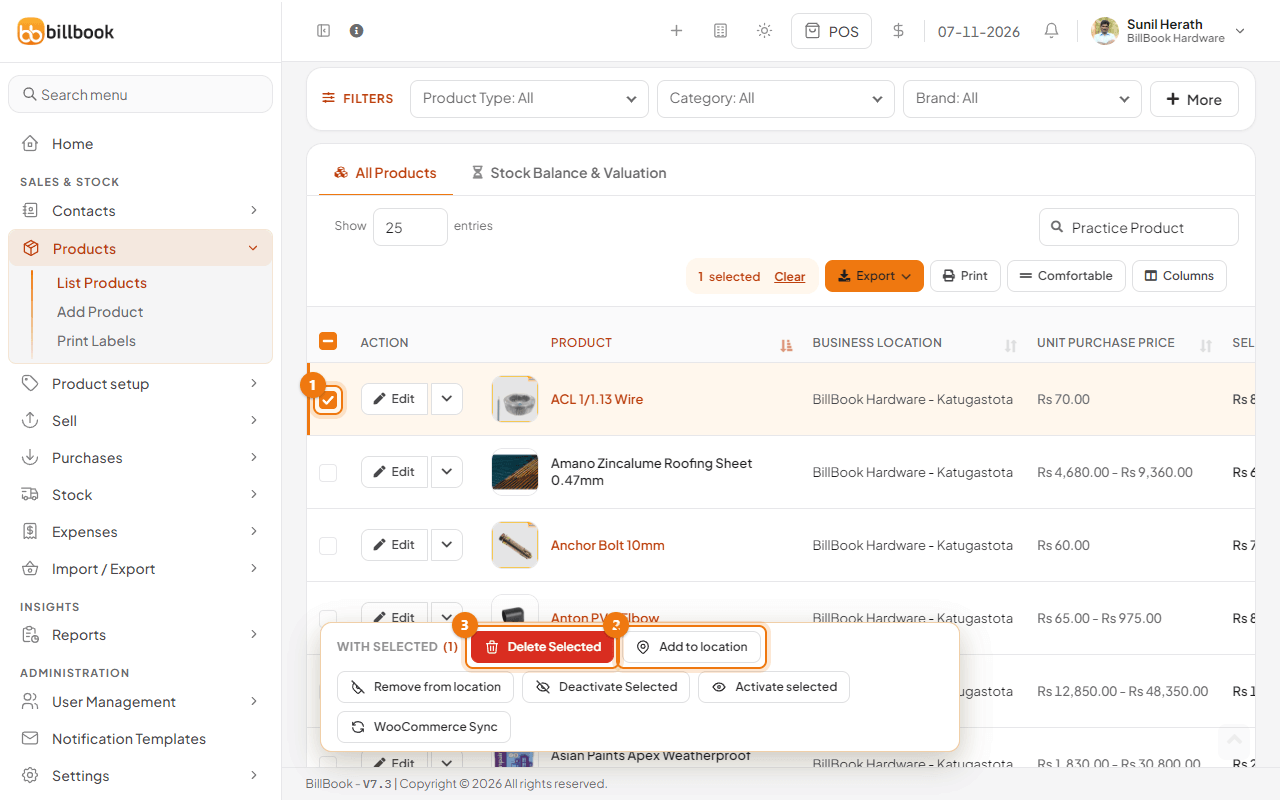
- Tick the box (1) on each product row. Tick the box in the table heading to select every row on the page. A bar appears at the bottom of the page.
- Select Add to location (2) to make the products available at another location, or Remove from location to take them away.
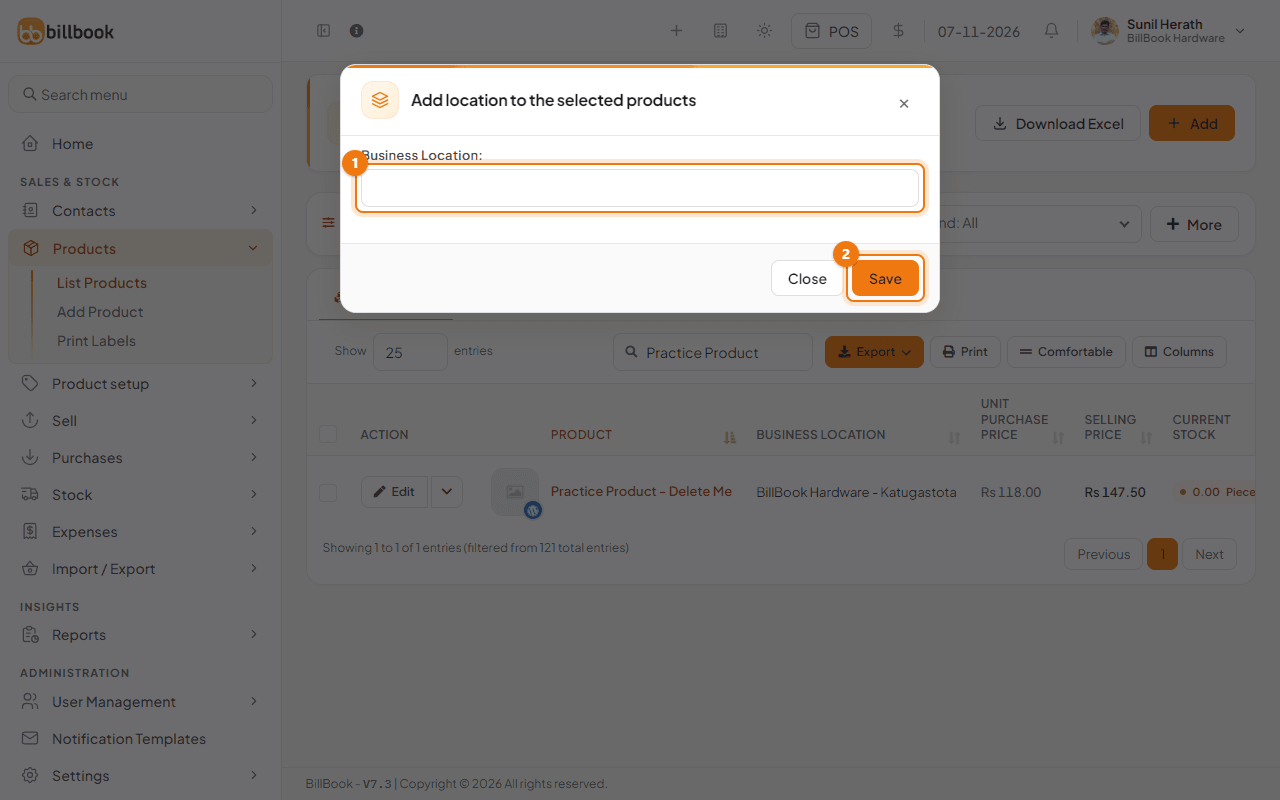
- In the pop-up, choose the Business Location (1) and select Save (2). BillBook shows Updated Successfully, and the Business Location column now lists both locations.
Activate or deactivate#
Deactivate a product you no longer buy or sell, such as a discontinued paint, instead of deleting it. Its history stays.
- Tick the products.
- Select Deactivate Selected in the bar. BillBook shows Products deactivated successfully. Deactivated products are not available for purchase or sale.
- To bring them back, tick them and select Activate selected. BillBook shows Products activated successfully.
Use the Status filter to list only active or only inactive products.
Delete one or many products#
- To delete one product, select the arrow next to Edit on its row and choose Delete.
- To delete several, tick them and select Delete Selected (3) in the bar.
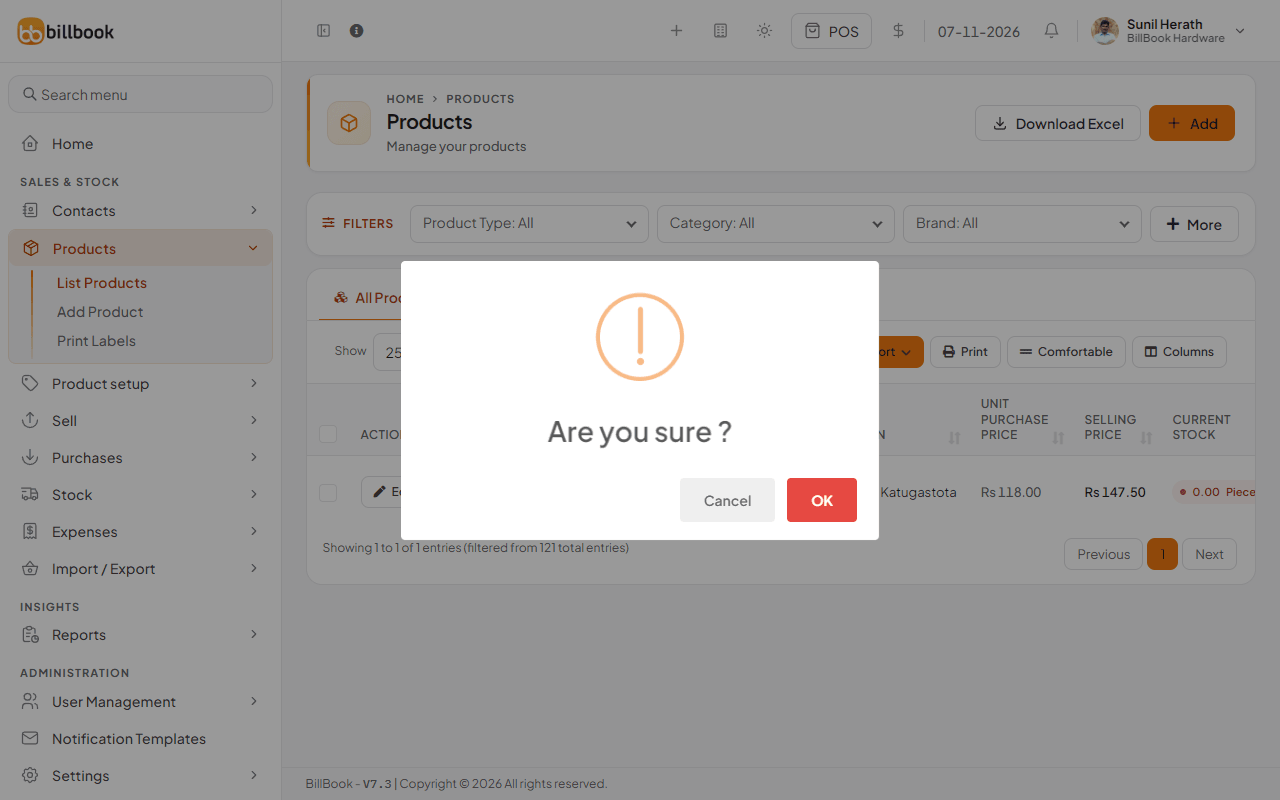
- BillBook asks Are you sure ?. Select OK, and it shows Deleted Successfully.
Note: A product that already has sales or other transactions cannot be deleted. BillBook tells you "Some products couldn't be deleted because it has transactions related to it." Deactivate it instead. Deleting cannot be undone.
Product stock history#
To see why a product's stock is what it is:
- Select the arrow next to Edit on the product row and choose Product stock history.
- Choose the Business Location if the product is at more than one.
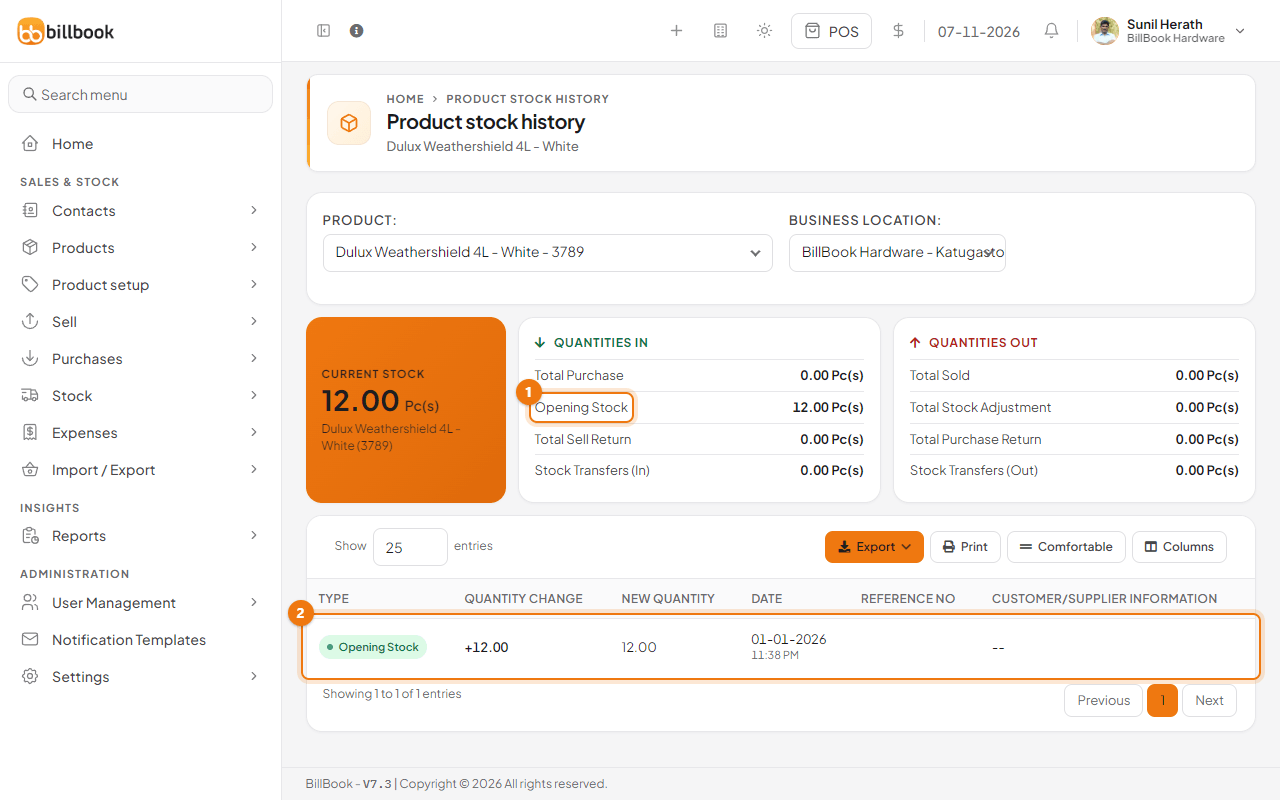
- The boxes at the top show the Current Stock, the Quantities In (Total Purchase, Opening Stock (1), Total Sell Return, Stock Transfers (In)) and the Quantities Out (Total Sold, Total Stock Adjustment, Total Purchase Return, Stock Transfers (Out)).
- The table (2) lists each change with its Type, Quantity Change, New Quantity, Date and Reference No.