
Barcode scanner
Last updated: 4 November 2026 · 3 min read
A barcode scanner adds a product to the bill the moment you scan it, so checkout is faster and there are fewer typing mistakes. BillBook needs no special setup for it: most scanners work like a keyboard.
Connect a scanner#
- Plug the scanner into your computer's USB port, or pair a Bluetooth scanner in the computer's Bluetooth settings. A scanner with a USB dongle just needs the dongle plugged in.
- If the scanner came with a driver, install it as the maker says. Most scanners need none.
- Open Notepad or any text box and scan a barcode. If the numbers appear followed by a new line, the scanner is ready. It "types" the code and presses Enter, exactly like a keyboard.
The scanner reads the product's SKU, so each product must have a SKU that matches its printed barcode. If you print your own labels, see Barcode label printer.
Two product settings help:
- Go to Products > List Products and select Edit on a product.
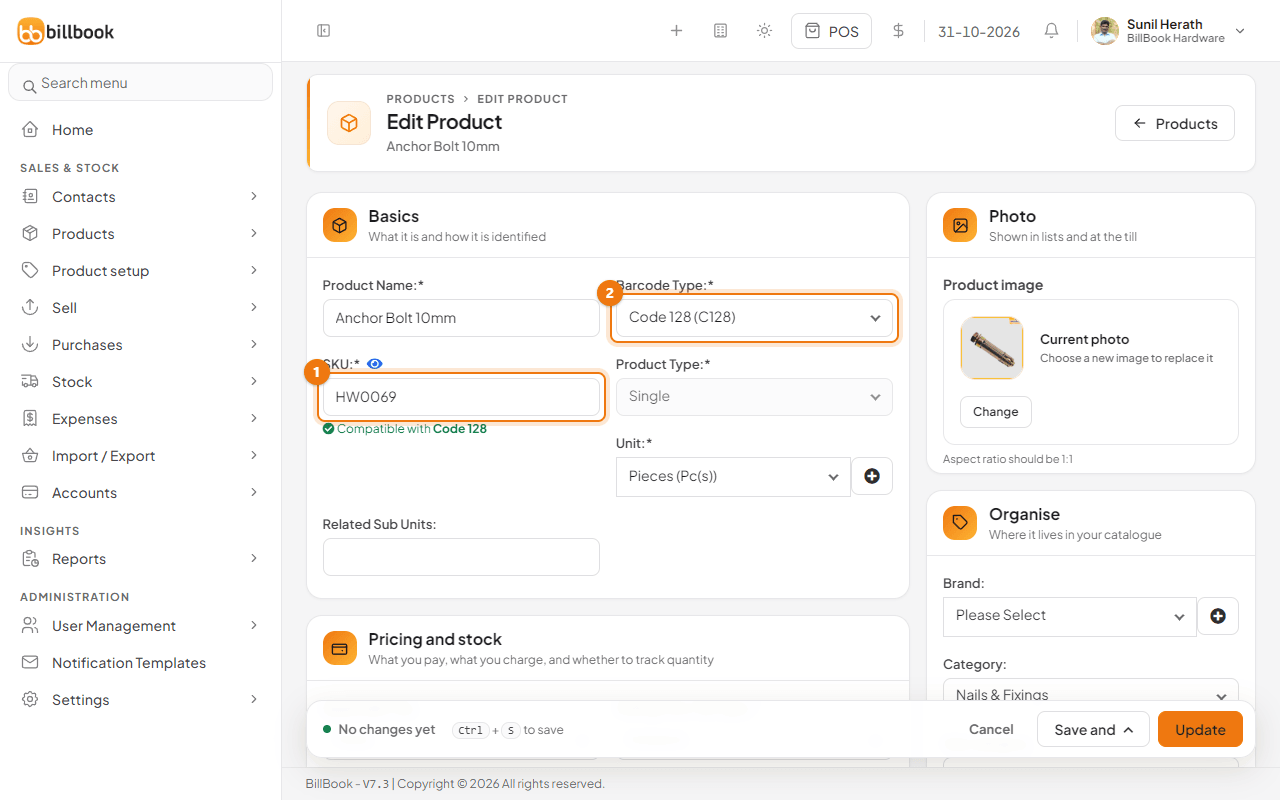
- Check the SKU (1). This is the number the scanner must read.
- Check the Barcode Type (2), for example Code 128 (C128). Choose the type your labels use: Code 128, Code 39, EAN-13, EAN-8, UPC-A or UPC-E. BillBook shows a green Compatible with note under the SKU when the SKU suits the type.
Scan in POS and purchases#
In POS#
- Go to Sell > Sales counter.
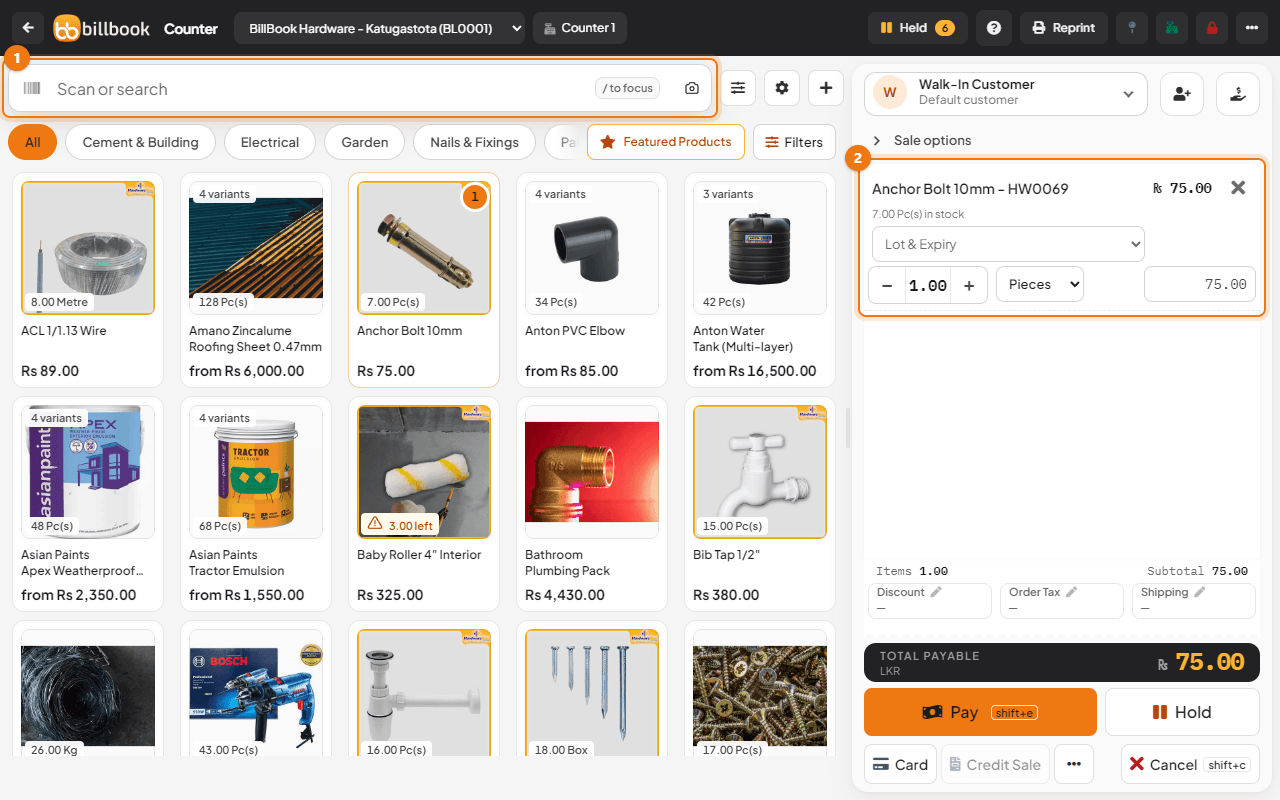
- Select the search box (1), which says Scan or search, or press
/to jump to it. - Scan the product. The product is added to the bill (2) with quantity 1. Scan it again to add one more.
To add several at once, type a quantity, a star and the code before pressing Enter, for example 3*HW0069.
No scanner to hand? Type a SKU, such as HW0069, and press Enter. That is exactly what a scanner does.
On Add Purchase#
- Go to Purchases > Add Purchase and choose the Supplier, Business Location and Purchase Status. The product box stays switched off until you do.
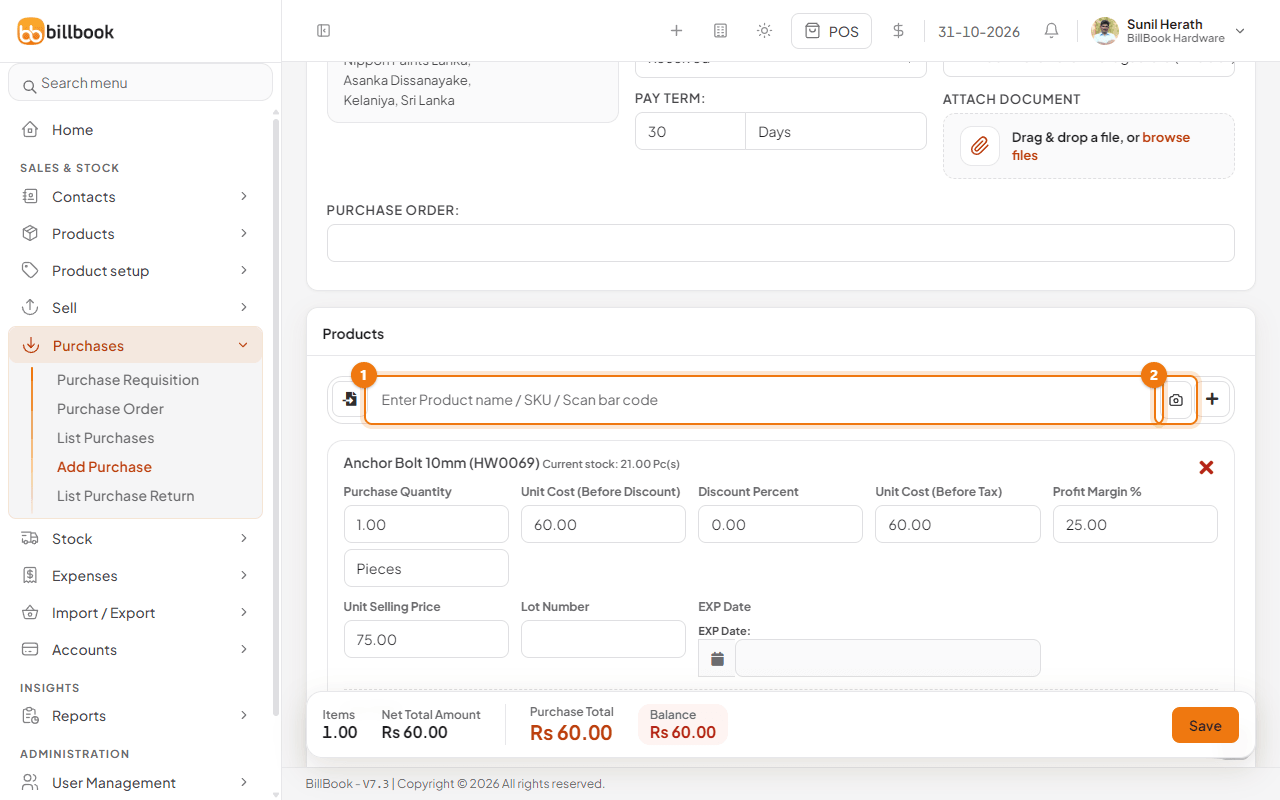
- Select the product box (1) and scan the product. It is added as a new line with its cost and selling price.
The Scan barcode camera button (2) next to the box scans with the device camera. Use it on a phone or tablet when you have no scanner. Your browser asks for permission to use the camera the first time.
Other screens#
Any product search box that says Enter Product name / SKU / Scan bar code, such as the one on stock adjustments, works the same way. Select the box first, then scan.
Tip: A scan only lands in the box that has the cursor. If nothing happens, select the search box and scan again.