
Custom fields
Last updated: 7 November 2026 · 2 min read
BillBook gives you spare fields on contacts, products, locations, users, purchases and sales. Out of the box they are called Custom Field 1, Custom Field 2 and so on. Rename the ones you need so staff see your own words, for example NIC / BR number on a customer or Shade code on a paint.
Before you start: You need permission to open Settings.
Rename custom field labels#
- Go to Settings > Business Settings, select Show advanced settings under the tab list, and open the Custom Labels tab.
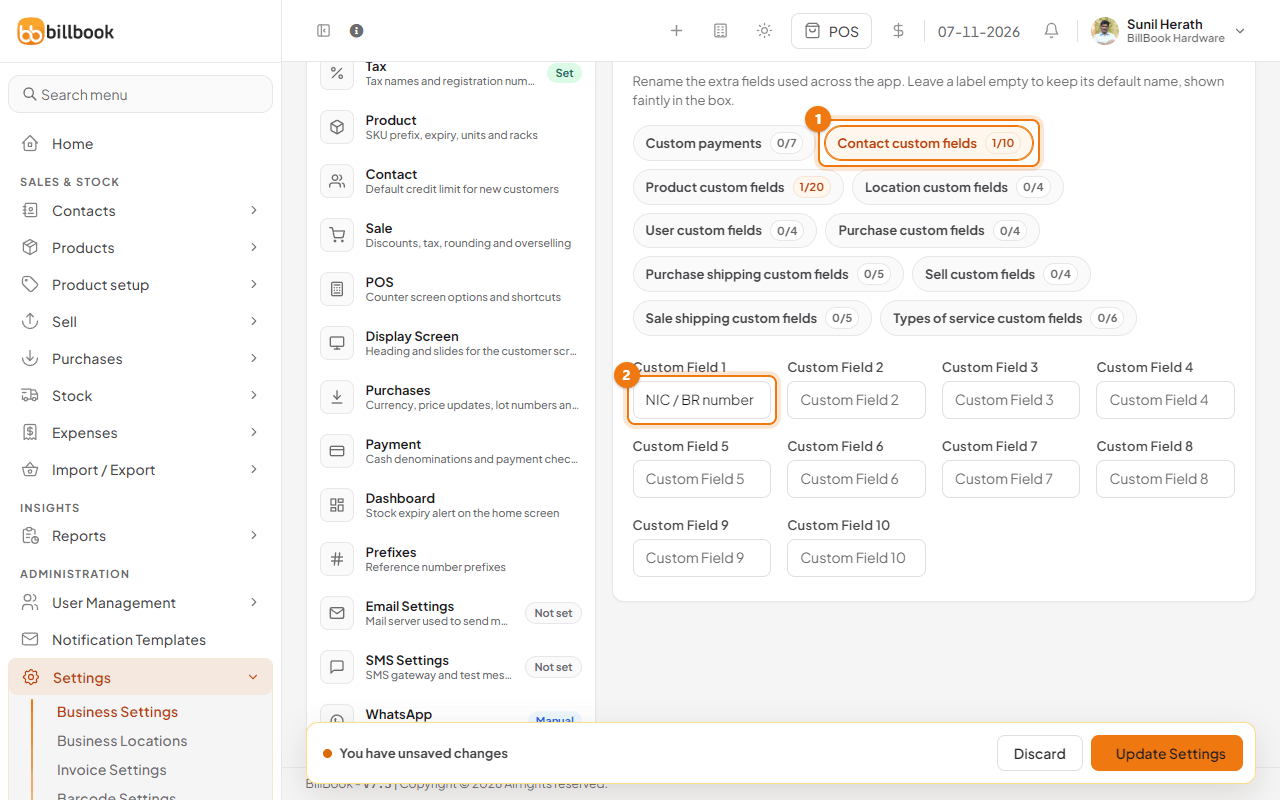
- Pick a group (1). The groups are Custom payments, Contact custom fields, Product custom fields, Location custom fields, User custom fields, Purchase custom fields, Purchase shipping custom fields, Sell custom fields, Sale shipping custom fields and Types of service custom fields. The number on each group, such as 1/10, shows how many labels you have filled in. Product custom fields has 20 fields, Contact custom fields has 10.
- Type the new name in the box (2), for example NIC / BR number in Custom Field 1 of Contact custom fields. A box you leave empty keeps its default name.
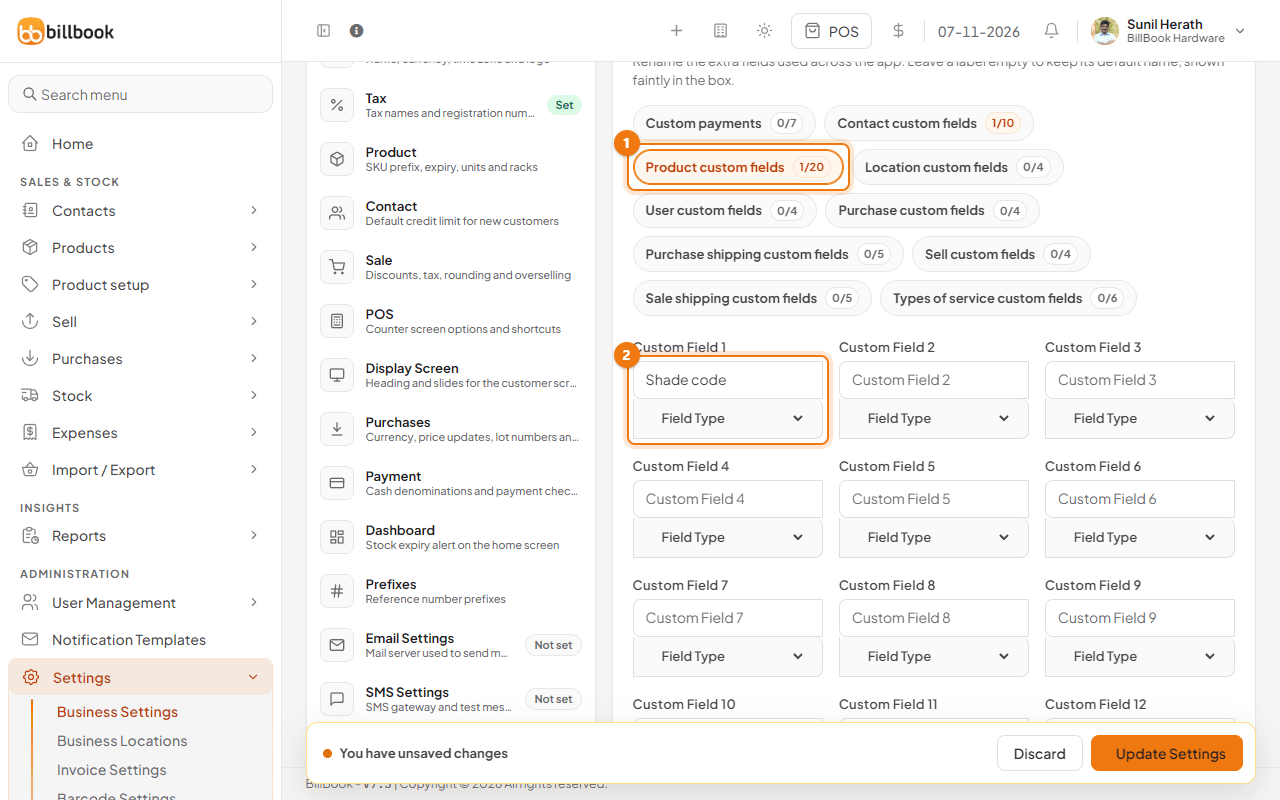
- For product fields, open Product custom fields (1) and type the label, for example Shade code. Each product field also has a Field Type (2): Text, Datepicker or Dropdown. Choose Text for a code or a short note. The label box is the small box on the left of Field Type.
- Select Update Settings. While you have unsaved changes, a bar at the bottom of the page shows You have unsaved changes with Discard and Update Settings.
Tip: Use short labels. They sit above a small box on the form, and long names get cut off.
Where custom fields appear#
After you save, the new name shows wherever that field is used.
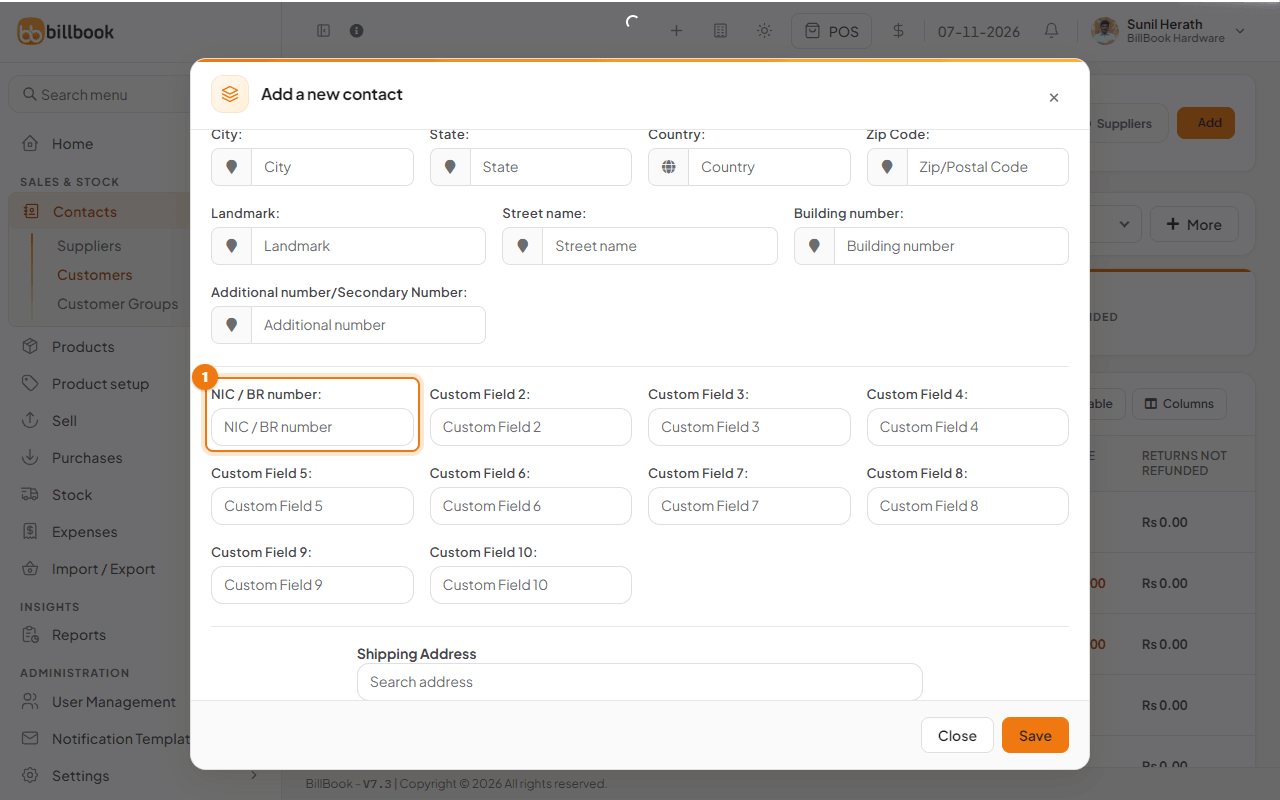
- Contacts: open Contacts > Customers (or Suppliers), select Add, then More Informations. NIC / BR number (1) is in the list of extra fields.
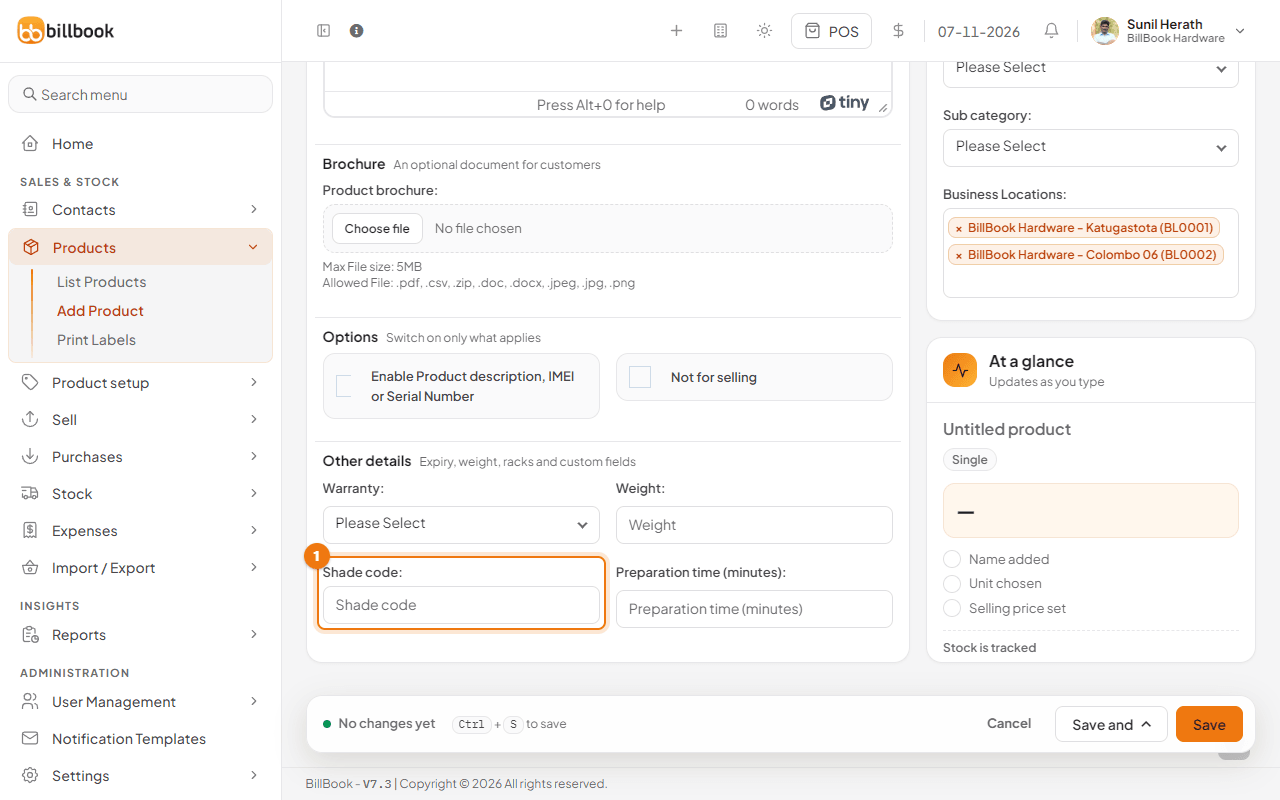
- Products: open Products > Add Product and select More details. Shade code (1) appears under Other details, with the other extra fields.
Fields you do not rename keep their default names, such as Custom Field 2. The invoice layout can print custom fields too; see Invoice layouts.