
Transfer stock between locations
Last updated: 7 November 2026 · 3 min read
Use a stock transfer when you move goods between your own locations, for example from your Katugastota shop to your Colombo branch. When the transfer is completed, stock goes down at the sending location and up at the receiving one.
Before you start: Stock Transfers must be switched on in Settings > Business Settings > Modules, and you need at least two business locations. Add the second one under Settings > Business Locations.
Create a transfer#
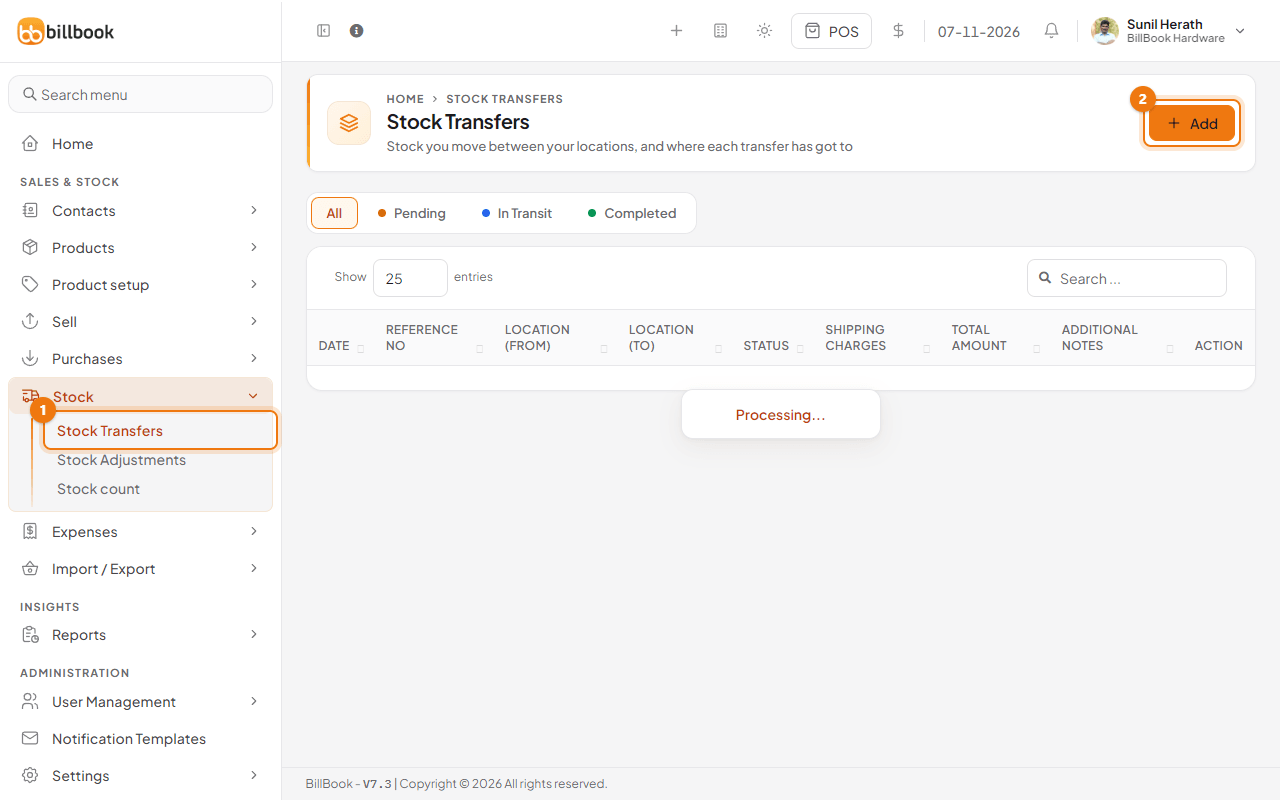
- Go to Stock > Stock Transfers (1) and select Add (2).
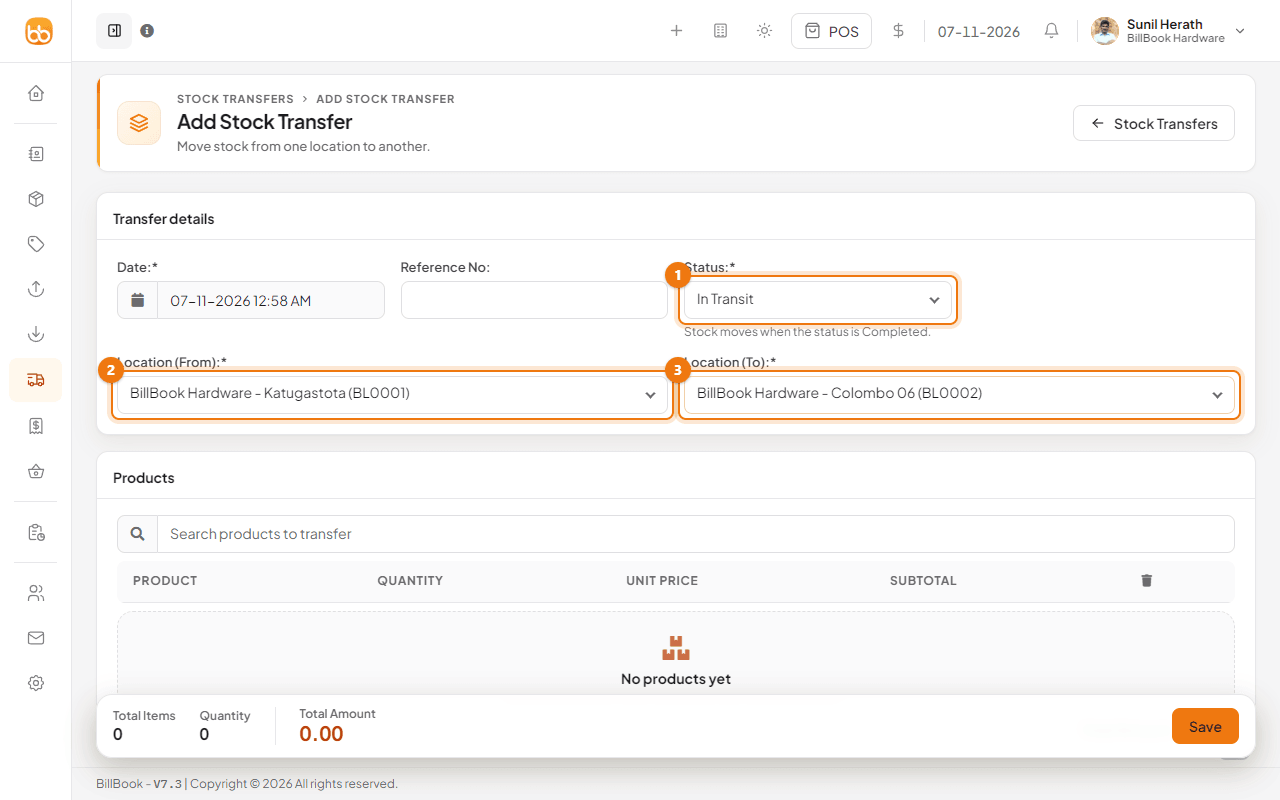
- Choose the Status (1). Use Pending if the goods have not left yet.
- Choose Location (From) (2), the shop that is sending the stock, and Location (To) (3), the shop that will receive it.
- Leave Reference No empty to let BillBook number the transfer (the first one is ST2026/0001). The Date starts as the current date and time.
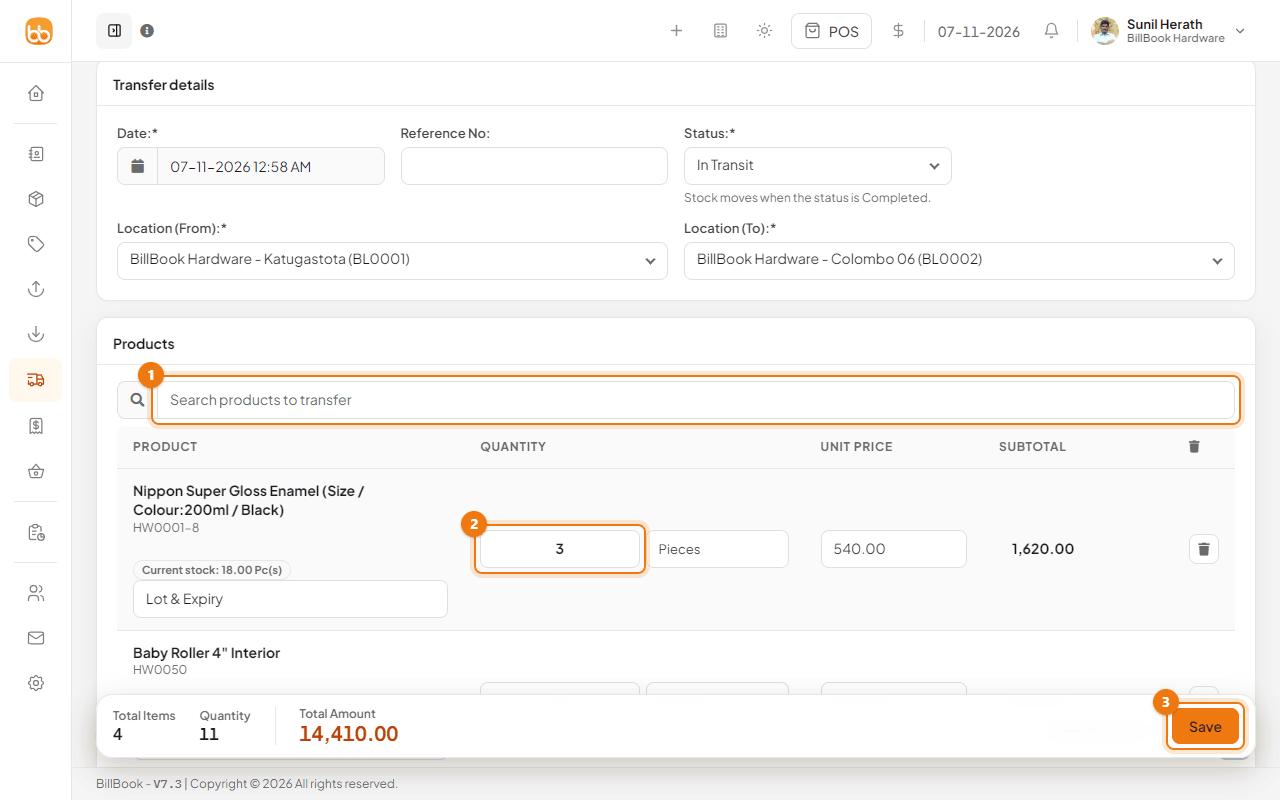
- Select the search box (1) under Products and type a name or SKU, for example enamel or roller. Pick the product from the list. Repeat for each item.
- Enter the Quantity (2) for each row. The row shows the Current stock at the sending location, so you can see what is available. If you track lots, you can also pick a Lot & Expiry for the row.
- Enter Shipping Charges if you paid for delivery, and use Add a note to this transfer if you want to leave a message.
- Check the totals at the bottom, then select Save (3).
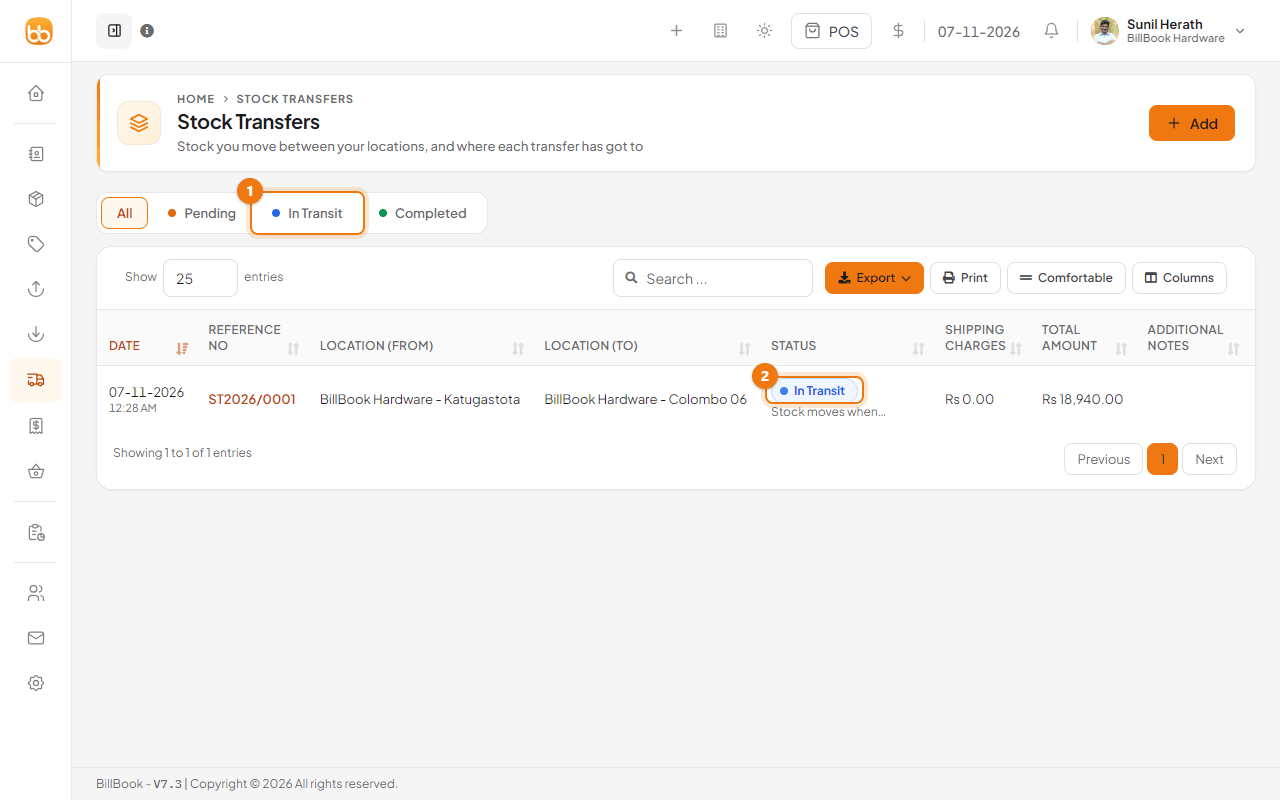
The transfer appears in the list.
Transfer statuses#
A transfer has three statuses.
- Pending: the transfer is recorded but the goods have not left. You can still change it with Edit.
- In Transit: the goods are on the way to the other location.
- Completed: the other location has received the goods. Only now does stock move: it goes down at Location (From) and up at Location (To). A completed transfer cannot be edited.
On the Stock Transfers list, use the tabs All, Pending, In Transit (1) and Completed to filter. The status badge on each row (2) shows where that transfer is.
Receive a transfer#
When the goods arrive at the receiving shop, mark the transfer as completed.
- On Stock > Stock Transfers, select the status badge on the transfer's row. Only the Update Status window opens.
- Choose Completed in Status (1).
- Select Update (2).
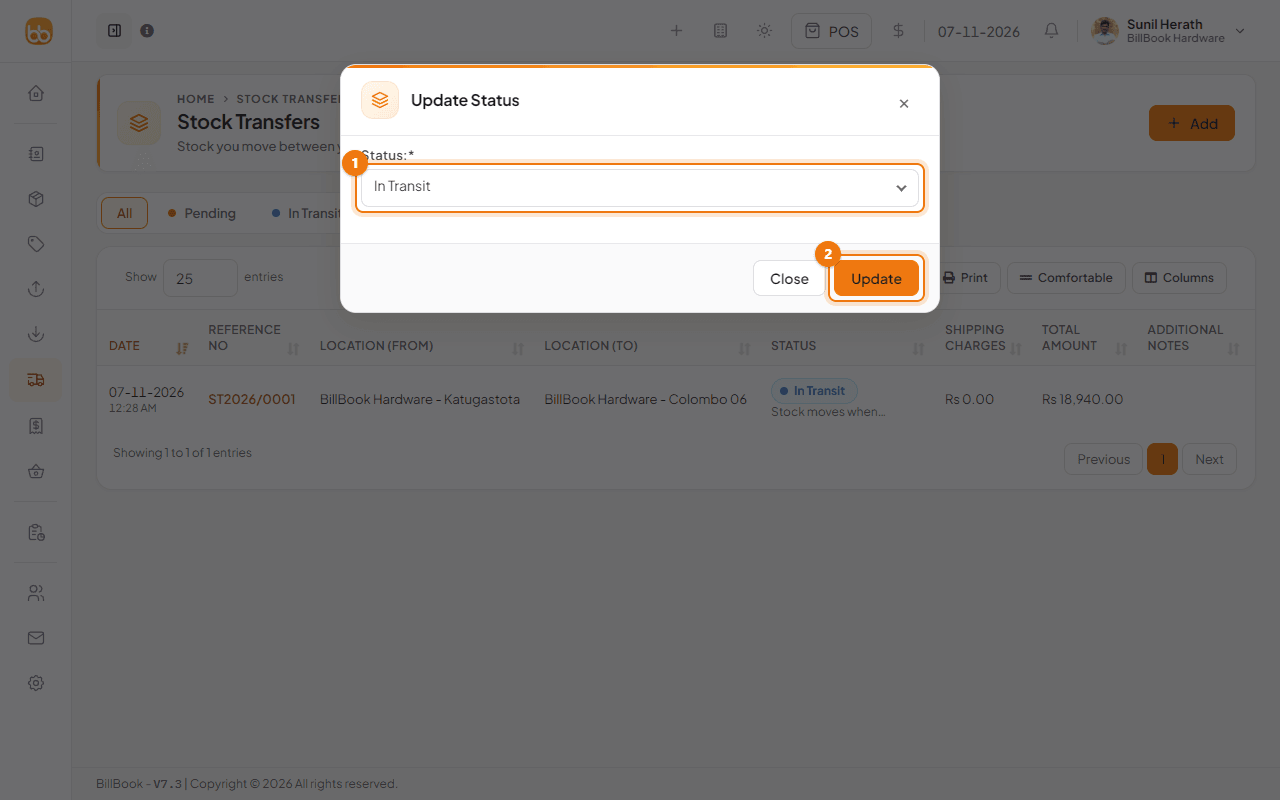
BillBook shows Updated Successfully and the row now says Completed. Check the stock at the receiving location in the stock reports.
Note: Stock moves when the status becomes Completed, so check the quantities before you update it. Transfers that were completed cannot be changed, and a transfer cannot be deleted if some of its stock has already been sold.
Print a transfer#
- On the Stock Transfers list, select the transfer's reference number to open its details. The window shows both locations, the three statuses, the items and the total.
- Select Print (1). BillBook opens your browser's print window with the transfer laid out for paper. Use the A4 menu beside it to choose another paper size.
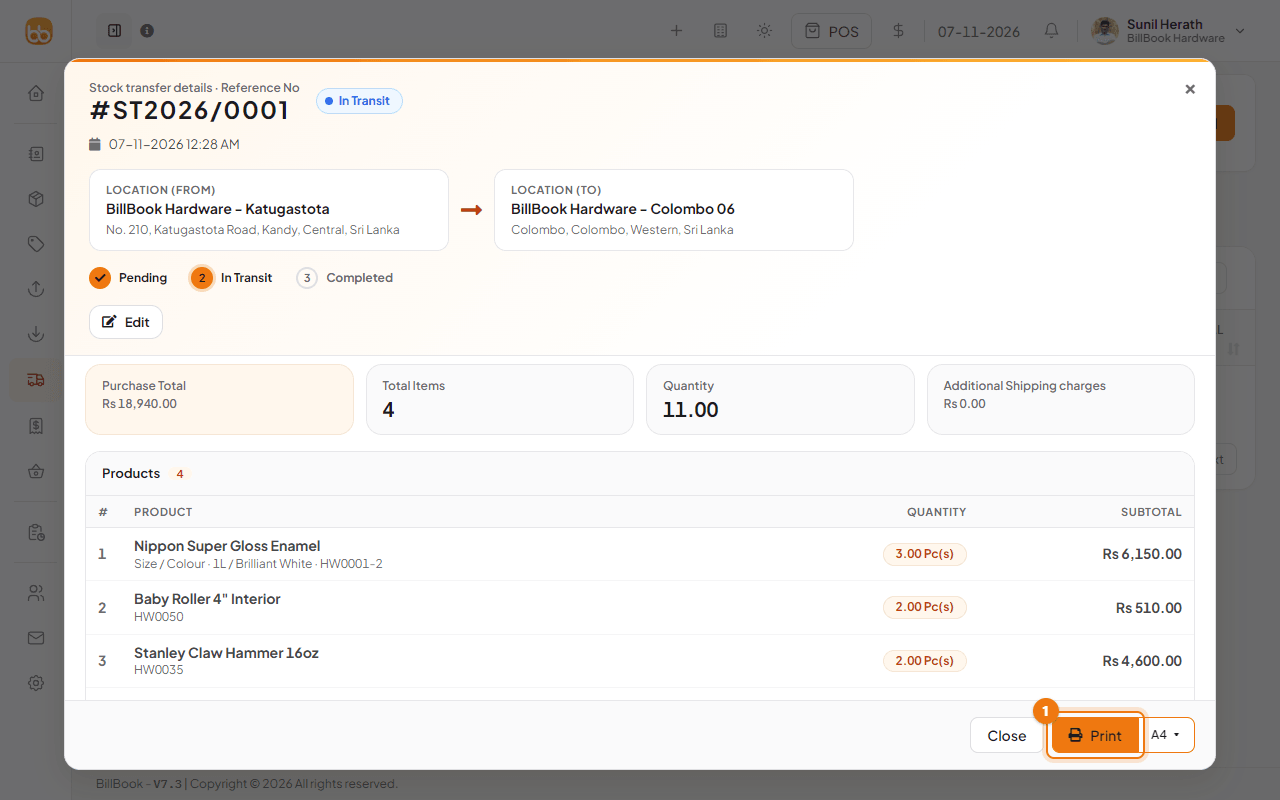
Send the printout with the goods so the receiving shop can check each item against it.