
Bookings
Last updated: 7 November 2026 · 4 min read
Bookings keep your table reservations in one place. You choose the customer, the time and a free table, and BillBook shows everything on a calendar so the host or waiter can see what is booked today and what is coming.
Before you start: Turn on Enable Bookings in Settings > Business Settings > Modules. To book a table, also turn on Tables and add your tables under Settings > Tables. To name a waiter on a booking, turn on Service staff. Turn on restaurant and salon features shows each step. Users need the Bookings permission in their role to see the page.
Create a booking#
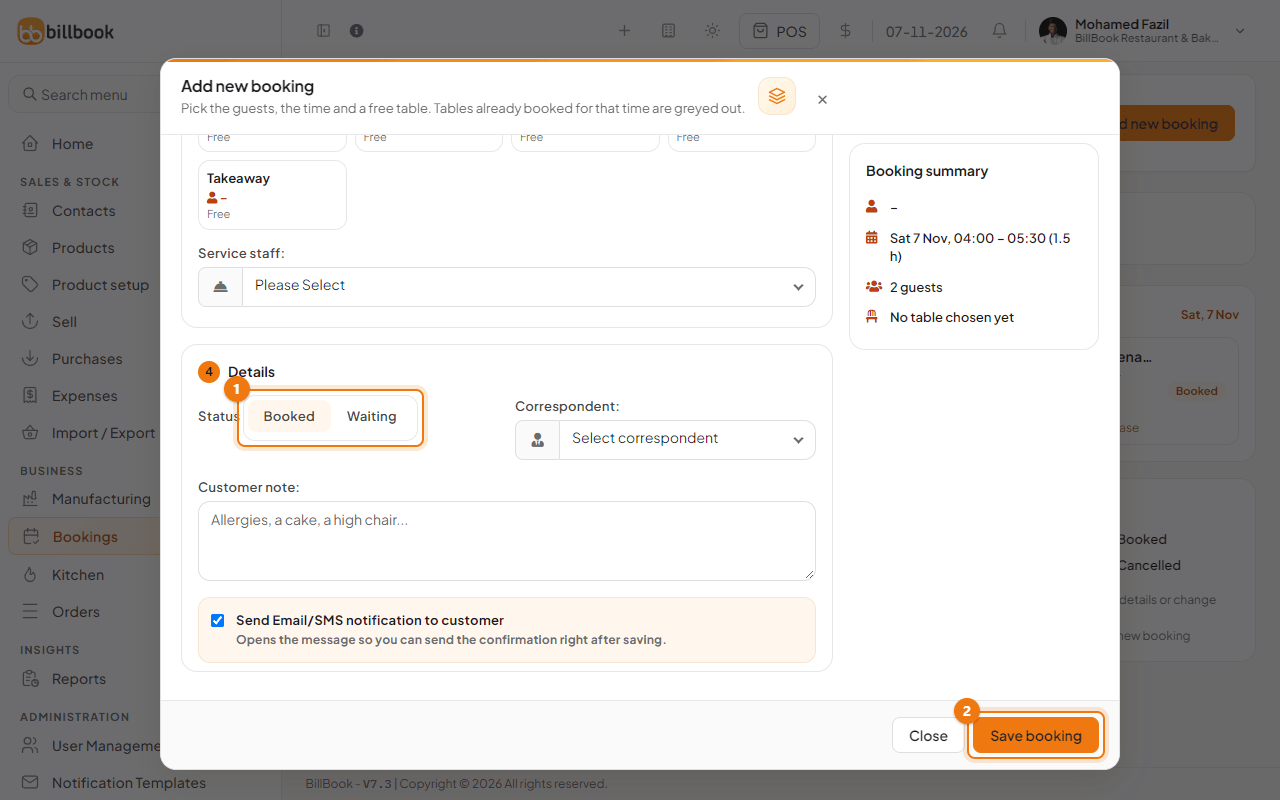
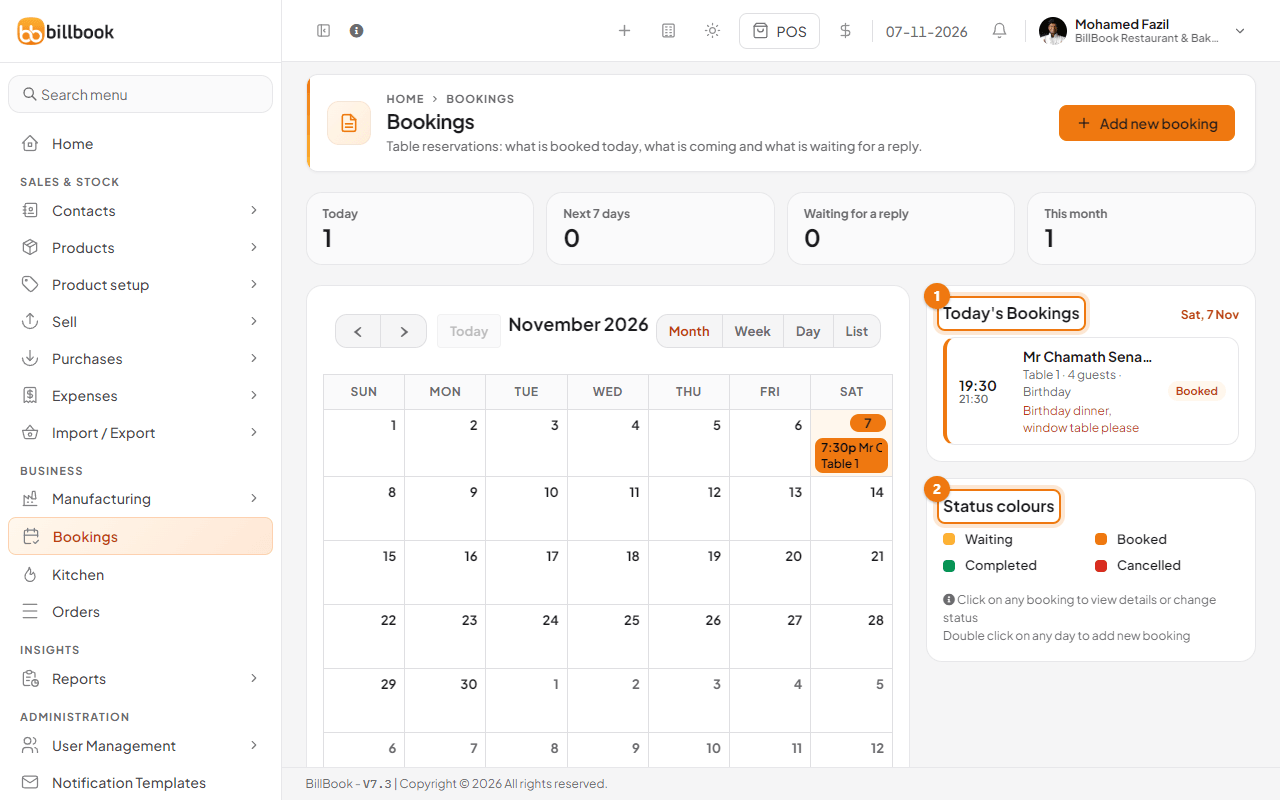
- Select Bookings (2) under BUSINESS in the left menu. The page shows four boxes at the top: Today, Next 7 days, Waiting for a reply and This month.
- Select Add new booking (1). You can also double-select a day on the calendar.
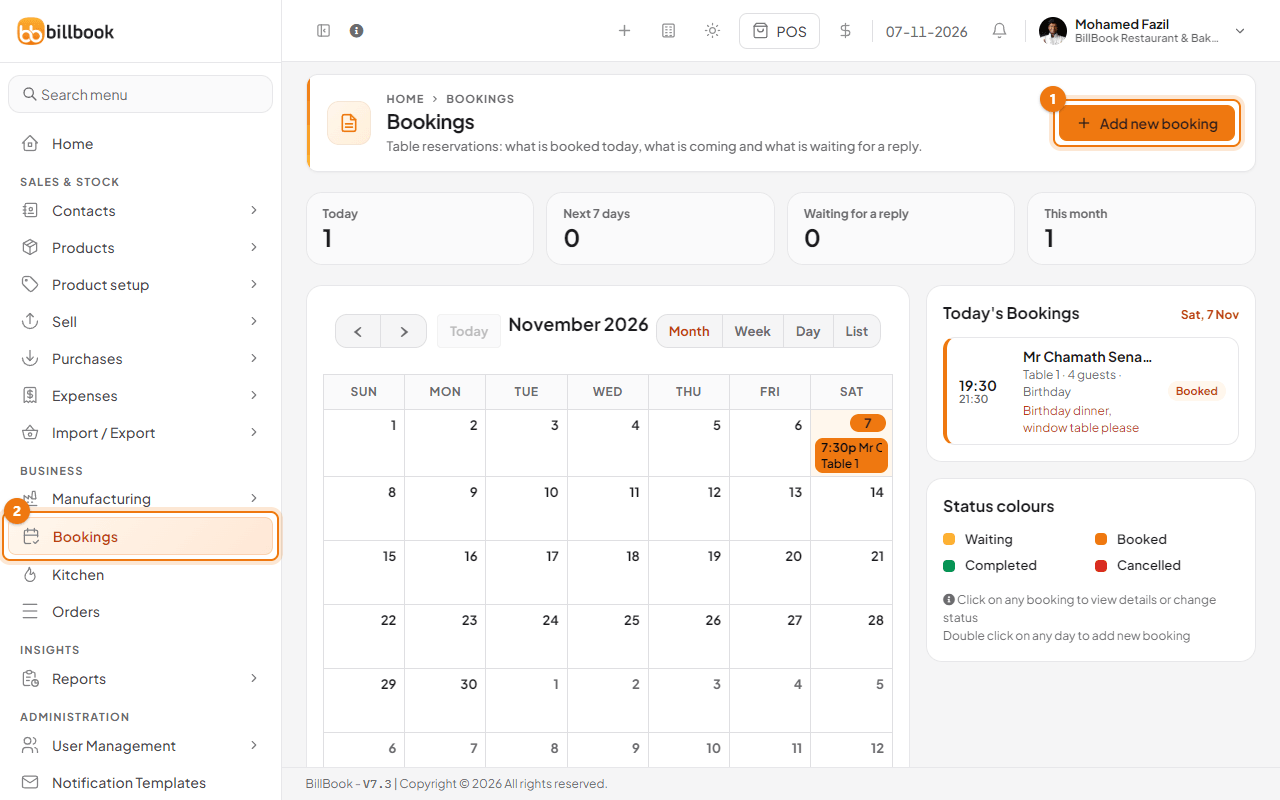
- In 1 Guest, choose the Customer (1). Select the + button next to it to add a new customer without leaving the window.
- Set the Number of guests with the − and + buttons or the quick numbers, and choose an Occasion if you want one: Birthday, Anniversary, Business, Family, Date night or Other.
- In 2 Date and time, choose the Start time (2) and End time, or select a Quick time such as 19:00 and a Stay for length such as 2 h.
- Pick a table, as shown in the next section.
- Choose the Service staff if a waiter will look after the table.
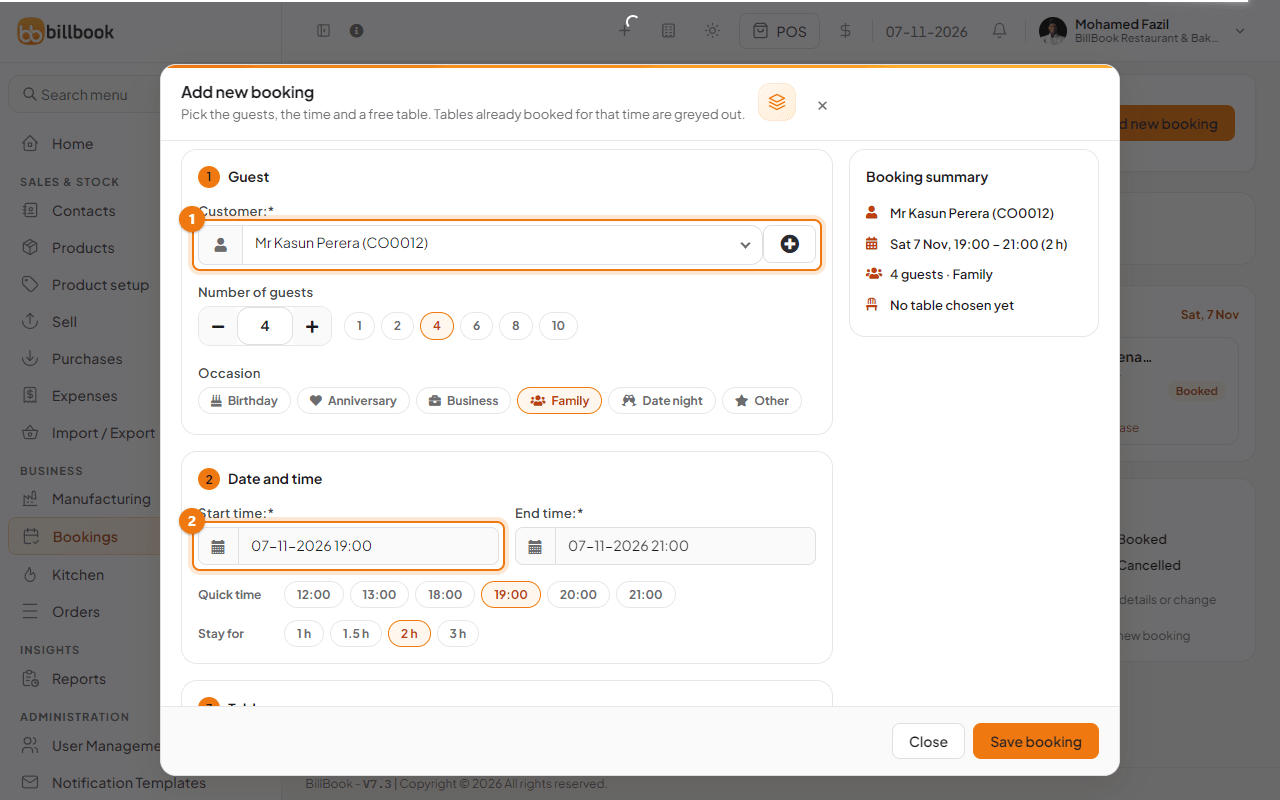
- In 4 Details, choose the Status (1), Booked or Waiting, and optionally a Correspondent (the staff member who took the booking) and a Customer note, for example "Allergies, a cake, a high chair".
- Select Save booking (2). BillBook shows Added Successfully and the booking appears on the calendar.
The Booking summary on the right of the window repeats the customer, time, guests and table as you fill it in.
Note: Send Email/SMS notification to customer is ticked when the window opens. It opens the message after you save so you can send the confirmation. Untick it if you do not want to send one.
Check availability#
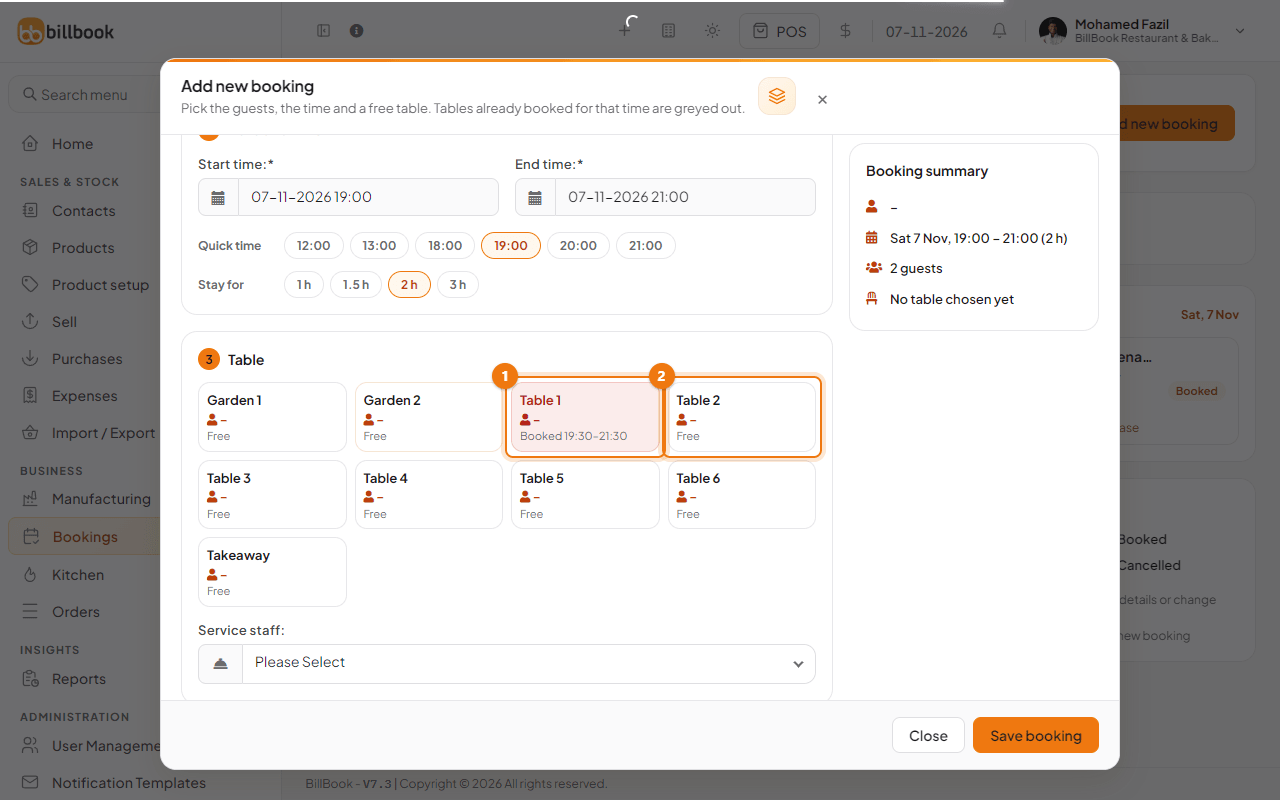
The 3 Table section lists your tables for the location. BillBook checks the times you chose, and tables that are already booked for that time are greyed out, with the booked hours, for example Booked 19:30-21:30 (1). A free table shows Free (2). Change the start or end time and the list updates.
- Choose a free table. The window will not let you choose a booked one.
- If the table you want is taken, change the time or choose another table, such as Table 2.
Today's bookings#
The panel on the right of the Bookings page, Today's Bookings, lists each booking for today with its start and end time, the customer, the table, the number of guests, the occasion, the waiter, the note and the status. Use it as the host's list for the day.
The calendar on the left shows all bookings. Use the Month, Week, Day and List buttons to change the view, the arrows to move on, and Today to come back. Select a booking on the calendar to see its details.
Booking status#
The Status colours key (2) on the page shows what each colour means: Waiting (yellow), Booked (orange), Completed (green) and Cancelled (red). Use Waiting for a request the customer has not confirmed, and Booked for a confirmed table. The Waiting for a reply box at the top counts the waiting ones.
To change a status:
- Select the booking on the calendar or in Today's Bookings. Booking Details opens with the customer, waiter, table, times, guests and occasion.
- Choose the new status in the box (1): Waiting, Booked, Completed or Cancelled.
- Select Update (2).
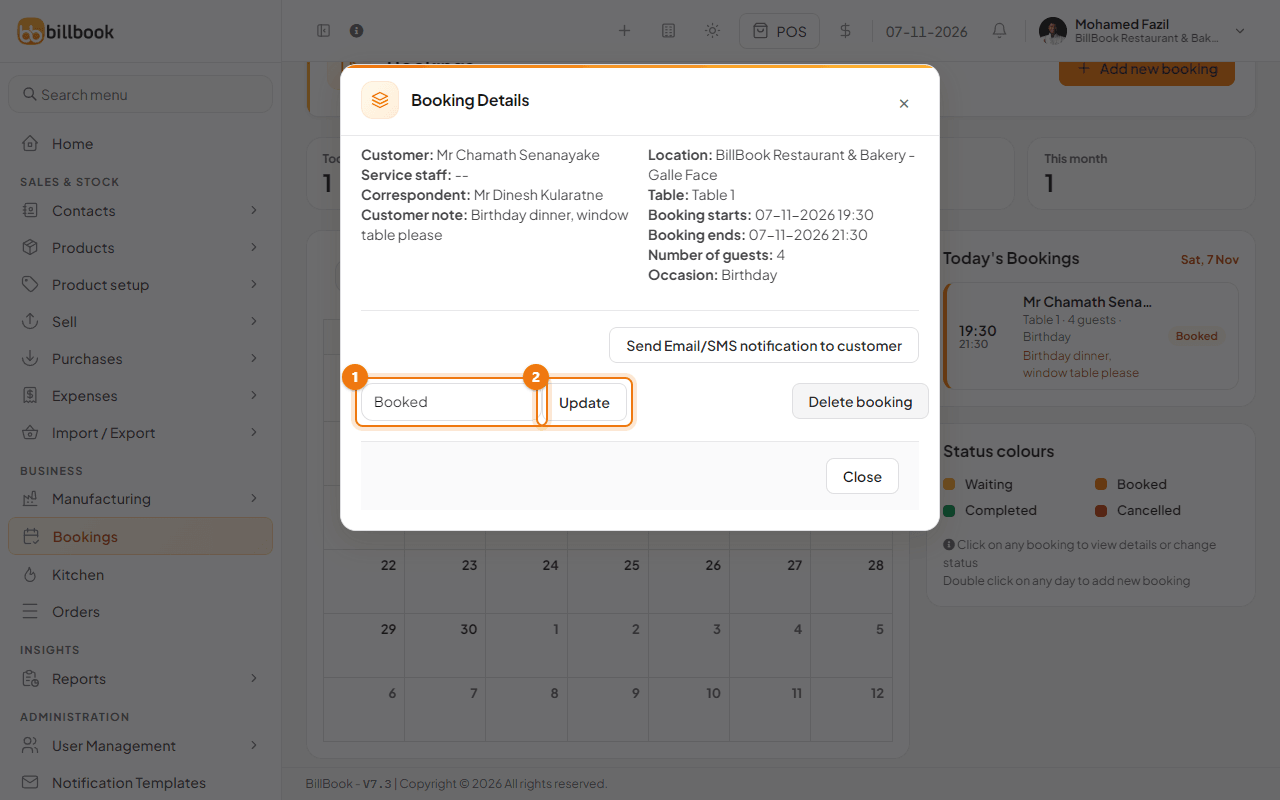
The same window has Send Email/SMS notification to customer to message the customer, and Delete booking to remove it for good. Choose Cancelled instead of deleting if you want to keep a record.
Tip: After you save a booking, reload the page if the four boxes at the top still show the old numbers. The calendar and Today's Bookings are already correct.