
Customer display screen
Last updated: 7 November 2026 · 2 min read
The customer display is a second screen that faces the customer. It lists the items as you scan them, shows the total and change, and plays your slides, such as offers or new stock. Customers see each price as it is rung up, so there are fewer arguments at the counter.
Before you start: You need permission to open Settings > Business Settings, and a second monitor or a tablet facing the customer.
Add slides and a heading#
- Go to Settings > Business Settings and select Display Screen in the left list.
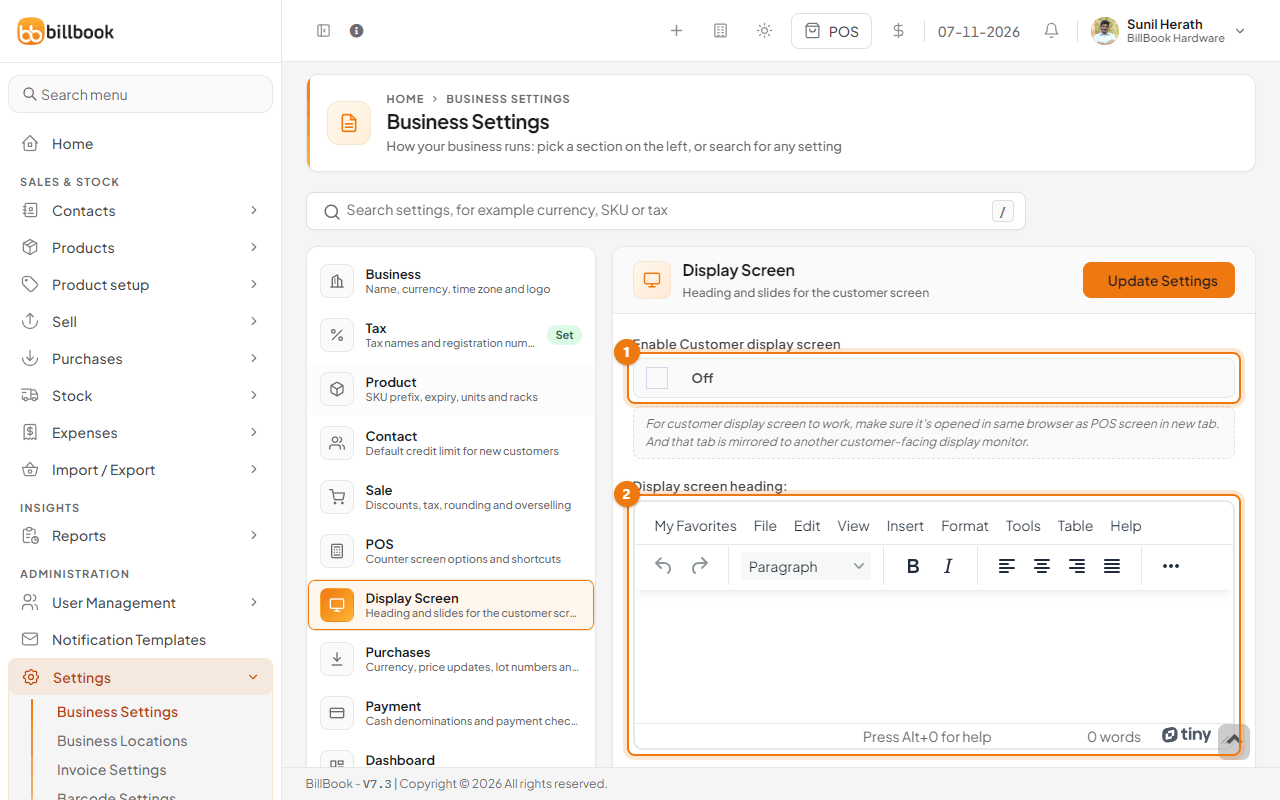
- Turn on Enable Customer display screen (1).
- Write your Display screen heading (2) in the editor, for example Welcome to BillBook Hardware. It shows at the top of the customer screen next to your logo.
- Scroll to Slides for the customer screen. Add up to 10 pictures. Drop a picture into an empty box (1) or select browse files. Use PNG, JPG or WebP files up to 5 MB.
- To replace a slide, select Change beside it. A new picture replaces the old one.
- Select Update Settings (2).
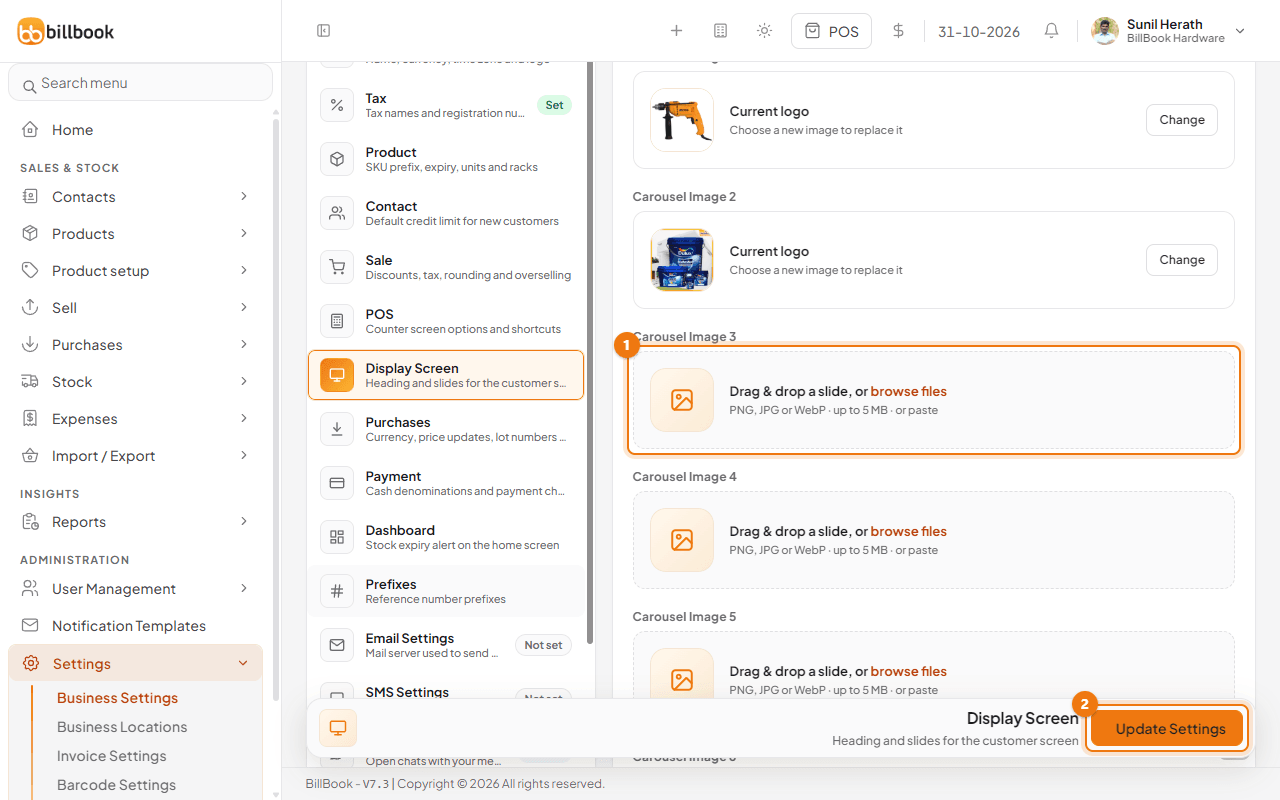
Note: The label beside an uploaded slide reads Current logo. It is only a label; the picture is your slide.
Open the customer display#
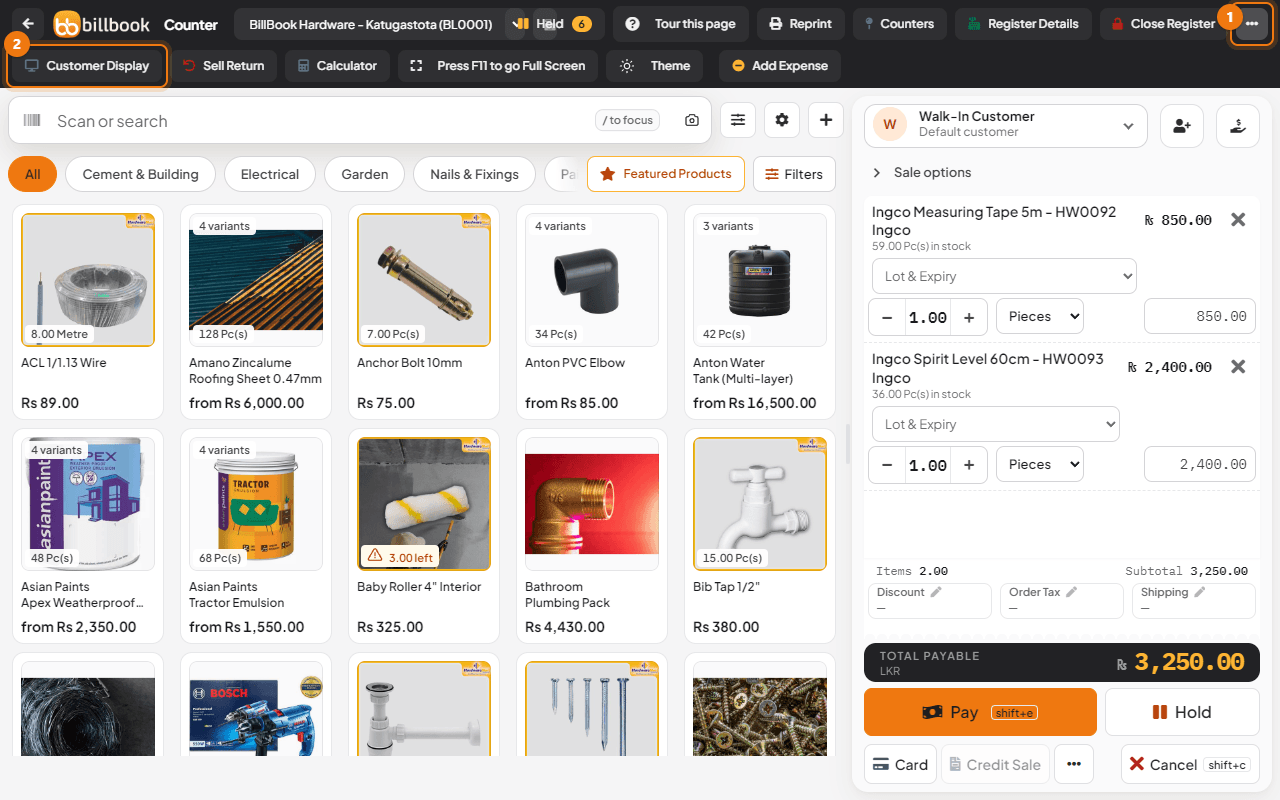
- Go to Sell > Sales counter and add items to the sale.
- Select Customer Display (2) in the POS header. On a smaller screen or a narrow browser window the header tools are folded away: select the ... button (1) at the right end of the header first.
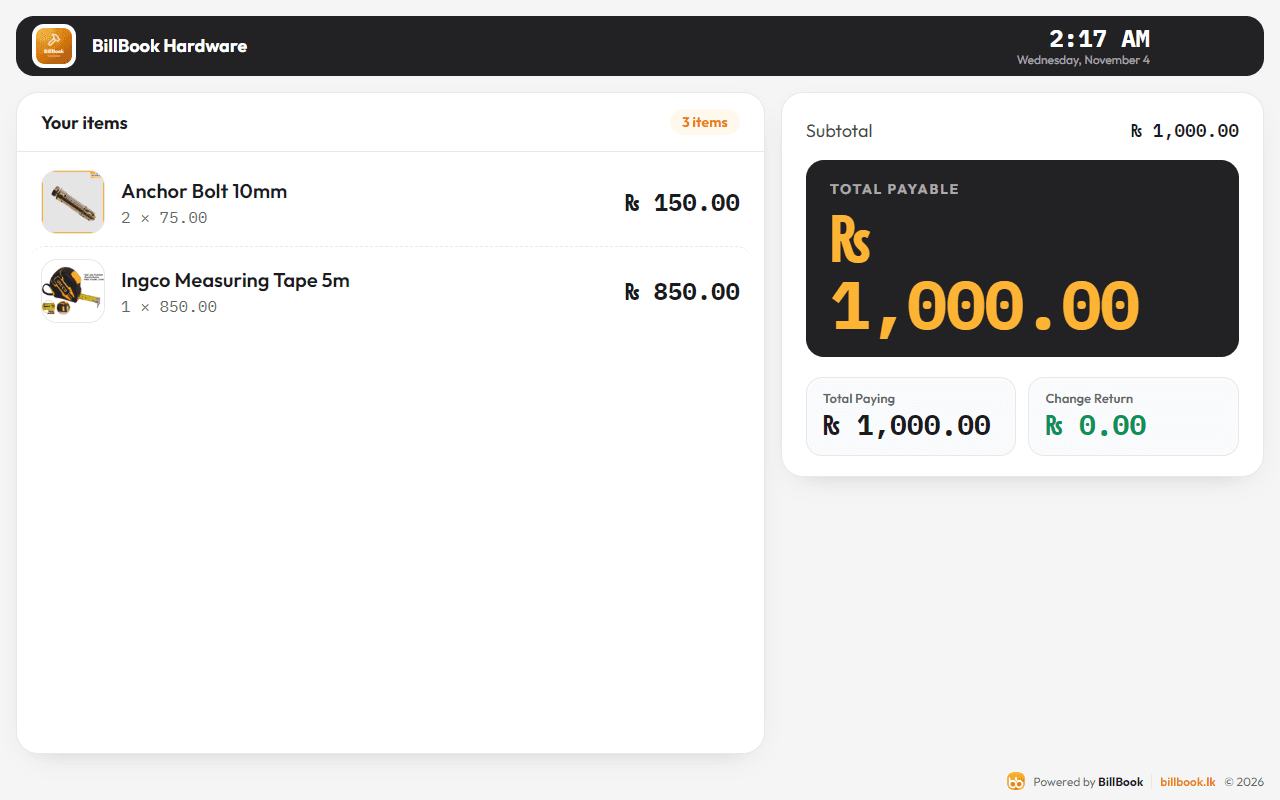
The customer display opens in a new browser tab. It lists each item with its quantity and price, the Subtotal, Total Payable, Total Paying and Change Return, and your slides in the corner. Items appear as you add them in the POS.
If you cannot see the button, check that Enable Customer display screen is on and update the POS page.
Use a second screen#
- Plug in the second monitor and set it to Extend these displays in your computer's display settings.
- Drag the customer display tab out of the browser into its own window, move that window onto the second monitor, then press F11 to fill the screen.
- Keep the POS on the main monitor.
Tip: Keep the customer display in the same browser as the POS. The two tabs talk to each other inside that browser, so a display opened on another computer or in another browser stays empty.