
Register your business
Last updated: 7 November 2026 · 4 min read
Register once to create your business in BillBook. It takes a few minutes. Keep your mobile phone nearby, because BillBook sends a code to check your number. If you have more than one shop, register the business once and add the other shops as locations later.
Before you start: Have your business name and address ready. Your TIN and VAT number are optional, and you can add them later.
Open the registration page#
- Go to the BillBook login page. If it opens on the Try a demo tab, select the Sign in tab.
- Under the Login button, select Register Now (1).
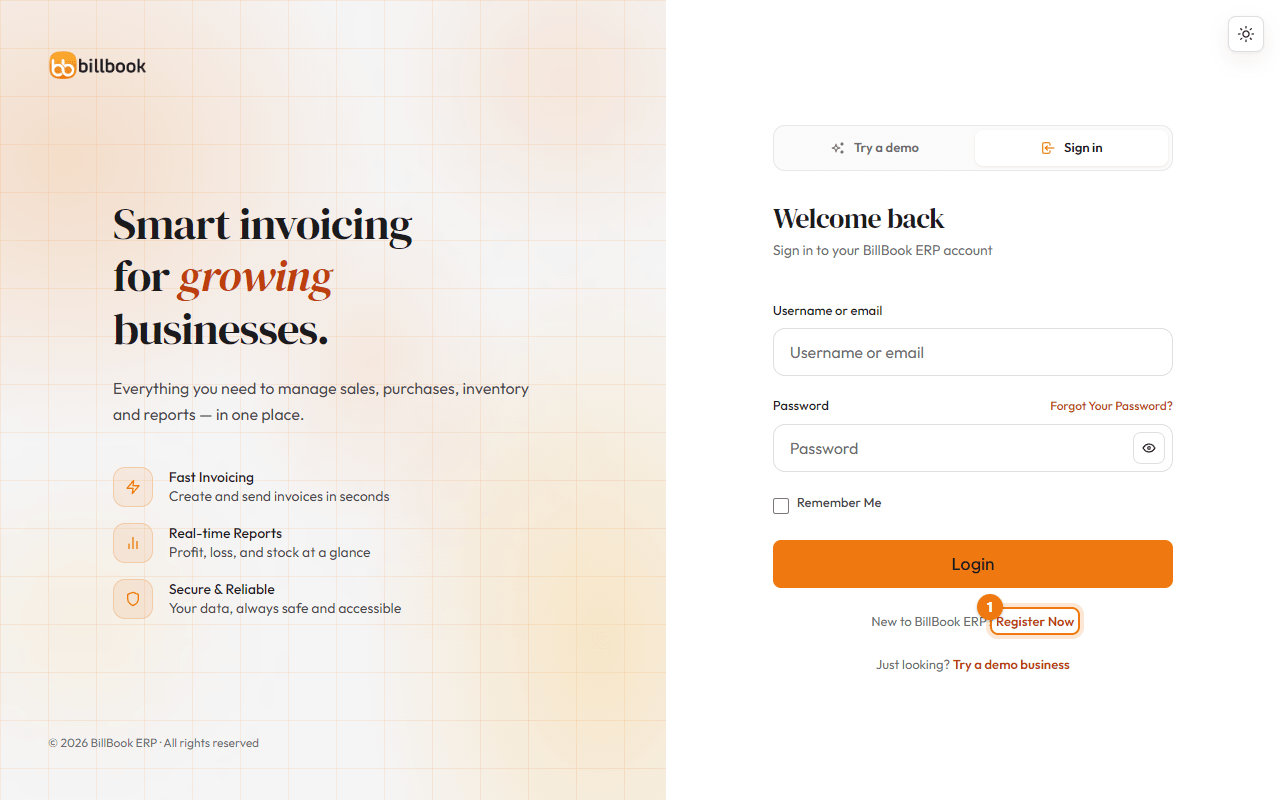
The registration form has three steps: Business details, Tax & accounting and Owner account. You can see which step you are on at the top of the form, and you can go back with ← Back at any time.
Business details, currency and time zone#
- Enter your Business Name (1). It is shown on your invoices and receipts. This is the only required field on this step.
- If you have one, add your logo under Upload Logo. A square image works best.
- Select More details (optional, can be added later) to open the rest of the step. Check the Currency (2) and Time zone (3). For Sri Lanka, these are already set to Sri Lanka - Rupees(LKR) and Asia/Colombo.
- Enter your Business contact number and your address: Country, Province / State, District, City, Zip Code and Landmark.
- Select Continue →.
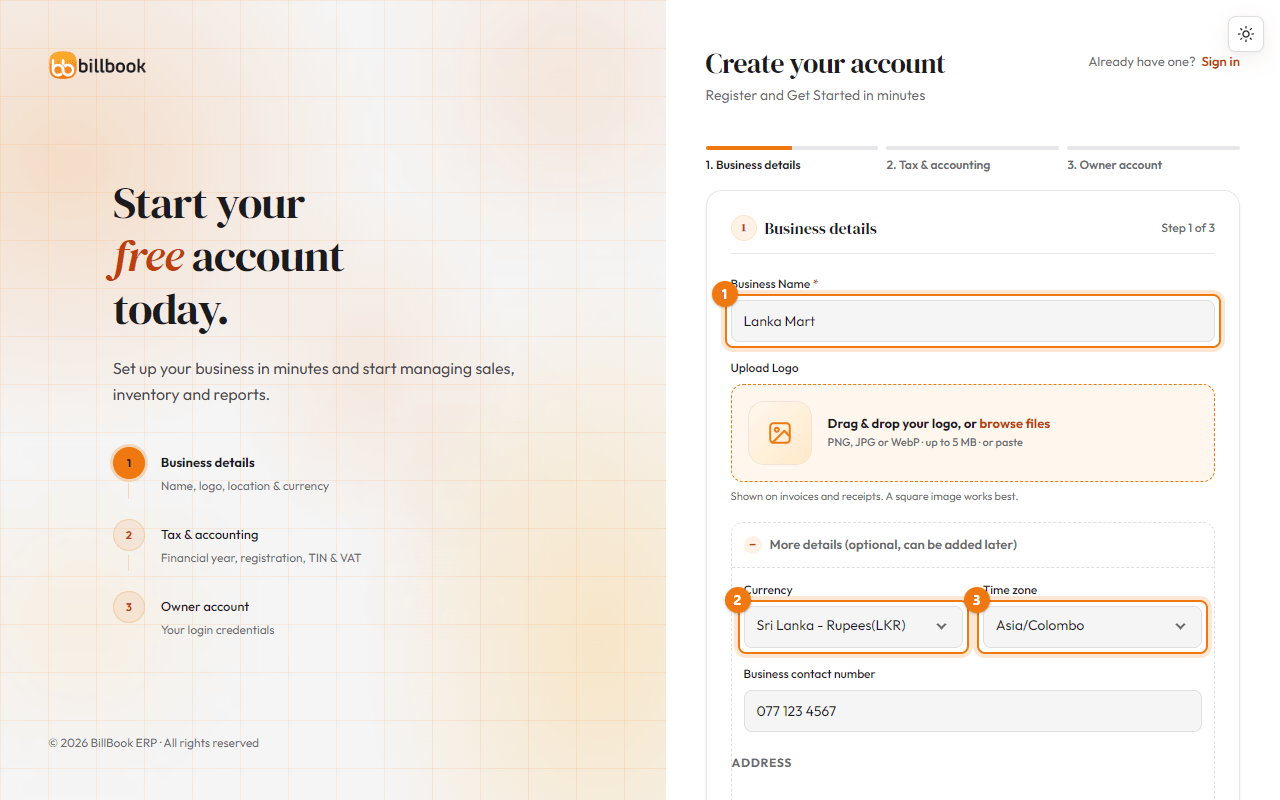
Tip: At the bottom of the same panel, a second More details (optional) block holds a start date, website and second phone number. You can leave it empty.
Tax details (TIN, VAT, SSCL)#
- Check the Financial year start month. It is set to April, the Sri Lankan tax year.
- Leave Stock Accounting Method as FIFO (First In First Out) unless your accountant tells you otherwise.
- If you have them, choose your Business type and enter your Business registration no.
- Enter your TIN (Taxpayer Identification No.) (1). This is the number issued by the Inland Revenue Department.
- Enter your VAT registration no. (2) only if your business is VAT registered.
- Tick SSCL registered (3) if you pay the Social Security Contribution Levy. BillBook then adds an SSCL 2.5% tax rate that you can apply to products.
- Select Continue →.
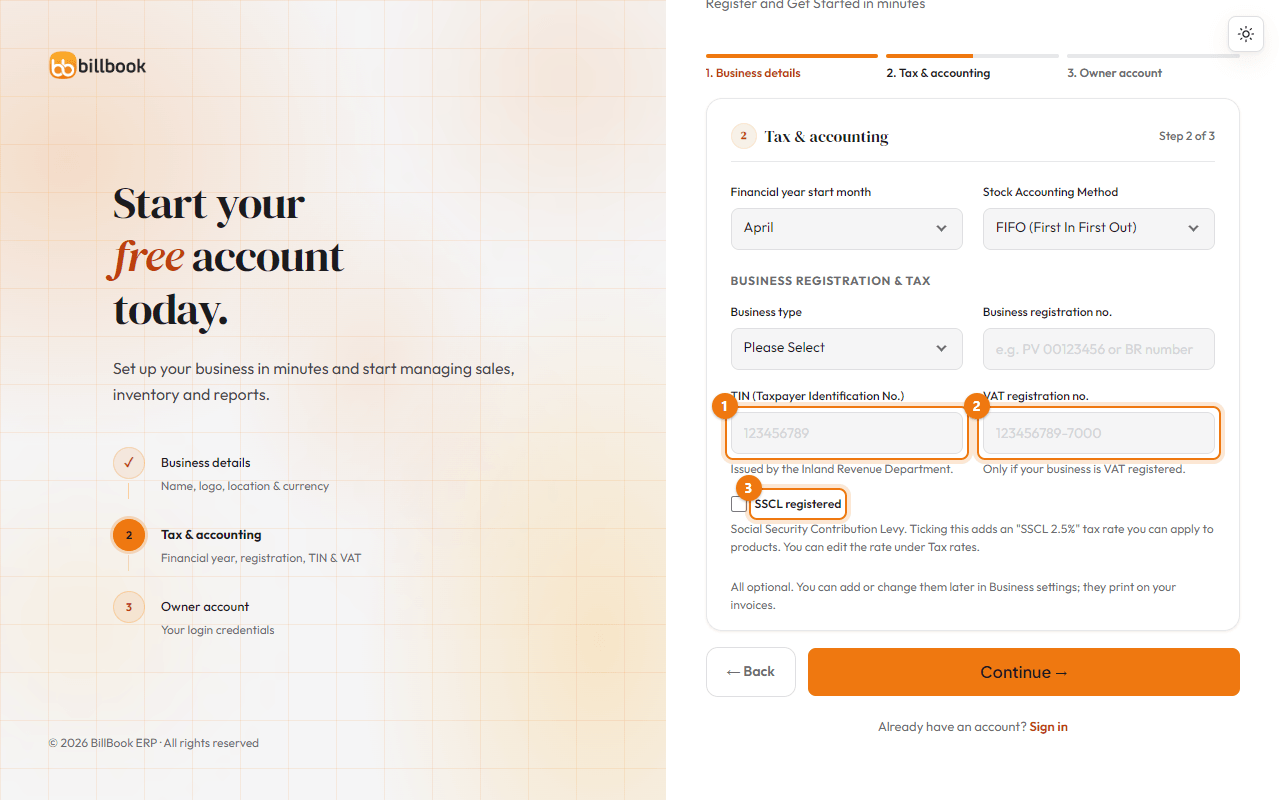
Everything on this step is optional. Your TIN and VAT number print on your invoices, so add them now if you have them.
Owner account and admin rights#
The person who registers becomes the owner of the business, with full admin rights. You can add staff with their own logins later.
- Enter your First Name and, if you like, your Prefix and Last Name.
- Choose a Username (1). You will use it to sign in. BillBook shows ✓ Available when no one else has it.
- Enter your Email. BillBook uses it if you forget your password.
- Enter your NIC number, in the old format (for example 851234567V) or the new 12-digit format.
- Enter a Password and type it again in Confirm Password. Keep these safe.
Verify your phone with OTP#
- Enter Your mobile number (2) and select Send code (3).
- BillBook sends you a 6-digit code by SMS. Enter the code and select Verify. You will see Mobile number verified.
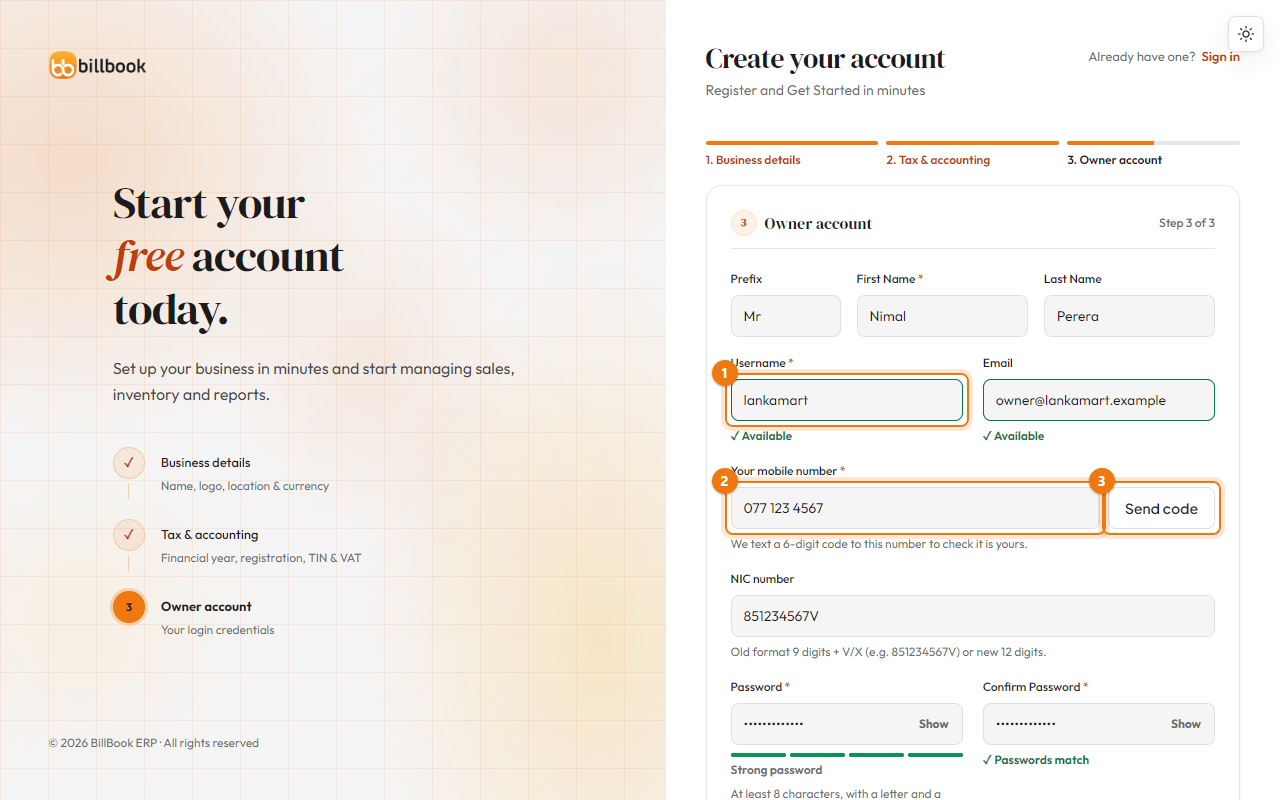
Note: The code works for 10 minutes. If it has expired, or you entered it wrong too many times, select Send code again. If BillBook cannot send the SMS, it tells you and lets you continue without the code.
Finish registration#
- If you are opening a new business, tick I'm starting a new business (1). You may be eligible for a free Starter period, and our team will call you to check.
- Select Read & accept (2), read the Terms & Conditions and select I agree.
- Select Register Now → (3).
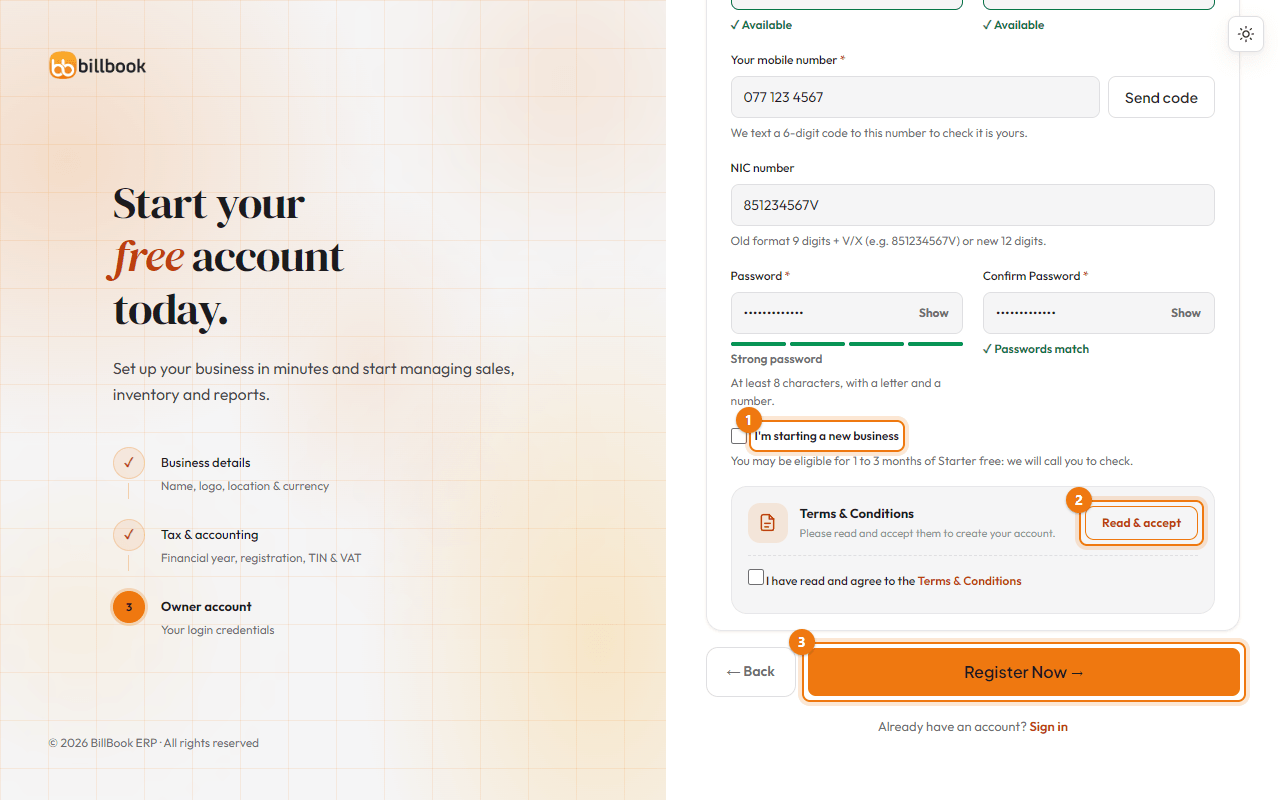
BillBook creates your business and takes you to the login page with the message Business created successfully. Sign in with your username and password.
Edit business details later#
You can change anything you entered during registration:
- To change your business name, logo, currency, time zone or address, go to Settings > Business Settings and open the Business tab.
- To change your TIN, VAT number or tax names, go to Settings > Business Settings and open the Tax tab.
- To change your own name, email or password, use your profile in the user menu.