Purchase orders
Last updated: 7 November 2026 · 3 min read
A purchase order (PO) is what you send a supplier to say what you want to buy, how many and at what price. It does not add stock. Stock goes up only when you receive the goods and record them as a purchase.
Before you start: Purchase orders must be turned on, and you need the supplier and products set up.
PO statuses#
- Ordered: the order is created and nothing has been received yet.
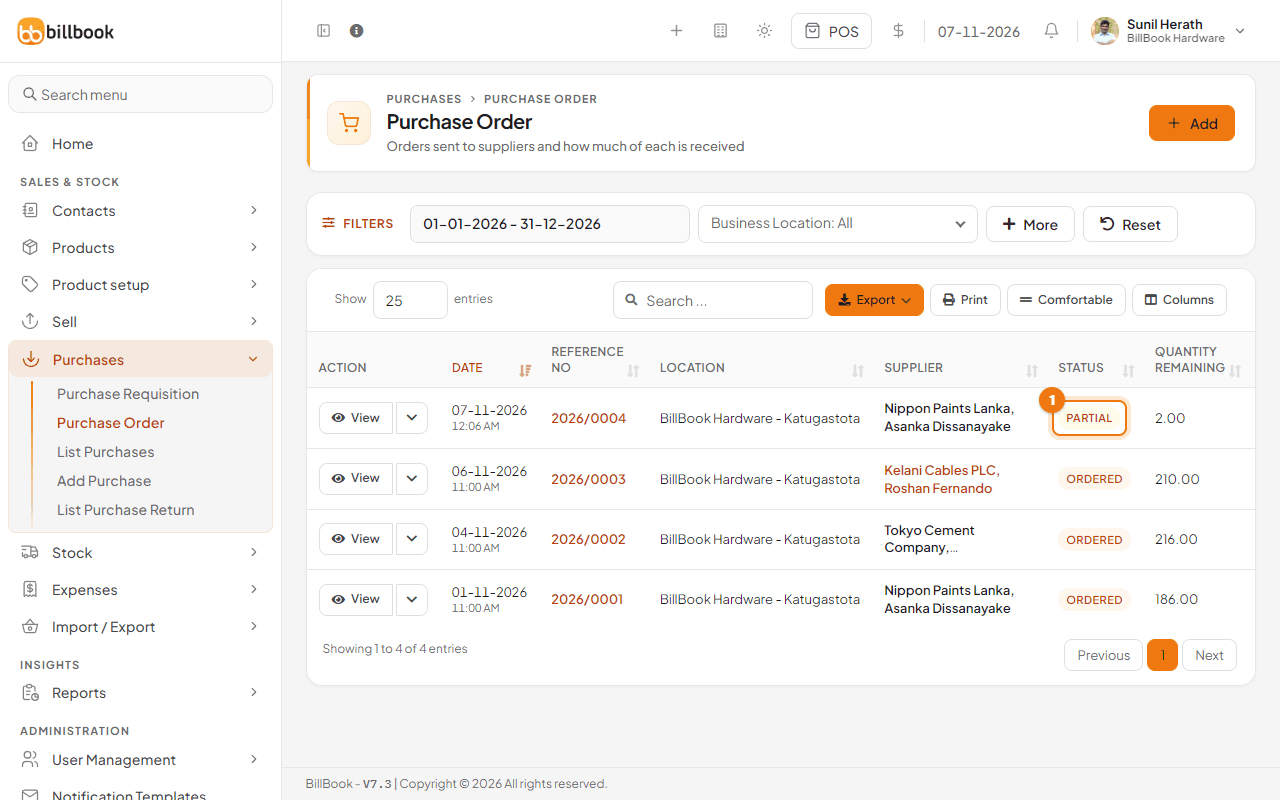
- Partial: some of the goods have arrived. The list shows how much is still Quantity Remaining.
- Completed: everything on the order has been received.
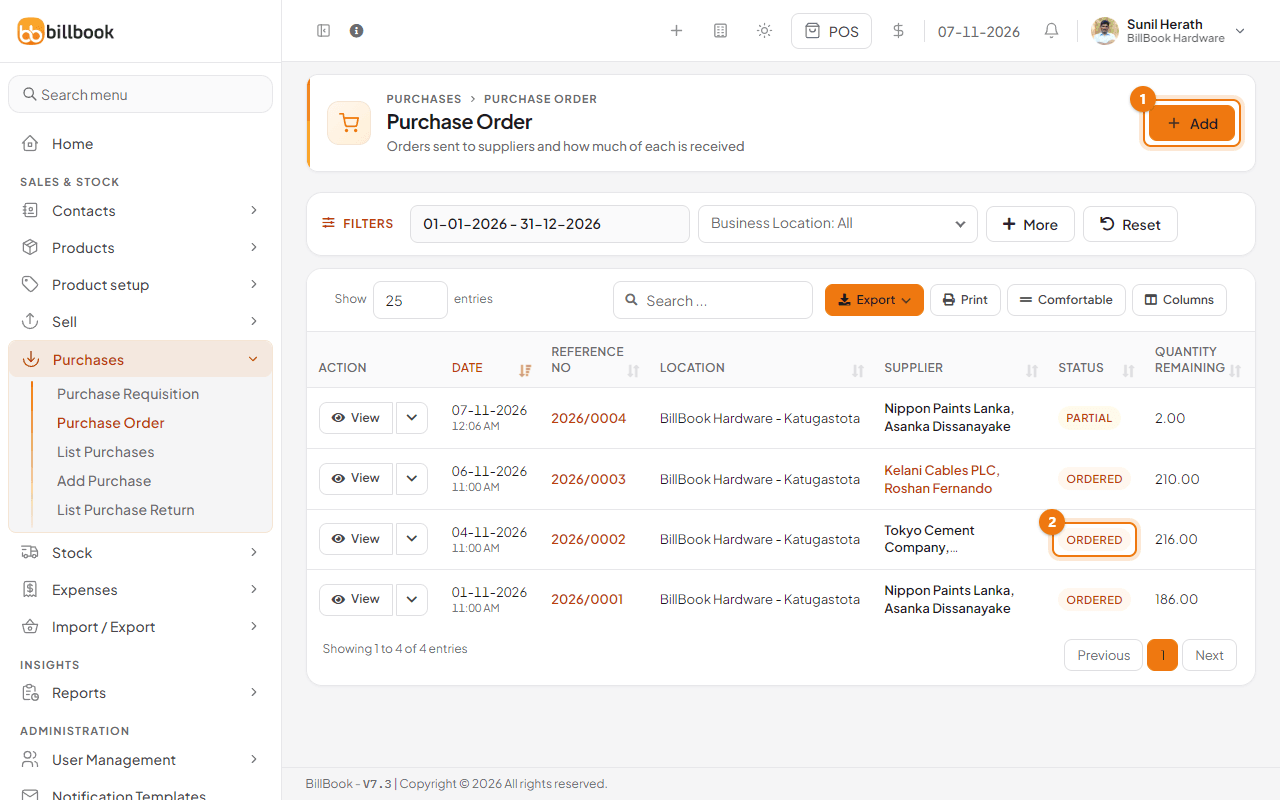
Select Add (1) on Purchases > Purchase Order to create an order. The Ordered status (2) is shown on each row.
Turn on purchase orders#
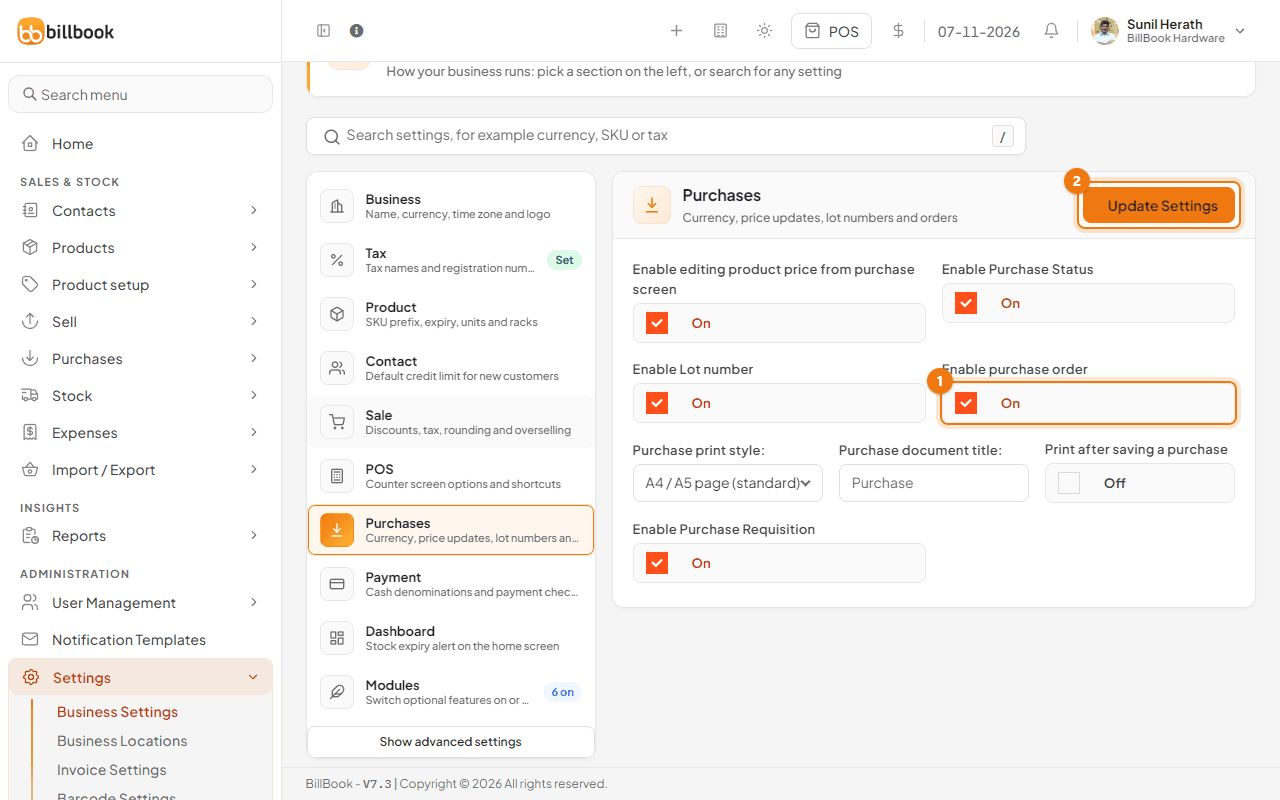
- Go to Settings > Business Settings and open Purchases.
- Turn on Enable purchase order (1).
- Select Update Settings (2).
Create a PO#
- Go to Purchases > Purchase Order and select Add. To start from a requisition instead, see Purchase requisitions.
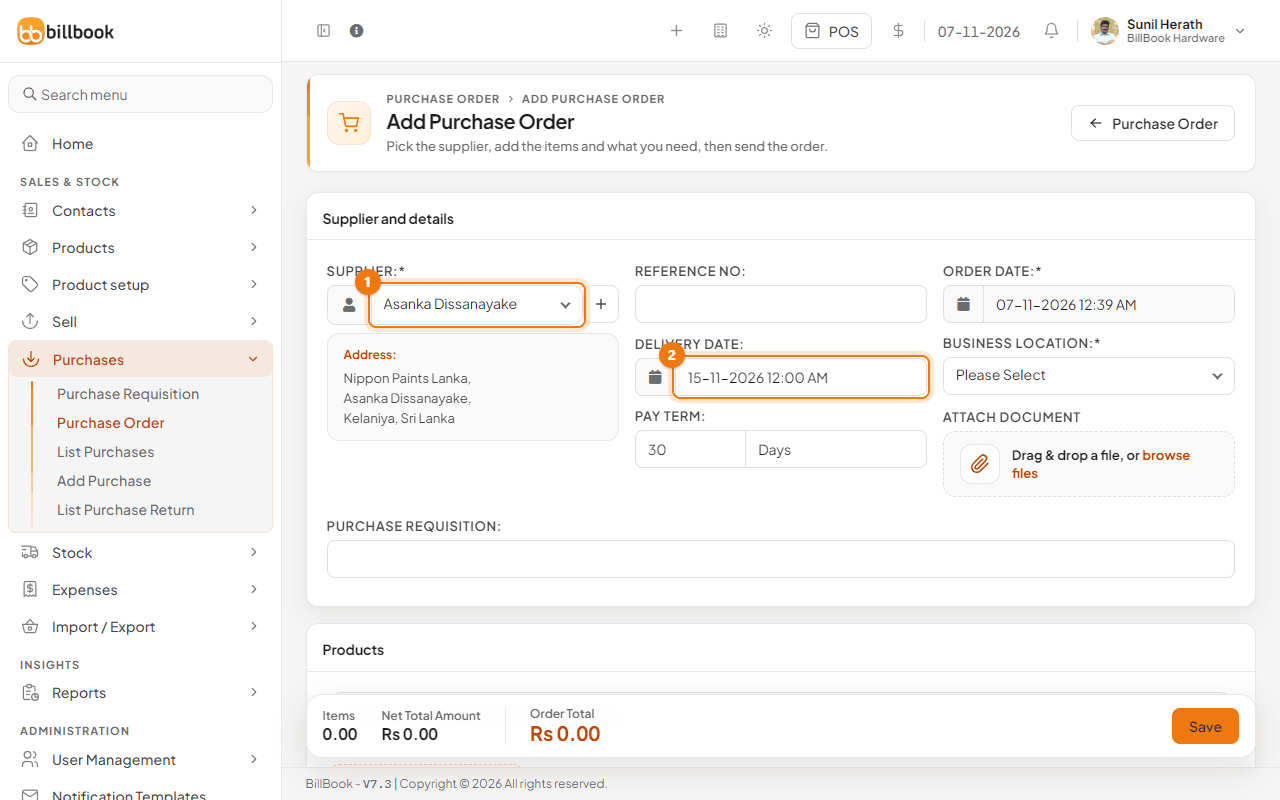
- Under Supplier and details, choose the Supplier (1) and the Business Location. Enter a Reference No if you want your own number, or leave it empty.
- Enter a Delivery Date (2) if you have agreed one, and a Pay Term.
- Search for each product and enter the Quantity and Unit Cost.
- Add shipping details, charges or a note if you need them, then select Save.
BillBook shows Added Successfully and the order appears in the list as Ordered. Use the row menu for Edit, Print, Download PDF, Edit Shipping or Send Notification to the supplier, and Close to close an order you will not receive.
Note: The printed order and its PDF show the products with their prices. A user who is not allowed to see purchase prices gets the order without unit prices and totals.
Convert a PO to a purchase#
When the goods arrive, turn the order into a purchase.
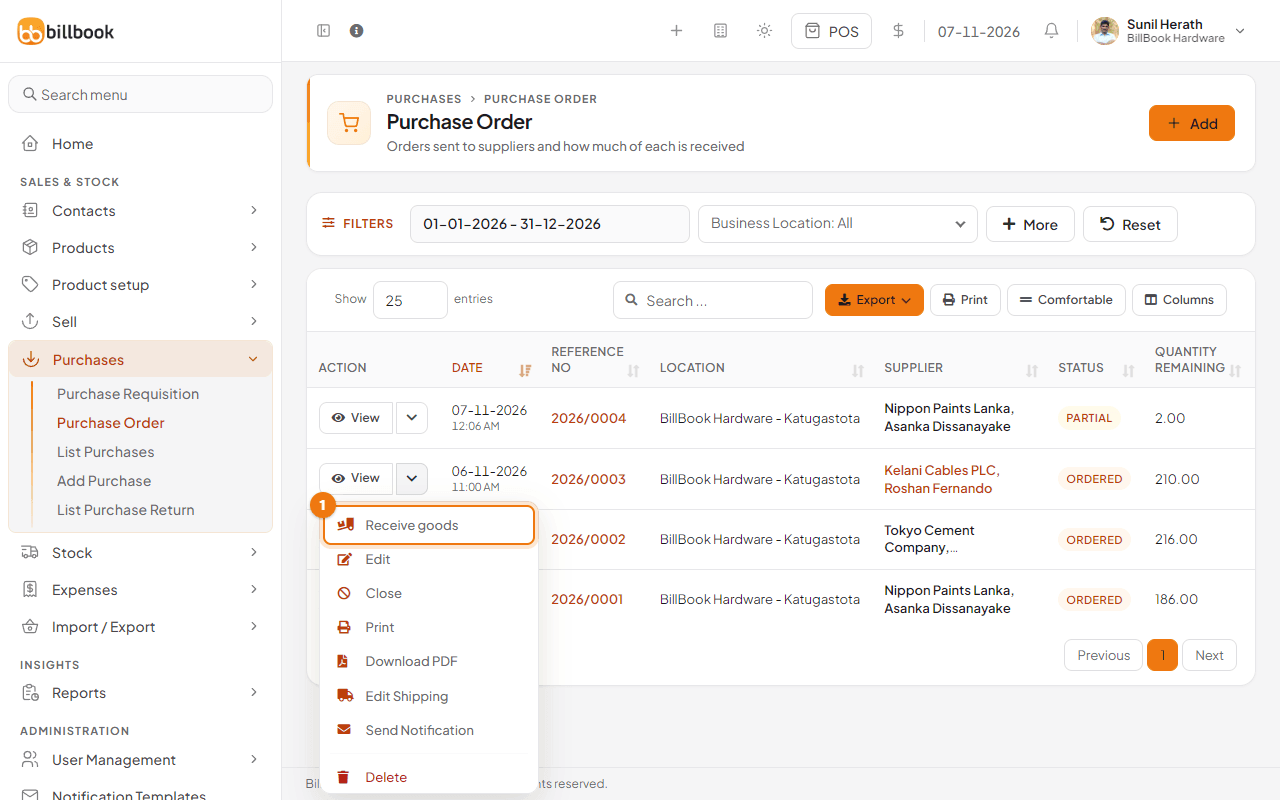
- On Purchases > Purchase Order, select the arrow next to View and then Receive goods (1).
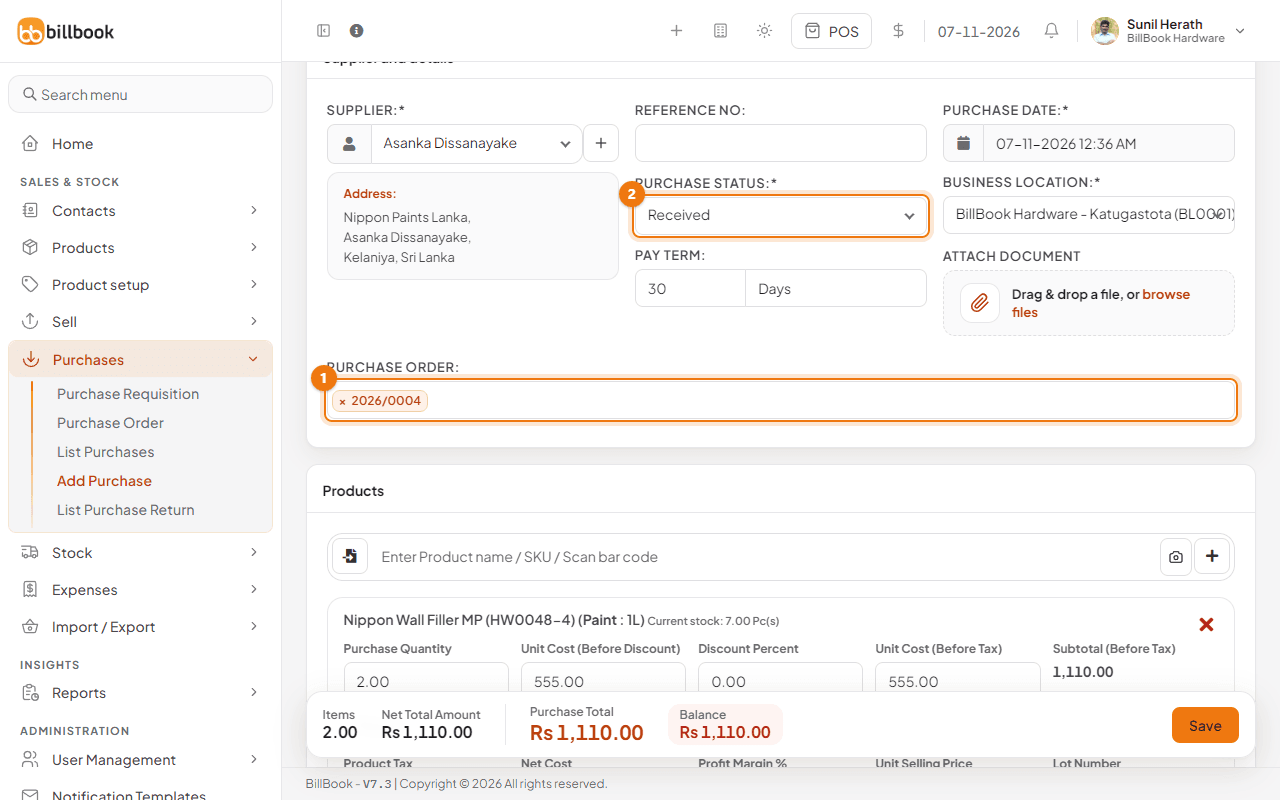
- The Add Purchase screen opens with the order in the Purchase Order field (1) and its lines filled in.
- Choose the Purchase Status (2), usually Received.
- Change each Purchase Quantity to what actually arrived. BillBook fills in the quantity still to be received, so reduce it if only part came.
- Add a payment if you are paying now, then select Save.
The order's status updates by itself. If you received less than ordered it becomes Partial (1); receive the rest later with Receive goods again, which starts with the quantity still remaining, and the order becomes Completed.