
Import expenses
Last updated: 7 November 2026 · 2 min read
If you keep your expenses in a spreadsheet, such as a month of fuel and bill payments, you can load them into BillBook in one go instead of typing each one.
Before you start: You need permission to add expenses. Your business location names must match BillBook exactly, for example BillBook Hardware - Katugastota.
Download the template#
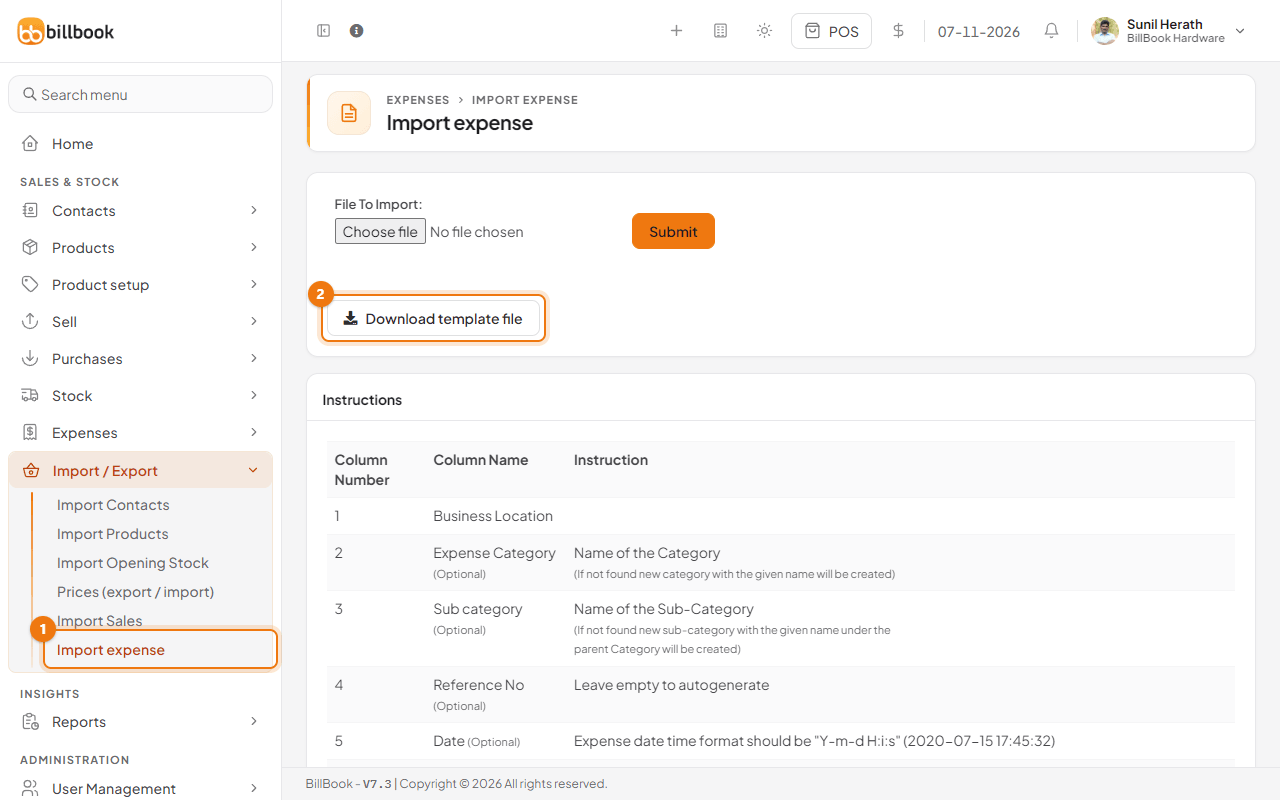
- Open Import / Export in the sidebar and select Import expense (1).
- Select Download template file (2). BillBook downloads a CSV file with the column headings already in place.
- Open it in Excel or Google Sheets and add one row for each expense. Keep the first row (the headings) as it is.
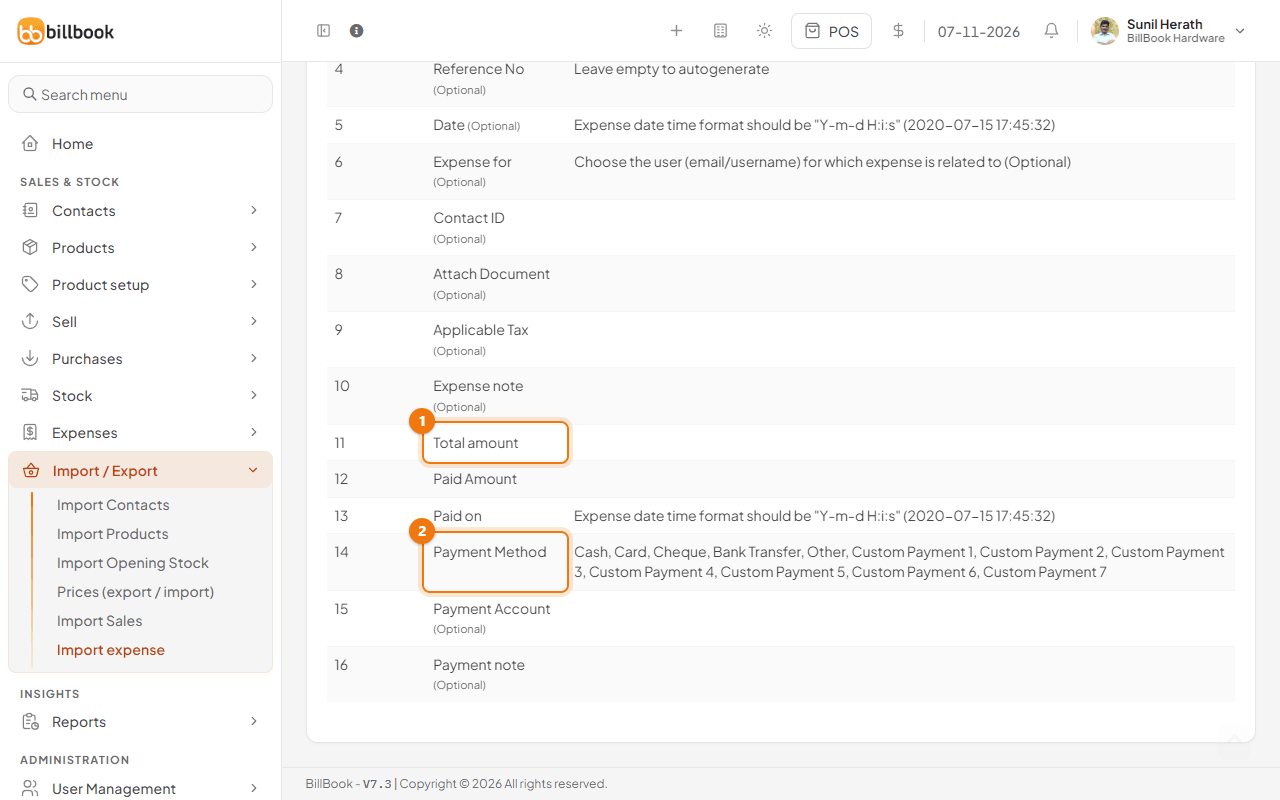
The instructions table lower on the same page lists all 16 columns. These are the ones you will use most:
- Business Location (column 1): required. Type the exact location name.
- Expense Category and Sub category: optional. If the name is new, BillBook creates it.
- Date: optional. Write it as 2026-10-28 10:00:00 (year-month-day hour:minute:second).
- Total amount (column 11) and Paid Amount (column 12): required.
- Payment Method (column 14): required. Use one of Cash, Card, Cheque, Bank Transfer, Other or Custom Payment 1 to 7.
Leave Reference No empty to let BillBook number each expense. Save the file as CSV (or XLS or XLSX).
Upload and check errors#
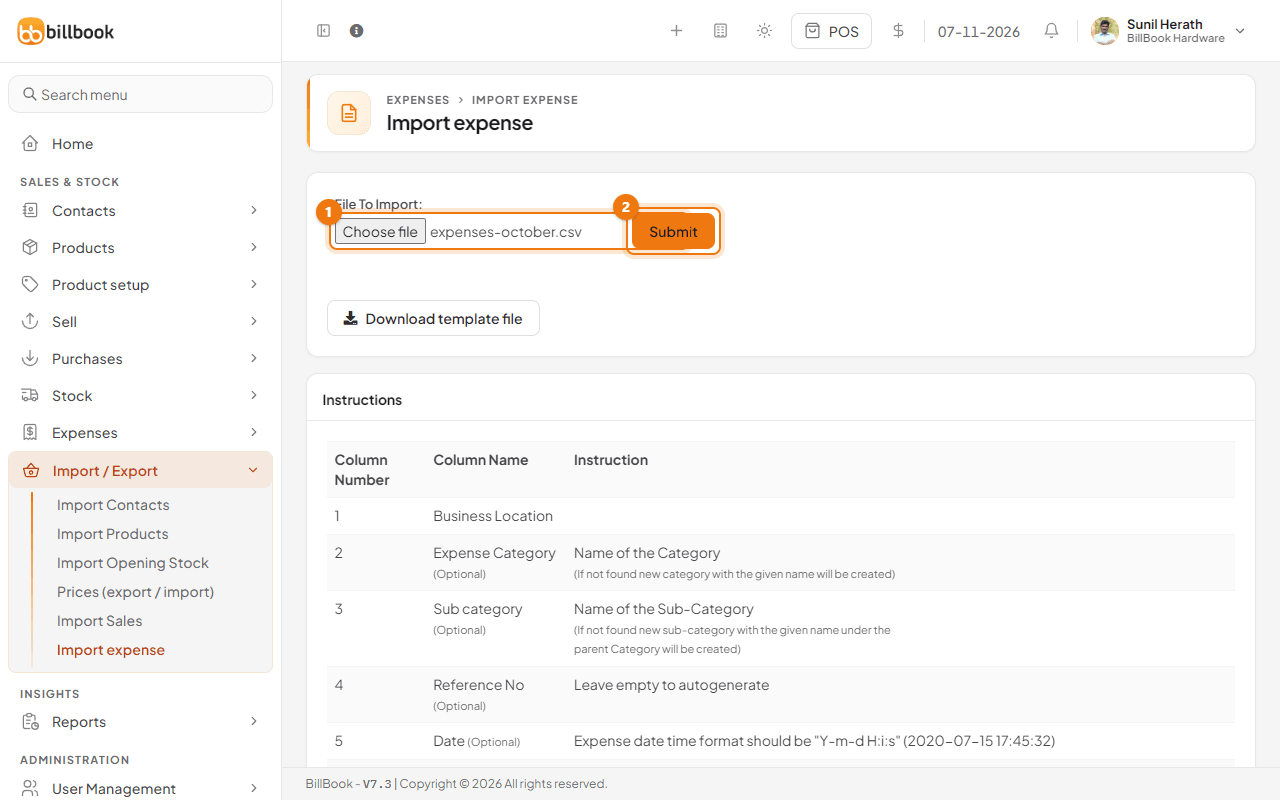
- On the Import expense page, select Choose File (1) and pick your file.
- Select Submit (2).
When everything is correct, BillBook shows File imported successfully and the expenses appear under Expenses > List Expenses.
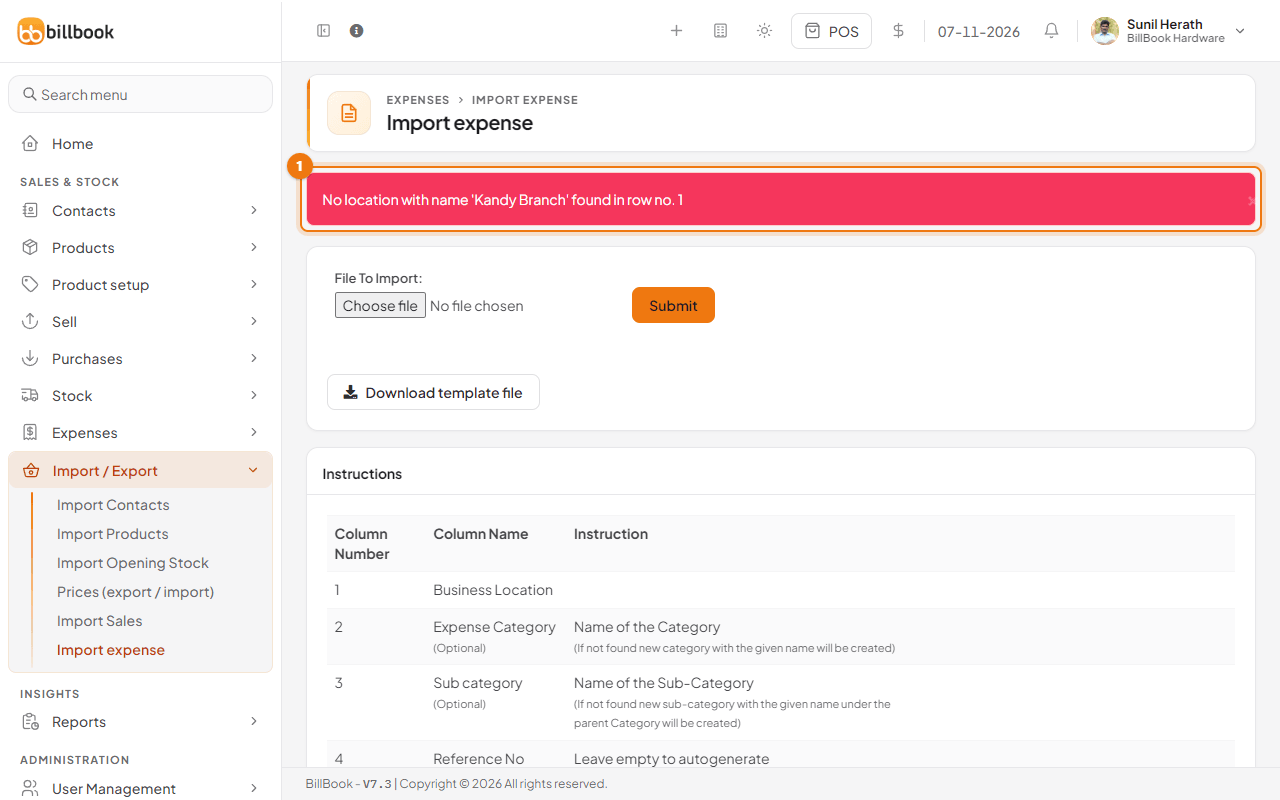
If a row has a problem, BillBook shows a red message (1) that names the row, for example No location with name 'Kandy Branch' found in row no. 1. Other messages you may see are Amount not found in row no. 3, Payment Method not found in row no. 3 and Invalid user details in row no. 3. A row is also refused when its Paid Amount is more than its Total amount. Each row's payment is read from that row only; nothing is copied from earlier rows. Fix that row in your file and upload it again.
Note: Upload each file only once. If you upload the same file again, BillBook adds the expenses a second time.