Record expenses
Last updated: 7 November 2026 · 4 min read
An expense is money the business spends that is not stock, such as shop rent, the electricity bill, staff salaries or a lorry to deliver cement. Record each one in BillBook so your profit figures are correct.
Before you start: You need permission to add expenses. Create your categories first (see Expense categories below) so you can pick one on the form.
Add an expense#
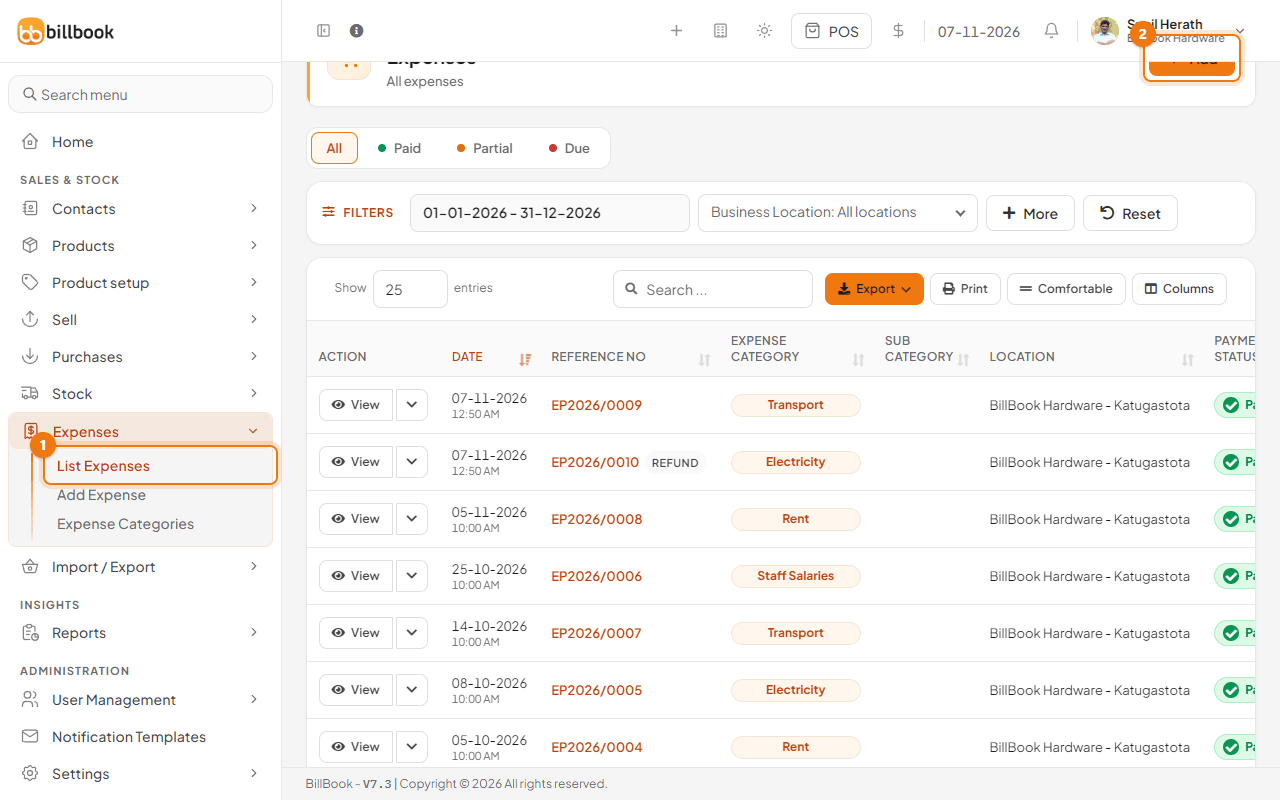
- Go to Expenses > List Expenses (1). The list shows each expense with its date, category, location, payment status and amount.
- Select Add (2).
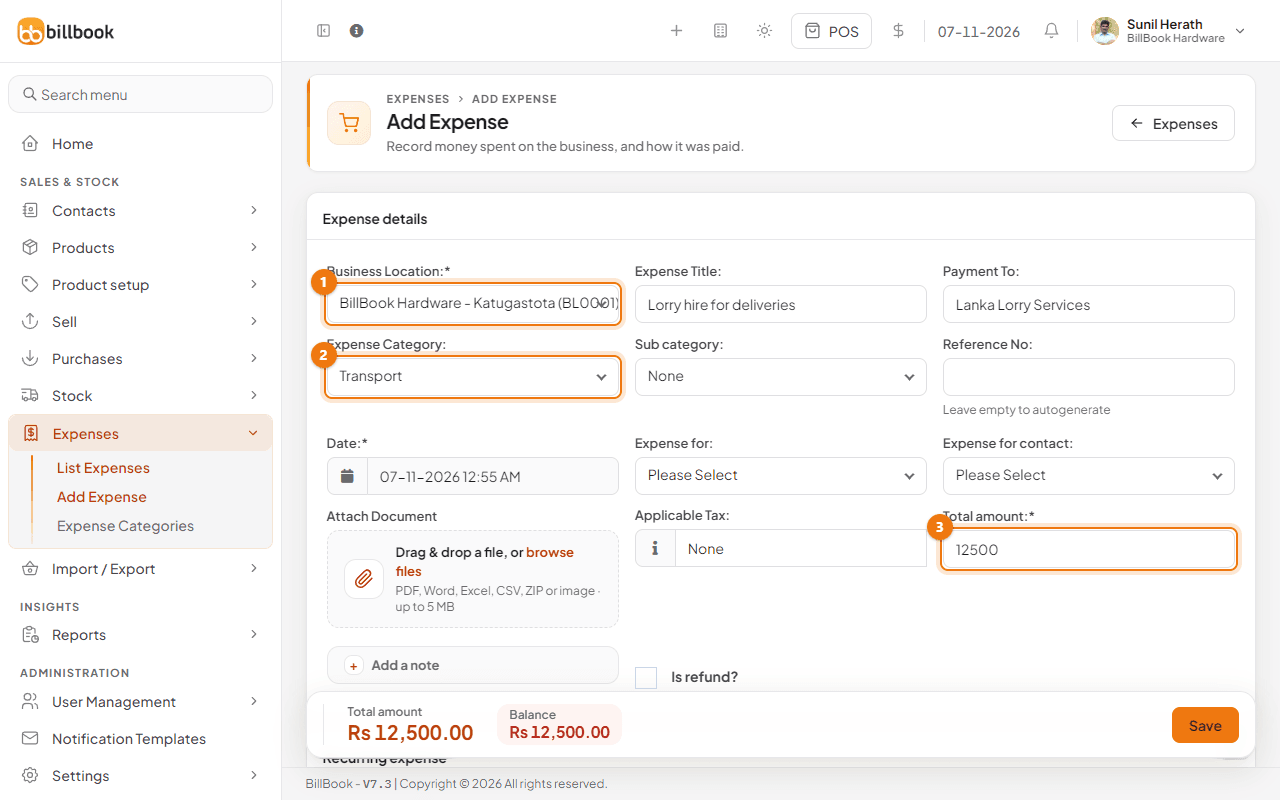
- Choose the Business Location (1). It is required.
- Enter an Expense Title, for example Lorry hire for deliveries, and who you paid in Payment To.
- Choose the Expense Category (2), for example Transport. Choose a Sub category if you have one.
- Leave Reference No empty to let BillBook number it (for example EP2026/0009). Check the Date.
- Enter the Total amount (3), for example 12,500.00. Use Add a note or Attach Document to keep a bill or receipt with the expense.
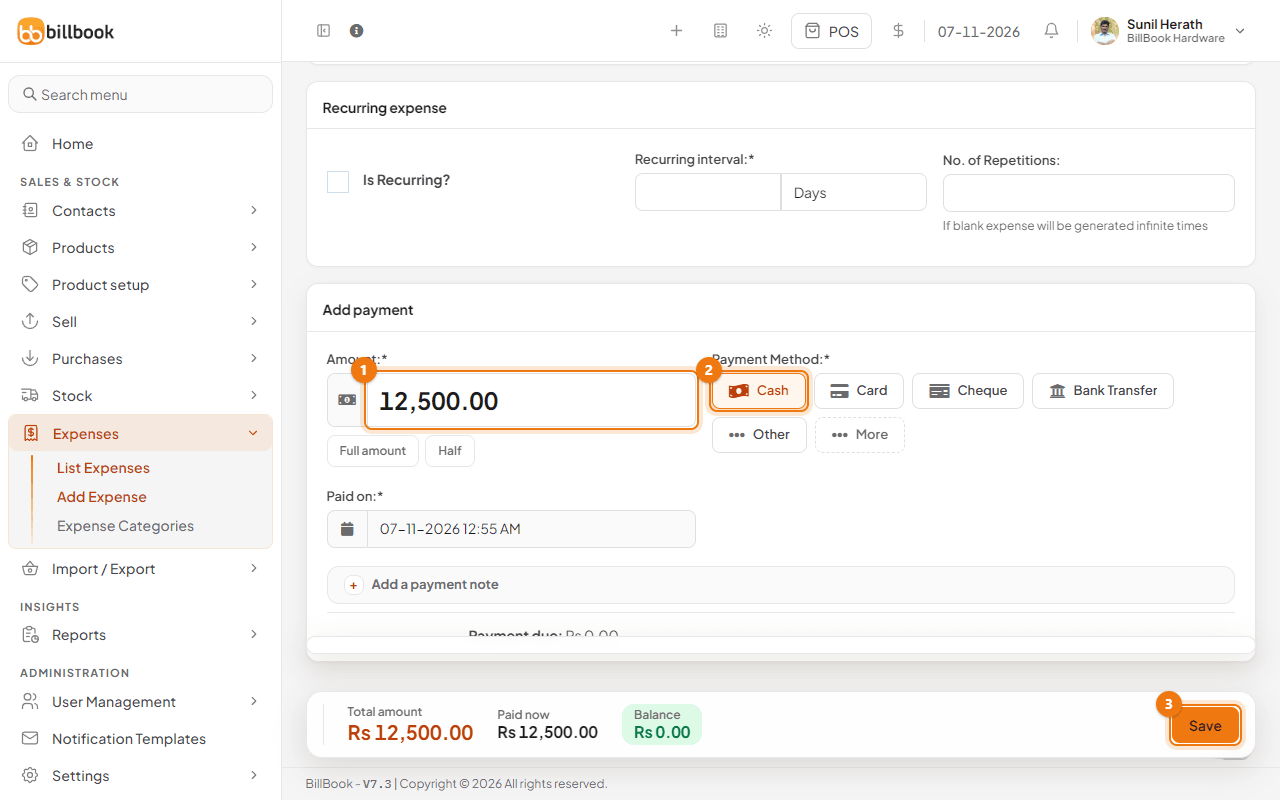
- Under Add payment, select Full amount to fill in the Amount (1) if you paid it all, or type a smaller amount if you paid part.
- Choose the Payment Method (2) by selecting its button, such as Cash, Card, Cheque or Bank Transfer. Select More for the other methods.
- Select Save (3). BillBook shows Expense added successfully and the expense appears at the top of the list with Paid status.
Note: BillBook refuses a payment that is more than what is still due on the expense: "Payment is more than the amount due on this expense." If you lower an expense's total below what is already paid, it says "The total is less than the amount already paid. Edit or delete a payment first." Edit or delete the payment first, then change the total.
Tip: Use the All, Paid, Partial and Due tabs at the top of the expenses list to find expenses you have not fully paid.
Repeat an expense#
For a bill that comes every month, such as shop rent, fill in the Recurring expense section above Add payment: tick Is Recurring?, enter the Recurring interval in days, months or years, and the No. of Repetitions. Leave the repetitions empty and BillBook keeps creating the expense at each interval. Leave Is Recurring? unticked for a one-time expense.
Expense categories#
Categories group your expenses so reports show where the money goes, for example Rent, Electricity, Staff Salaries and Transport.
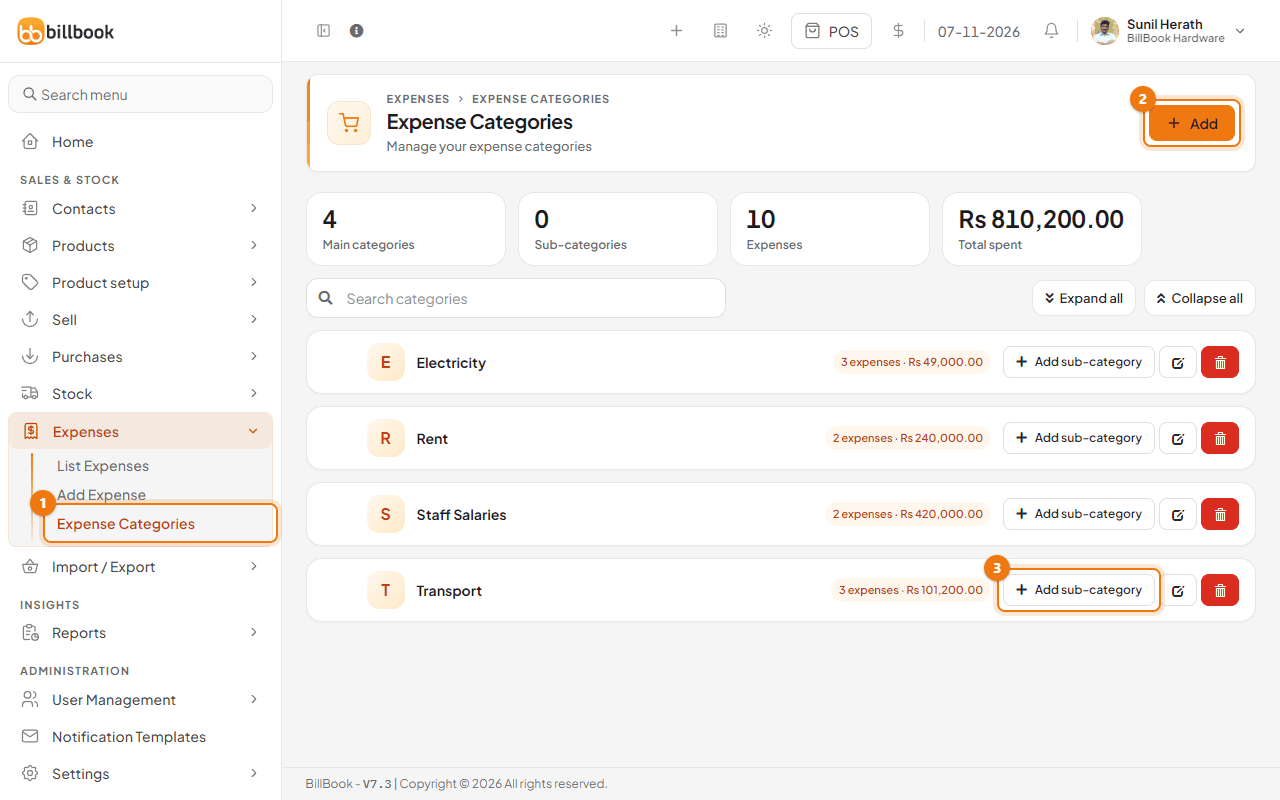
- Go to Expenses > Expense Categories (1). Each category shows how many expenses it holds and the total spent.
- Select Add (2), enter the name and save.
- To split a category further, select Add sub-category (3) on its row. For example, add Fuel under Transport.
Use the edit and delete buttons on each row to rename or remove a category.
Expenses for an employee#
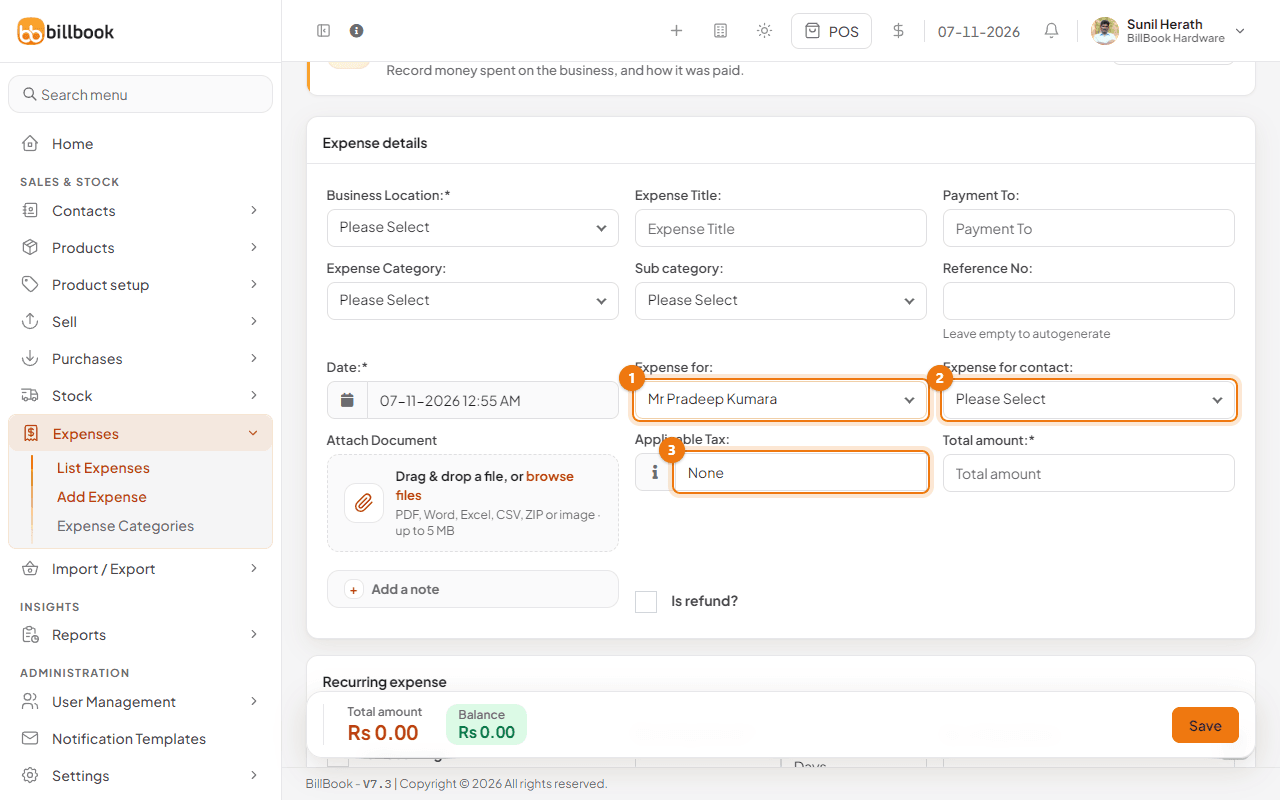
To record something that belongs to one person, such as a salary advance or travel, choose their name in Expense for (1). Pick a category such as Staff Salaries.
To see what each person has been paid, go to Reports > Sales Representative Report. The Expenses column shows the total for each person.
Expenses for a customer or supplier#
If the expense belongs to a customer or supplier, choose them in Expense for contact (2). The expense is then kept against that contact.
Default tax for expenses#
Use Applicable Tax (3) on the form to add tax to an expense. The choices come from Settings > Tax Rates, for example VAT 18%. BillBook has no setting that applies one tax to every expense, so choose the tax on each expense that needs it. Leave it on None for expenses without tax.