
Record a purchase
Last updated: 7 November 2026 · 5 min read
Record a purchase every time you buy goods from a supplier, for example 20 coils of wire from Kelani Cables PLC. When the purchase is received, stock at the location goes up and the supplier's balance goes up by what you still owe.
Before you start: Add the supplier under Contacts > Suppliers and the products under Products. To find a product on the purchase screen it must be assigned to the business location you choose.
Add a purchase#
- Go to Purchases > Add Purchase.
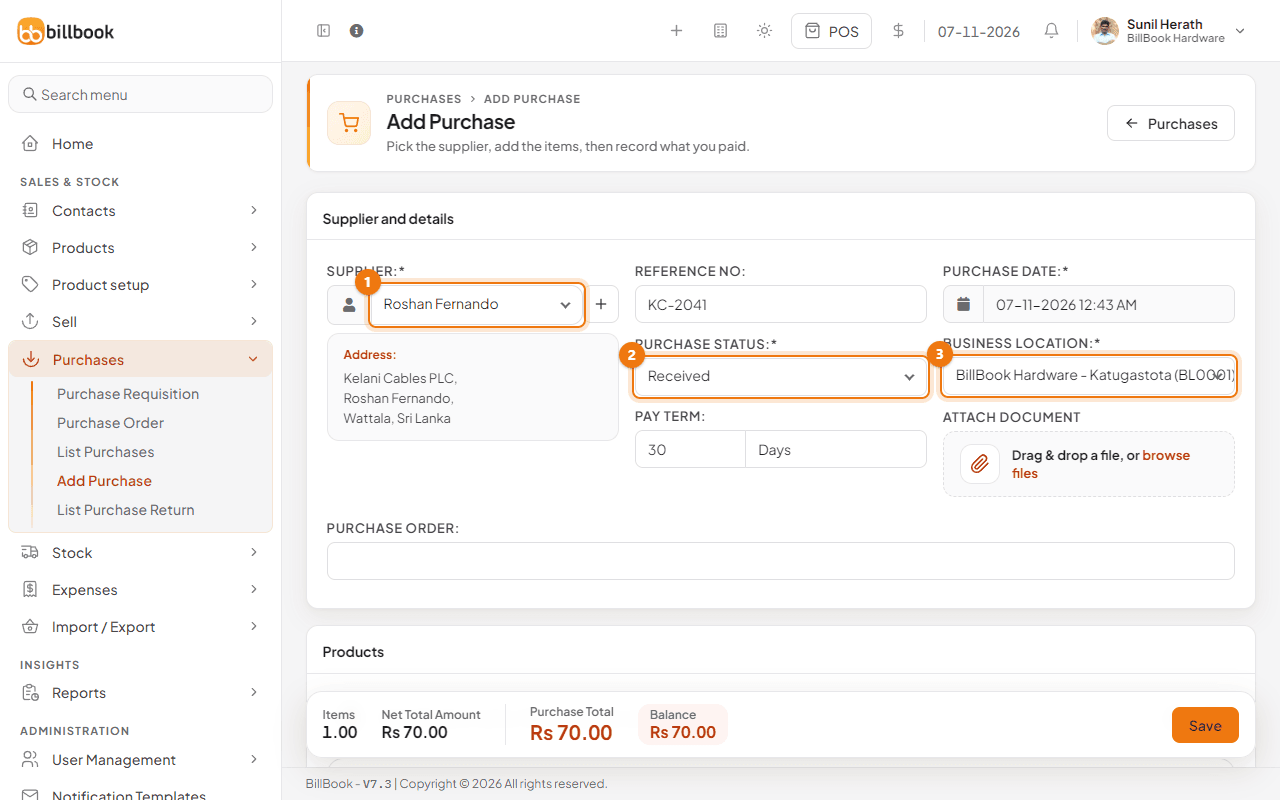
- Choose the Supplier (1). Select the + next to it to add a new supplier without leaving the screen. The supplier's address shows below.
- Enter the Reference No if you have one, such as the supplier's invoice number (KC-2041). Leave it empty and BillBook numbers the purchase for you.
- Check the Purchase Date. Choose the Purchase Status (2) and the Business Location (3) the goods are coming into. Choose the location before you add products: until you do, the product box asks you to Choose location.
- Check the Pay Term. It is filled in from the supplier, for example 30 Days, and you can change it. You can attach the supplier's bill under Attach Document.
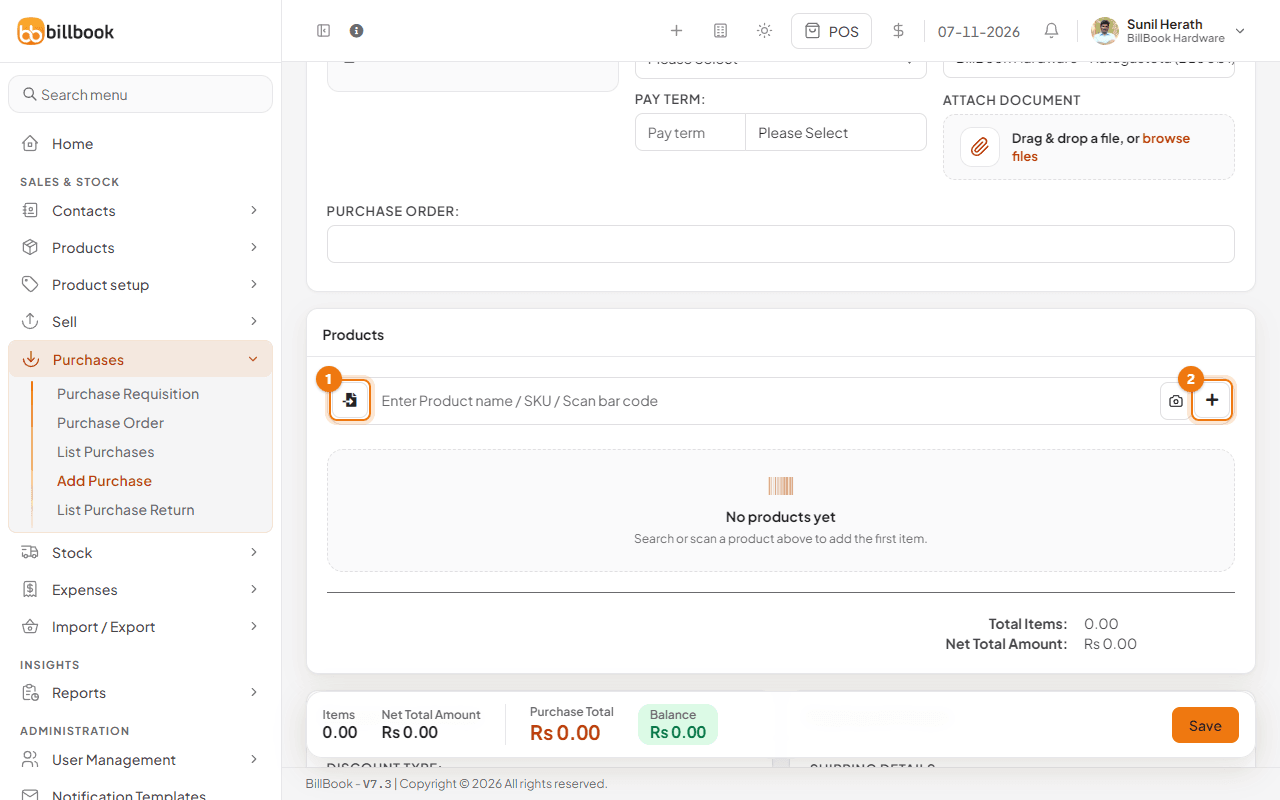
- In the Products card, type the product name or SKU in the search box, or scan its barcode, and pick it from the list. Select the Import Products button (1) to load many lines from a file (see below), or Add new product (2) to create one. If you buy the same goods from this supplier again and again, select Repeat last purchase under the search box to add the products and quantities of their last purchase.
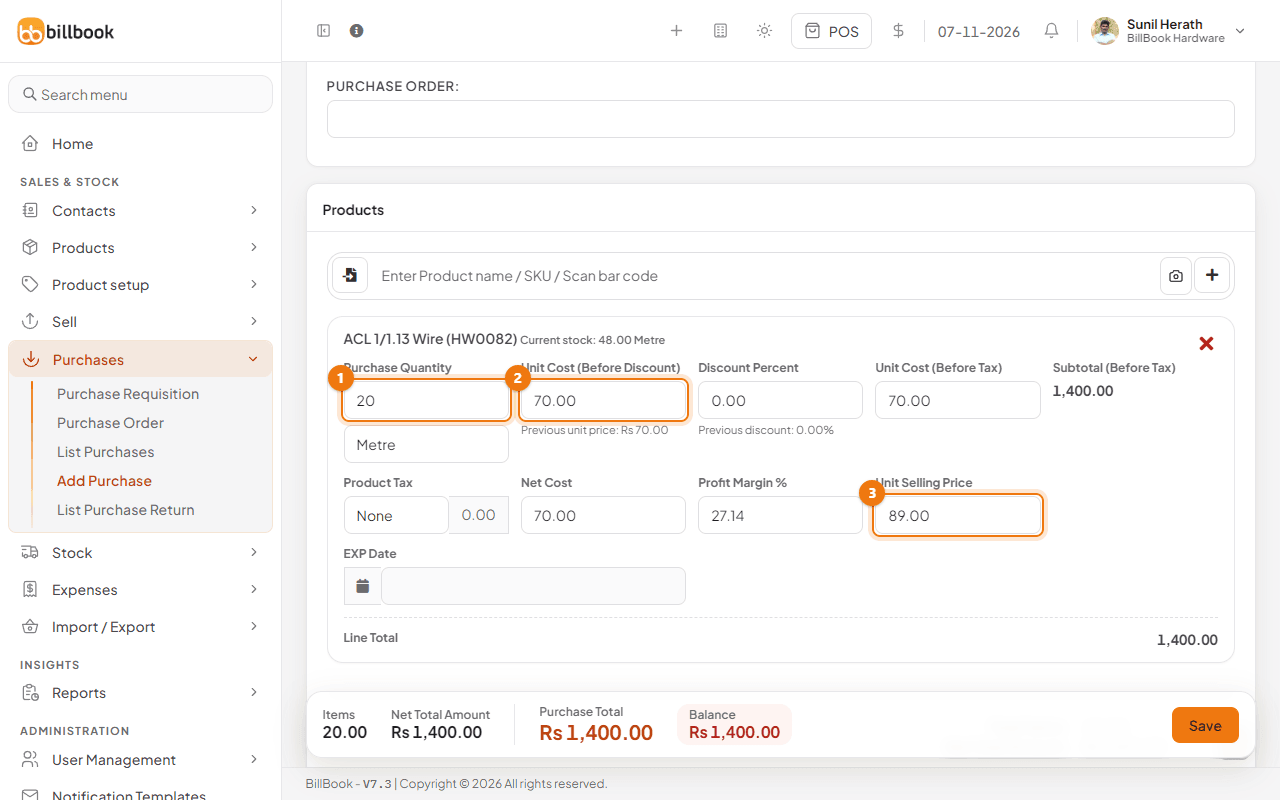
- For each line enter the Purchase Quantity (1) and the Unit Cost (Before Discount) (2). BillBook works out the Unit Cost (Before Tax), the Net Cost and the Line Total. If you were given a discount on the line, enter it as Discount Percent.
- Under Discount, tax and notes, add an overall Discount Type and Discount Amount, a Purchase Tax and a note if you need them. Under Shipping and charges, add shipping details, Additional Shipping Charges or Additional expenses. The Purchase Total in the bar at the bottom updates as you go.
- To pay now, fill in the Add payment section (see Pay suppliers). Leave the amount at 0.00 to record the purchase as unpaid. The payment can't be more than the Purchase Total.
- Select Save. BillBook shows Purchase added successfully and the purchase appears in Purchases > List Purchases. If you turned on Print after saving a purchase, the print window opens first (see Print a purchase invoice).
Purchase status (received, pending, ordered)#
The Purchase Status says whether the goods have reached you.
- Received: the goods are in. Stock goes up at the location straight away.
- Pending: the purchase is recorded but the goods have not arrived.
- Ordered: you have ordered the goods and are waiting for them.
Change the status later from the row menu on List Purchases: select the arrow next to View, then Update Status. If you do not want this step, turn off Enable Purchase Status in Settings > Business Settings > Purchases. Every purchase is then treated as received.
Lot numbers and expiry#
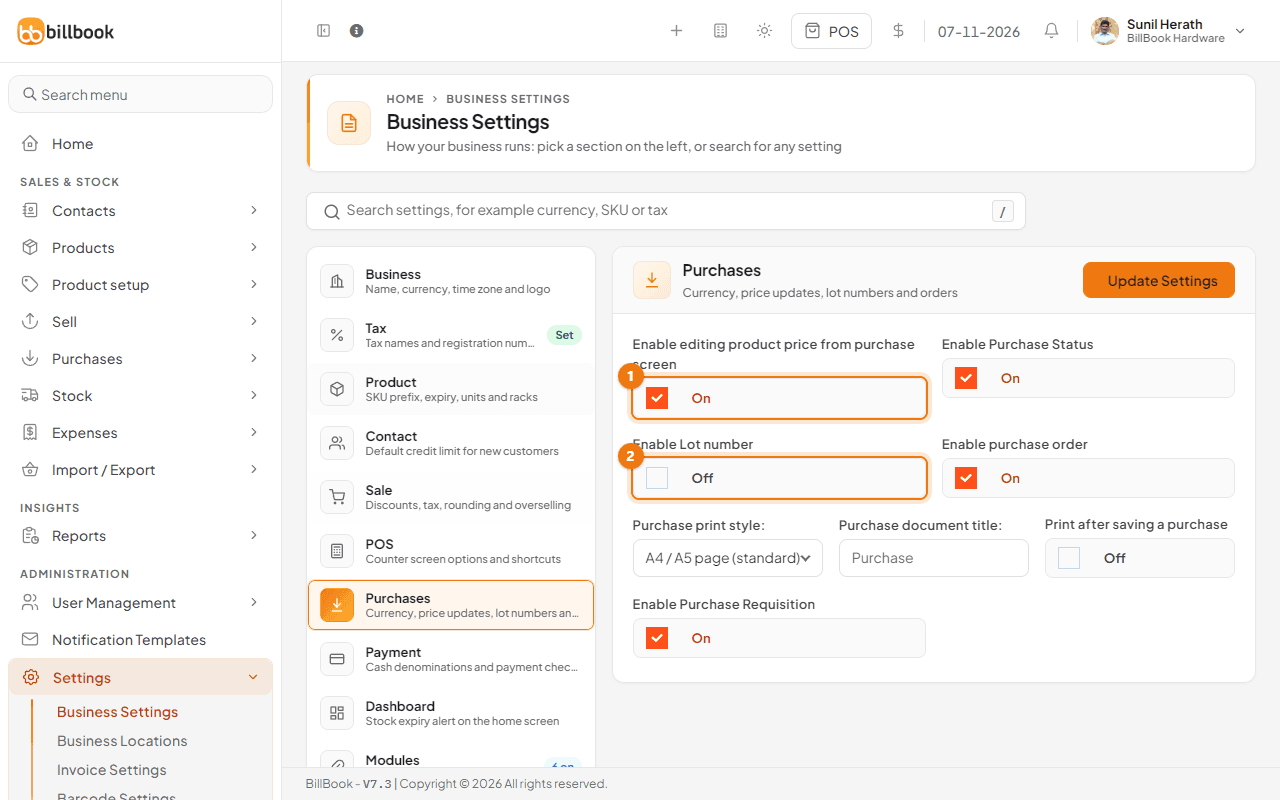
Lot numbers and expiry dates are off in a new business. Turn on Enable Lot number (2 in the picture below) in Settings > Business Settings > Purchases, and a Lot Number box appears on every purchase line. To also record MFG Date and EXP Date, turn on product expiry in Settings > Business Settings > Product. See Track expiry and lot numbers for how they are used.
Update selling prices from the purchase#
When Enable editing product price from purchase screen (1) is on, each line also shows Profit Margin % and Unit Selling Price. Change the margin or the selling price and the other one follows. When you save, the product's cost and selling price are updated to match the purchase. Leave the setting off if you want prices to stay as they are.
Tip: Check the Unit Selling Price on every line before you save when this setting is on. A new cost can quietly change what you charge customers.
Import purchase lines#
If a supplier sends you a list, you can load it instead of typing each line.
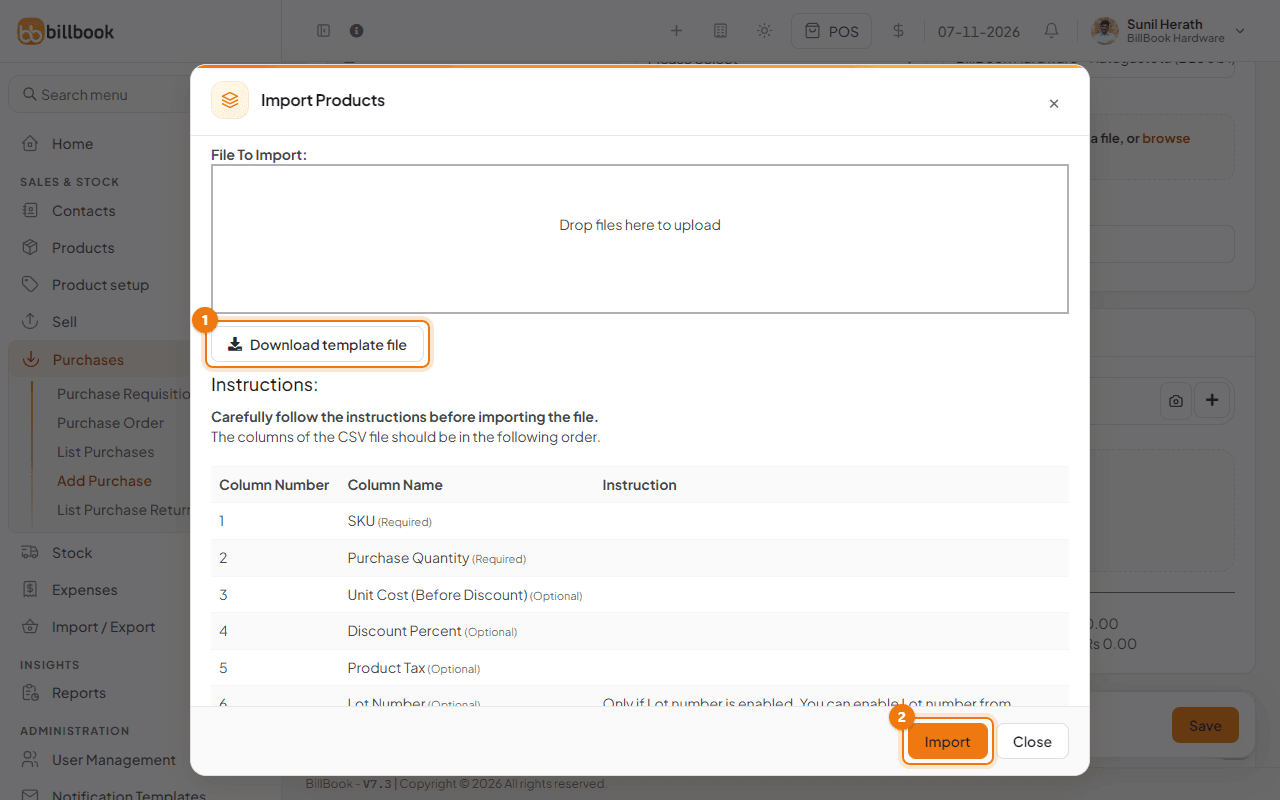
- On the Add Purchase screen, select Import Products (the button on the left of the product search box).
- Select Download template file (1) and fill it in. The columns are SKU and Purchase Quantity (both required), then Unit Cost (Before Discount), Discount Percent, Product Tax, Lot Number, MFG Date and EXP Date. The last three only work if lot numbers or expiry are turned on.
- Drop the file in the box, or select it, then select Import (2).
The lines are added to the purchase and you can still change them before saving.
Product not found#
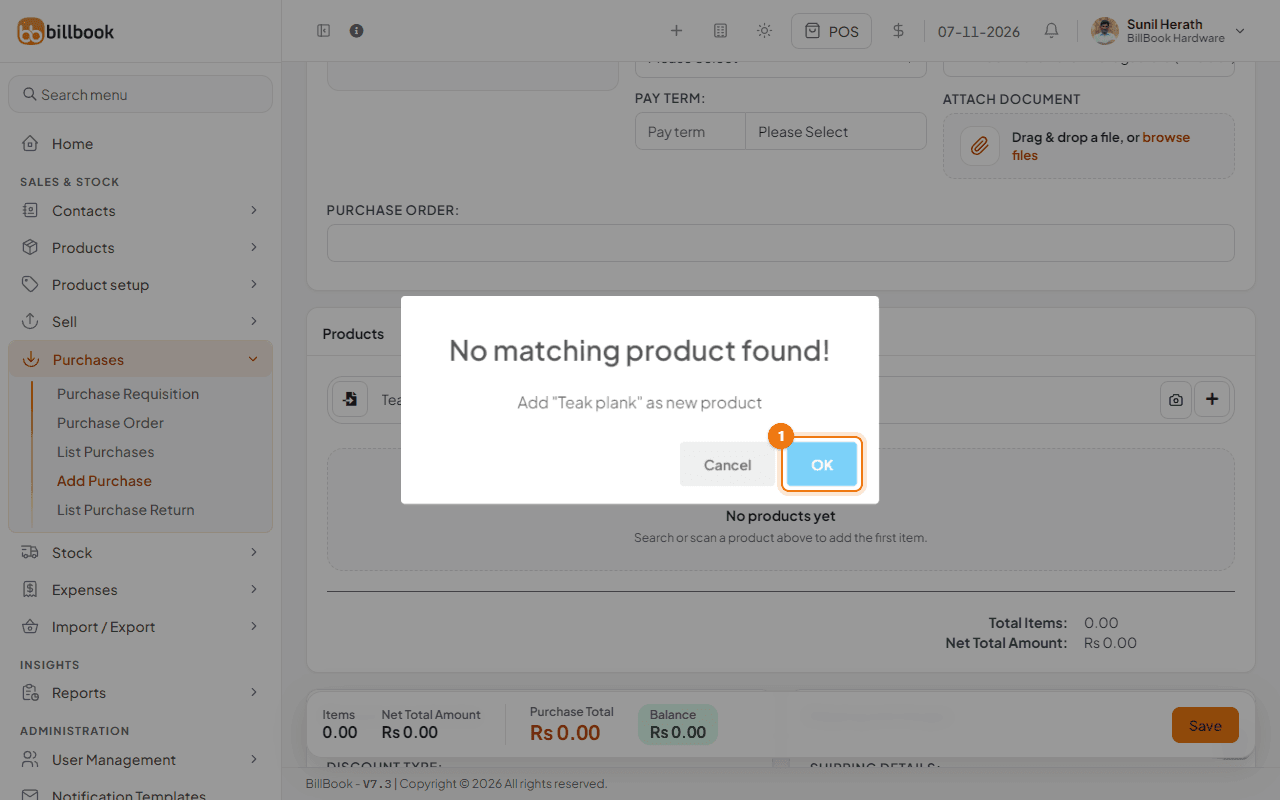
If you type something that is not in your products, BillBook shows No matching product found! and offers to add it as a new product. Select OK (1) to open the Add new product window with the name filled in, then complete it and save. The product is added to the purchase.
If a product you know exists is not found, check these:
- The name or SKU is spelled differently. Search under Products > List Products.
- The product is not assigned to the business location you chose.
- Manage Stock? is turned off for the product, so it cannot be bought into stock.