
SMS setup
Last updated: 7 November 2026 · 3 min read
SMS lets BillBook text your customers, for example a thank-you after a sale or a payment reminder. BillBook does not send SMS by itself. You connect it to an SMS service that you have an account with.
Before you start: You need an account with an SMS service and permission to open Settings > Business Settings. SMS credit is bought from your SMS service, not from BillBook.
Choose an SMS service#
- Go to Settings > Business Settings. Select Show advanced settings under the list on the left, then select SMS Settings. The tag next to it reads Not set until an SMS service is saved, then Configured.
- Under SMS provider, choose BillBook SMS (by IT Starter) (1) or Custom gateway (2).
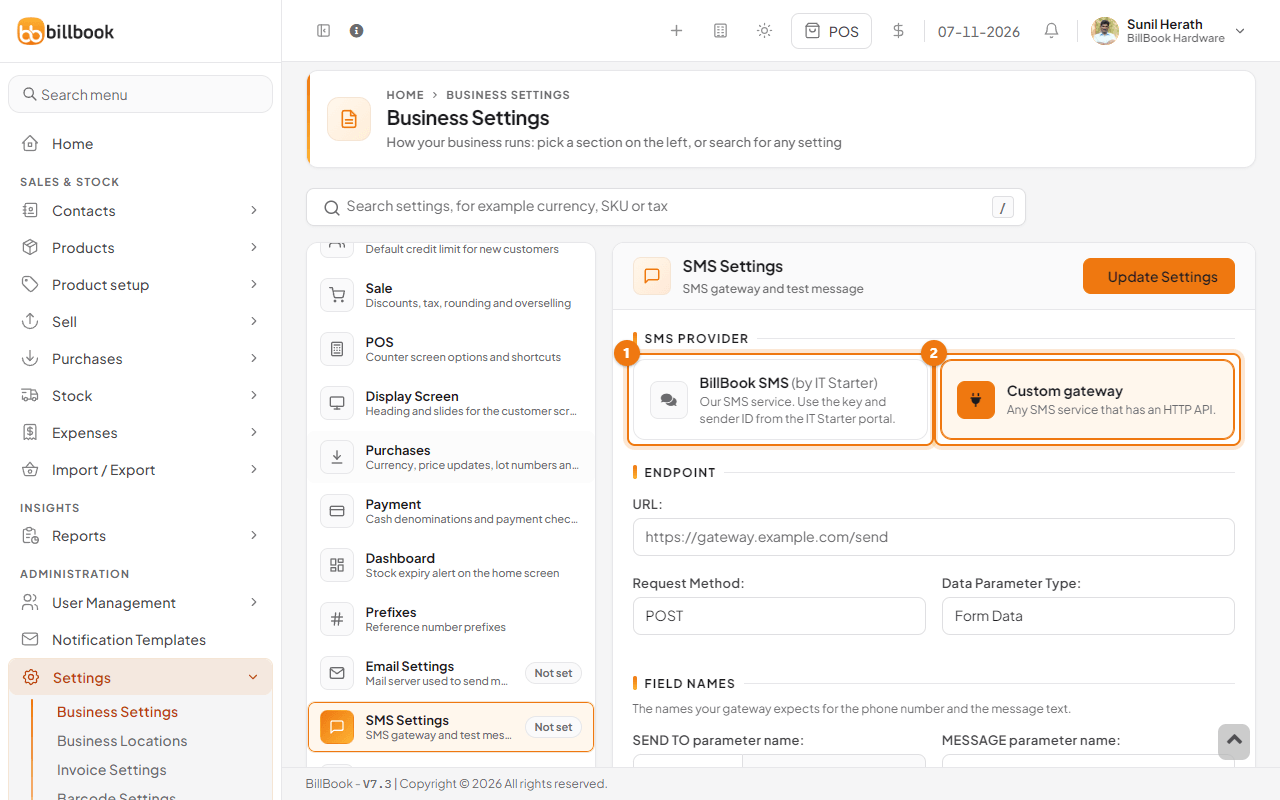
These are the two choices on this screen. If an older guide told you to pick Nexmo or Twilio, those are not listed. If your provider has an HTTP API, use Custom gateway.
BillBook SMS#
Use this if you have an SMS account with IT Starter.
- Select BillBook SMS (by IT Starter).
- Enter the API key (1) and the Sender ID (2) from your IT Starter SMS account. Type the Sender ID exactly as it was approved for you, because it is case sensitive.
- Select Update Settings to save.
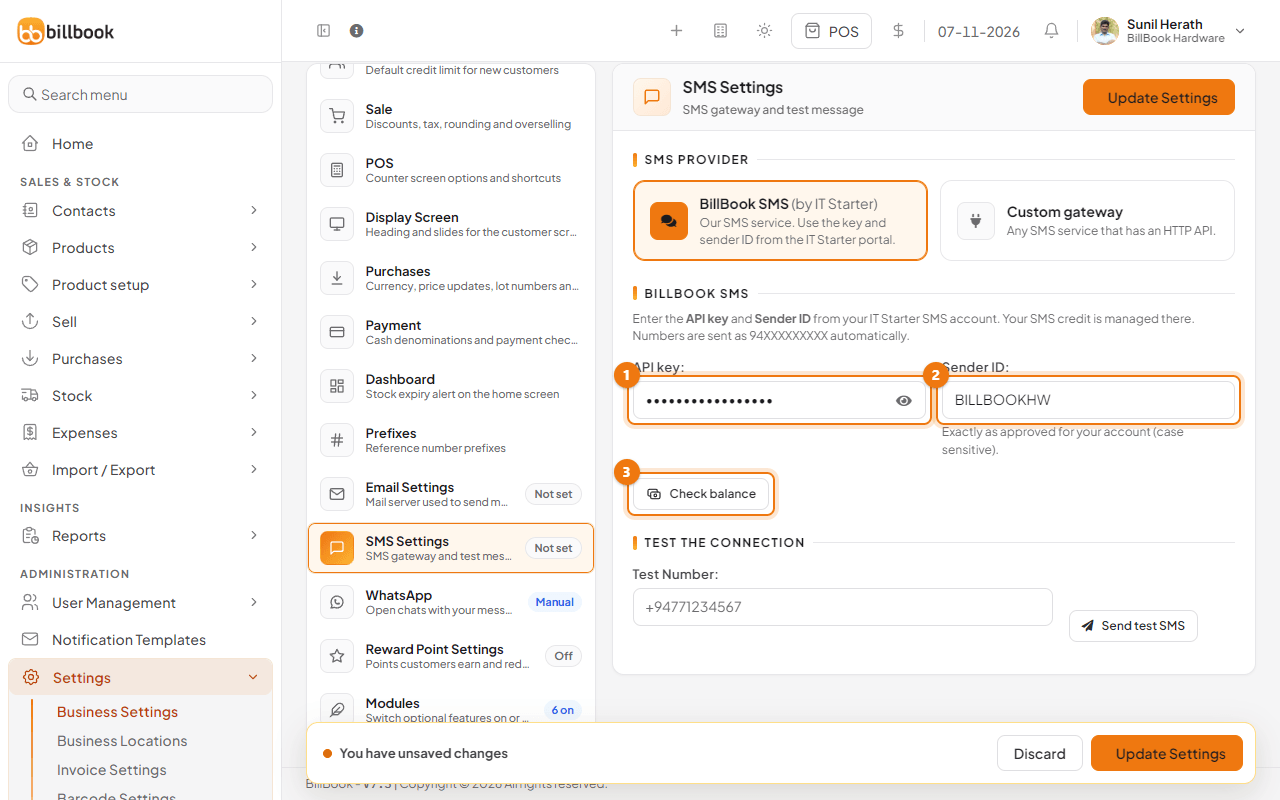
You can enter mobile numbers the Sri Lankan way, such as 0771234567. BillBook sends them as 94XXXXXXXXX automatically.
Generic SMS gateway#
Use Custom gateway for any SMS provider that gives you a web address (an API) for sending messages. Your provider's guide tells you the values to enter.
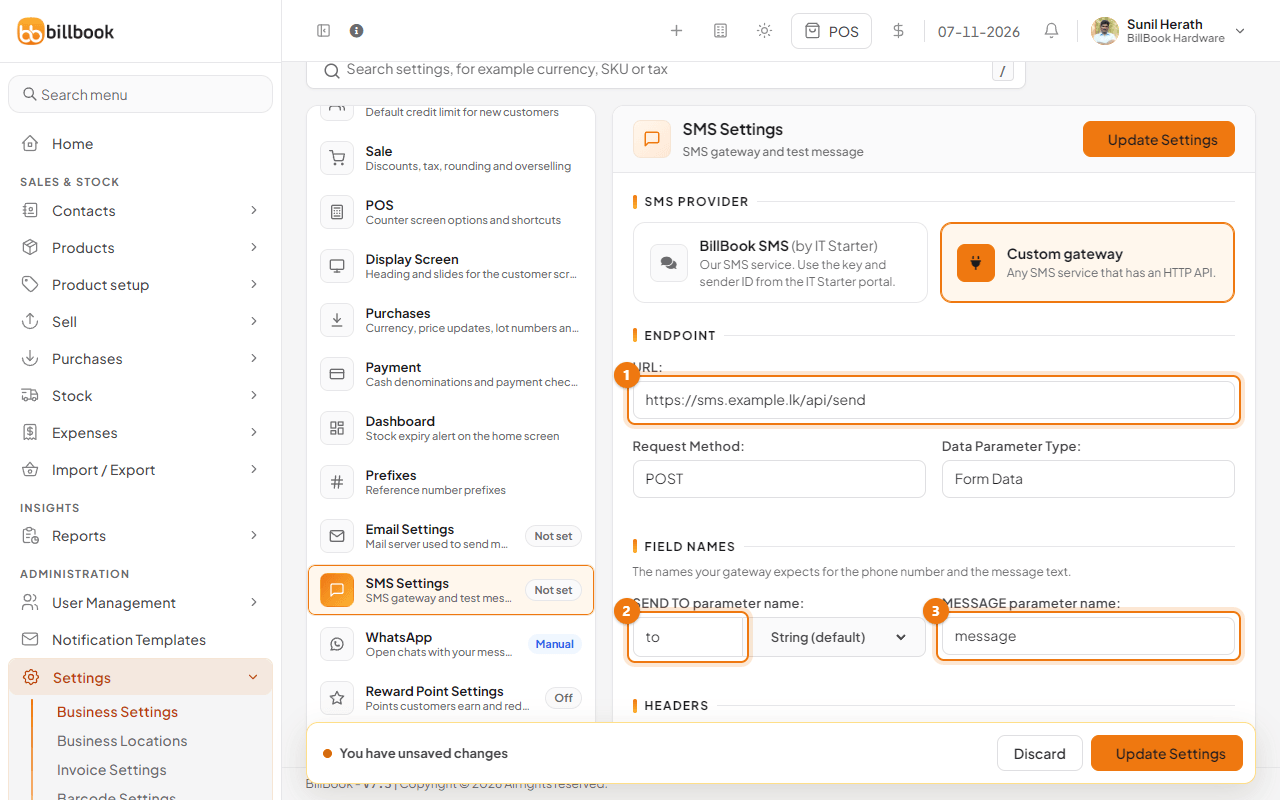
- Select Custom gateway.
- Under Endpoint, enter the URL (1) from your provider. It must be a public address starting with http:// or https://.
- Choose the Request Method, GET or POST, and the Data Parameter Type, Form Data or JSON, that your provider asks for.
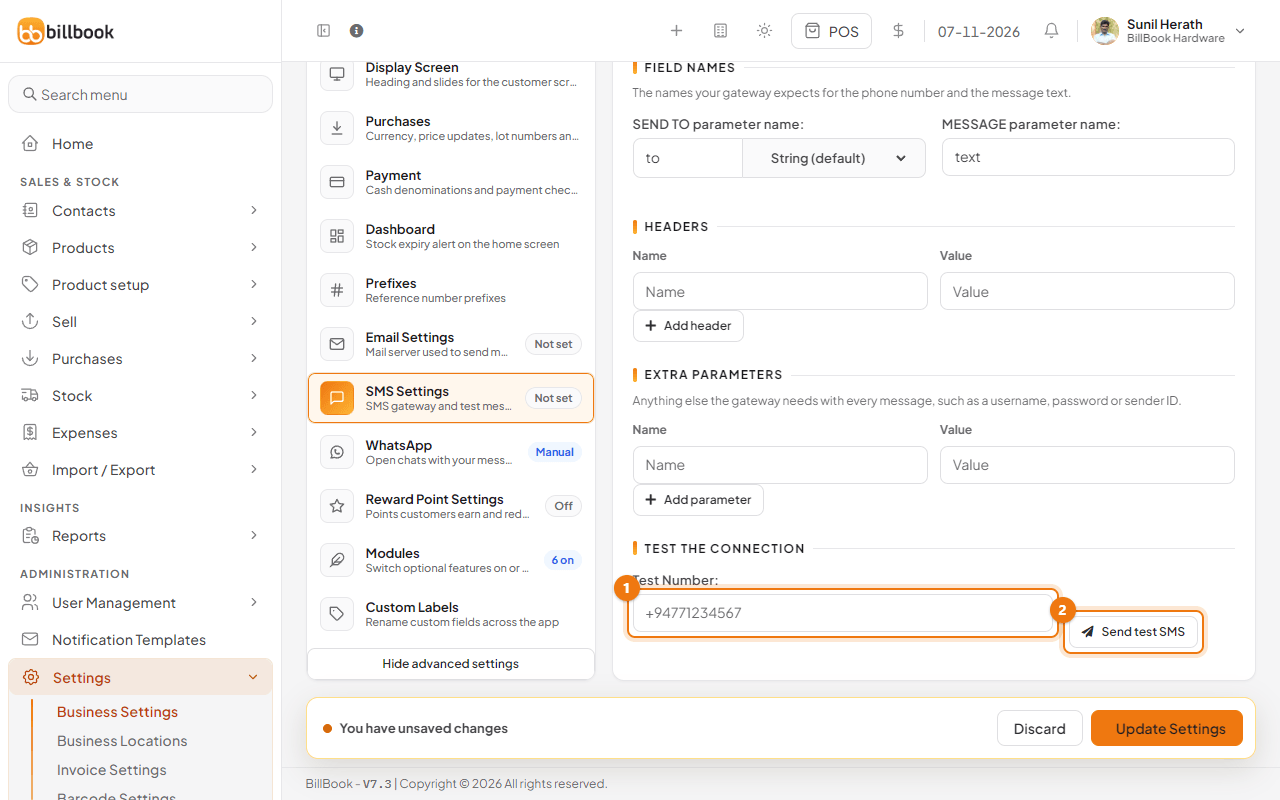
- Under Field names, enter the SEND TO parameter name (2) and the MESSAGE parameter name (3). These are the names your provider expects for the phone number and the text, for example to and message. Leave the type next to SEND TO on String (default), or choose Array if the provider wants a list of numbers.
- If your provider needs a header such as a token, enter its name and value under Headers (1). Select Add header for more.
- Add anything else the gateway needs with every message, such as a username, password or sender ID, under Extra parameters (2). Select Add parameter for more.
- Select Update Settings.
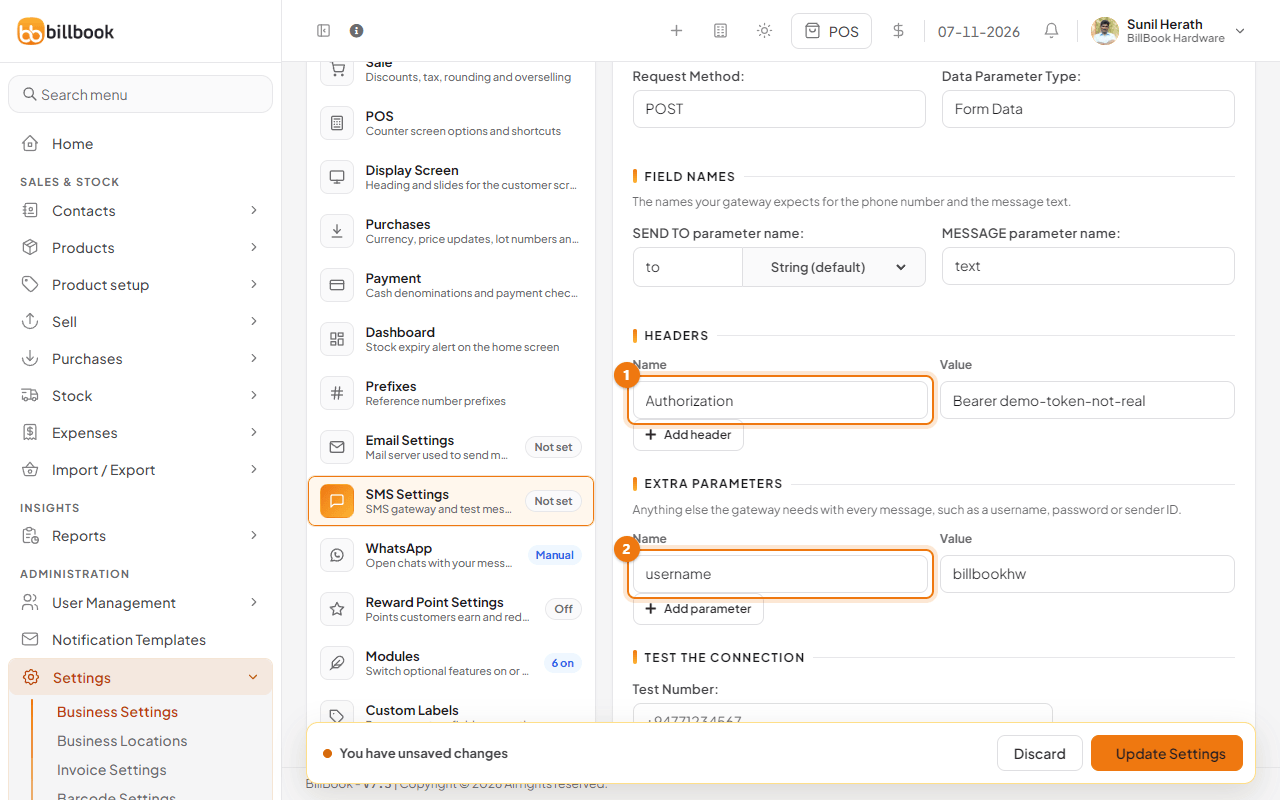
Note: Whether numbers need the country code depends on your provider. Some accept 0771234567 and others need 94771234567, so check its guide.
Check SMS balance#
With BillBook SMS, select Check balance (3 in the BillBook SMS picture) after you enter the API key. BillBook asks your IT Starter account and shows Connected. Balance: with the amount. If the key is empty it asks you to Enter the API key first.
The Custom gateway has no balance check. Look at your provider's own portal for your credit.
Send a test SMS#
- Scroll to Test the connection.
- Enter your own mobile number in Test Number (1).
- Select Send test SMS (2). BillBook sends the words "This is a test SMS" to that number using the settings on screen, so you can test before you save.
- With BillBook SMS, BillBook shows a message that the test SMS was accepted for your number. With a custom gateway, check the phone to confirm it arrived.
If nothing arrives, check the URL, the field names and your provider's credit. Then see Notification templates to write the messages.