
Add and manage users
Last updated: 7 November 2026 · 4 min read
Add a user for every person who works in BillBook, such as a cashier at your Katugastota counter or a manager at your Colombo branch. Each user signs in with their own username and password, so you can see who did what.
Before you start: You need permission to add users. Decide the person's role first. If none of the roles fit, create one under Roles and permissions.
Add a user#
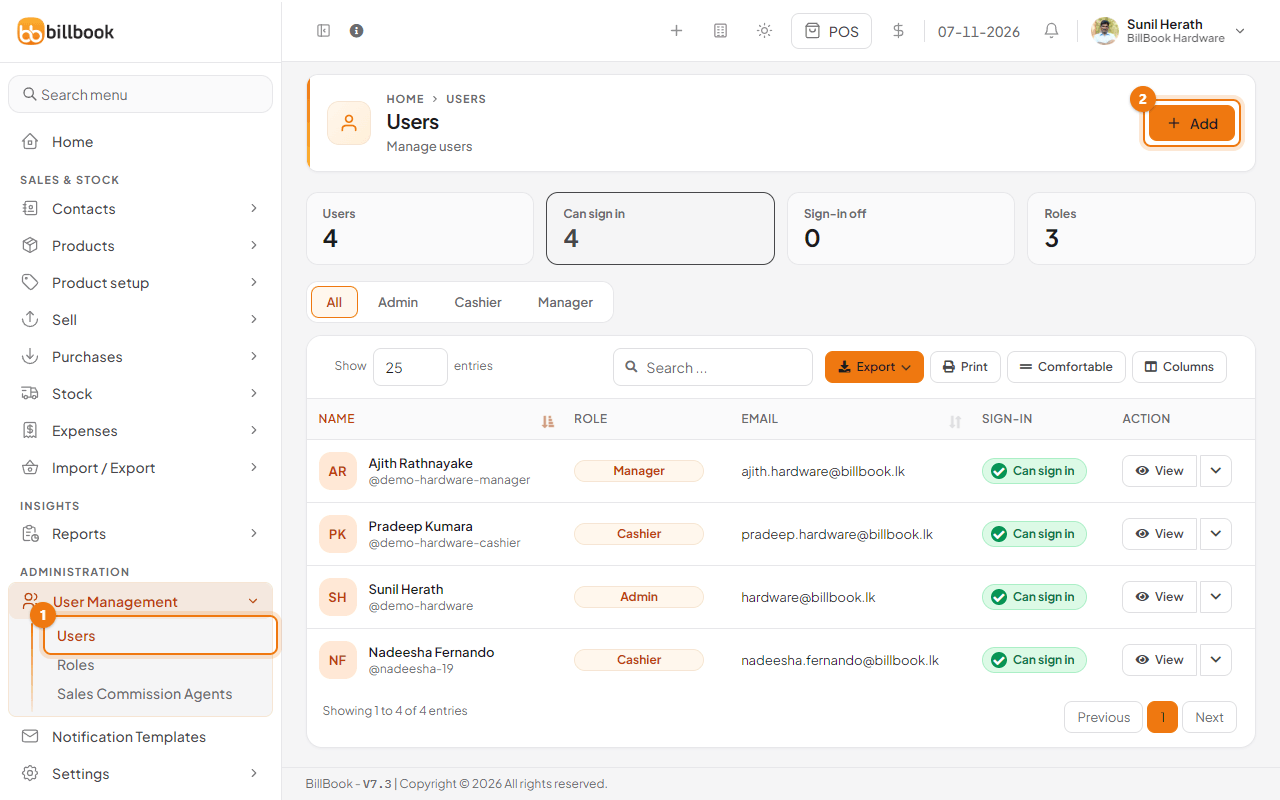
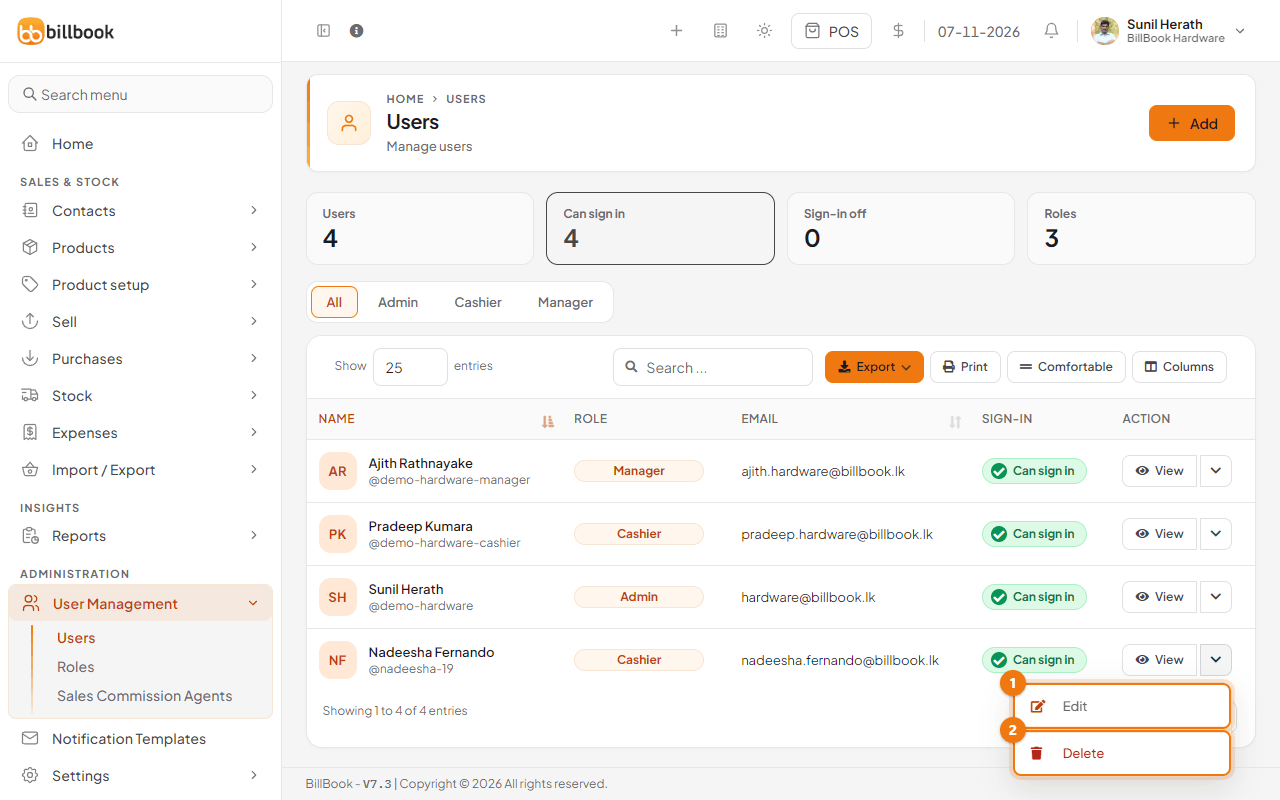
- Go to User Management > Users (1). The cards at the top count your users, who can sign in, who cannot, and your roles. The list shows each user with their role, email and whether they can sign in. Use the tabs above the list (All, Admin, Cashier, Manager and your own roles) to show one role.
- Select Add (2).
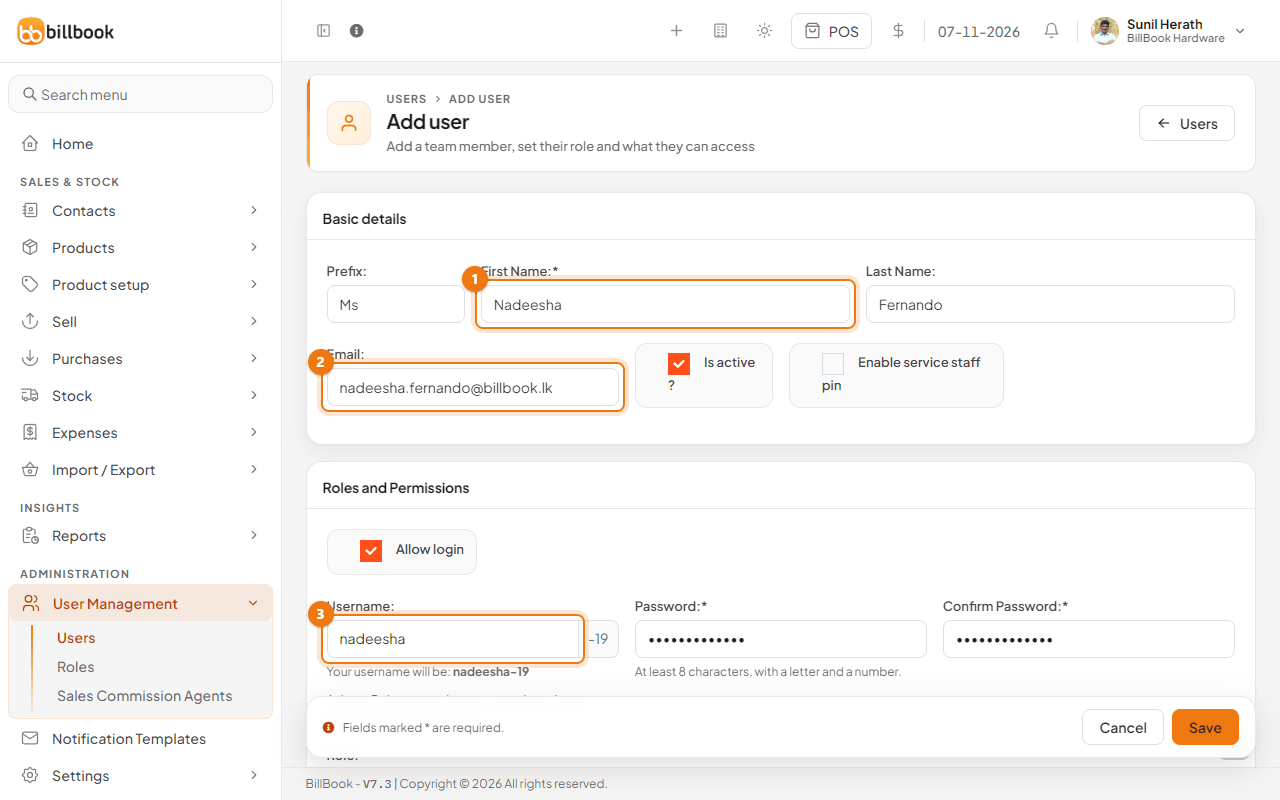
- Enter the First Name (1), for example Nadeesha. Prefix (such as Ms or Mr) and Last Name are optional.
- Enter the Email (2). It is required.
- Keep Allow login ticked so the person can sign in. Enter a Username (3) and a Password and Confirm Password. Under the username BillBook shows the full name the person will type, for example nadeesha-19, because BillBook adds a number to each username. If you leave Username blank, BillBook makes one up.
Assign a role#
A role decides which screens and actions the person can use.
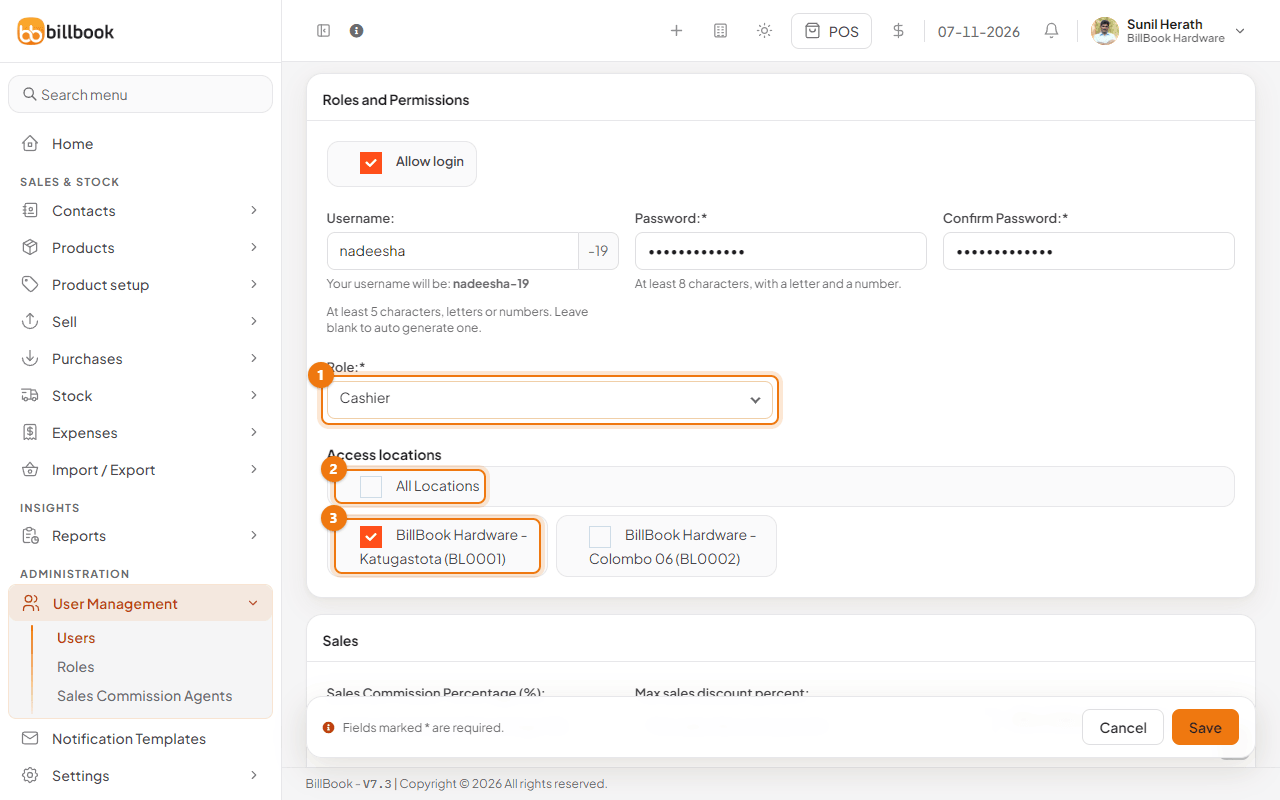
- Under Roles and Permissions, open Role (1) and choose one, such as Cashier, Manager, Admin or a role you created.
- Select Save at the bottom of the page. BillBook shows User added successfully and the new person appears in the list.
Note: Choose Admin only for people you trust with everything. Admins can open every location.
Limit access to locations#
Under Access locations, All Locations (2) is ticked by default. To keep someone to one shop, untick it and tick that shop (3), for example BillBook Hardware - Katugastota (BL0001). The person then sees only that location's sales, stock and reports.
Set commission and discount limit#
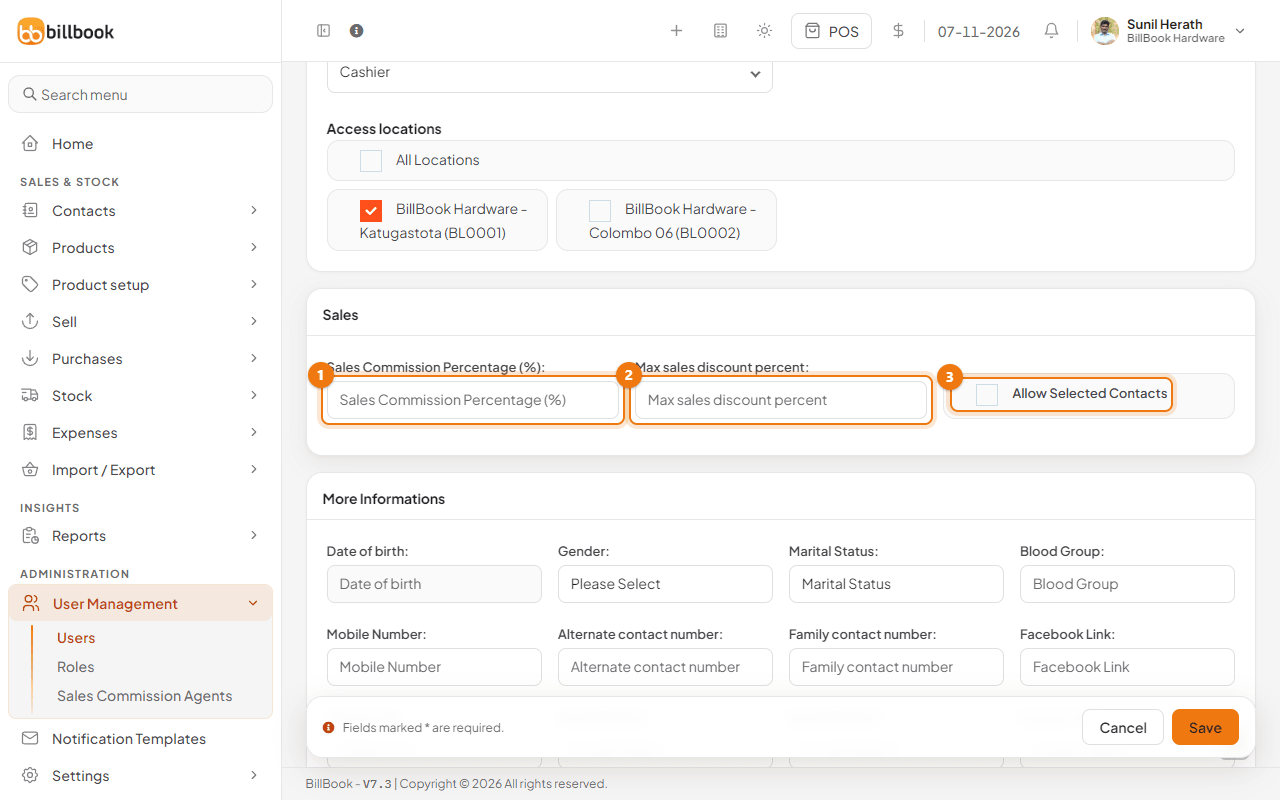
The Sales section has three more settings.
- Sales Commission Percentage (%) (1) is the commission this user earns on sales. BillBook uses it only when the commission setting is Logged In user or Select from users list. See Sales commission agents.
- Max sales discount percent (2) is the biggest discount the person can give on a sale. Leave it blank for no limit.
Limit access to contacts#
- Tick Allow Selected Contacts (3) to let the person find only certain customers and suppliers when they pick one on a sale or purchase. A Select Contacts box appears so you can choose them.
Edit a user#
- On the Users list, select the arrow next to View on the person's row.
- Select Edit (1) and change what you need.
- Select Update. To keep the current password, leave the password boxes blank.
Deactivate or delete a user#
When someone leaves, switch them off first. You can switch them back on later.
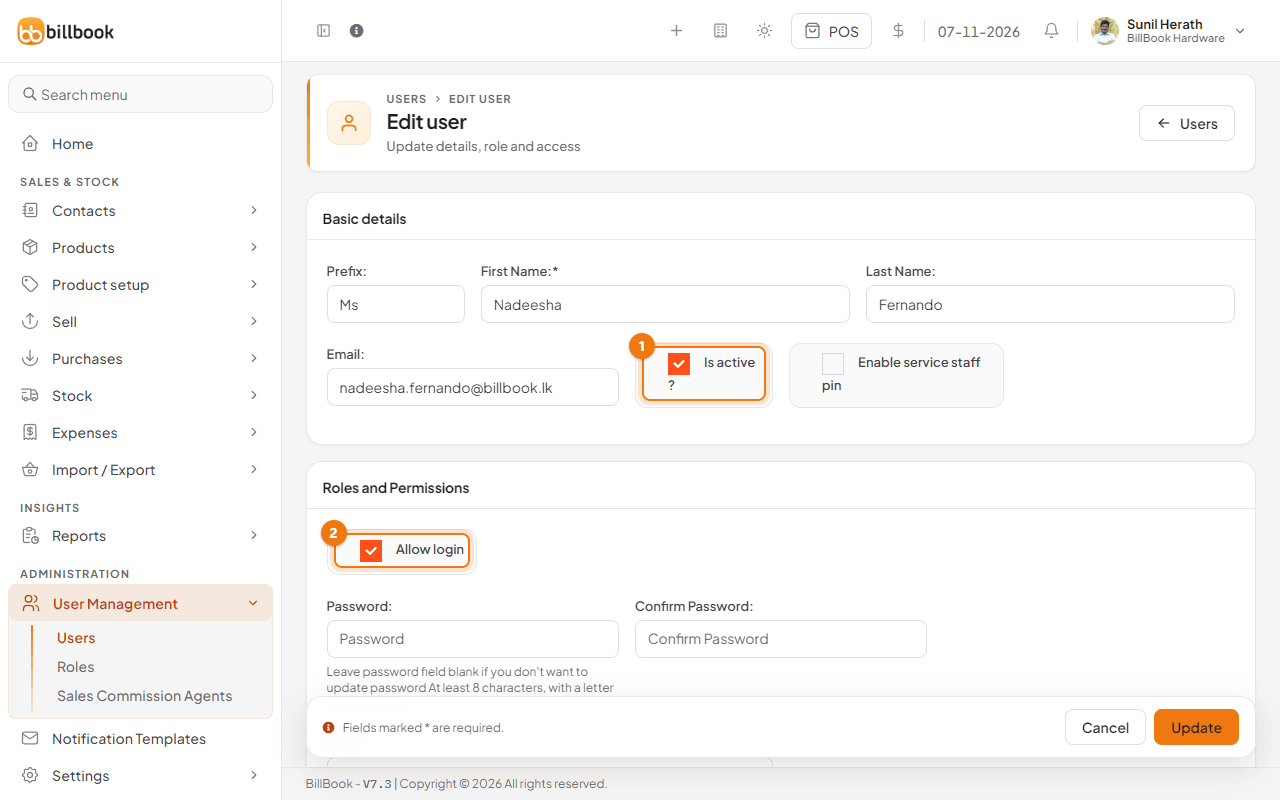
- Open Edit on the person's row.
- Untick Is active (1) to make the user inactive, or untick Allow login (2) to stop them signing in while keeping the user.
- Select Update. The Sign-in column on the list shows whether they can still sign in.
To remove a user for good, open the row menu and select Delete (2 in the earlier picture), then confirm. BillBook shows User deleted successfully. Their past sales stay on record.
Tip: Prefer deactivating over deleting. It keeps the person's name against old sales and reports.
Sign in as a user#
BillBook does not have a button for an owner to sign in as another user. To see what a role can do, sign out and sign in with that user's own username and password, then sign back in as yourself.