
Set up payment accounts
Last updated: 7 November 2026 · 4 min read
A payment account is a place where your money sits, such as a cash drawer, a current account or a savings account. When you record payments against accounts, BillBook shows how much is in each one and where the money moved.
Before you start: You need permission to open Settings and the Accounts menu. Payment accounts are an optional feature, so you switch them on first.
Turn on payment accounts#
- Go to Settings > Business Settings and open Modules in the list on the left.
- Turn on Account (1).
- Select Update Settings at the top of the page.
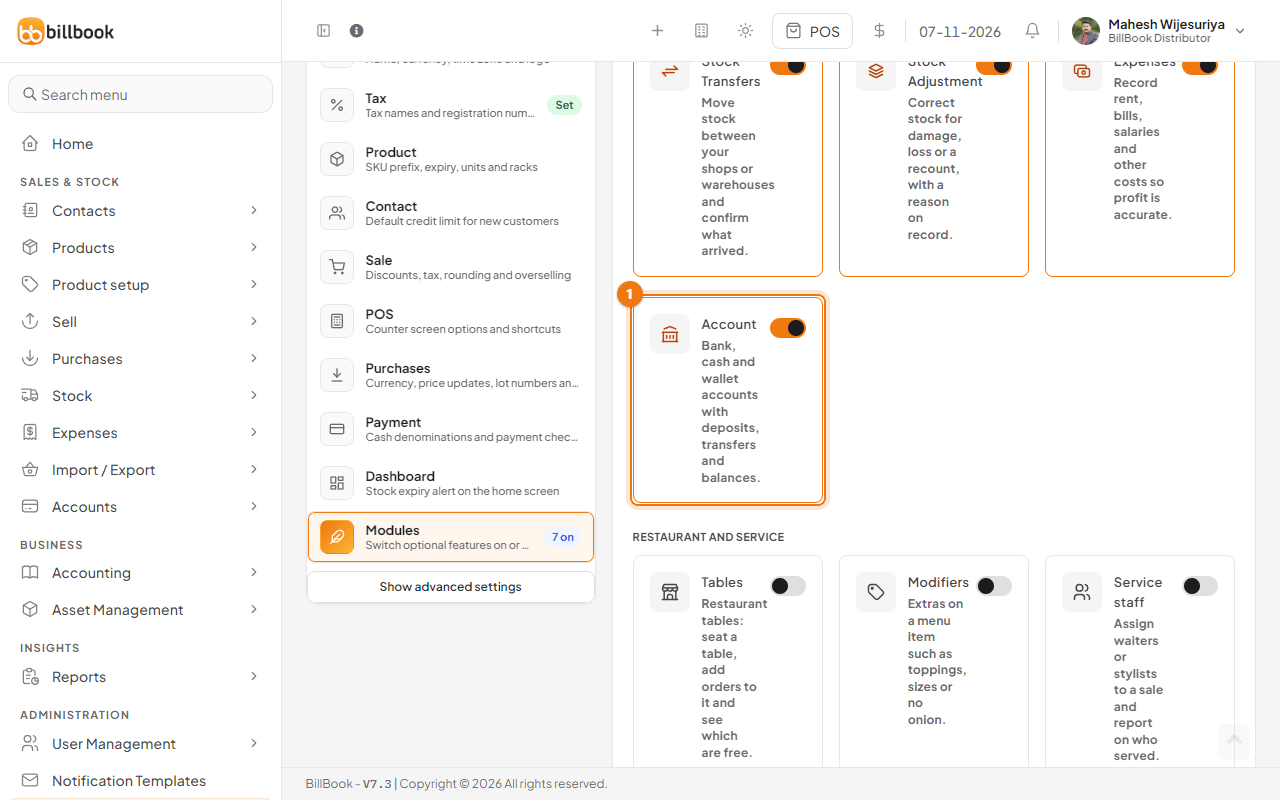
A new Accounts group appears in the sidebar with List Accounts, Cash Flow and Payment Account Report.
Account types and sub-types#
Account types group your accounts, for example Cash or Bank Accounts. A sub-type sits inside a type, for example Current Accounts and Savings Accounts inside Bank Accounts.
- Go to Accounts > List Accounts and select the Account Types tab (1).
- Select Add (2).
- Enter the Name, for example Bank Accounts. Leave Parent account type empty to make a main type.
- To make a sub-type, choose the main type under Parent account type, for example Bank Accounts, and enter a name such as Savings Accounts.
- Select Save.
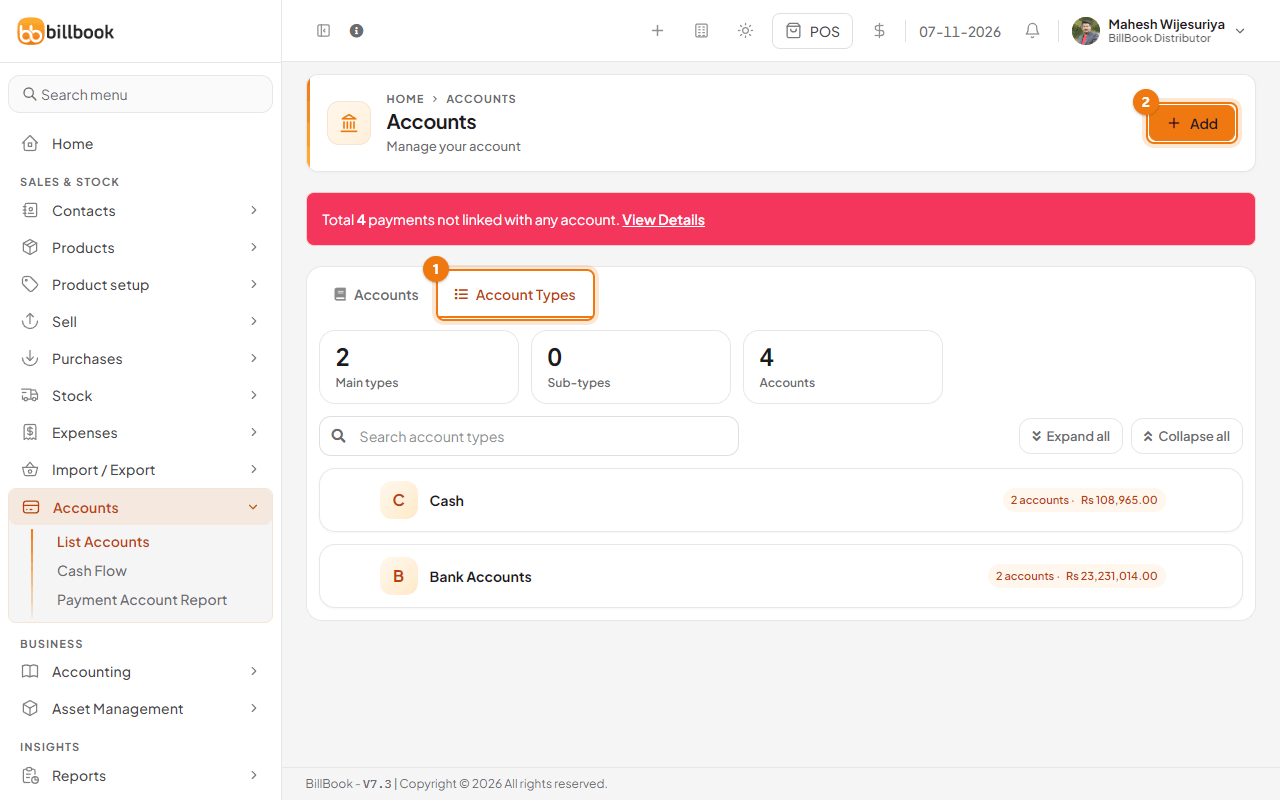
Each main type shows how many accounts and sub-types it holds and their total balance. You can also add a sub-type straight from a main type's row with Add sub-category.
Note: The Add button follows the tab you are on. On the Accounts tab it adds an account, and on the Account Types tab it adds a type, so check the tab first.
Create an account#
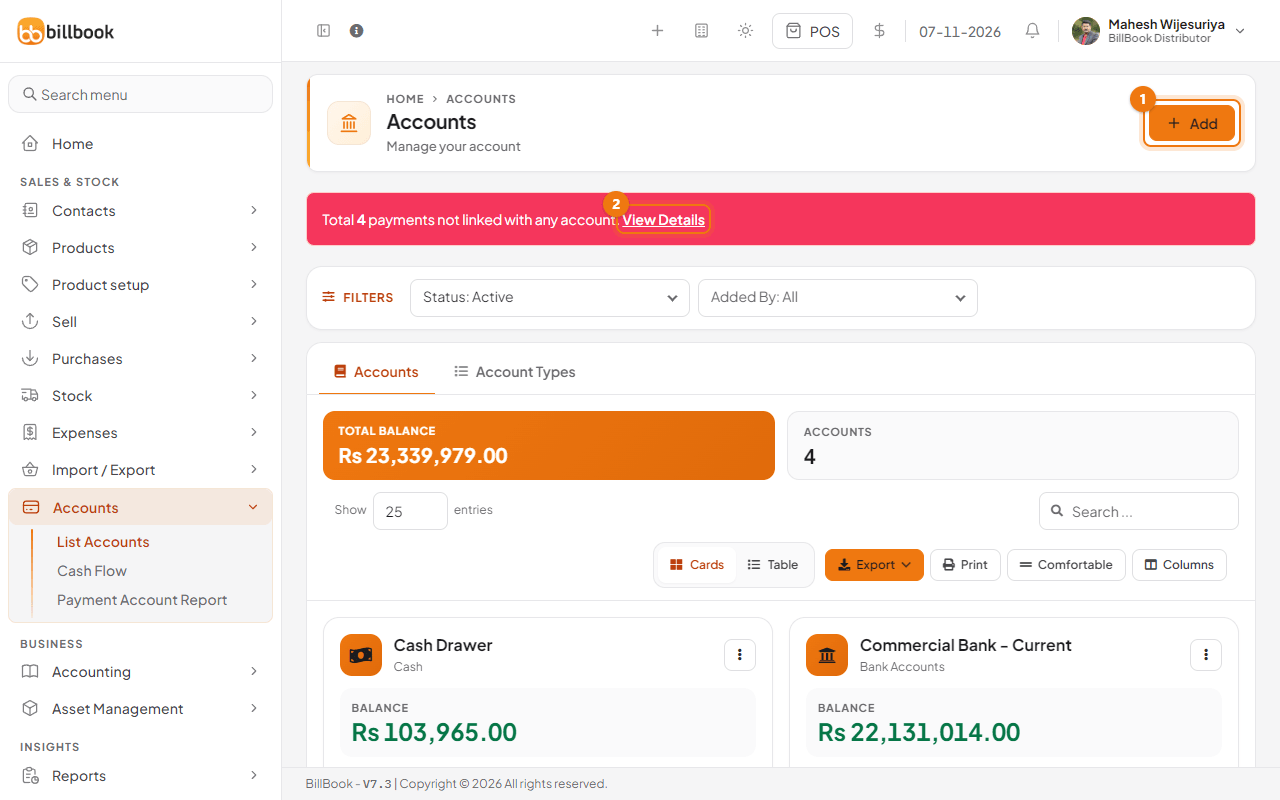
- On the Accounts tab, select Add.
- Enter the Name (1), for example HNB - Current A/C 2011 3344 55.
- Enter the Account Number. This is required. For a cash drawer you can use any code, such as CASH-01.
- Choose the Account Type (2). Pick Bank Accounts (or one of its sub-types) for a bank account, or Cash for a drawer.
- Enter the Opening Balance (3), the amount in the account today, for example 450000.
- Use Account details to keep extra facts such as the bank branch. Add a Label and a Value on each row. Add a Note if you want one.
- Select Save.
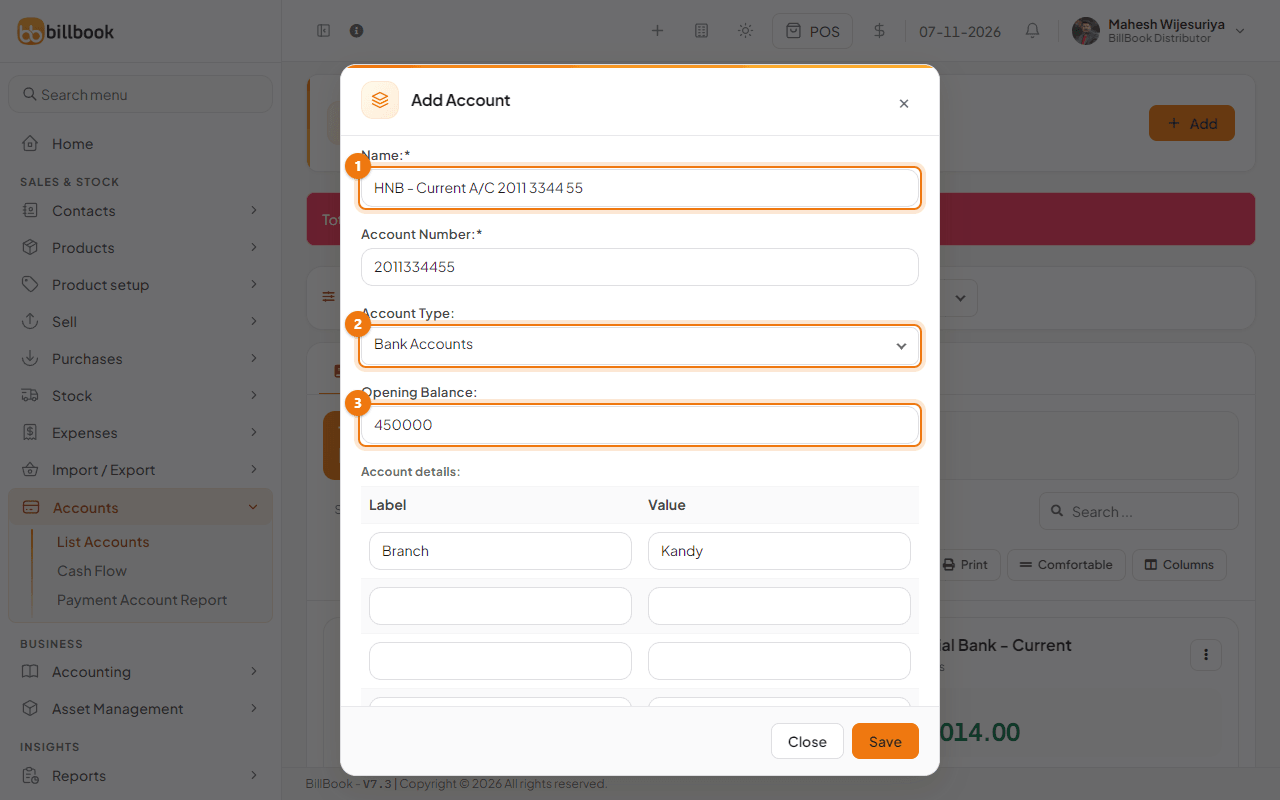
The opening balance is recorded as the first entry in the account's book. Create one account for each cash drawer and bank account you use, for example Cash Drawer, Commercial Bank - Current and Sampath Bank - Savings.
Each account shows as a card with its balance, number and details. Switch to Table above the cards for a list instead. The Total Balance at the top adds up the accounts you are looking at. If you see a red bar saying some payments are not linked to any account, select View Details (2) to link them. Cash flow and account reports explains how.
Default account per payment method#
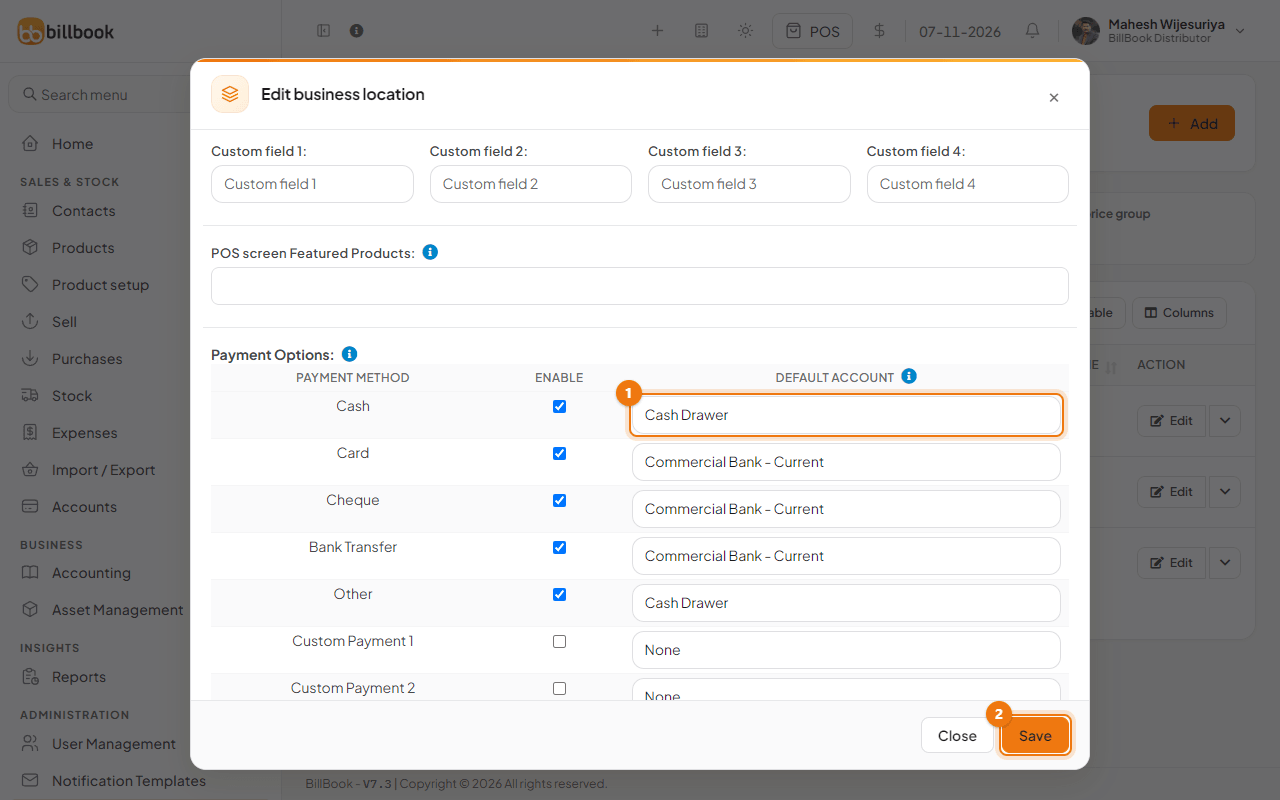
Set a default account so that cash, card and bank payments land in the right account without anyone choosing it each time.
- Go to Settings > Business Locations and select Edit on the location.
- Scroll to Payment Options. Once you have accounts, a Default Account column appears next to Enable.
- For each payment method, choose the account in the Default Account list (1). For example, choose Cash Drawer for Cash, and Commercial Bank - Current for Card, Cheque and Bank Transfer. Leave None if you do not want a default.
- Select Save (2). BillBook shows Business location updated successfully.
From now on, when you take a payment with that method at this location, BillBook picks the matching account for you. When you add a payment to a purchase, a Payment Account list also shows, starting with that default, and you can choose another account. Each location has its own defaults, so repeat these steps for every location.