
Add a product
Last updated: 7 November 2026 · 5 min read
Add each item you sell once, then use it on every purchase, sale and stock report. A new product takes about a minute: a name, a unit and a selling price are enough, and you can fill in the rest later.
Before you start: Set up your Units, Brands and Categories first if the ones you need are missing. See Units and sub-units and Categories, brands and warranties.
Product types at a glance#
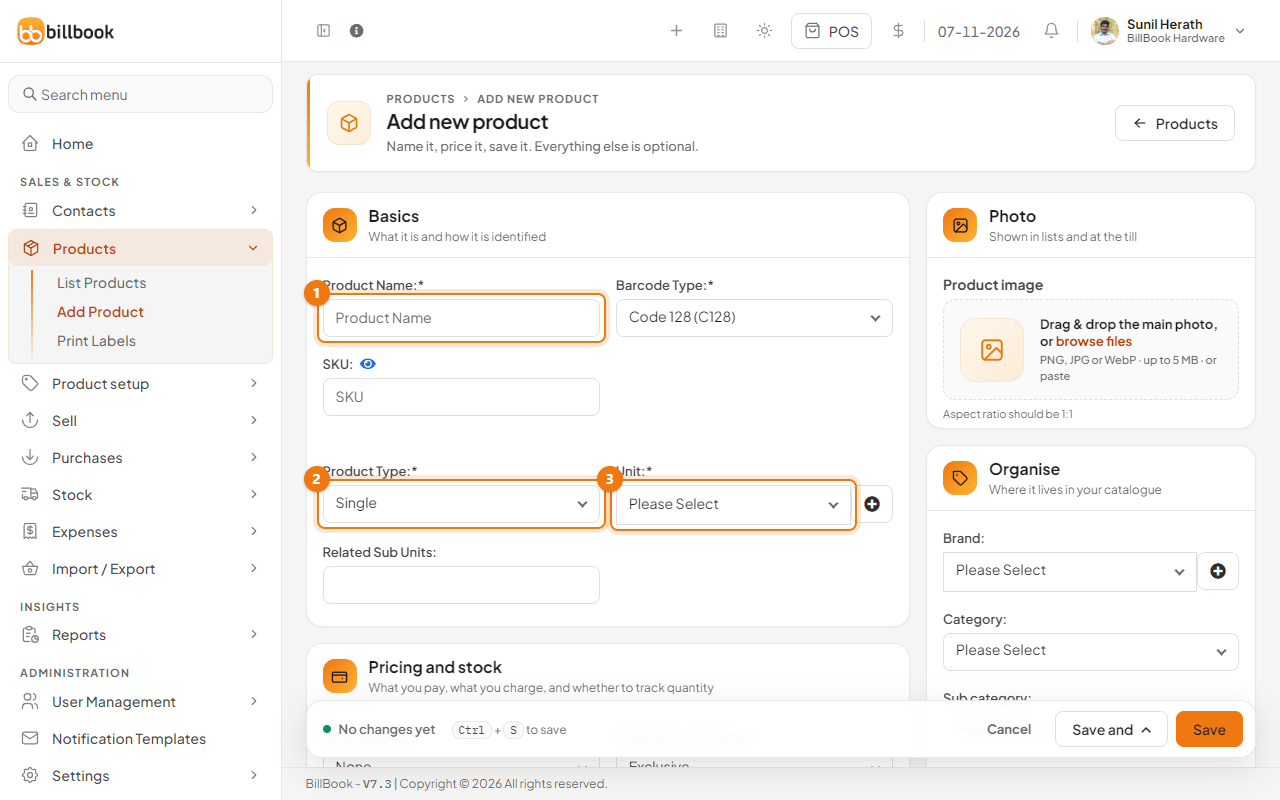
Go to Products > Add Product. Product Type (2) has three choices:
- Single is one item with one price, such as a tin of paint or a hammer. This page covers it.
- Variable is one product with several versions, such as a paint in 1L, 4L and 10L tins. See Variable products and variation templates.
- Combo is a kit made of other products sold at one price. See Combo and bundle products.
Single product step by step#
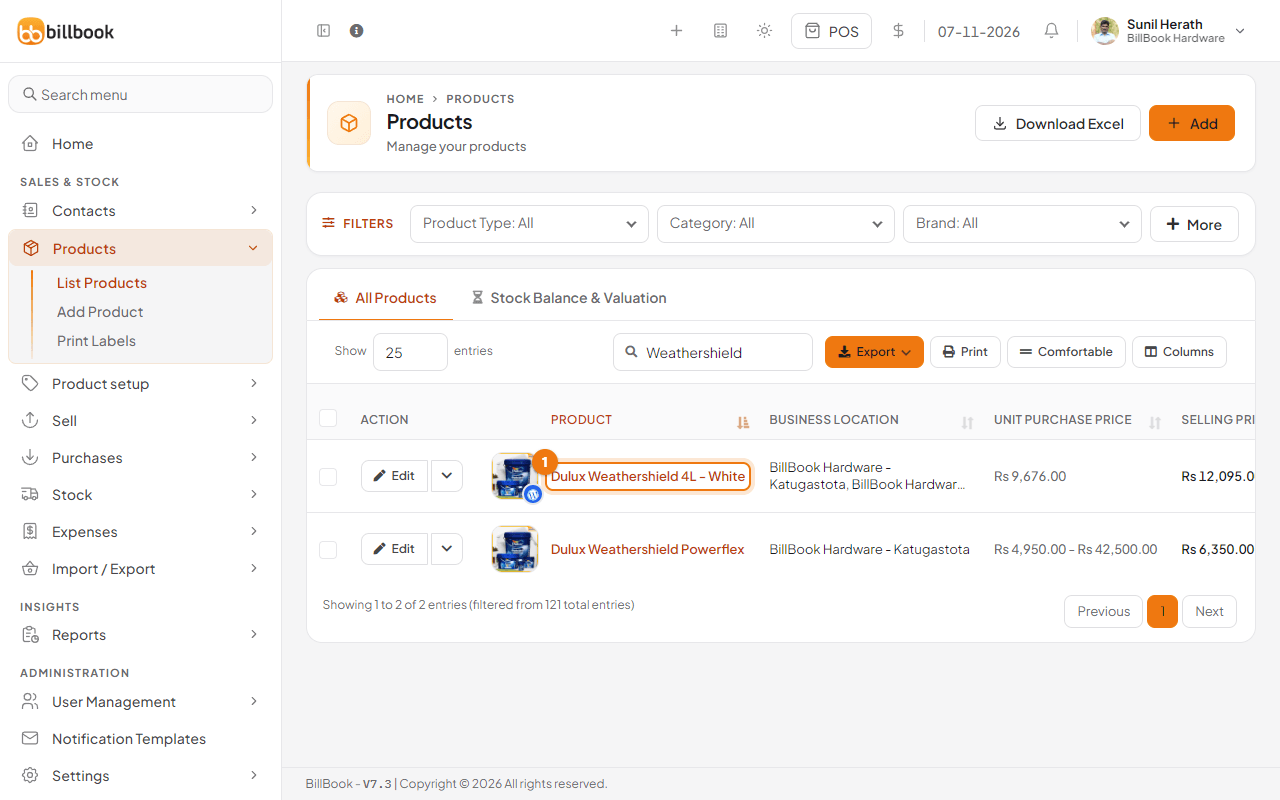
- Enter the Product Name (1), for example Dulux Weathershield 4L - White.
- Leave SKU empty to let BillBook number it for you, or type your own code. Leave Barcode Type as it is unless your labels use another type.
- Keep Product Type (2) on Single.
- Choose the Unit (3), for example Pieces (Pc(s)). Use the + button next to it to add a unit without leaving the form.
- If the unit has sub-units, such as Bag and 10 Bags, choose the ones you also sell in under Related Sub Units. This box shows only when Enable Sub Units is on.
Pricing, tax and margin#
The Pricing and stock card works out the third number when you enter any two of purchase price, margin and selling price.
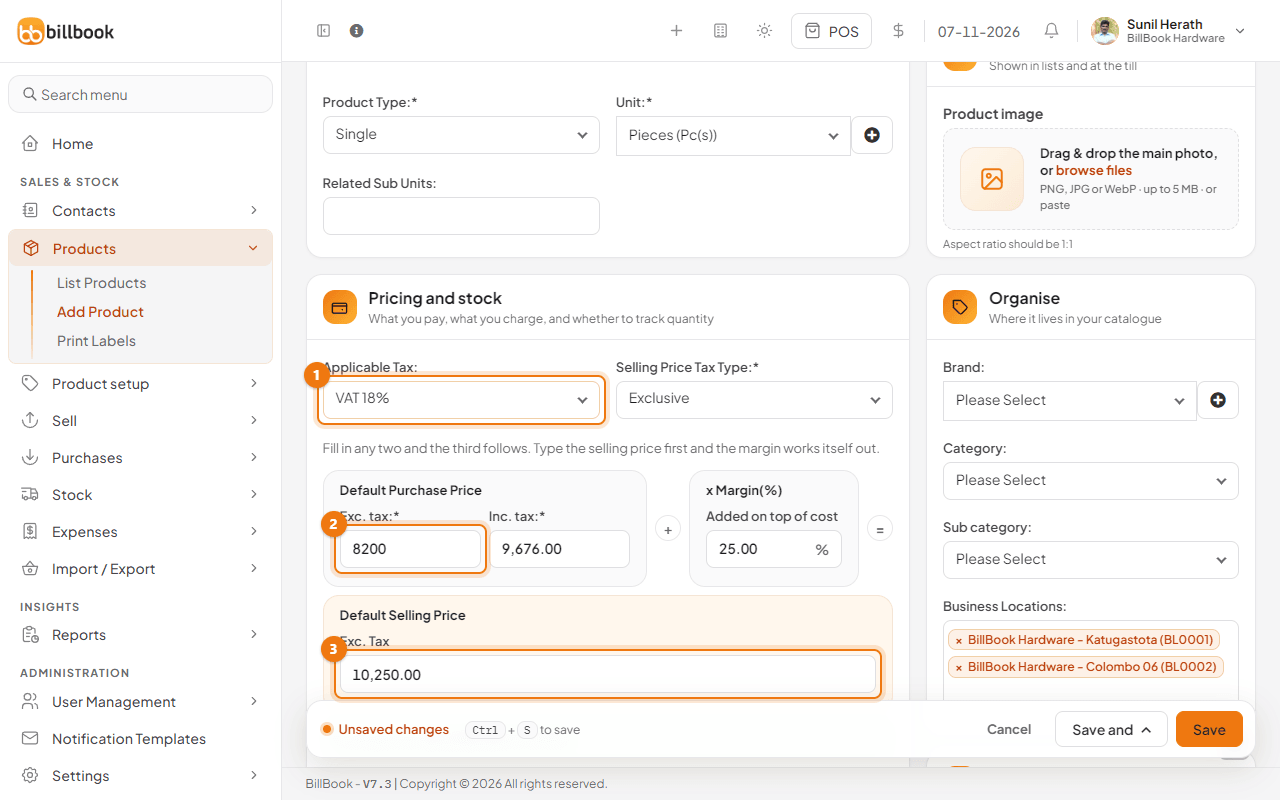
- Choose the Applicable Tax (1), for example VAT 18%. Leave it on None if the item carries no tax.
- Leave Selling Price Tax Type on Exclusive if you enter prices before tax, or choose Inclusive if your shelf price already includes tax.
- Under Default Purchase Price, enter Exc. tax (2), the price you pay your supplier before tax. Inc. tax fills in by itself.
- Check the Margin(%) box. The default is 25%. Change it, or type the Default Selling Price (3) yourself and the margin follows.
- Under Profit per unit, check the profit BillBook shows.
With a cost of Rs. 8,200.00 before tax and a 25% margin, the selling price is Rs. 10,250.00 before tax (Rs. 12,095.00 with 18% VAT).
- Leave Manage Stock? ticked so BillBook keeps count of the stock. Enter an Alert quantity if you want a warning when stock runs low. Untick it for services and other items you do not count.
Images and description#
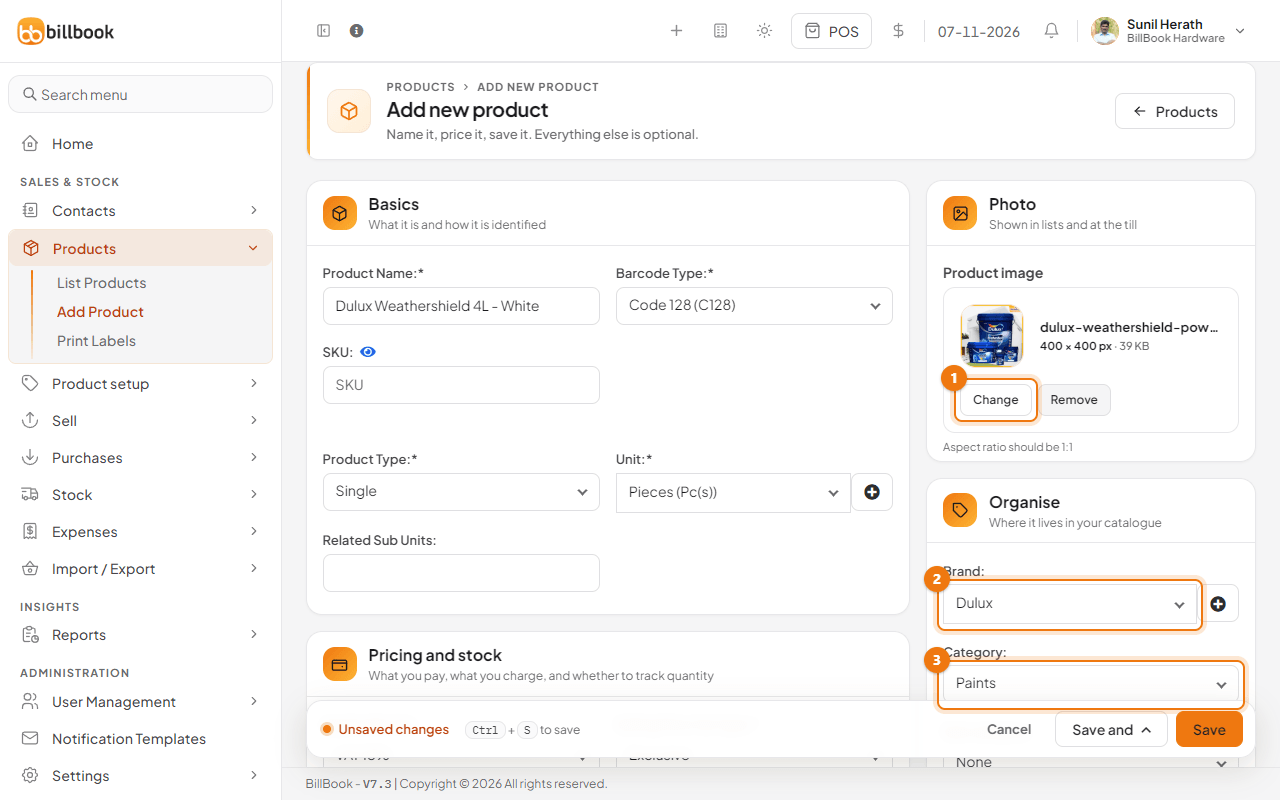
- In the Photo card, drag a picture onto Product image, select browse files, or paste an image. Use a square picture (PNG, JPG or WebP, up to 5 MB). Select Change (1) to pick another one.
- Choose the Brand (2) and Category (3). A sub-category list appears under the category when it has sub-categories.
- Under Business Locations, choose each shop that sells the product.
The picture shows in the product list and at the till. Under Pricing and stock, More photos takes extra pictures.
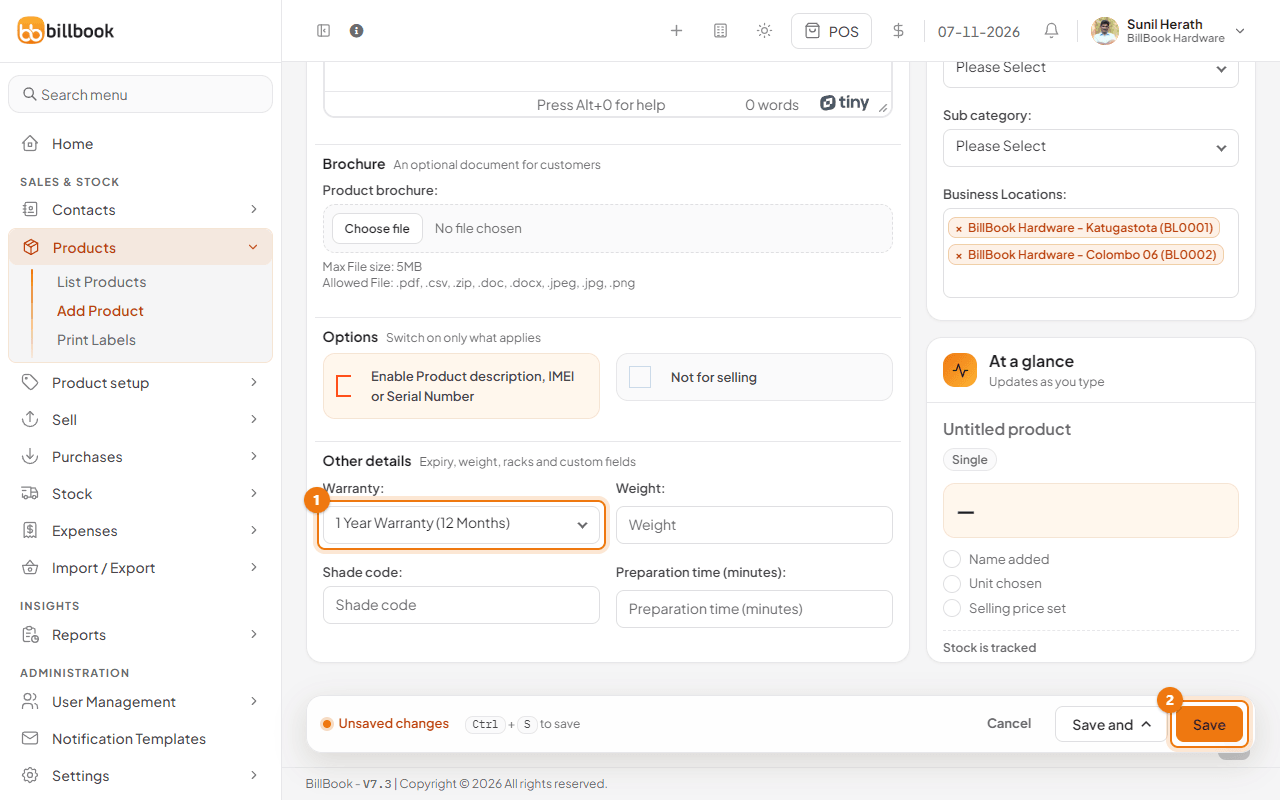
- Open More details to write a Description, attach a Product brochure or choose a Warranty (1). Weight and a few switches are also here.
- Select Save (2).
BillBook opens the product list and the new product appears in it.
Tip: Press Ctrl + S to save. Save and saves the product and then opens Save & Add Opening Stock, Save & Add Selling-Price-Group Prices (only if you have price groups) or Save And Add Another.
Rack, row and position#
Rack, Row and Position let you note where an item sits in the shop. They show in More details only when switched on, so you may not see them.
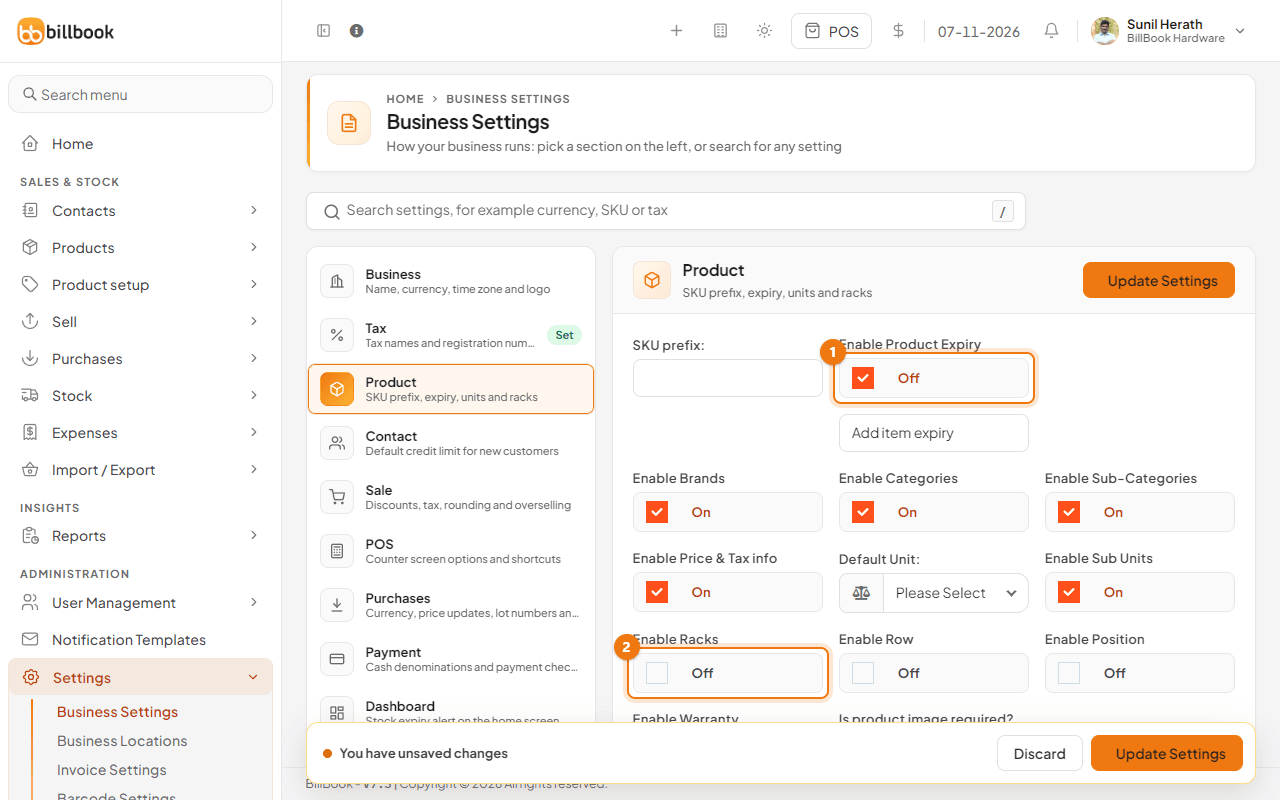
- Go to Settings > Business Settings and open the Product section.
- Turn on Enable Racks (2). Enable Row and Enable Position are next to it.
- Select Update Settings.
Expiry and alerts#
Use expiry for goods that go off, such as food or medicine. Hardware shops usually leave it off.
- In the same Product section, turn on Enable Product Expiry (1).
- Select Update Settings.
The product form then asks Expires in (a number of months or days), and BillBook asks for expiry dates when you buy stock. For low stock, use the Alert quantity on the product.
Quick add from POS or purchase#
When you are in the middle of a purchase and an item is missing, you do not have to leave the screen.
- On Purchases > Add Purchase, select the Add new product button next to the product search.
- Enter the Product Name, Unit, Applicable Tax, prices and, if you like, Brand and Category.
- Save, then pick the new product for the purchase line.
Quick add makes a single product only. For variable or combo products, use Products > Add Product.