
Turn on restaurant and salon features
Last updated: 7 November 2026 · 4 min read
BillBook has extra features for businesses that serve people at a table or by appointment: restaurants, cafes, salons and service centres. Tables and bookings let you seat and reserve customers, modifiers add extras to an item, service staff names the waiter or stylist on a sale, and the kitchen screen shows the cooks what to prepare. They are all off until you switch them on.
Before you start: You need permission to open Settings. Turn on only what you will use, so cashiers do not see boxes they do not need.
Which modules to turn on#
- Go to Settings > Business Settings and select Modules.
- Under Restaurant and service, switch on the features you need. Each one is a card with a switch:
- Tables (1): dine-in tables, chosen on the POS and used for bookings.
- Modifiers: extras and options for a menu item, such as extra cheese or no sugar.
- Service staff (2): the waiter, stylist or technician on a sale.
- Enable Bookings: table reservations.
- Kitchen (For restaurants) (3): the kitchen screen and the Kitchen order box on the POS.
- Types of service, under Selling and buying: dine-in, parcel, delivery and similar, with their own price group and packing charge. See Types of service and packing charges.
- Select Update Settings at the top of the page.
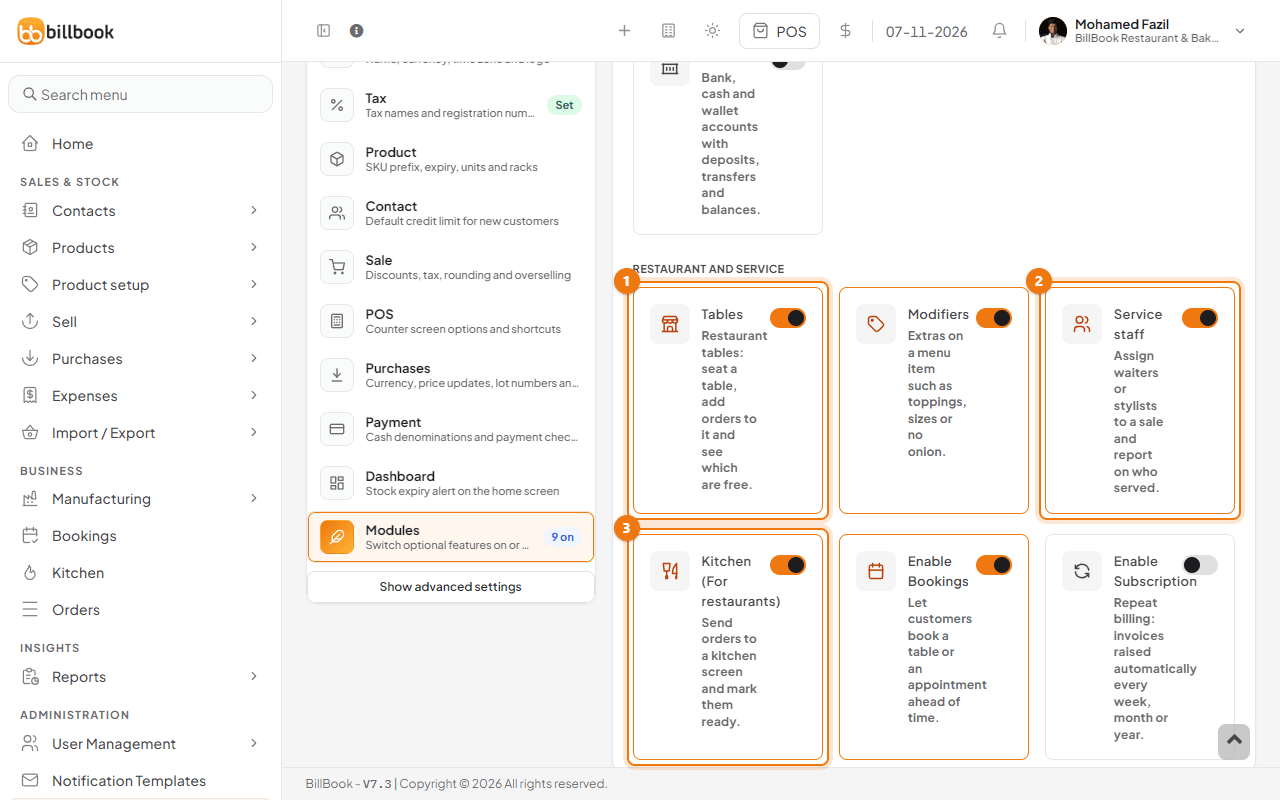
Bookings, Kitchen and Orders now appear under BUSINESS in the left menu, and Tables and Modifiers under Settings.
Tables#
Add each table once, and cashiers can pick it on the POS and the host can reserve it.
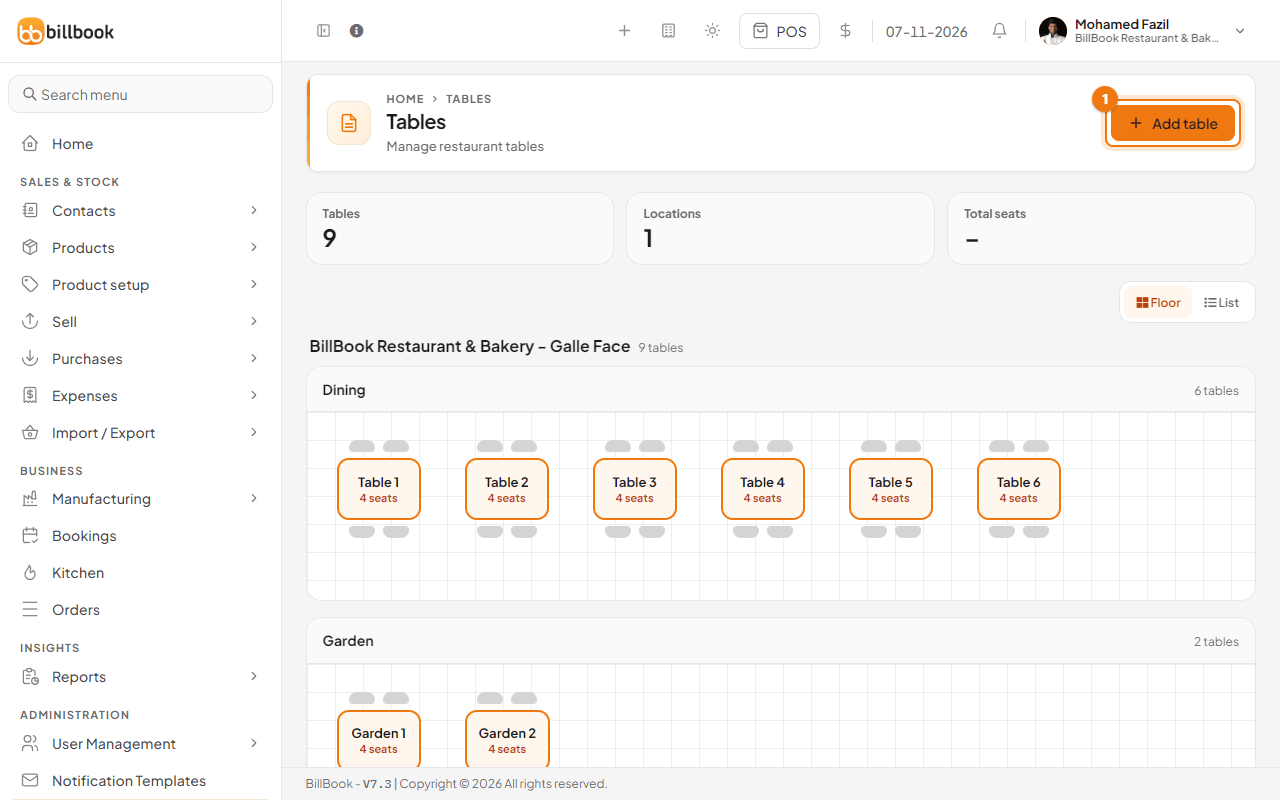
- Go to Settings > Tables. The page shows your tables with their seats, grouped by area such as Dining and Garden. Use Floor or List to change the view.
- Select Add table (1).
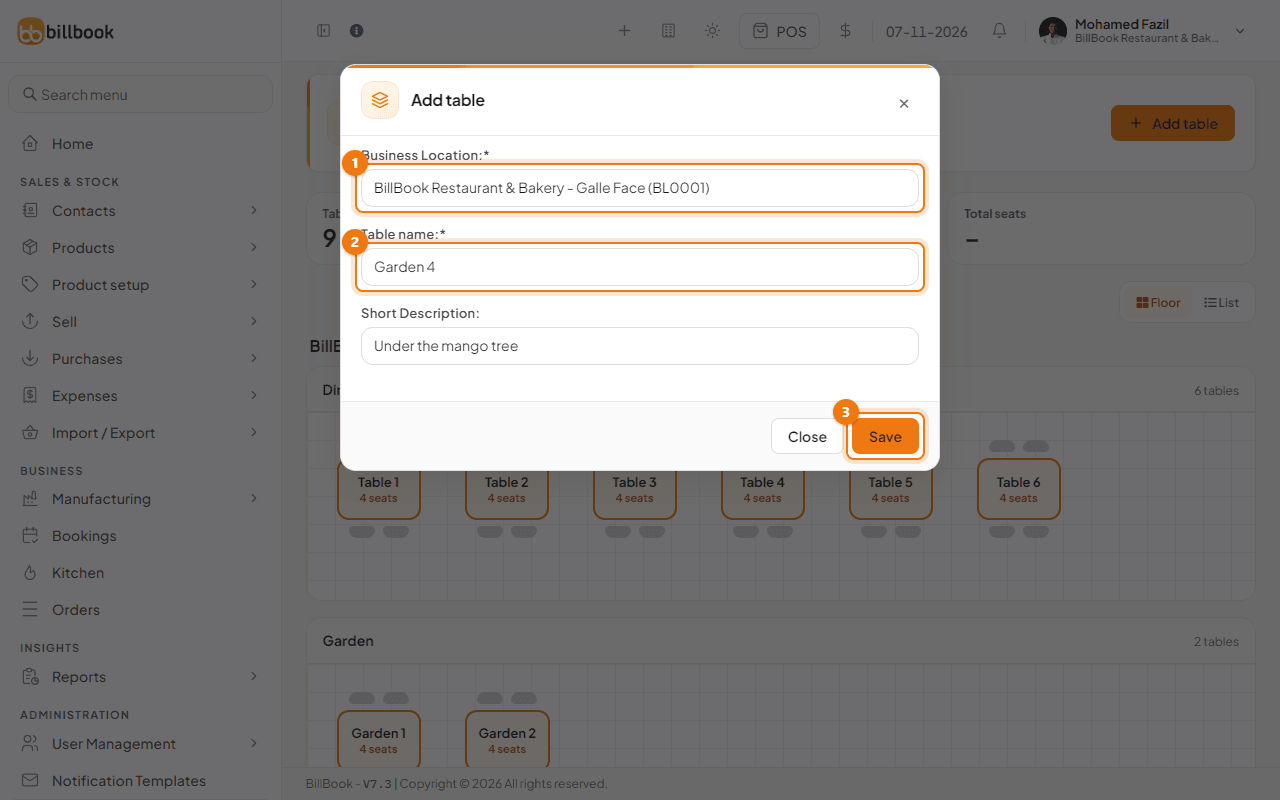
- Choose the business location (1).
- Enter the Table name (2), for example Garden 4, and a Short Description if you like.
- Select Save (3). The table appears in the list and in the Select Table box on the POS.
To rename or remove a table later, use Edit or Delete on its card in the list.
Service staff#
Service staff are ordinary users whose role is marked as a service staff role. Only users with that role appear in the Select service staff boxes.
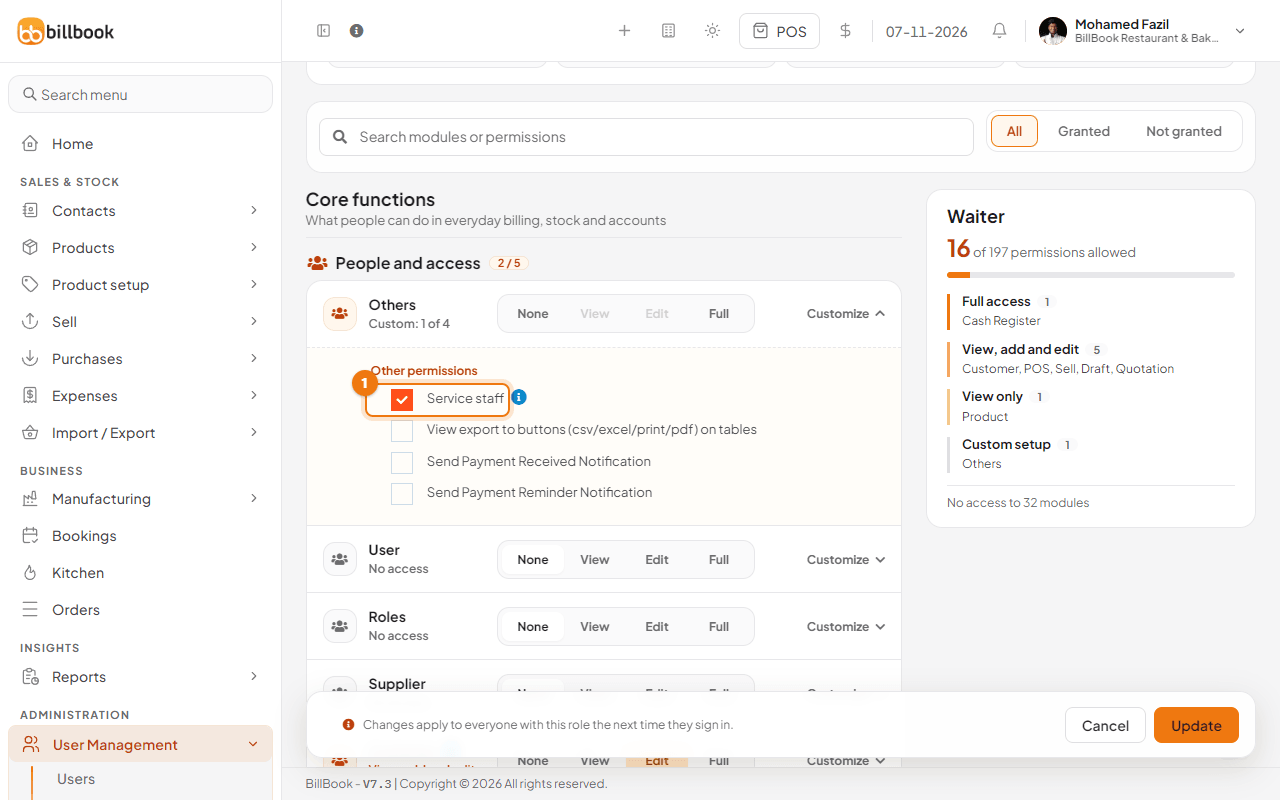
- Go to User Management > Roles and select Edit on the role your waiters or stylists use, or select Add to make one called Waiter. For a new role you can start from a template such as Cashier.
- Open Customize on Others and tick Service staff (1).
- Give the role what it needs to sell and serve, such as POS, Sell and Bookings.
- Select Update (or Save for a new role) at the bottom of the page.
- Go to User Management > Users, then select Add or Edit, and choose that role for each waiter or stylist. A waiter who never signs in to BillBook does not need a login: untick Allow login on their form.
Roles and permissions and Add and manage users explain these screens. A waiter whose role is a service staff role sees their own orders straight away on the Orders screen.
Assign staff per item in POS#
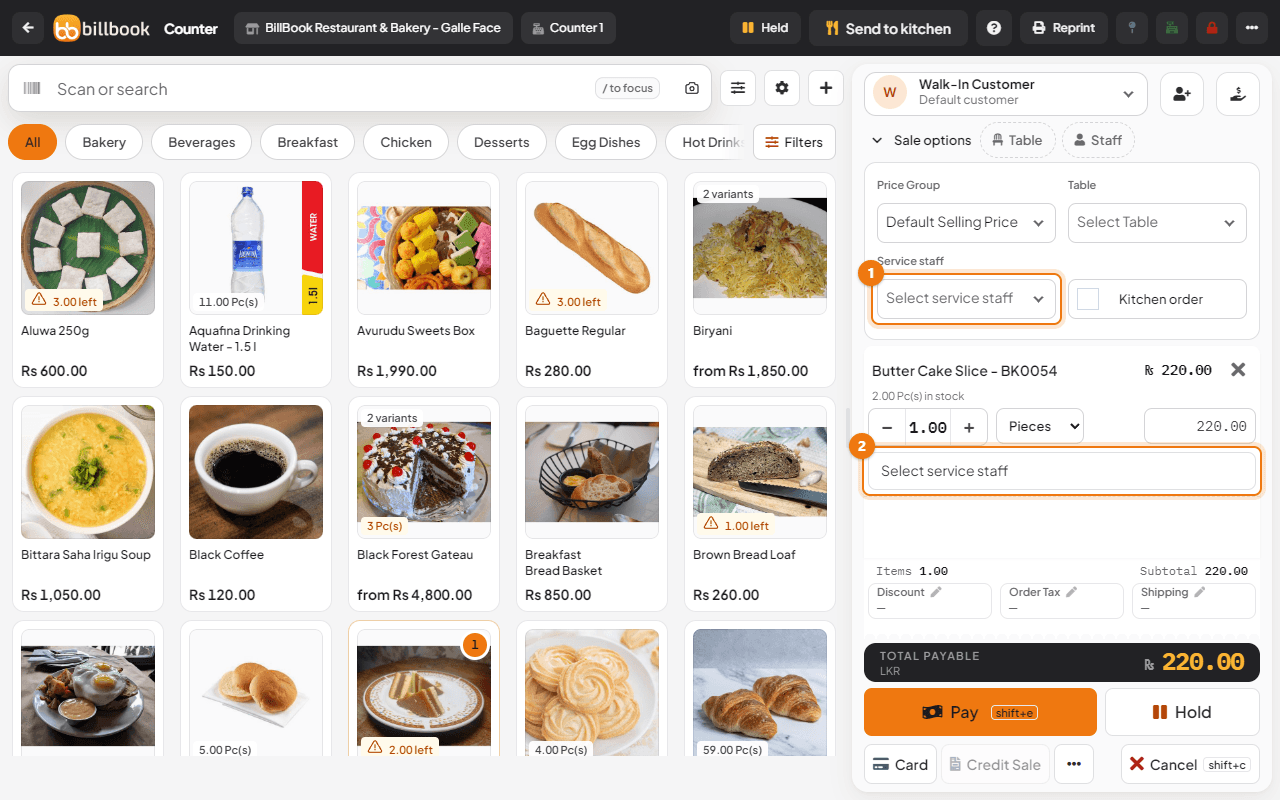
On the POS, you can always choose one Select service staff for the whole sale. To give different items to different people, for example one stylist cuts hair while another colours it, turn on the per-item box.
- Go to Settings > Business Settings and select POS.
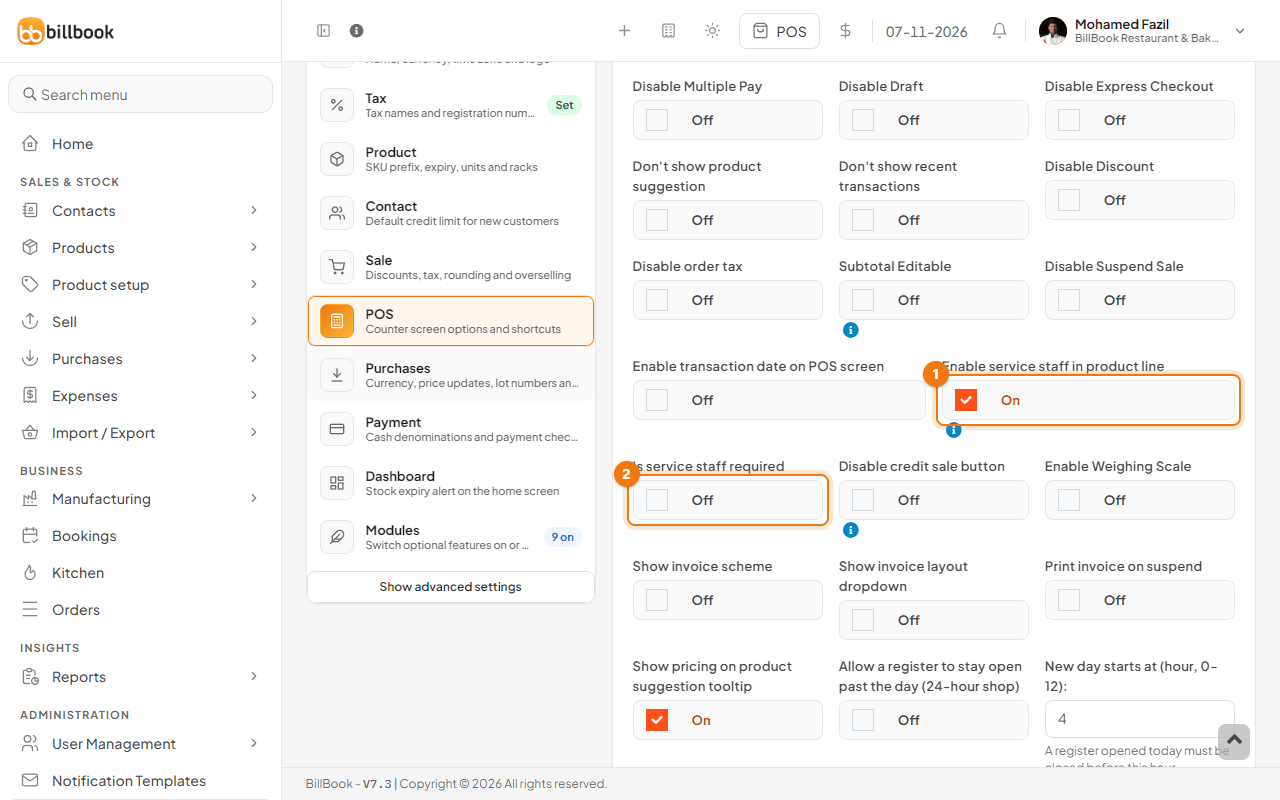
- Switch on Enable service staff in product line (1). Each item in the cart then has its own Select service staff box.
- Switch on Is service staff required (2) if every sale must name the staff.
- Select Update Settings.
On the POS, open Sale options and choose the person for the whole sale in Service staff (1), and for each item in its Select service staff box (2). Items you give to one person show up on that person's Line Orders list. See Orders and line orders.
Auto-refresh screens#
The Kitchen and Orders screens update by themselves every 15 seconds, so new orders and cooked items show up without anyone pressing anything. Select Refresh on either screen to update it straight away.
The 15 seconds is not a setting in BillBook's menus. It is fixed for the whole installation, so ask whoever hosts your BillBook if you need a different time.