
Sell services
Last updated: 4 November 2026 · 3 min read
A hardware shop sells more than goods. Paint mixing, delivery within Kandy, cutting a pipe to length, or a repair are services. BillBook sells them like any product, but does not count stock for them.
Before you start: You need permission to add products. The steps below create a service called Paint mixing service. Use your own services and prices.
Add a service#
- Go to Products > Add Product.
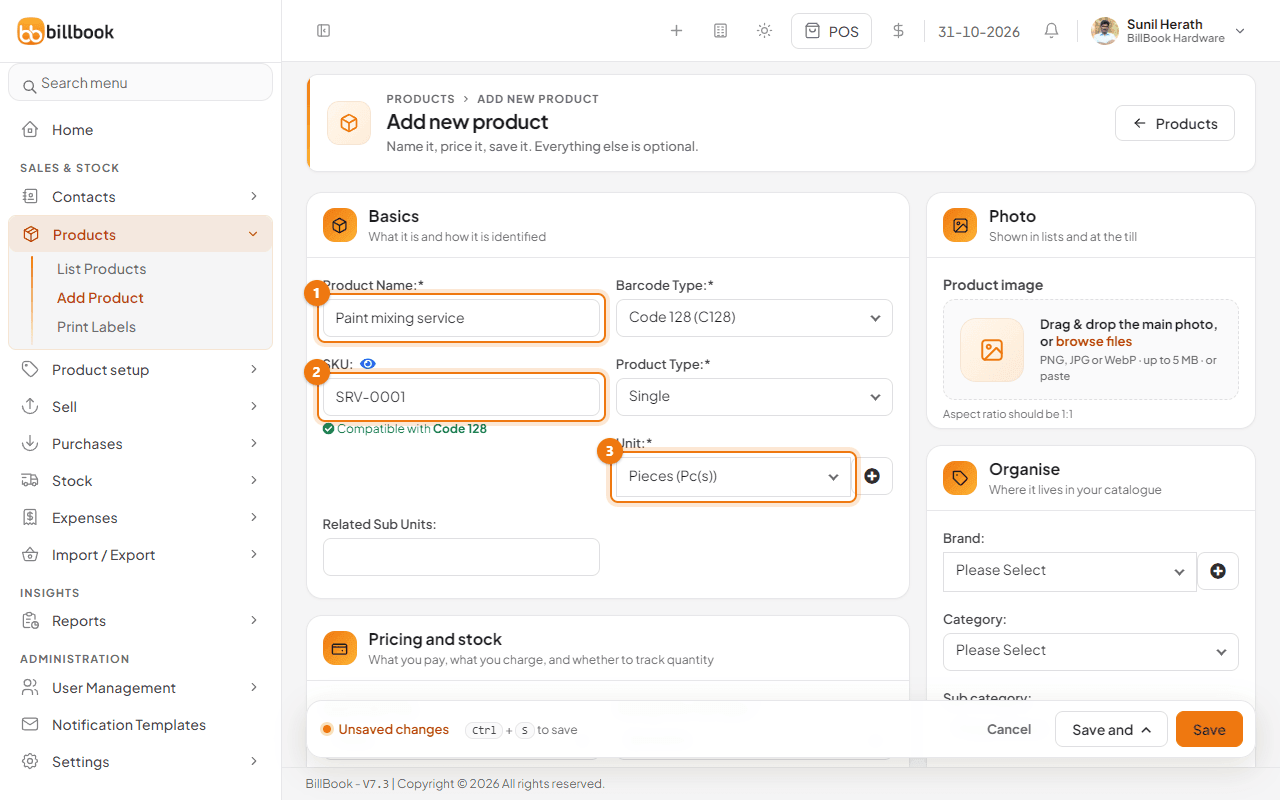
- Enter the Product Name (1), for example Paint mixing service. Add a SKU (2) such as SRV-0001, or leave it empty to let BillBook make one.
- Choose a Unit (3), for example Pieces (Pc(s)).
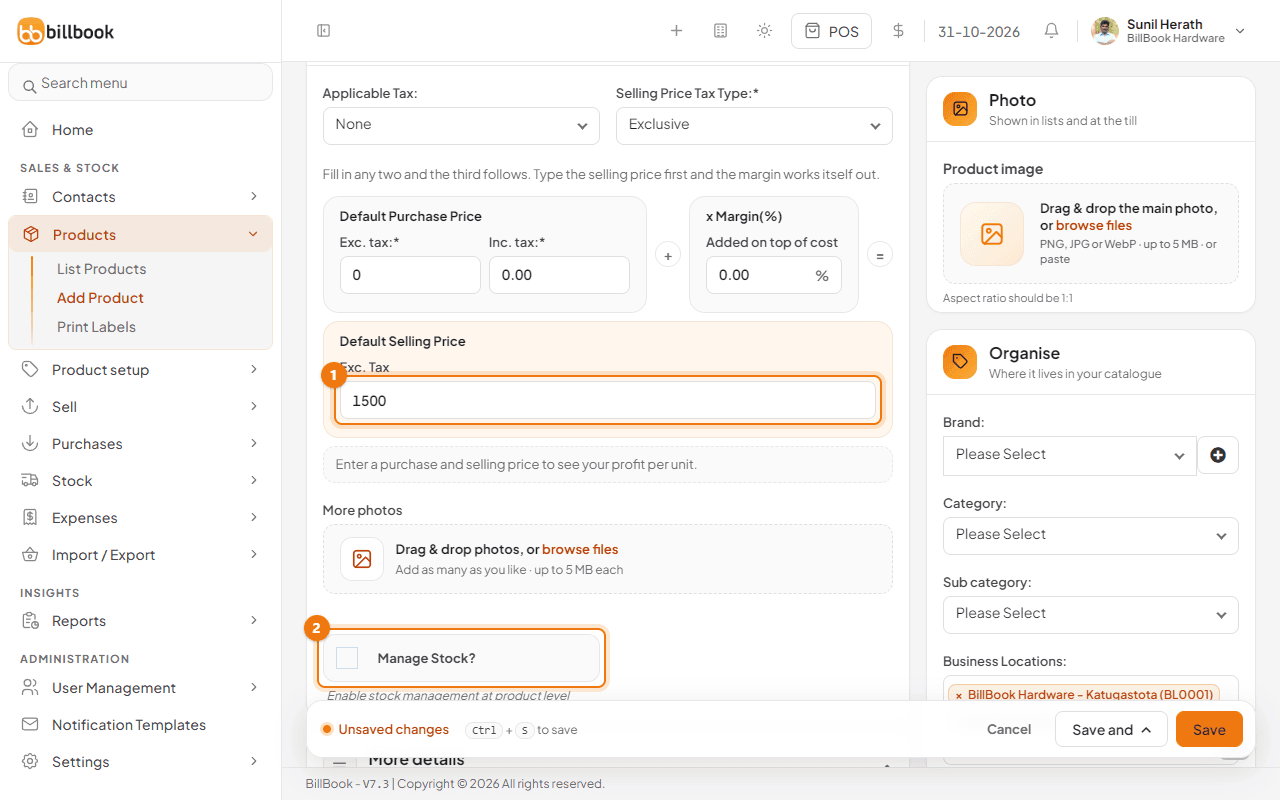
- Under Default Selling Price, enter the price in Exc. Tax (1), for example 1500. Enter 0 for the purchase price if you do not buy the service from anyone.
- Untick Manage Stock? (2). This is what makes it a service. BillBook no longer counts stock for it, and the Alert quantity box disappears.
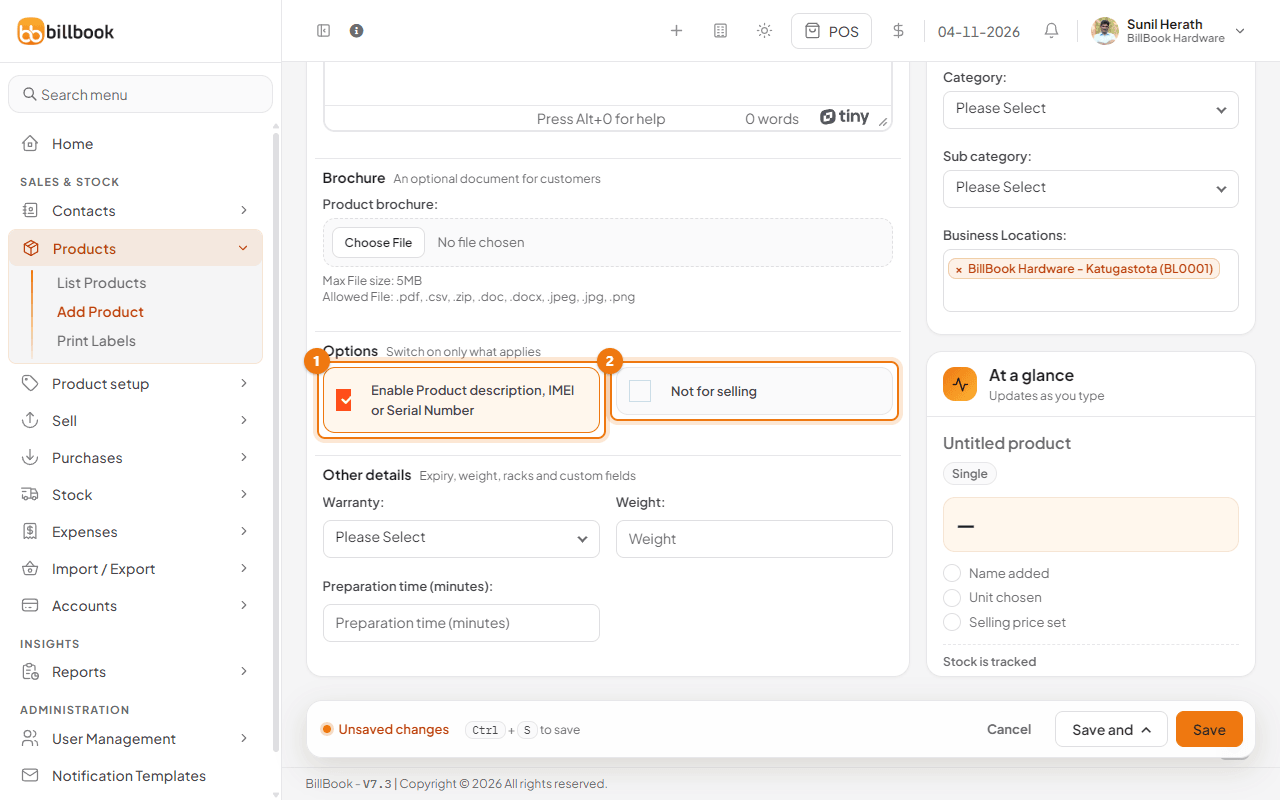
- Open More details and tick Enable Product description, IMEI or Serial Number (1) if you want to type details, such as the paint colour code, each time you sell the service.
- Leave Not for selling (2) unticked. It is meant for items you keep on the list but do not sell.
- Under Business Locations, choose the locations that offer the service, then select Save.
BillBook shows Product added successfully.
Sell a service in POS#
- Go to Sell > Sales counter.
- In the search box, type the service name or SKU, for example SRV-0001, and press Enter. In the product grid, services show Service instead of a stock count.
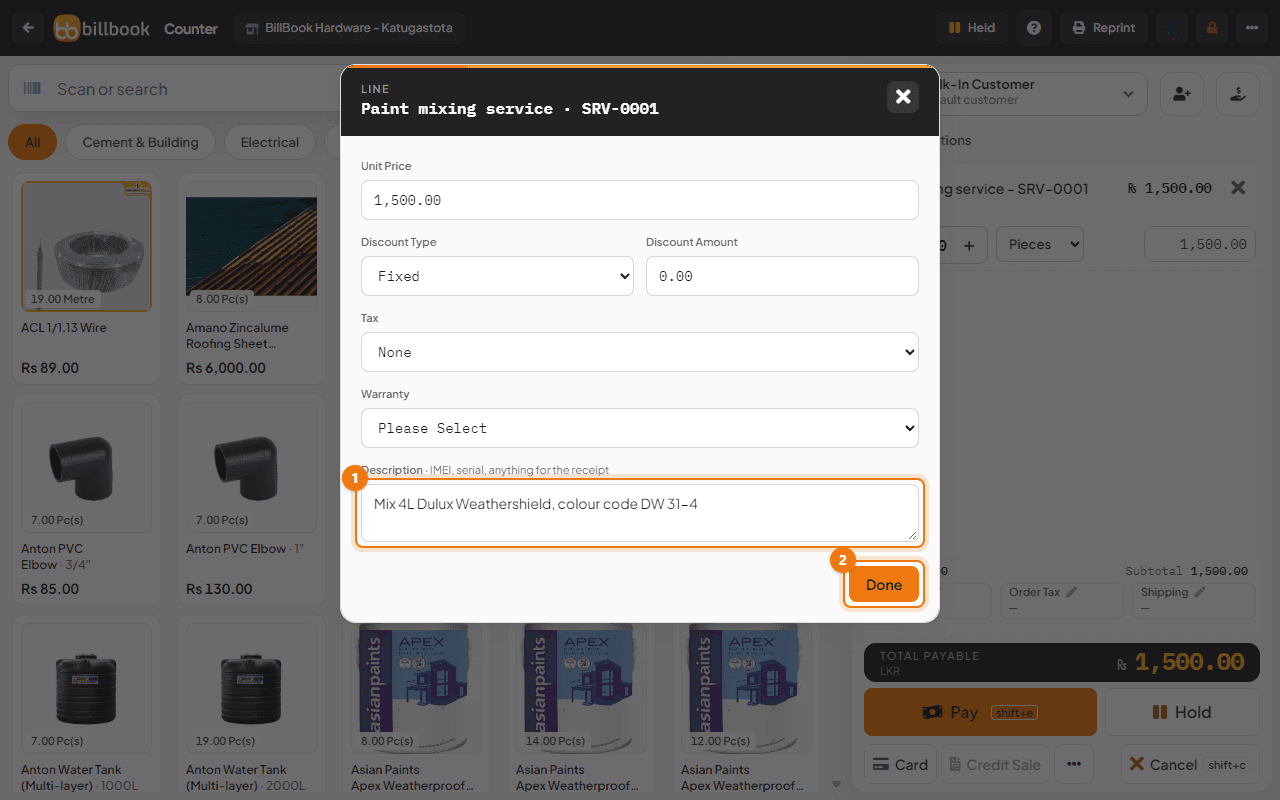
- If you ticked Enable Product description, IMEI or Serial Number, a window opens for the sale line. Type the details in Description (1), for example Mix 4L Dulux Weathershield, colour code DW 31-4, then select Done (2).
- Add the paint or any other items, then finish the sale with Pay, Card or Credit Sale, or park it with Hold. See Sell from the POS screen.
Because the service has no stock, you can sell it as often as you like and it never shows as out of stock.
Print service descriptions#
The details you type at the till can be printed on the invoice, so the customer and your workshop see the same instruction.
- Go to Settings > Invoice Settings and open the Invoice Layouts tab.
- Select Edit on the layout you use, and open the Items table tab.
- Tick Show sale description (1). This prints the text you typed in the Description box of each line.
- Tick Show product description (2) as well if you also want the description saved on the product itself, under More details on the product form, to be printed.
- Select Update (3).
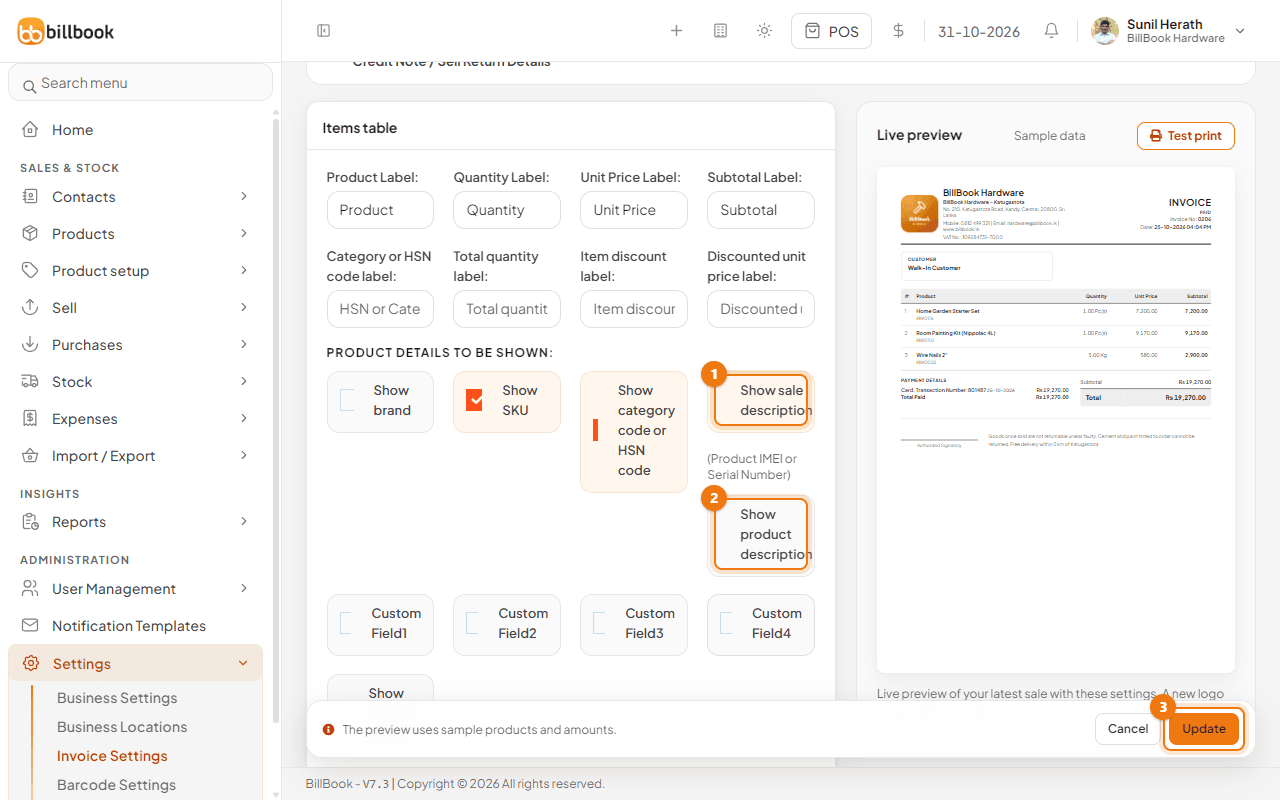
New invoices and receipts that use this layout now print the description under the item name.