
Stock count
Last updated: 7 November 2026 · 3 min read
A stock count checks the shelf against BillBook. You count the goods, type the numbers in, and BillBook works out which items are short or over and saves the differences as stock adjustments for you. Do it for one aisle at a time, or for the whole shop at month end.
Before you start: Stock Adjustment must be switched on in Settings > Business Settings > Modules. Count only when sales and transfers for that location are up to date, so the system quantities are right.
Start a count#
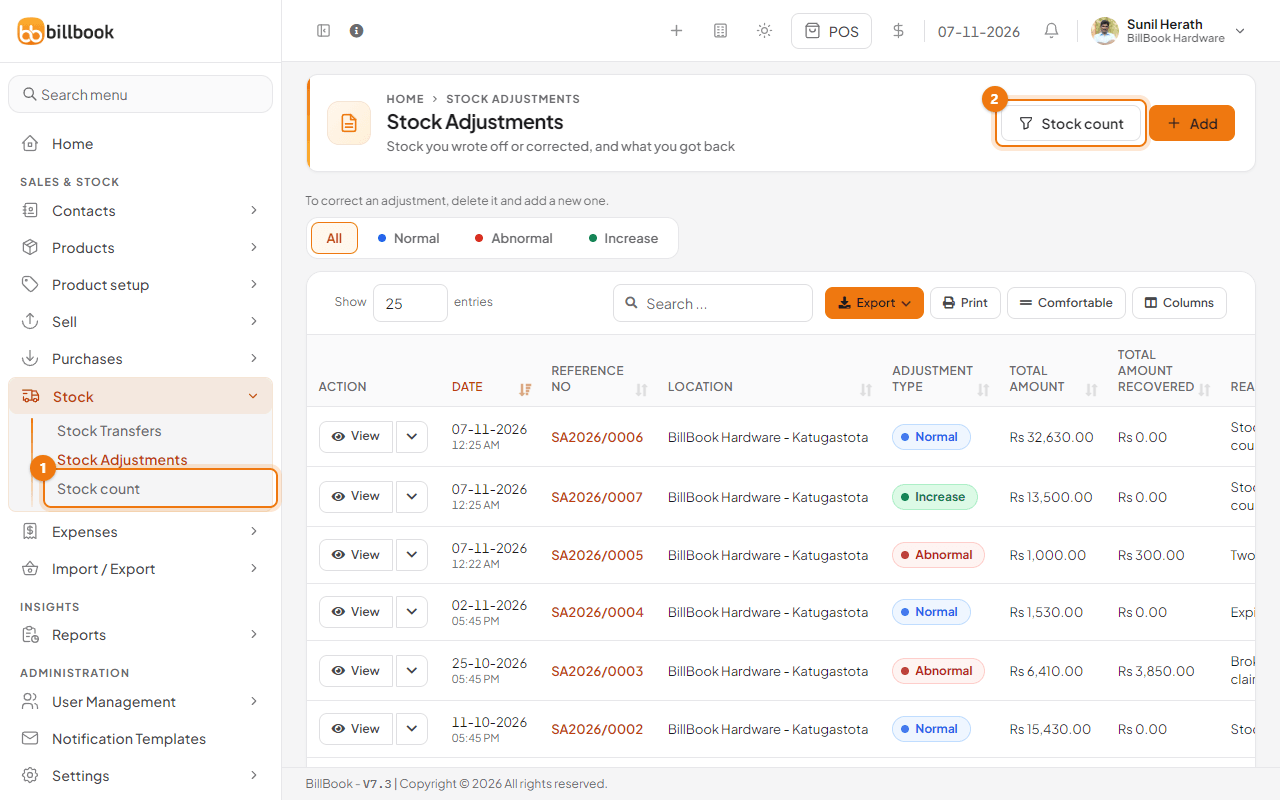
- Go to Stock > Stock count (1). You can also select Stock count (2) at the top of Stock > Stock Adjustments.
- Choose the Business Location (1) you are counting.
- To count only part of the shop, choose one or more Category (2) and Brand values. Leave both empty to load every product at the location.
- Select Load products (3).
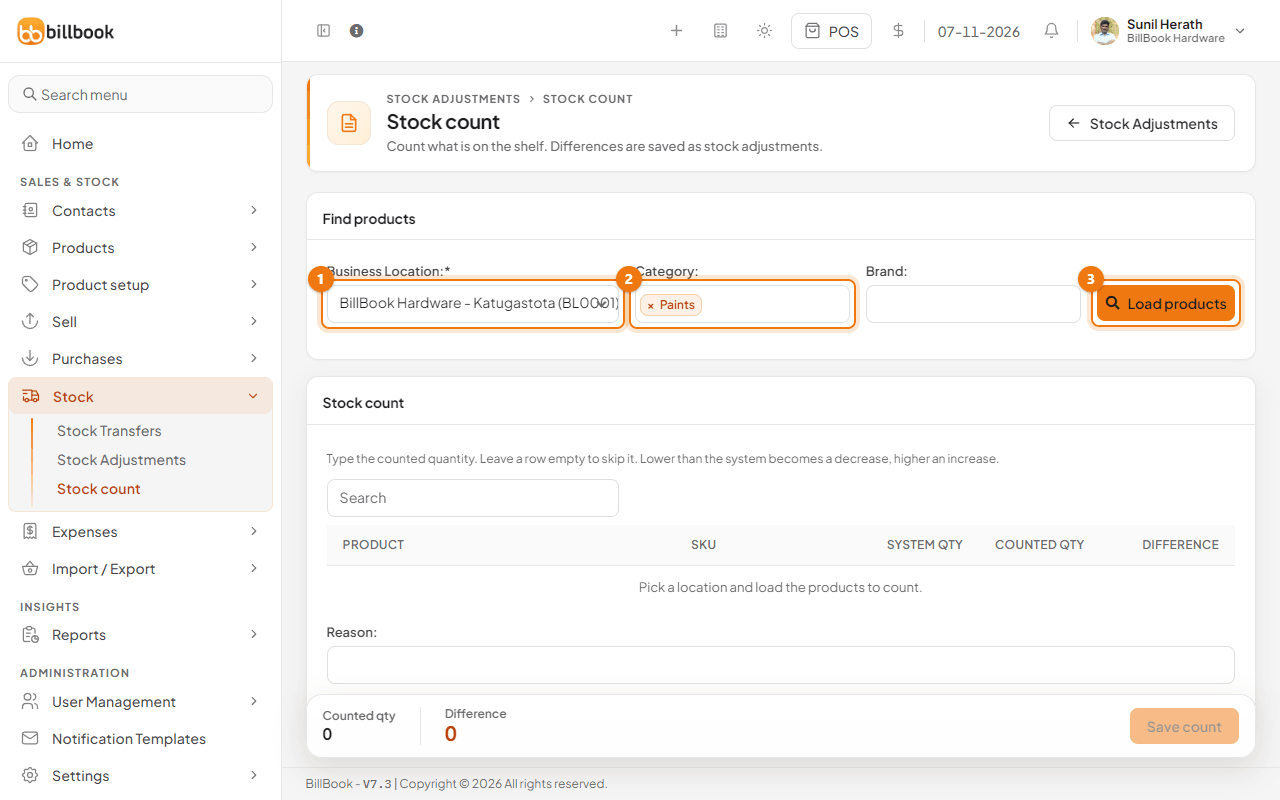
BillBook lists the products with their SKU and the System QTY, which is the quantity BillBook thinks you have. Use the Search box above the table to find a product quickly.
Enter counted quantities#
- Type what you actually counted in the Counted QTY box (1) of each product.
- Leave a box empty to skip a product. Skipped products are not changed.
- Check the Difference column (2). A number in red means fewer on the shelf than in BillBook, and a number in green means more.
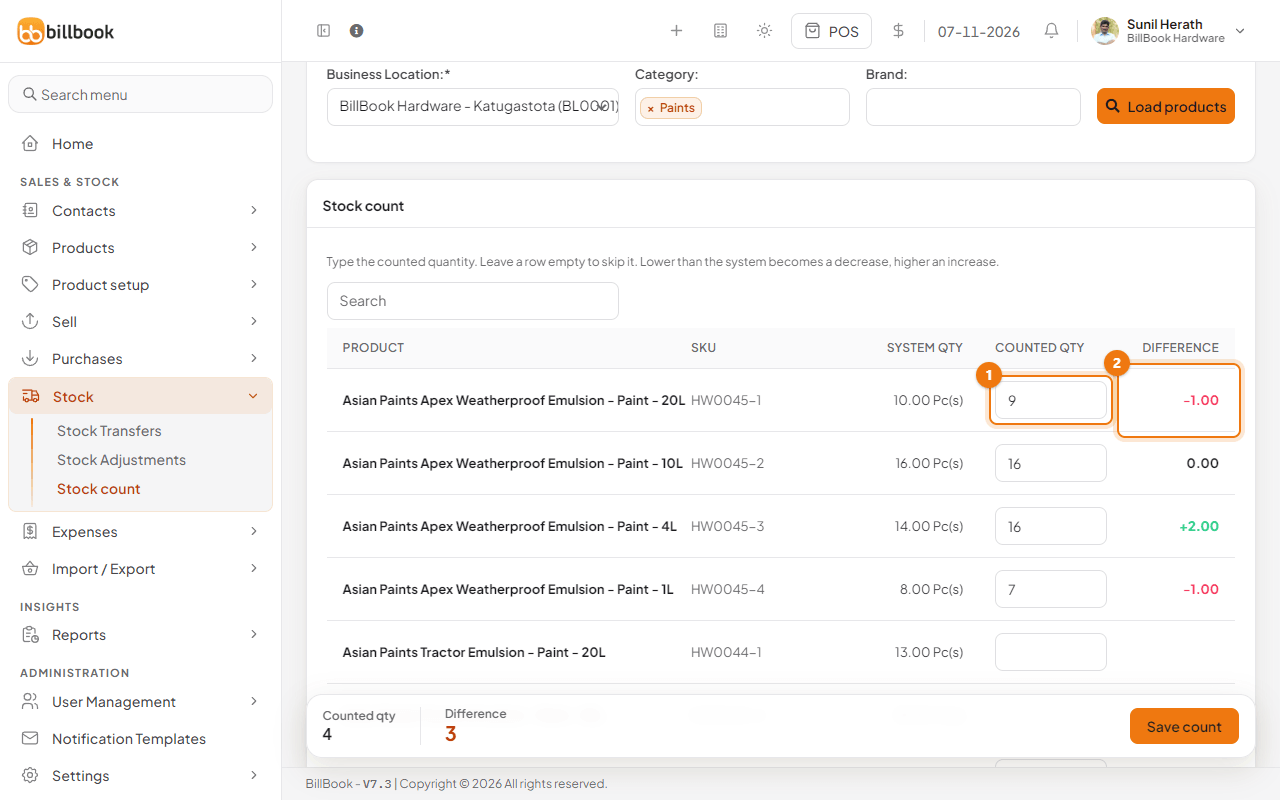
At the bottom of the screen, Counted qty shows how many products you have counted and Difference shows how many of them do not match.
Tip: Type 0 when a product is on the list but you have none on the shelf. An empty box means you did not count it.
Post differences as an adjustment#
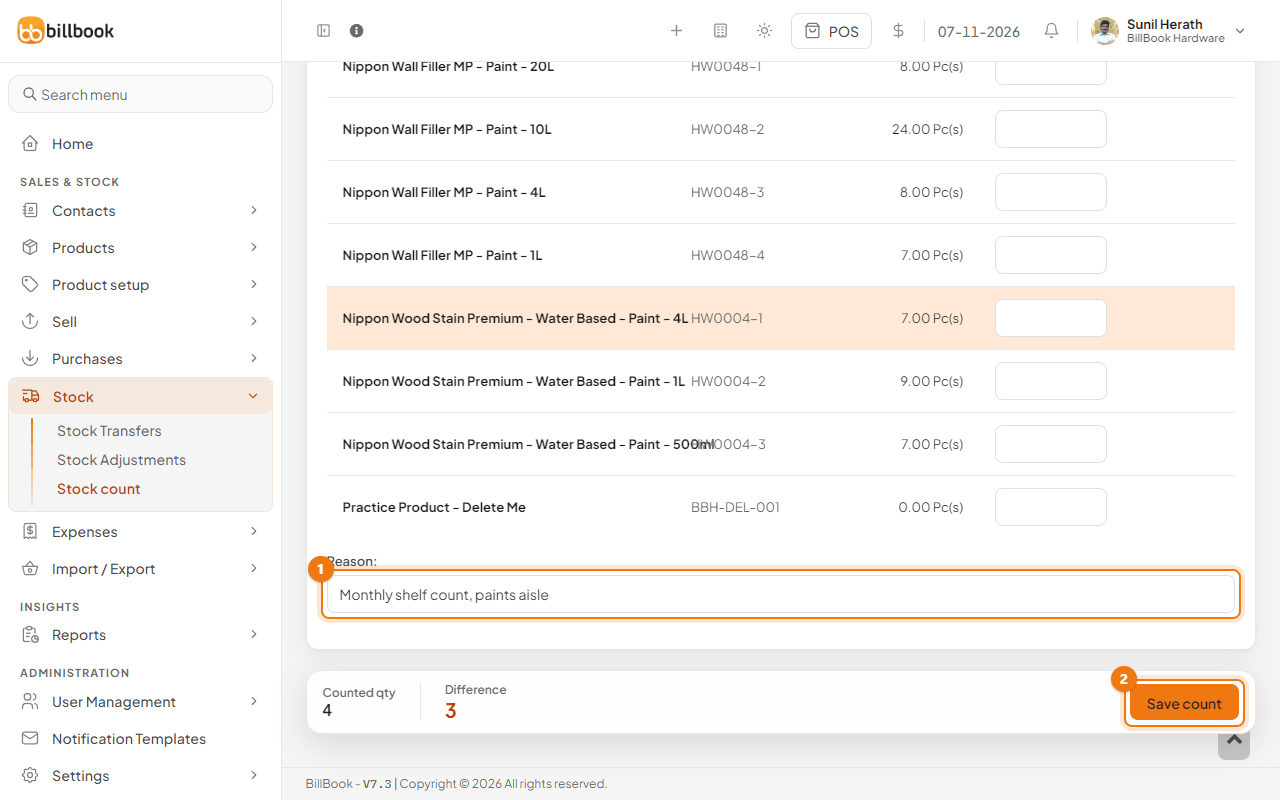
- Scroll to the bottom and write a short note in Reason (1), for example Monthly shelf count, paints aisle.
- Select Save count (2). The button stays greyed out until you have typed at least one counted quantity.
BillBook saves the count and shows a message such as Stock count saved: 2 short, 1 over. It takes you to Stock > Stock Adjustments, where the differences now appear as adjustments marked Stock count:
- Products that were short are taken off stock in one Normal adjustment (2 here).
- Products that were over are added to stock in one Increase adjustment (1 here).
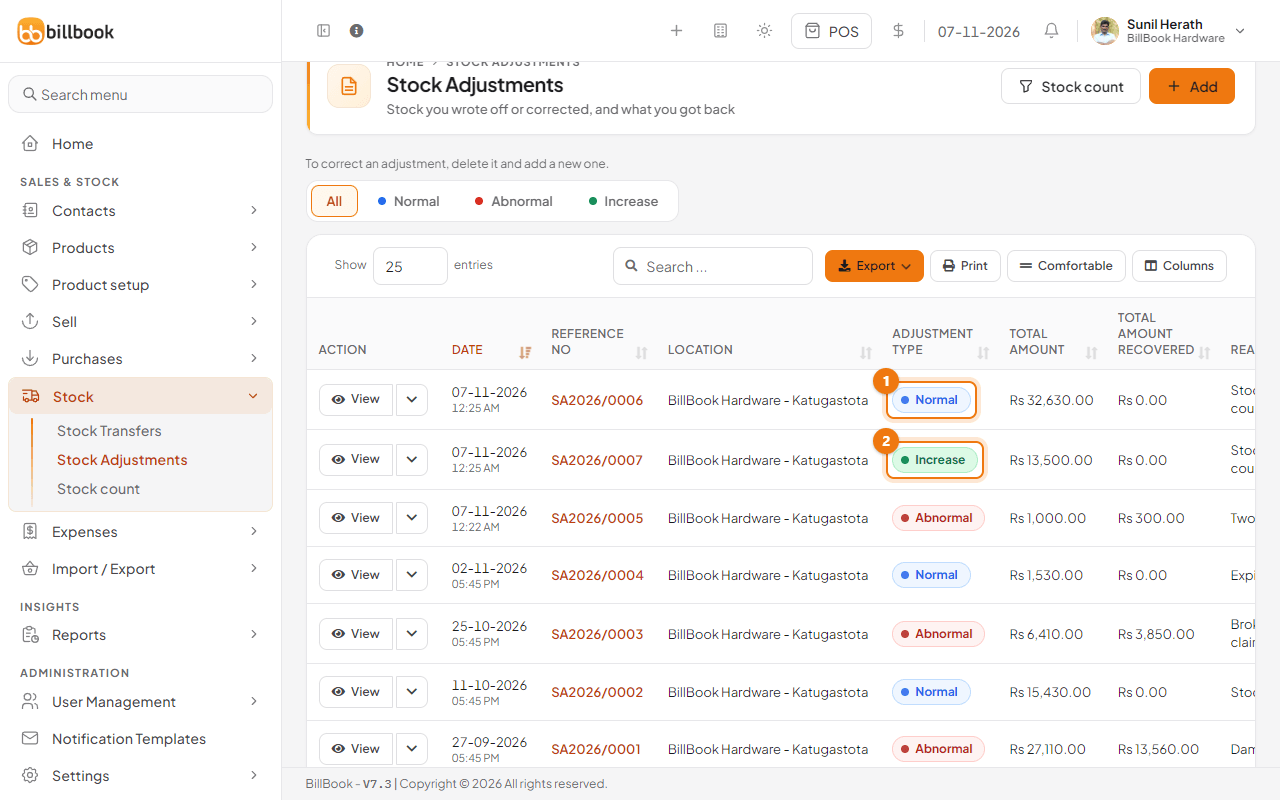
Products that matched, such as the second row in the example, create nothing. Open an adjustment with View to see every product it changed.