
Find your way around the POS screen
Last updated: 7 November 2026 · 6 min read
The POS screen is where every counter sale happens, so it helps to know what each button does before the shop gets busy. This page walks through the screen from the top left to the bottom right. For the steps of a sale itself, see Sell from the POS screen.
Before you start: Open Sell > Sales counter, or select POS in the header. If you have no open register, open one on a counter first. See Cash register: open and close.
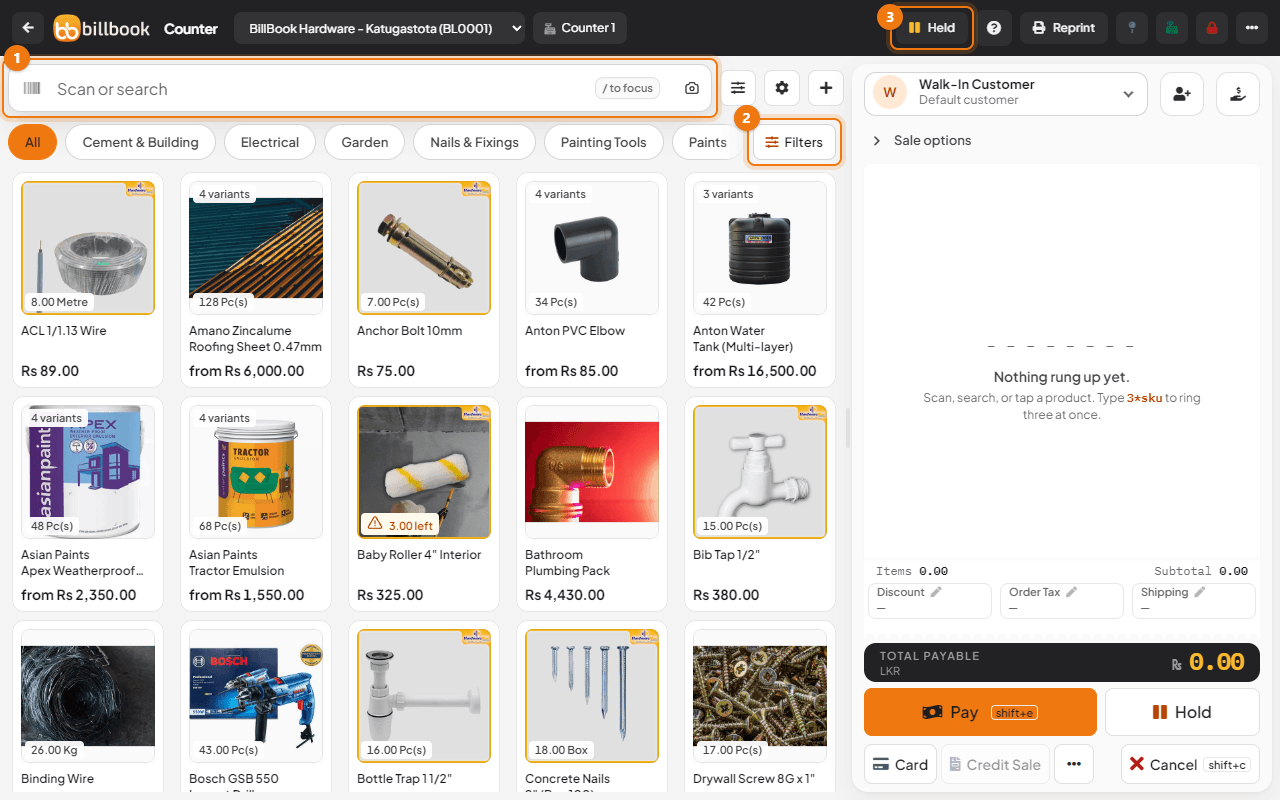
The header at the top#
The dark bar at the top holds the things a cashier needs between sales.
- The back arrow and the billbook logo take you out of the POS. The location name shows where the stock comes from, and the pill next to it shows the counter your register is on, for example Counter 1.
- Held (3) opens the list of sales you parked with Hold, and shows how many are waiting. See Hold, resume and delete held sales.
- The ? button, Tour this page, starts a short guided tour of the screen.
- Reprint prints the last receipt again. It is greyed out until you finish a sale.
- Counters takes you to Sell > Sales counter to see which counters are free or busy. See Cash counters.
- Register Details and Close Register show and close your cash register.
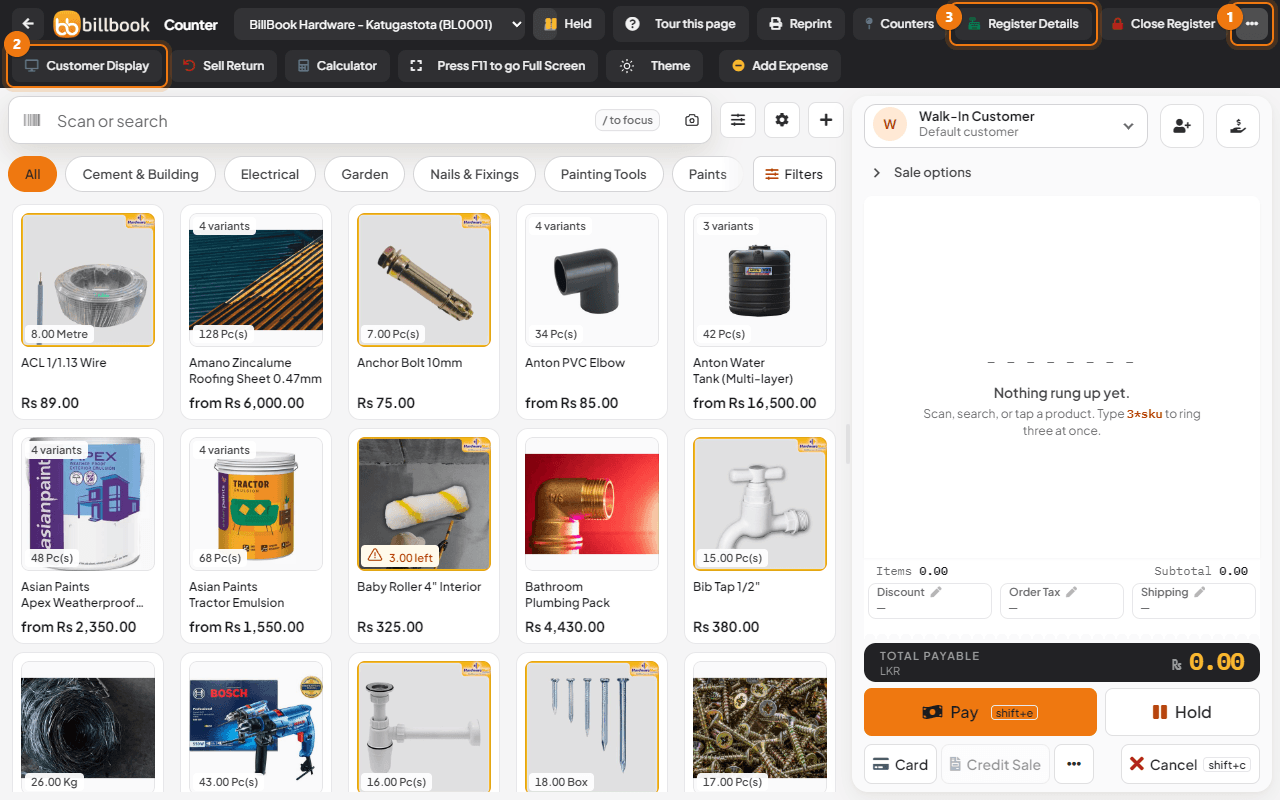
- The ... button on the right opens the rest of the tools: Customer Display, Sell Return, Calculator, full screen, Theme and Add Expense. On a wide screen these sit in the header itself.
To open the second row of tools, select the ... button (1). Then select the tool you need, for example Register Details (3) or Customer Display (2).
Search, categories and filters#
Below the header, the left side of the screen is the catalog.
- Use the search box (1 in the first picture above) to scan a barcode or type a name or SKU. Press / to jump to it from anywhere on the screen. Type 3*HW0106 to add three of one item at once.
- Next to the search box, the camera button is Scan barcode, the sliders button is Configure product search, the gear is Product display (3) and the + button is Add new product.
- Select a category chip such as Electrical or Paints to show only those products. All shows everything. If you have many categories, the last chip, More, opens the full list.
- If you have featured products, a Featured Products chip opens your favourites in a strip above the grid.
- Select Filters (1 in the picture below) to choose a brand, a stock level (All stock, In stock, Low stock or Out of stock) (2 in the picture below) and the sort order, for example A-Z or Best selling.
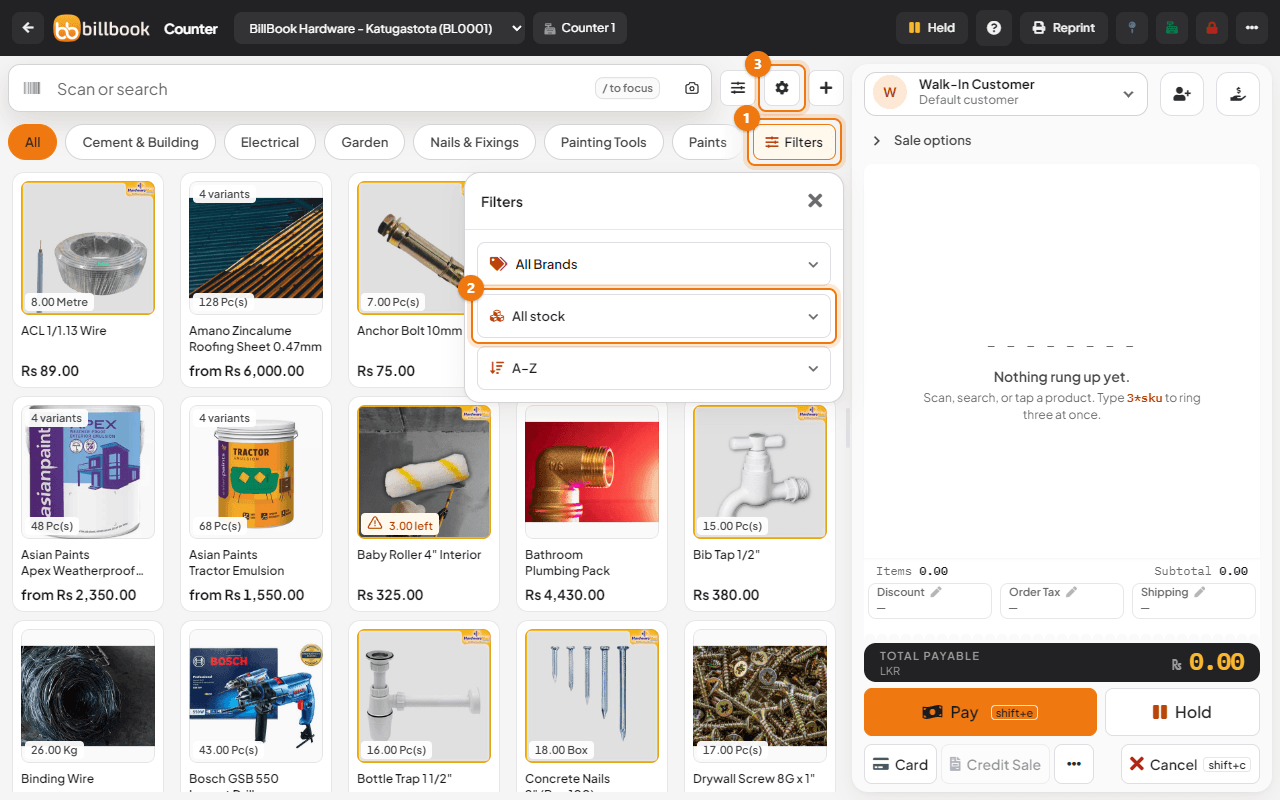
In Product display you can make the cards bigger (M, L or XL) and choose how many columns the grid has. BillBook remembers the choice on this screen.
Product cards#
Each card shows the product photo with its stock on it, for example 19.00 Metre, then the name and the price. When stock is low the card shows a warning such as 3 left, and Out when nothing is left. A small orange number on a card shows how many of that item are already in the bill. Select a card to add one to the bill, or select it again to add more.
A product that comes in several colours or sizes is one card with a chip such as 6 variants and a from price. Select it to open Choose a variant, pick the colour first and then the size, and the item goes into the bill. A single option, for example only one size, is added straight away.
The bill#
The right side of the screen is the sale.
- The customer box at the top starts on Walk-In Customer. The two buttons beside it are Add a new contact and Receive Payment, for a customer who comes to pay what they owe. If the customer has a balance, a red Customer Due line shows under the box.
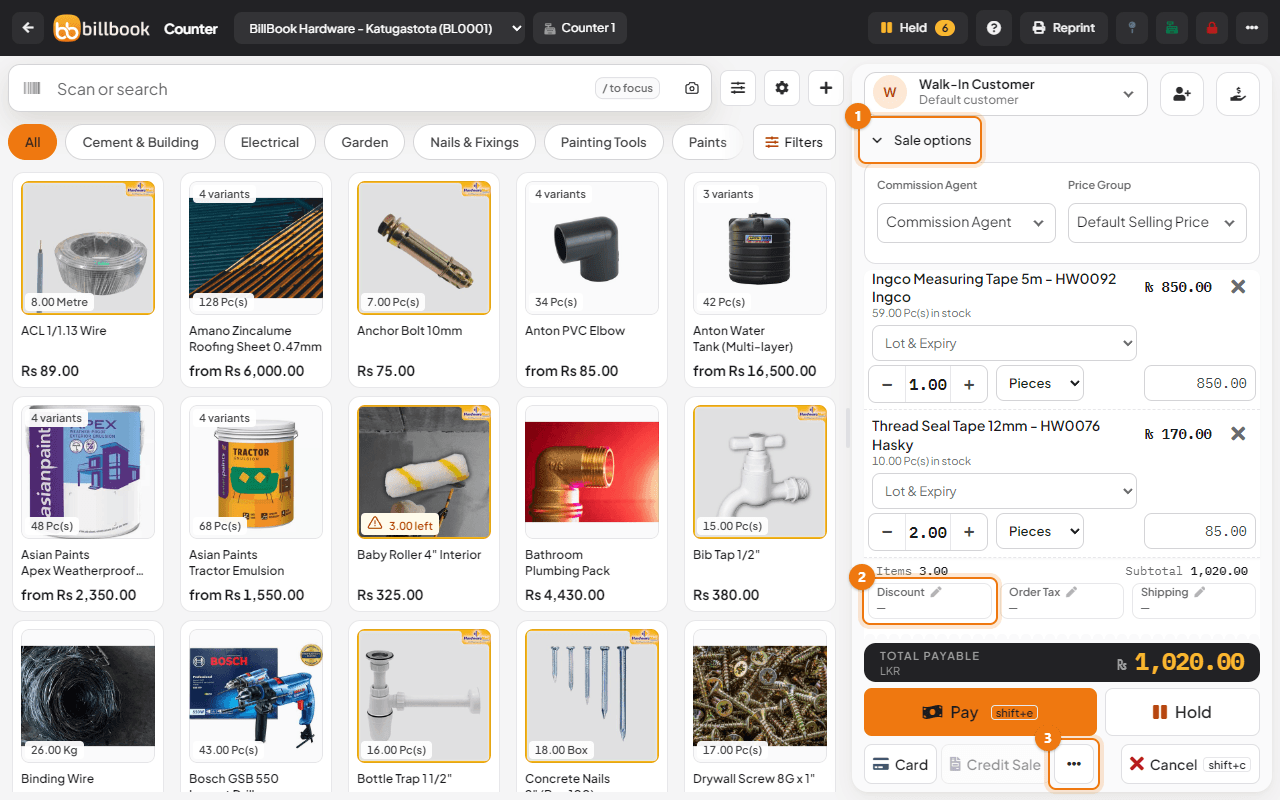
- Sale options (1) is a folded panel. Select it to open the Price Group and other fields your business uses, such as the type of service. The chips next to it show what is chosen.
- Each line shows the item name, the stock left, the quantity with - and + buttons, the unit and the price. Select the name to change the price, add a line discount or write a description. Select the x to remove a line.
- Under the lines, Items and Subtotal are followed by Discount (2), Order Tax and Shipping. If your business uses types of service, a Packing Charge box appears too. Select any of them to change it.
- Total Payable is the amount the customer pays.
Payment buttons and the More menu#
The buttons at the bottom of the bill finish or park the sale.
- Pay takes the full amount in cash, or opens the Payment window where you can split the payment. Its shortcut, shift+e, is shown on the button.
- Hold parks the sale to finish later.
- Card pays the full amount by card, and Credit Sale leaves the amount unpaid for a named customer.
- Cancel clears the bill.
- The ... button (3) opens More: Hold with a note, Draft and Quotation under Save as, Recent Transactions, the Screen split buttons and Shortcuts.
For what each payment button does, see Sell from the POS screen and Credit sales and partial payments.
Resize the screen#
If the bill is too narrow or the catalog too small, drag the thin divider between them to make one side wider. Double-select the divider to put it back. You can also choose a preset in the More menu under Screen split (catalog / bill): 30 / 70, 50 / 50 or 70 / 30.
Keyboard shortcuts#
Select ... and then Shortcuts to see the list of keys, for example shift+e for Pay, shift+d for Draft and shift+c for Cancel. The full table is on Sell from the POS screen.