
Email (SMTP) setup
Last updated: 7 November 2026 · 4 min read
BillBook sends emails such as invoices and order notices through a mail (SMTP) server. You can use your own business mailbox, such as a Gmail or Outlook address, so the messages come from your shop's address.
Before you start: You need permission to open Settings > Business Settings, and the sign-in details for your mailbox. Gmail and several other providers need an app password rather than your normal password (see below).
Business email settings#
- Go to Settings > Business Settings. Select Show advanced settings under the list on the left, then select Email Settings. The tag next to it reads Default when you use the system email, Configured once your own mail server is saved, and Not set before that.
- Choose how messages are sent. Use the system email (1) sends through the email service set up for the whole app, so there is nothing to configure. Use my own mail server (2) sends from your own address through Gmail, Outlook or any SMTP server.
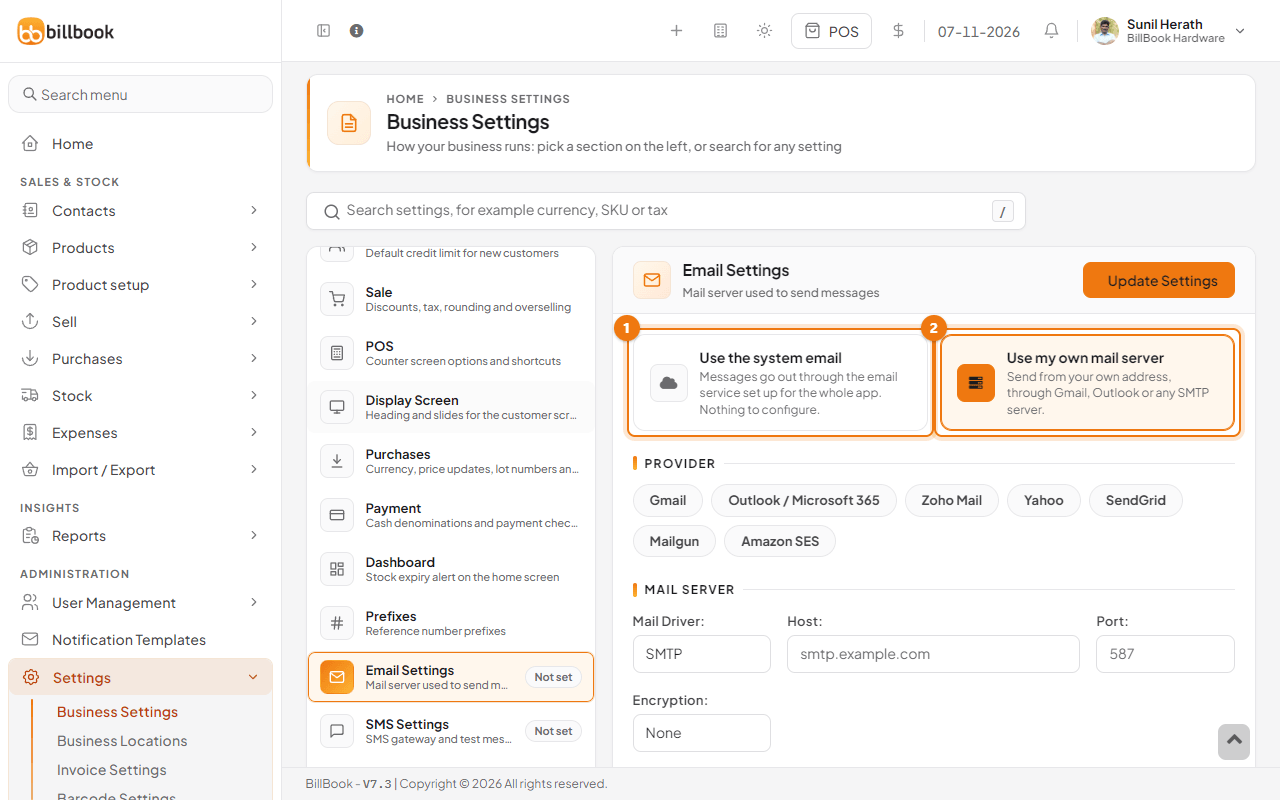
If you use your own mail server, fill in these parts. Ready-made values for a provider are on the next picture.
- Under Mail server, keep Mail Driver on SMTP. Enter the Host (1) and Port, and choose the Encryption: None, TLS (STARTTLS) or SSL.
- Under Sign in, enter the Username (2) and Password. Select the eye icon to show or hide the password.
- Under Sender, enter the From Address and From Name, for example [email protected] and BillBook Hardware. Customers see these on every email.
- Select Update Settings.
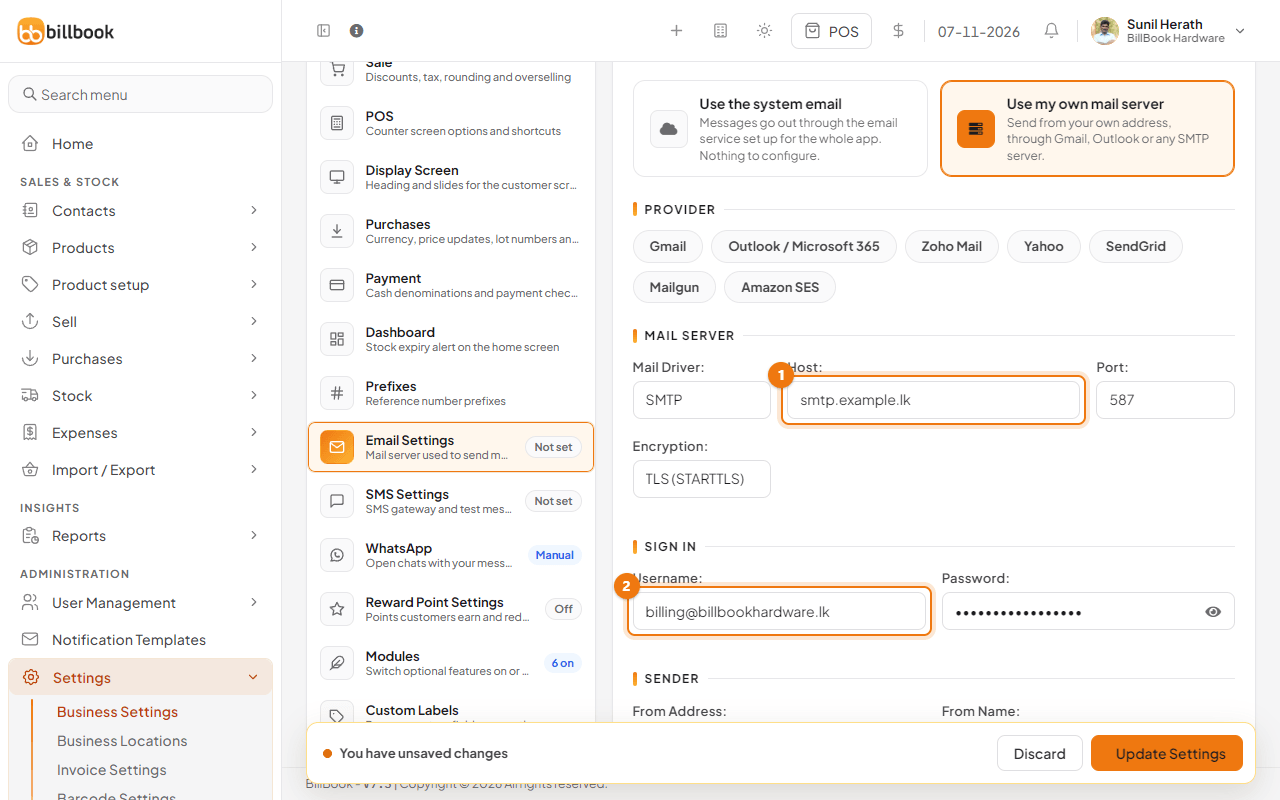
Note: Enter the real details from your email provider. The examples here, such as smtp.example.lk, are made up.
SMTP for password reset#
Password-reset ("Forgot password") emails and some system alerts do not use the business email settings above. BillBook sends them from its own mail service, so there is nothing for you to set up.
If a password-reset email does not arrive within a few minutes, check your spam folder, then contact BillBook support on WhatsApp +94 77 393 4001.
Gmail setup and troubleshooting#
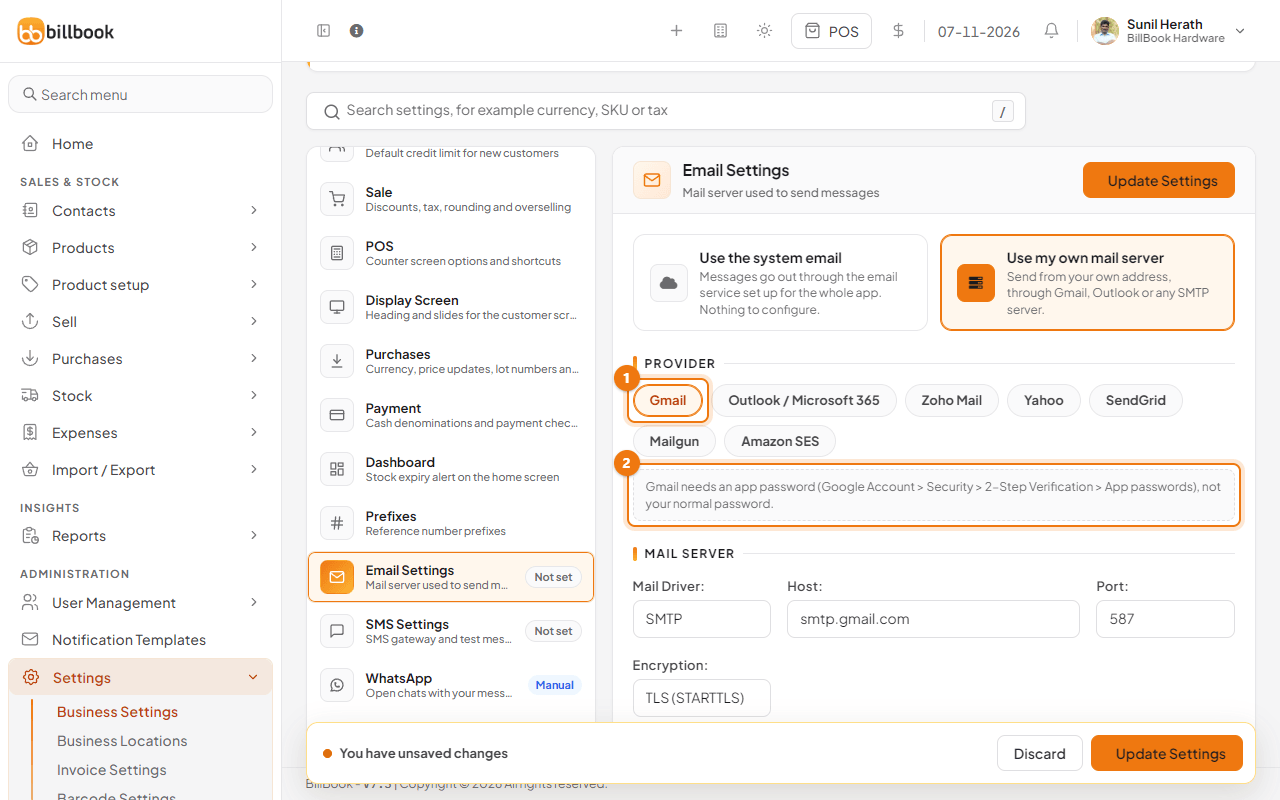
Select a provider button under Provider to fill in its host, port and encryption for you, and to show a tip for it. The buttons are Gmail, Outlook / Microsoft 365, Zoho Mail, Yahoo, SendGrid, Mailgun and Amazon SES.
- Select Gmail (1). BillBook fills in smtp.gmail.com, port 587 and TLS (STARTTLS).
- Read the tip (2): Gmail needs an app password, not your normal password.
- In your Google account, turn on 2-Step Verification, then open your Google account's Security page, choose 2-Step Verification, then App passwords, create a password for BillBook and copy it.
- Back in BillBook, enter your Gmail address as the Username and paste the app password as the Password.
If sending fails, check these first:
- The username must be your full email address.
- The password must be the app password, with no spaces added.
- The port and encryption must match: 587 with TLS, or 465 with SSL.
- For Outlook, ask your admin to allow SMTP AUTH for the mailbox.
- The host must be a public server name, so a name that only works inside your office network is rejected.
Send a test email#
Test your settings before you rely on them. The test uses what is on screen, so you can try it before you save.
- Fill in the Host and the From Address first. BillBook asks for both before it will test.
- Under Test the connection, enter your own address in Send the test to (1). If you leave it empty, BillBook sends the test to the From Address.
- Select Send test email (2).
- If the settings work, BillBook shows Email configurations verified successfully and the test message arrives in the mailbox. If not, it shows the error from the mail server, which usually says what is wrong.
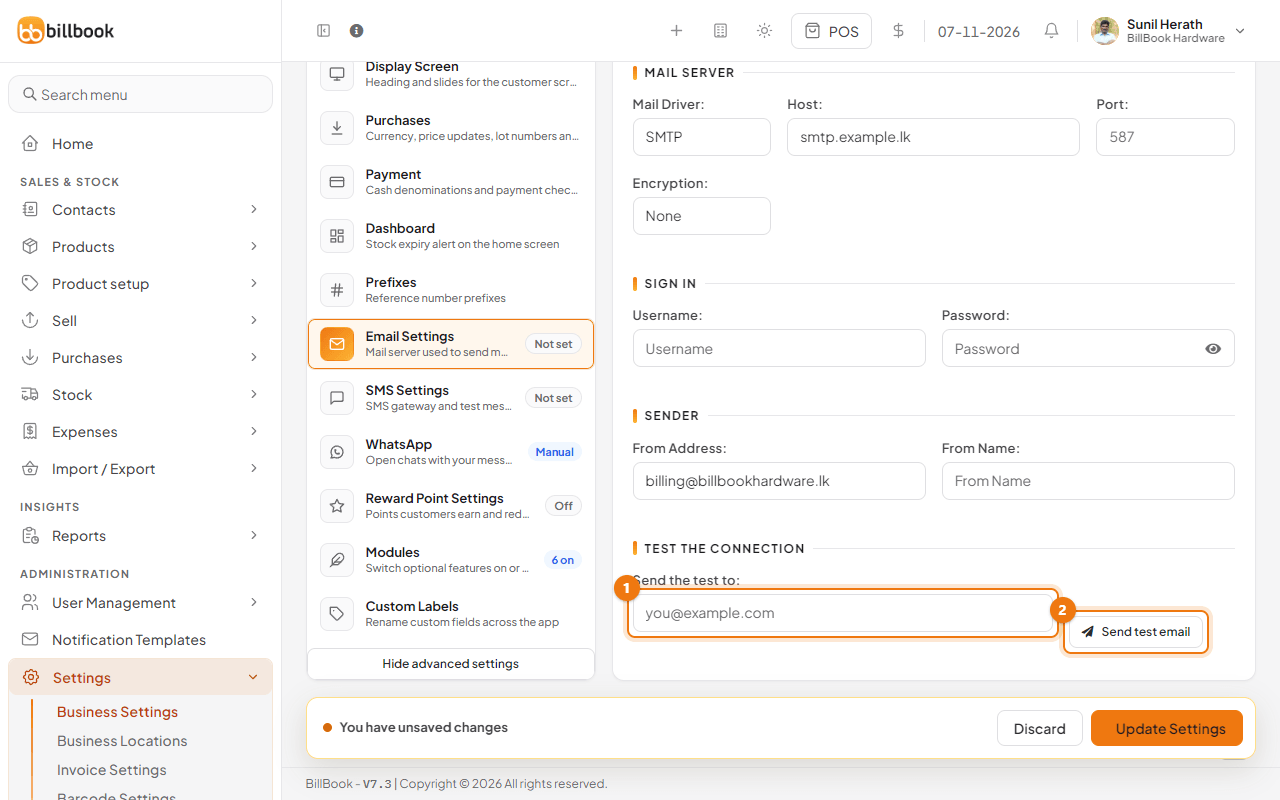
Select Update Settings to keep your settings once the test works.