
Opening stock
Last updated: 7 November 2026 · 3 min read
Opening stock is what you already have in the shop on the day you start using BillBook, for example 12 tins of paint at Katugastota and 6 at Colombo 06. Enter it once per product and location, and BillBook counts sales and purchases from there.
Before you start: The product must have Manage Stock? switched on. See Add a product.
Add opening stock to a product#
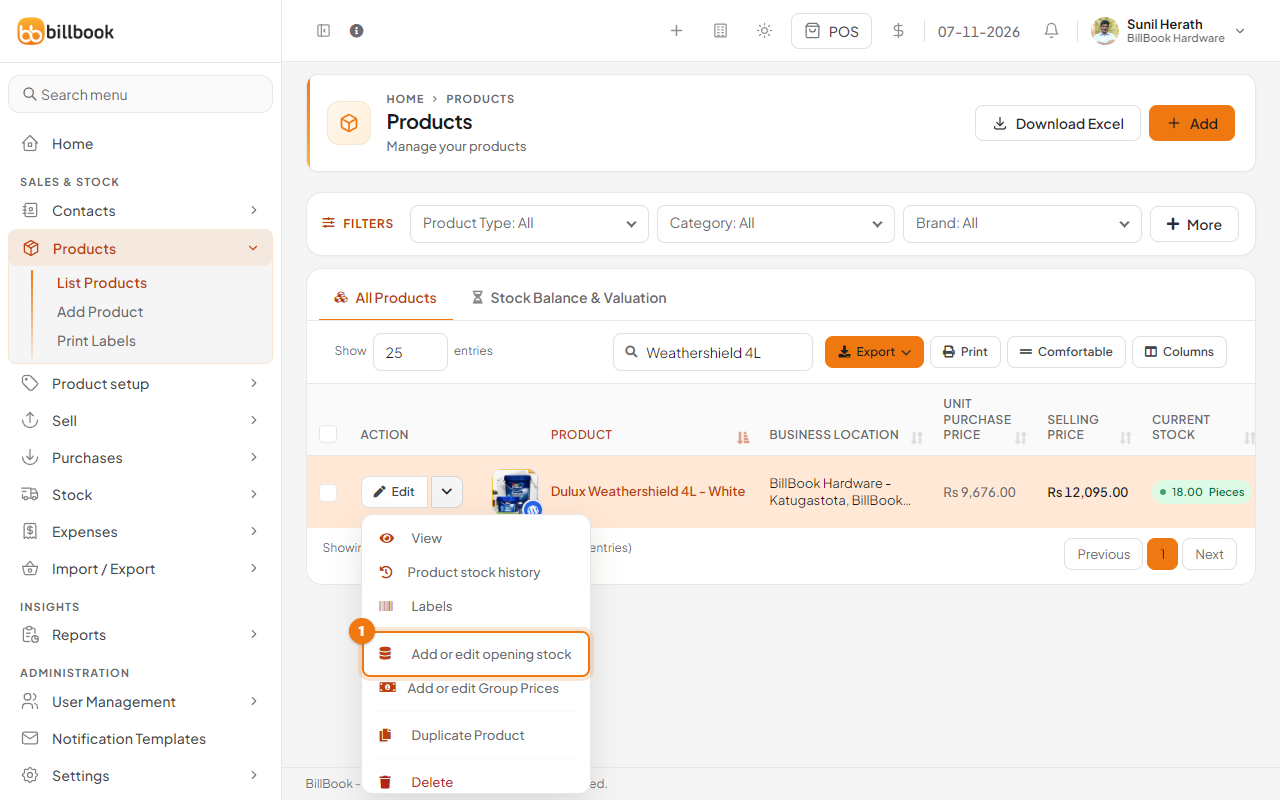
- Go to Products > List Products and find the product, for example Dulux Weathershield 4L - White.
- Select the arrow next to Edit and choose Add or edit opening stock (1).
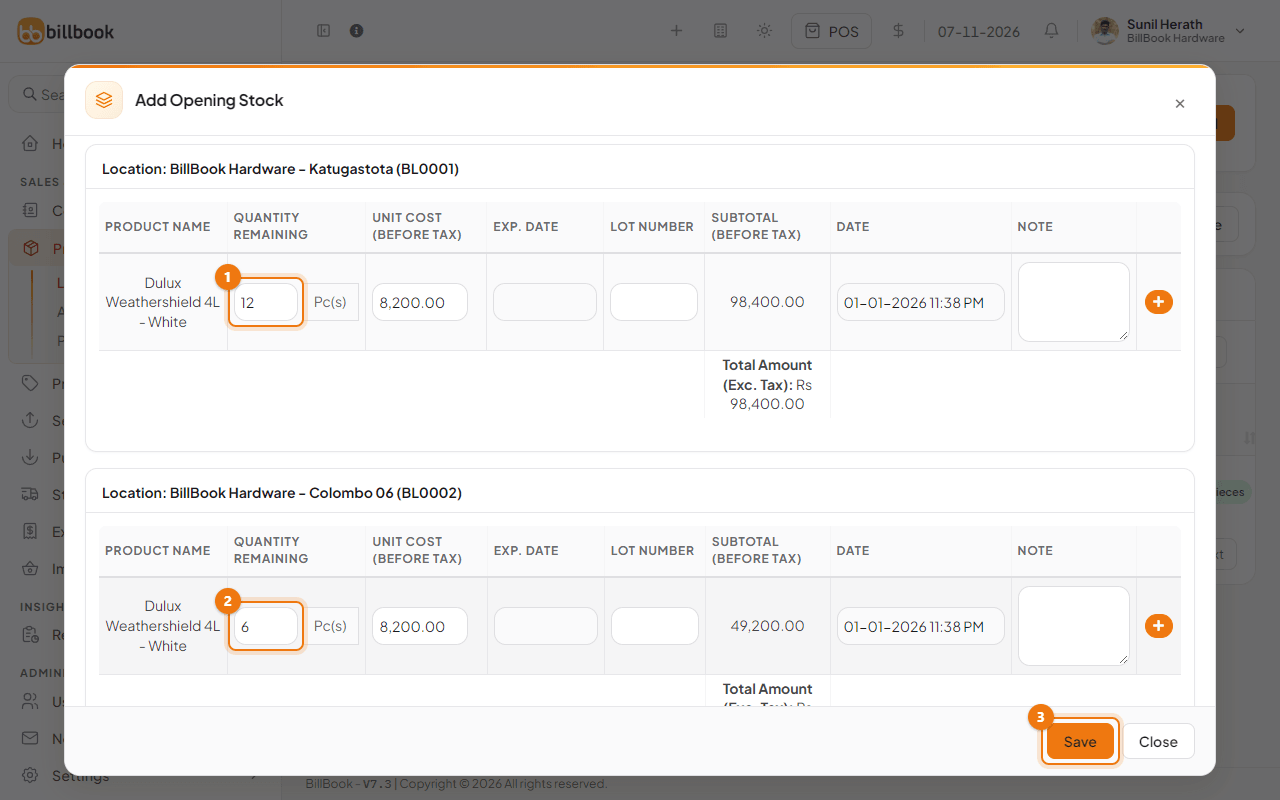
- The pop-up has one block for each business location. Enter the Quantity Remaining for BillBook Hardware - Katugastota (1), for example 12, and for BillBook Hardware - Colombo 06 (2), for example 6.
- Check the Unit Cost (Before Tax). It starts as the product's purchase price, here Rs. 8,200.00. The Subtotal shows 98,400.00 for 12 pieces and 49,200.00 for 6. The Exp. Date and Lot Number boxes you see here are explained in the next section.
- The Date is filled in with the first day of your financial year, for example 01-01-2026. Opening stock is the stock you held when the year began, and your stock value and profit reports count it from that date, so leave it unless you have a reason to change it.
- Add a Note if you want one, then select Save (3). BillBook shows Opening stock added successfully.
To change the numbers later, open the same menu item again. The boxes show what you saved.
Note: If some of this stock has already been sold, BillBook will not let you remove it. Use a stock adjustment instead.
Lot number and expiry#
The Exp. Date and Lot Number boxes only show when you switch those settings on. They are on in the screenshot above. Most hardware shops leave them off.
- Enable Lot number is in Settings > Business Settings, in the Purchases group.
- Enable Product Expiry is in Settings > Business Settings, in the Product group.
Once they are on, each opening stock line gets Lot Number and Expiry Date boxes. Use them for goods such as paint or adhesive that you track by batch.
Import opening stock in bulk#
Use this when you have many products, for example after importing a product list. The products must already exist and have Manage Stock? on.
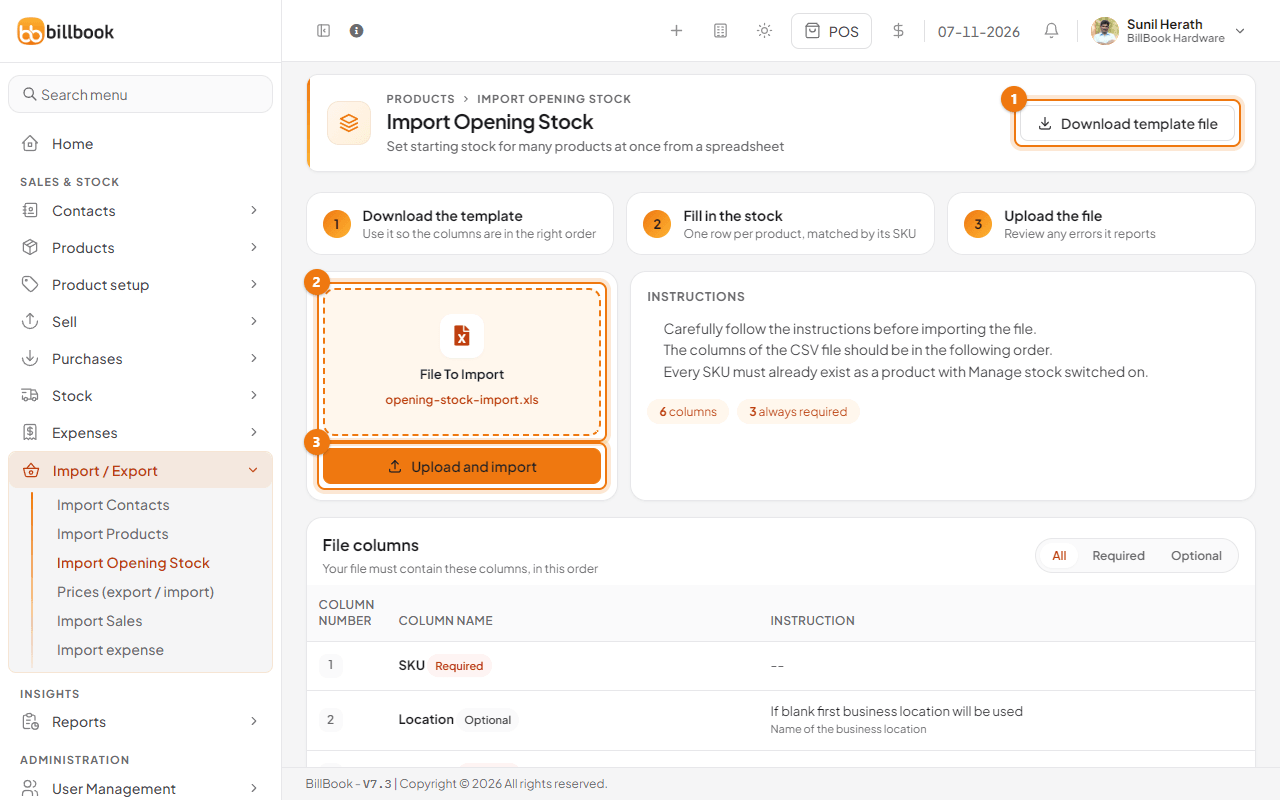
- Go to Import / Export > Import Opening Stock.
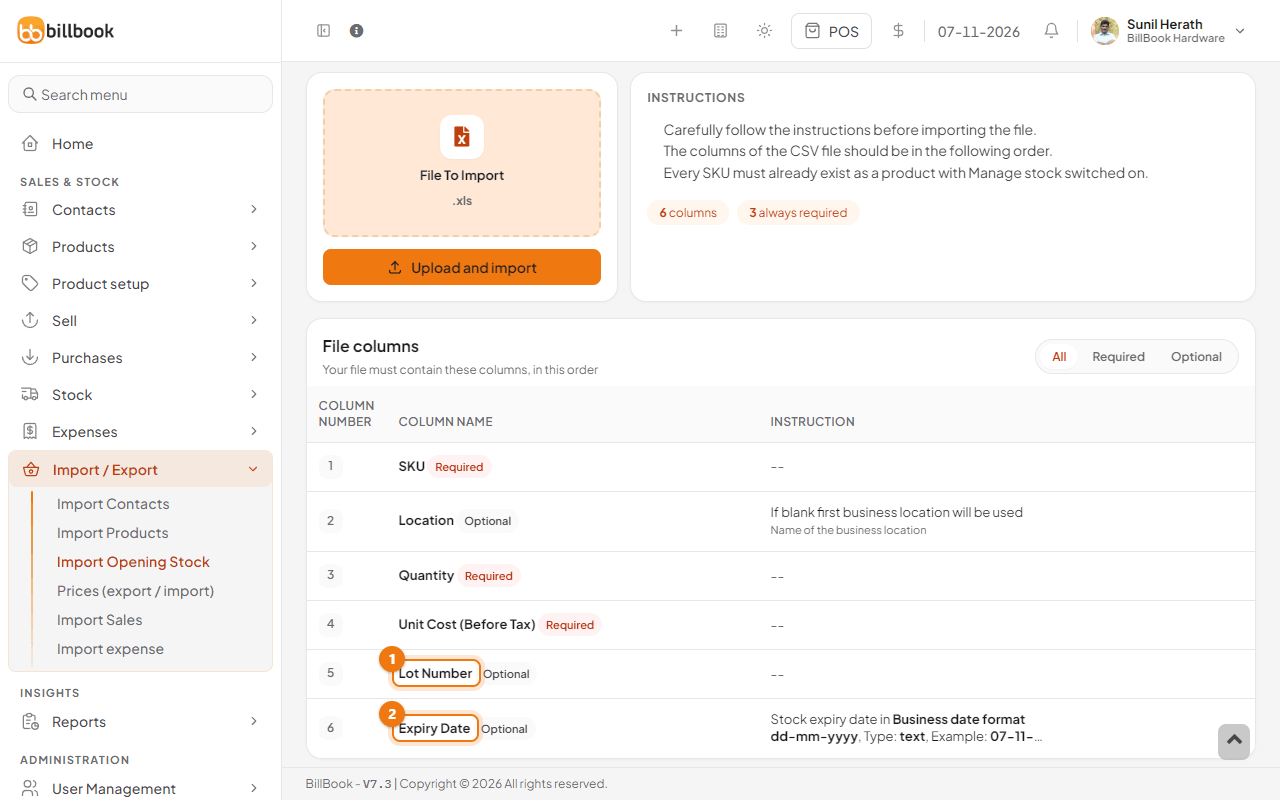
- Select Download template file (1). It has six columns: PRODUCT SKU, LOCATION NAME, QUANTITY, UNIT COST (BEFORE TAX), LOT NUMBER and EXPIRY DATE.
- Add one row for each product and location. For example, SKU BBH-IMP-001, location BillBook Hardware - Katugastota, quantity 20, unit cost 7600. If you leave the location empty, BillBook uses the first location. PRODUCT SKU, QUANTITY and UNIT COST are required.
- Save the file as .xls. Under File To Import (2), choose it.
- Select Upload and import (3). BillBook shows File imported successfully.
The Lot Number (1) and Expiry Date (2) columns are optional. Write the expiry date as dd-mm-yyyy, for example 31-10-2026.
If a row has a problem, BillBook stops and names the row. The common ones are a SKU that is not found, a product with Manage Stock? off, a location name that does not exist, and a SKU that already has opening stock at that location. For that last one, change the stock from the product's own Add or edit opening stock screen or with a stock adjustment.