
Import contacts
Last updated: 6 November 2026 · 4 min read
If you already keep your customers or suppliers in a spreadsheet or a notebook, importing saves you typing them one by one. You fill in BillBook's template, upload it, and every row becomes a contact.
Before you start: You need permission to add customers or suppliers. Keep one contact per row, and do not change the header row.
Download the template#
- Go to Import / Export > Import Contacts (1).
- Select Download template file (2). It saves an Excel file called
import_contacts_csv_template.xlswith the 28 column headings already in the right order.
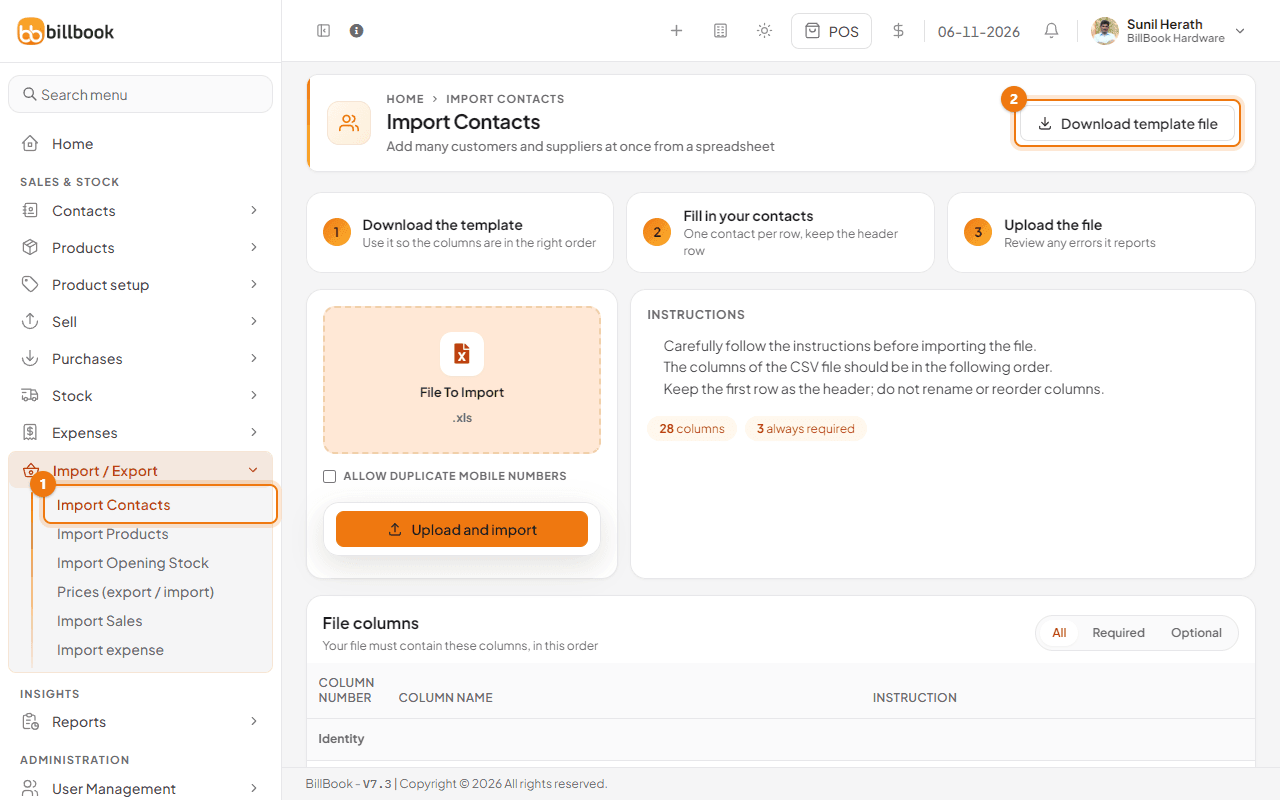
The page lists every column below the upload box, with All, Required and Optional buttons to filter them. Open the template in Excel or a similar program.
Fill in required columns#
Type one contact per row under the headings, starting on row 2. Do not rename, delete or reorder any column. Only three things are always required.
| Column | What to enter |
|---|---|
| CONTACT TYPE | 1 for a customer, 2 for a supplier, 3 for both |
| FIRST NAME | The person's first name, for example Dinesh |
| MOBILE | The mobile number, for example 0714567891 |
Suppliers and contacts of type both also need BUSINESS NAME, PAY TERM and PAY TERM PERIOD (days or months).
Everything else is optional. Some columns you may want:
- OPENING BALANCE: what the contact already owes you, for example
12000. See Opening balances for contacts. - CREDIT LIMIT: for example
100000. - CUSTOMER GROUP: the name of a group that already exists under Contacts > Customer Groups, for example
Wholesale. Leave it empty for none. - CONTACT ID: leave empty and BillBook numbers the contact for you (CO0031, CO0032 and so on).
- DOB: use the form
2026-10-31(year-month-day).
Here is a small example with two Galle and Kandy customers (other columns left empty):
| CONTACT TYPE | PREFIX | FIRST NAME | LAST NAME | OPENING BALANCE | CREDIT LIMIT | EMAIL | MOBILE | CITY | CUSTOMER GROUP | |---|---|---|---|---|---|---|---|---|---| | 1 | Mr | Dinesh | Perera | 12000 | 100000 | [email protected] | 0714567891 | Galle | Wholesale | | 1 | Mrs | Shalini | Fernando | | | | 0763456712 | Kandy | |
Tip: Save the file as an Excel .xls file. The upload box on the page asks for .xls.
Upload and check errors#
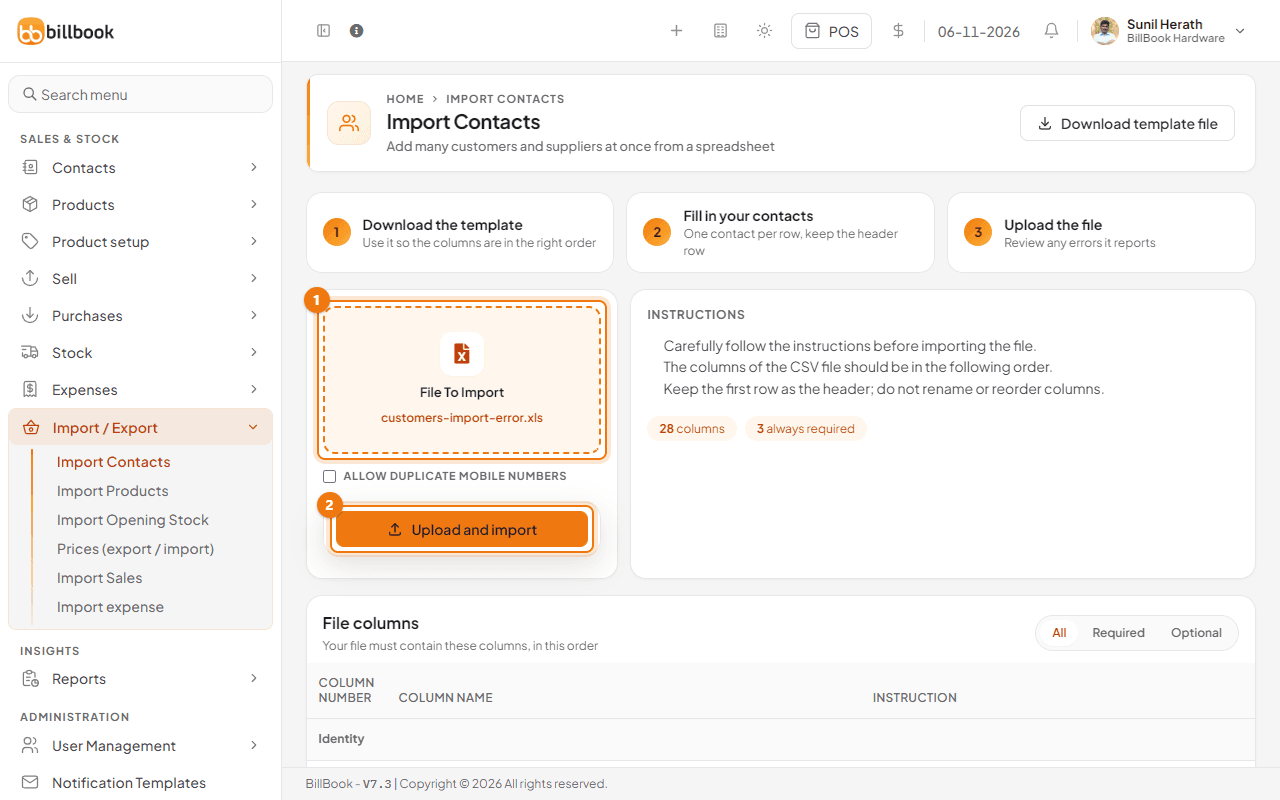
- On Import Contacts, select the File To Import box (1) and choose your file. Its name appears in the box.
- Tick Allow duplicate mobile numbers only if two contacts really share a number, such as a husband and wife. Otherwise leave it empty.
- Select Upload and import (2).
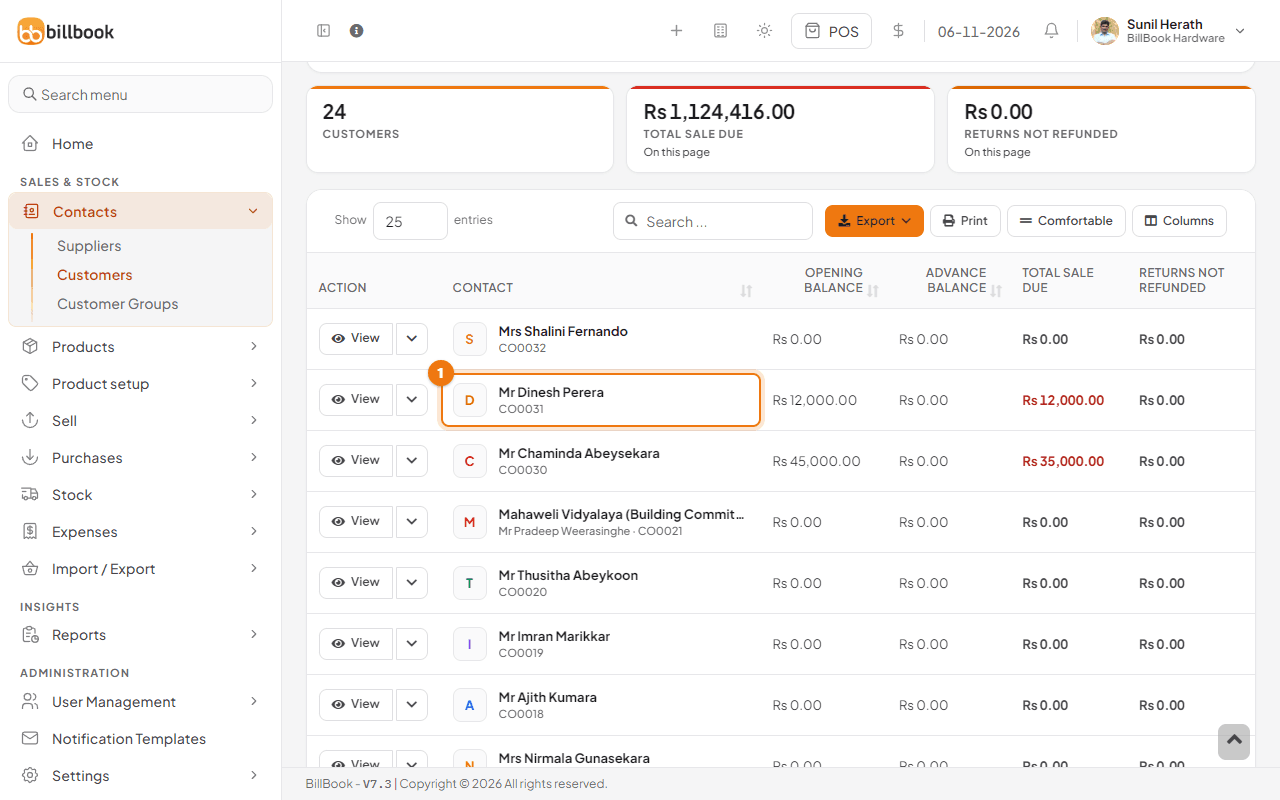
When the file is good, BillBook shows File imported successfully and opens the Customers list (or Suppliers) with the new contacts at the top. In our example Mr Dinesh Perera (1) was added as CO0031 in the Wholesale group with a credit limit of Rs. 100,000.00 and an opening balance of Rs. 12,000.00, and Mrs Shalini Fernando as CO0032.
If the import fails#
BillBook checks every row. If one row has a problem it stops, adds none of the contacts, and tells you which row to fix. For example, if the second row has no first name:
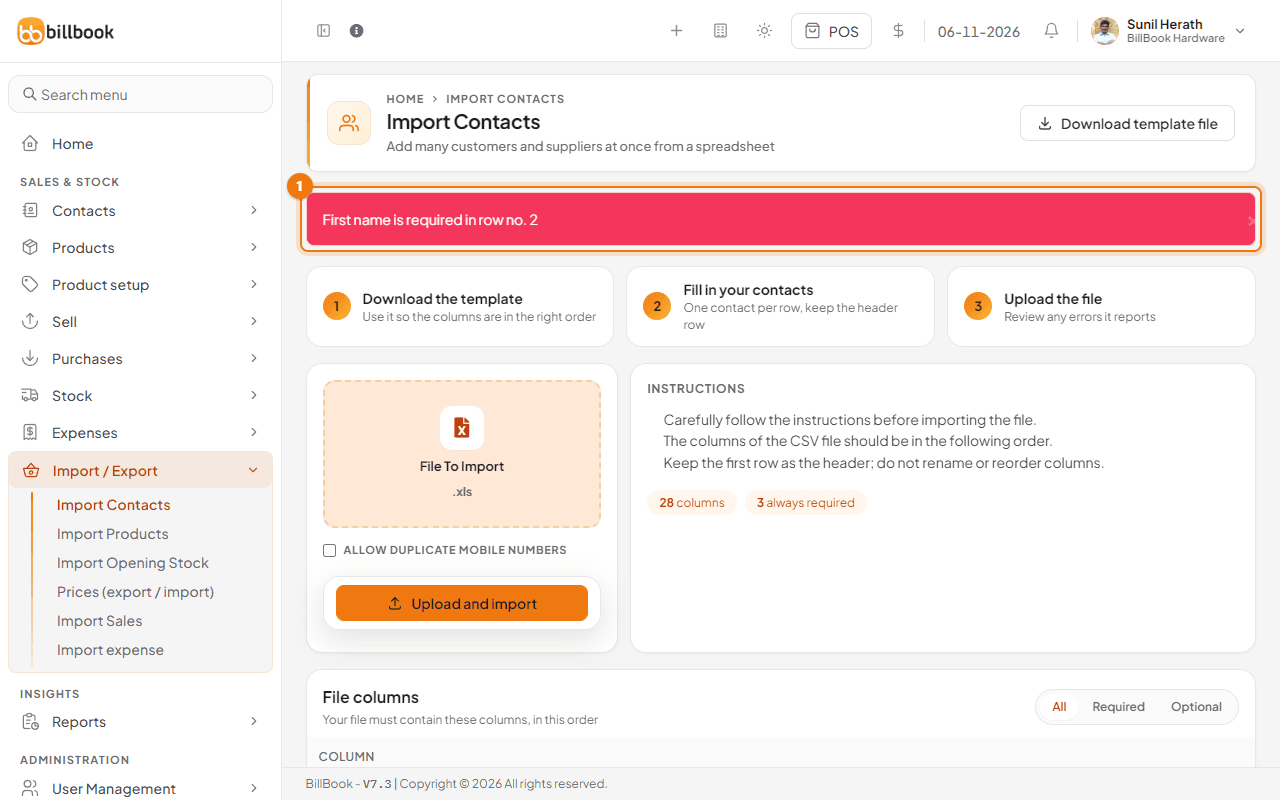
The message First name is required in row no. 2 (1) points to the row in your file. Fix it and upload the file again. Common messages:
- Invalid contact type ... in row no. N: the first column must be
1,2or3. - Contact type is required in row no. N and First name is required in row no. N: fill in the missing cell.
- Pay term is required in row no. N and Pay term period is required in row no. N: needed for suppliers and for contacts of type both.
- Contact ID already exists in row no. N: another contact already uses that ID. Leave the cell empty to let BillBook number it.
- A mobile number already used by another contact, or twice in the same file, stops the import unless you tick Allow duplicate mobile numbers.
Because a failed import adds nothing, you can safely fix the file and upload the whole thing again without creating duplicates.