
Print a purchase invoice
Last updated: 7 November 2026 · 3 min read
A printed purchase invoice is a copy of what you recorded: the supplier, products, costs, payments and totals. Keep it with the supplier's own bill or give it to your accountant. You can also print a goods received note (GRN) that shows what arrived but no prices, for your storekeeper.
Print a purchase invoice#
From the purchase list:
- Go to Purchases > List Purchases.
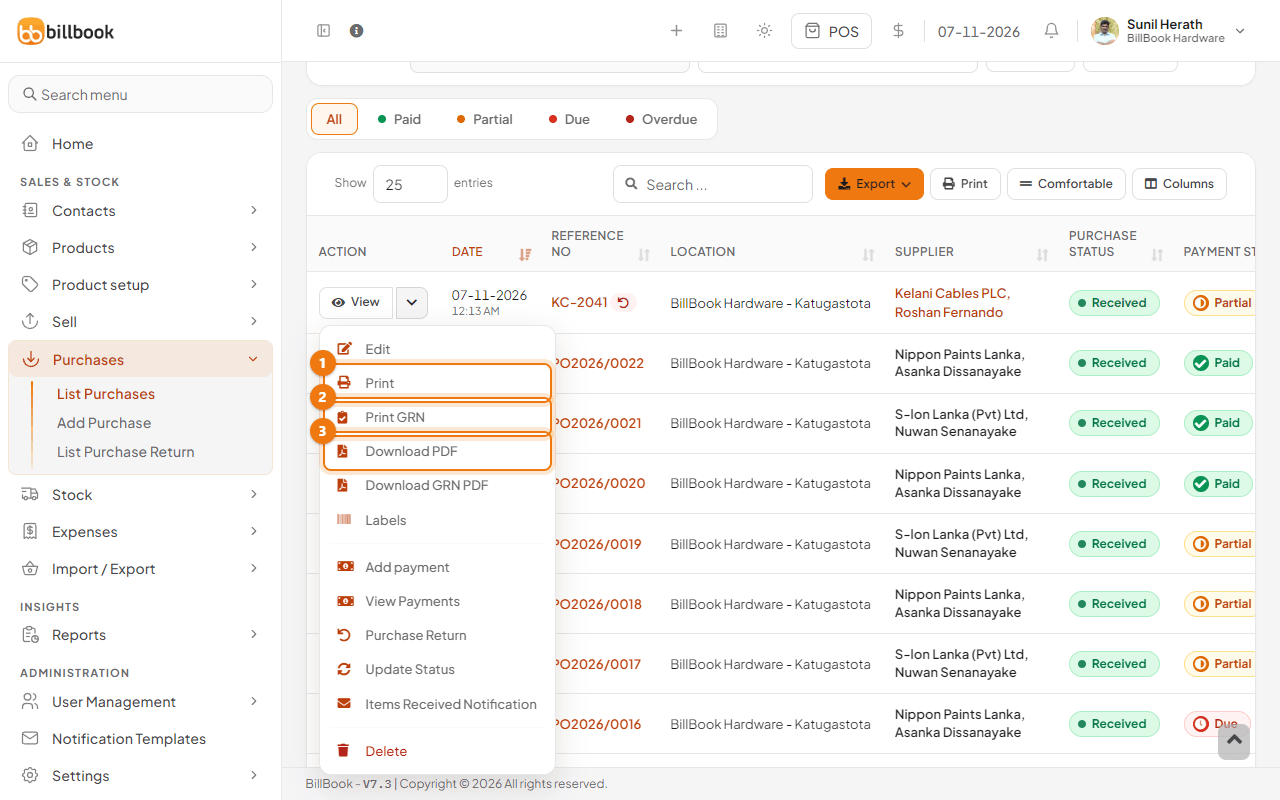
- Select the arrow next to View on the purchase's row and choose Print (1).
- Your browser's print window opens. Choose your printer or Save as PDF and print.
From the purchase details:
- Select View on the purchase's row. The details window shows the purchase, its payments and its totals.
- Select Print (1) at the bottom. The size next to it, A4 or A5, is the paper size. Select it to change.
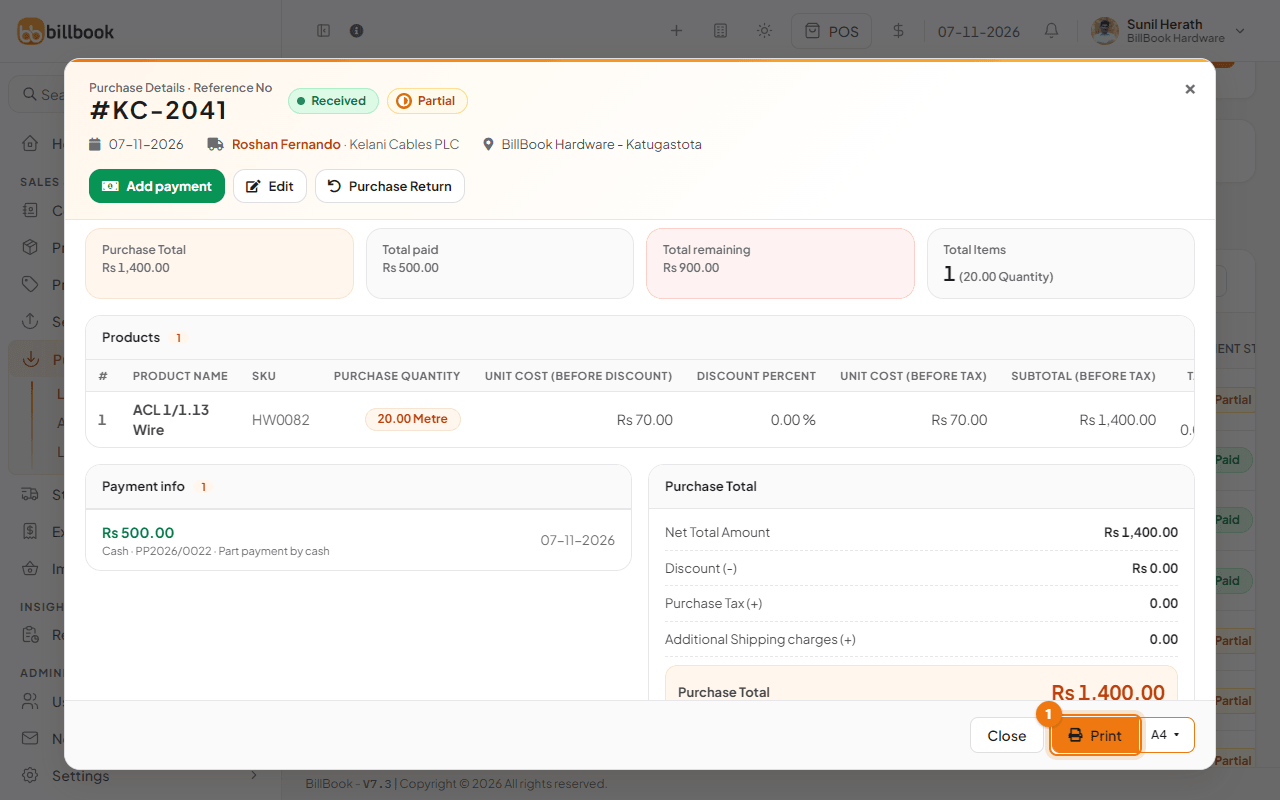
Tip: Open the details window first if you want to check the payments and totals before you print.
Print a goods received note#
A goods received note (GRN) lists the products and quantities that arrived, with no prices, and ends with a line for Received by. Hand it to the person who checks the delivery.
- On Purchases > List Purchases, select the arrow next to View on the purchase's row.
- Choose Print GRN (2).
It is printed in the same paper style as the purchase invoice (see below).
Download a PDF#
To keep or send the purchase as a file instead of printing it, choose Download PDF (3) in the same row menu. Choose Download GRN PDF for the goods received note. The file follows the print style you chose in the settings below. A thermal style gives a narrow PDF as long as the receipt needs.
Choose the print style#
By default a purchase prints on an A4 or A5 page. If you print on a receipt roll, you can change that.
- Go to Settings > Business Settings and open Purchases.
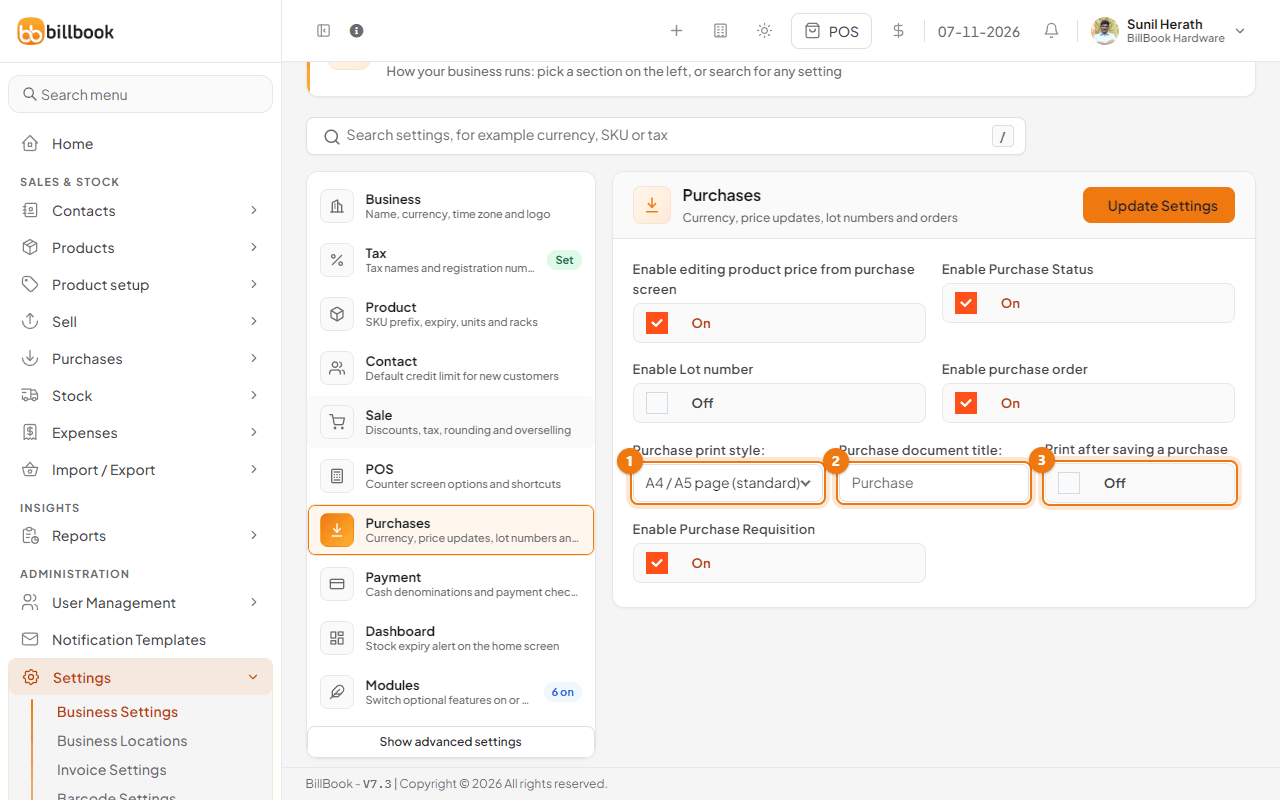
- Choose the Purchase print style (1): A4 / A5 page (standard), Thermal receipt, 80mm or Thermal receipt, 58mm.
- In Purchase document title (2), type the heading you want on the printout, for example Purchase Receipt or Purchase Voucher. Leave it empty to print Purchase.
- Turn on Print after saving a purchase (3) if you want the print window to open each time you save a new purchase. BillBook then goes on to the purchase list.
- Select Update Settings.
The thermal receipt shows your business name and address, the reference number, date and time, supplier, who recorded the purchase, each product with its quantity and price, the totals, what was paid and what is still due, and a line for the supplier's signature. The same receipt layout is used for both widths.
Note: A user who is not allowed to see purchase prices never gets prices on a printout, a PDF or a GRN, whatever the print style.
Barcode on the purchase invoice#
The printed A4 or A5 invoice ends with a barcode of the purchase's Reference No, for example KC-2041. It is added automatically and does not show on the screen, only on the printed page. You can scan it later to find the purchase quickly. The thermal receipt has no barcode.