Customers and suppliers
Last updated: 6 November 2026 · 5 min read
Contacts are the people and shops you buy from and sell to. Keep every customer and supplier here so sales, purchases, payments and balances all land on the right name.
Before you start: You need permission to add customers or suppliers. To bring in many contacts at once, see Import contacts.
Add a customer or supplier#
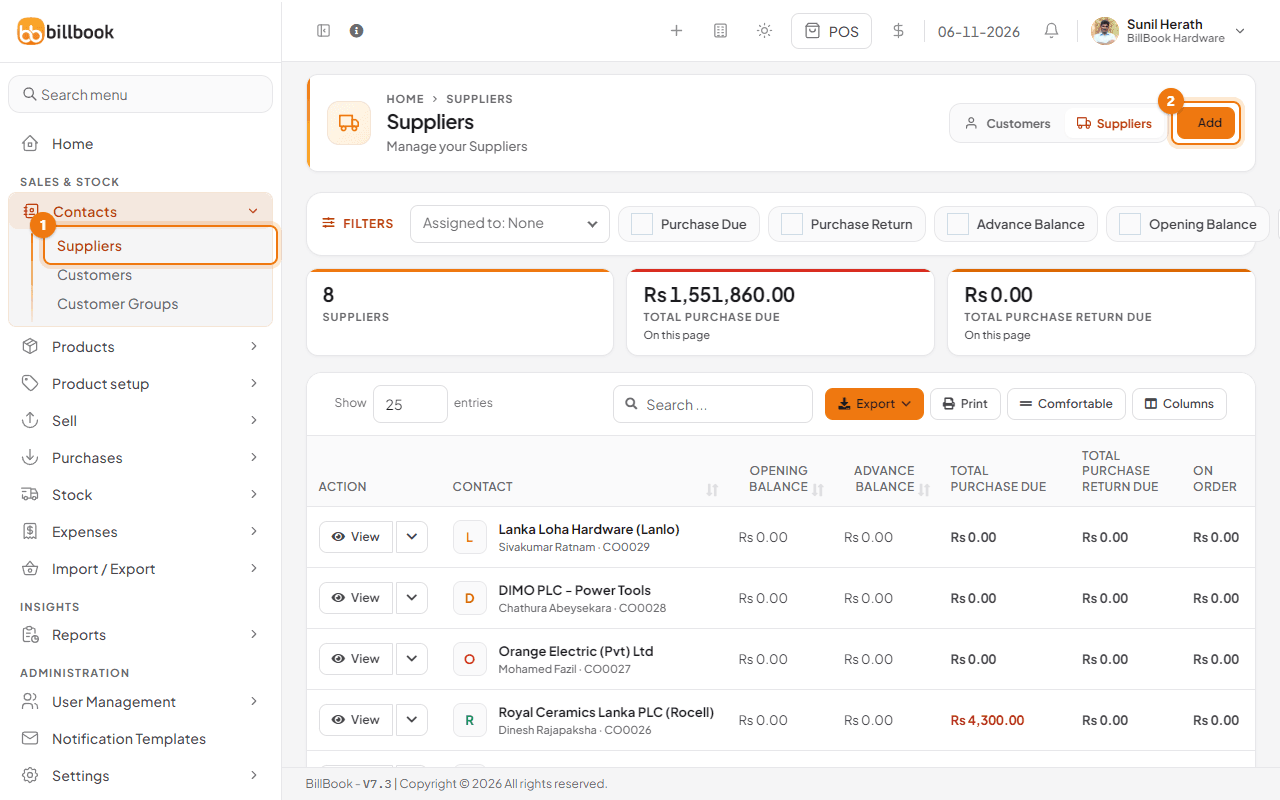
- Go to Contacts > Customers (1) to see your customers, or Contacts > Suppliers to see your suppliers. Use the Customers and Suppliers switch (2) at the top of the list to move between them.
- Select Add (3).
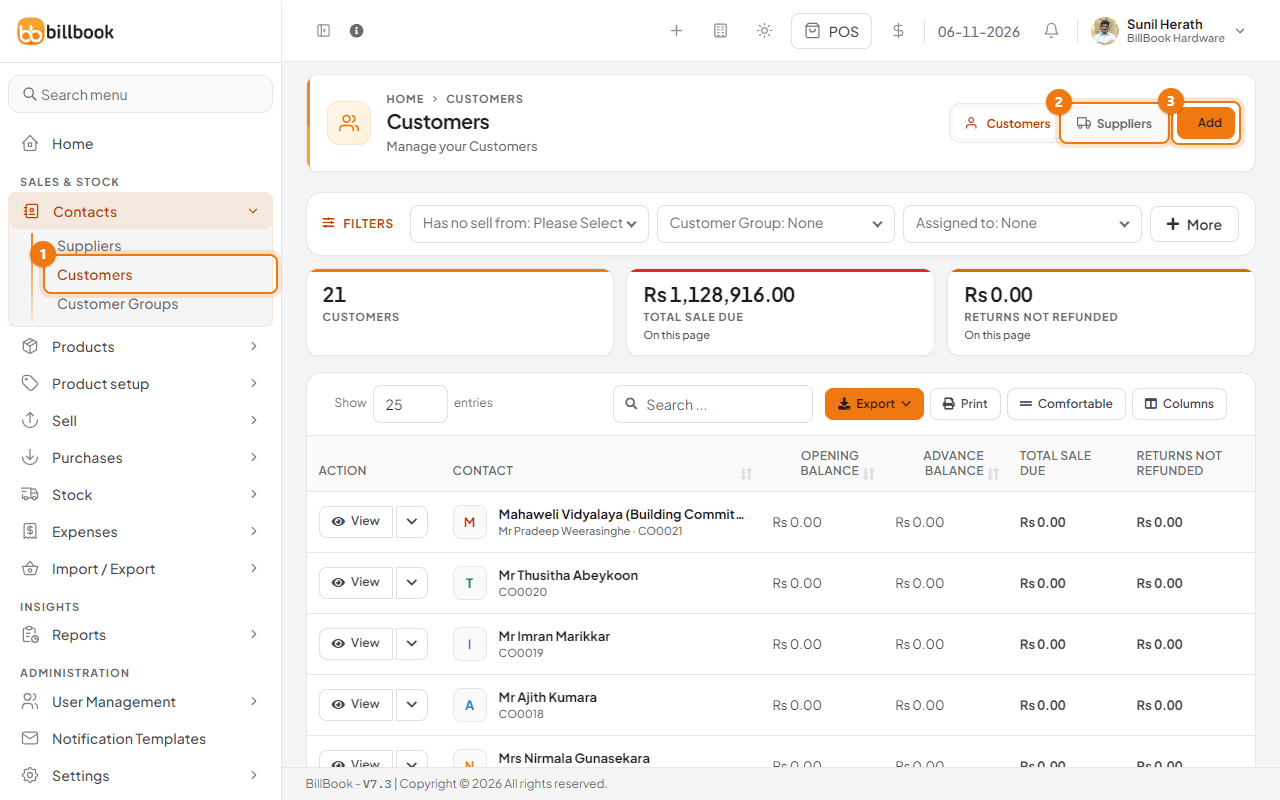
- Choose the Contact type (1): Customers, Suppliers or Both.
- Choose Individual or Business. For an individual, enter the Prefix (such as Mrs), First Name and Last Name. For a business, enter the Business Name and the contact person.
- If this is a customer, you can choose a Customer Group (2). See Customer groups and group pricing.
- Enter the Mobile number (3). It is required. Add an Alternate contact number, Landline or Email if you have them.
- Leave Contact ID empty to let BillBook number it for you (for example CO0030, then CO0031), then select Save.
BillBook shows Contact added successfully and the contact appears in the list.
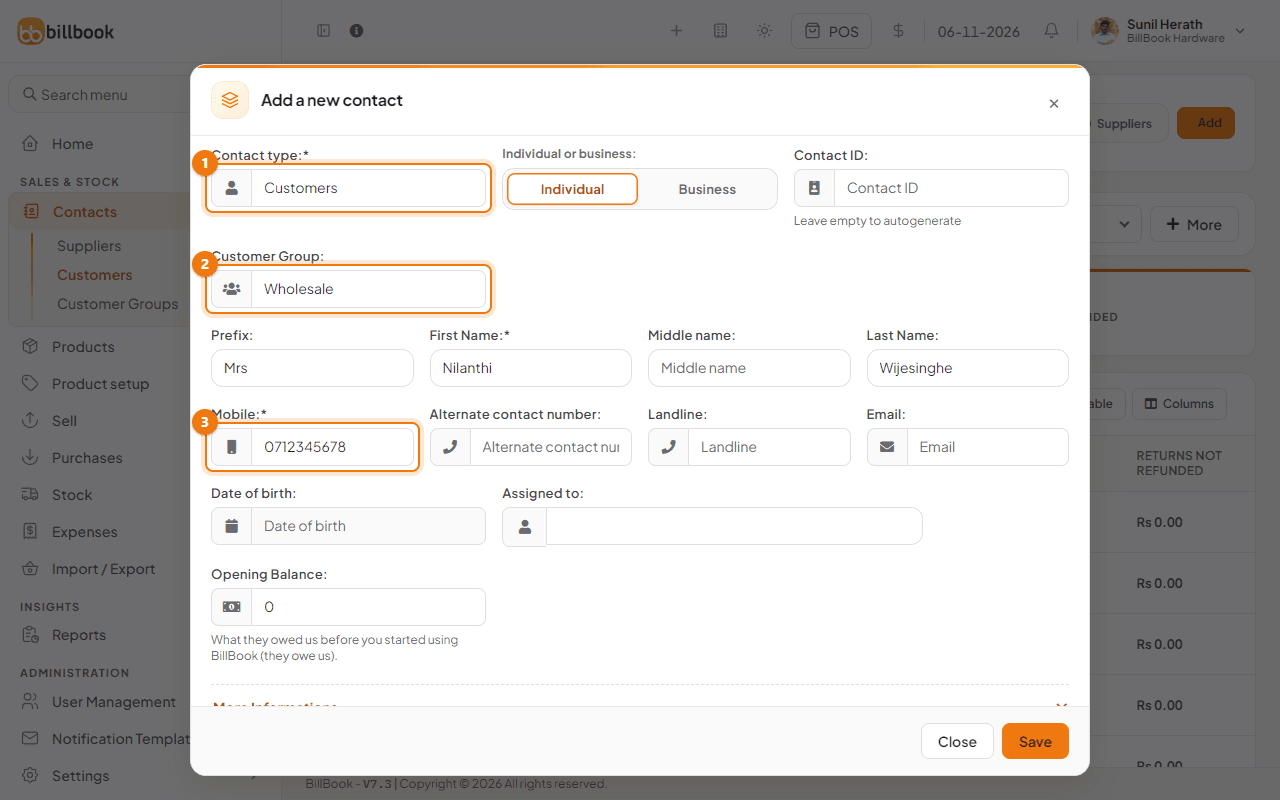
If the mobile number already belongs to another contact, BillBook asks Are you sure ? and shows Already registered for that contact's name before it saves. Select Cancel (1) to go back and fix the number, or OK (2) if two contacts really share a number. The same check runs for a Tax number that is already in use.
Key contact fields#
These fields are on the main form:
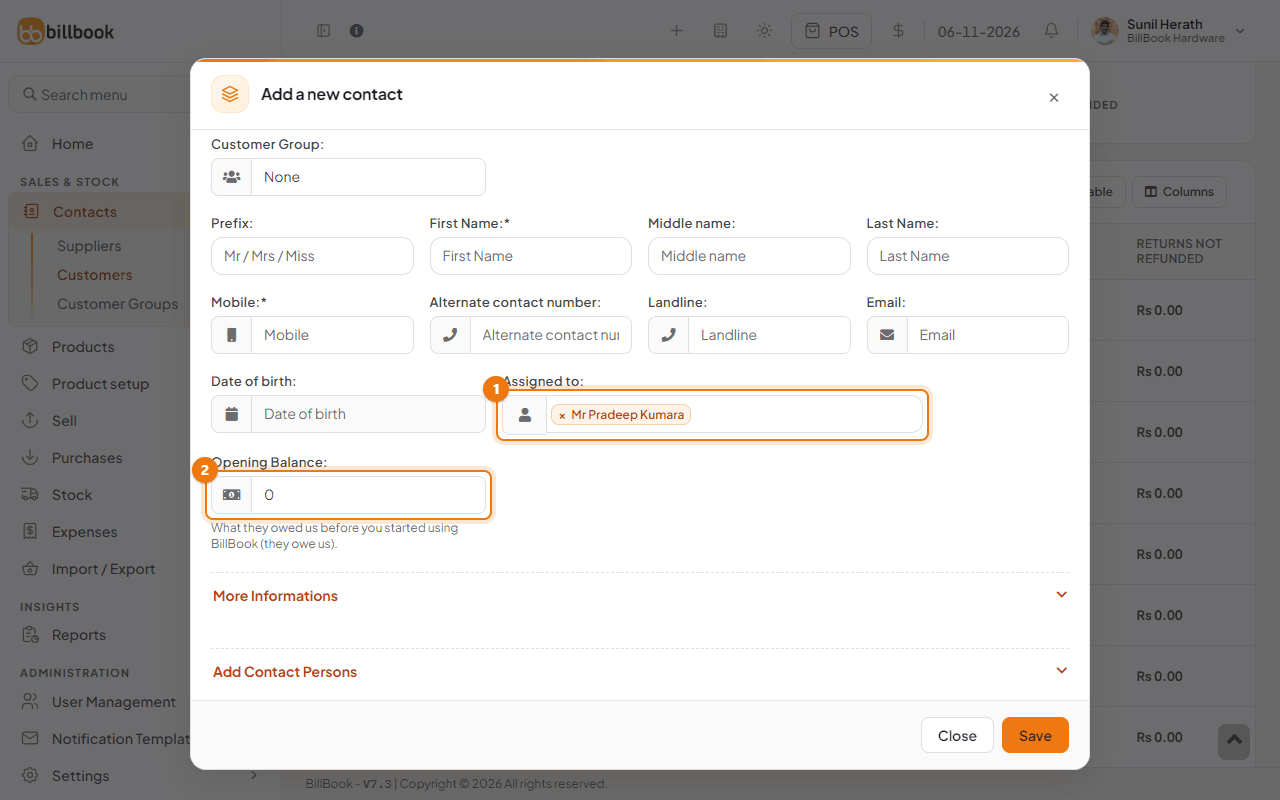
- Assigned to (1): the staff who look after this contact. See the next section.
- Opening Balance (2): the amount the contact already owes you (or you owe them) from before BillBook. See Opening balances for contacts.
Select More Informations to open the rest of the form:
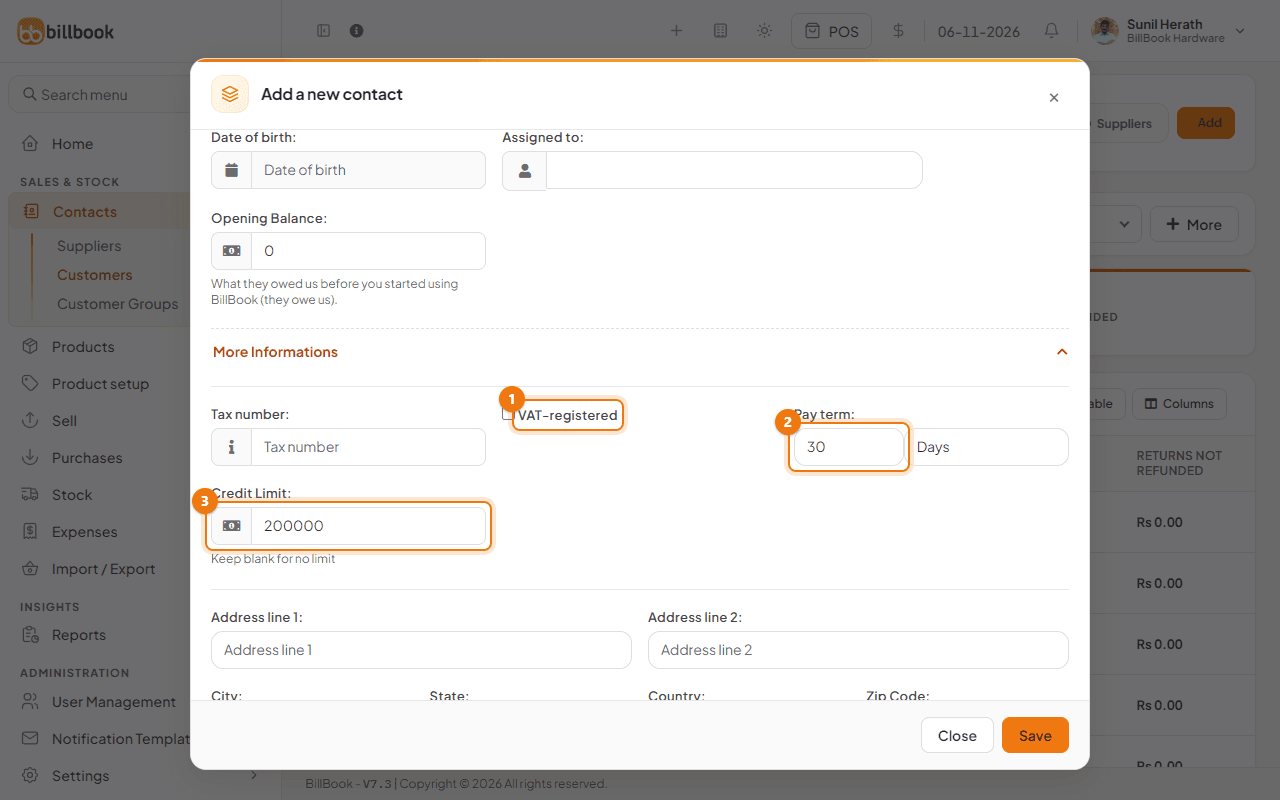
- Tax number: appears on invoices. For a customer who is registered for VAT, tick VAT-registered (1) as well. BillBook then needs a 9-digit Tax number and Address line 1 before it saves the contact, because the Sri Lanka VAT tax invoice prints the purchaser's TIN and address. The box is offered to Sri Lankan rupee (LKR) businesses only. See Invoice layouts.
- Pay term (2): how many days or months a contact has to pay. It fills in the pay term on new sales and purchases for that contact.
- Credit Limit (3): the most a customer can owe you. See below.
- Address fields (Address line 1, City, State, Country, Zip Code) and more detail such as Landmark and Street name.
- Custom Field 1 to Custom Field 10: extra boxes you can use for anything you want to keep with the contact. You can rename them, see Custom fields.
Assign contacts to users#
Use Assigned to (1 on the earlier picture) to link a customer or supplier to one or more of your staff, for example the sales rep who looks after that shop. Choose the users from the list. Later you can filter the contact lists by Assigned to.
Set a credit limit#
Set Credit Limit (3) under More Informations, either when you add the contact or later with Edit.
- Leave it blank for no limit.
- Enter an amount, for example Rs. 200,000.00, and BillBook stops a sale that would take the customer's unpaid total above it, with the message Customer Credit Limit Exceeded. A sale that is paid in full is not checked.
- Enter 0 if the customer must never buy on credit.
On the customer's page, the Credit Limit card shows the limit and how much is still Available.
To give every new customer a starting limit, enter a Default credit limit under Settings > Business Settings, on the Contact tab.
Change the walk-in customer name#
BillBook creates one Walk-In Customer for quick sales where you do not take a name. It cannot be deactivated or deleted, and the screens have no setting to rename it. If you need a different name, ask BillBook support to change it for you.
Activate or deactivate a contact#
Deactivate a contact you no longer deal with. They are hidden from the pick lists on new sales and purchases, but their history stays.
- On the list, open the arrow next to View on the contact's row.
- Select Edit (1) to change details, or Deactivate (2) to switch the contact off.
- To bring the contact back, open the same menu and select Activate.
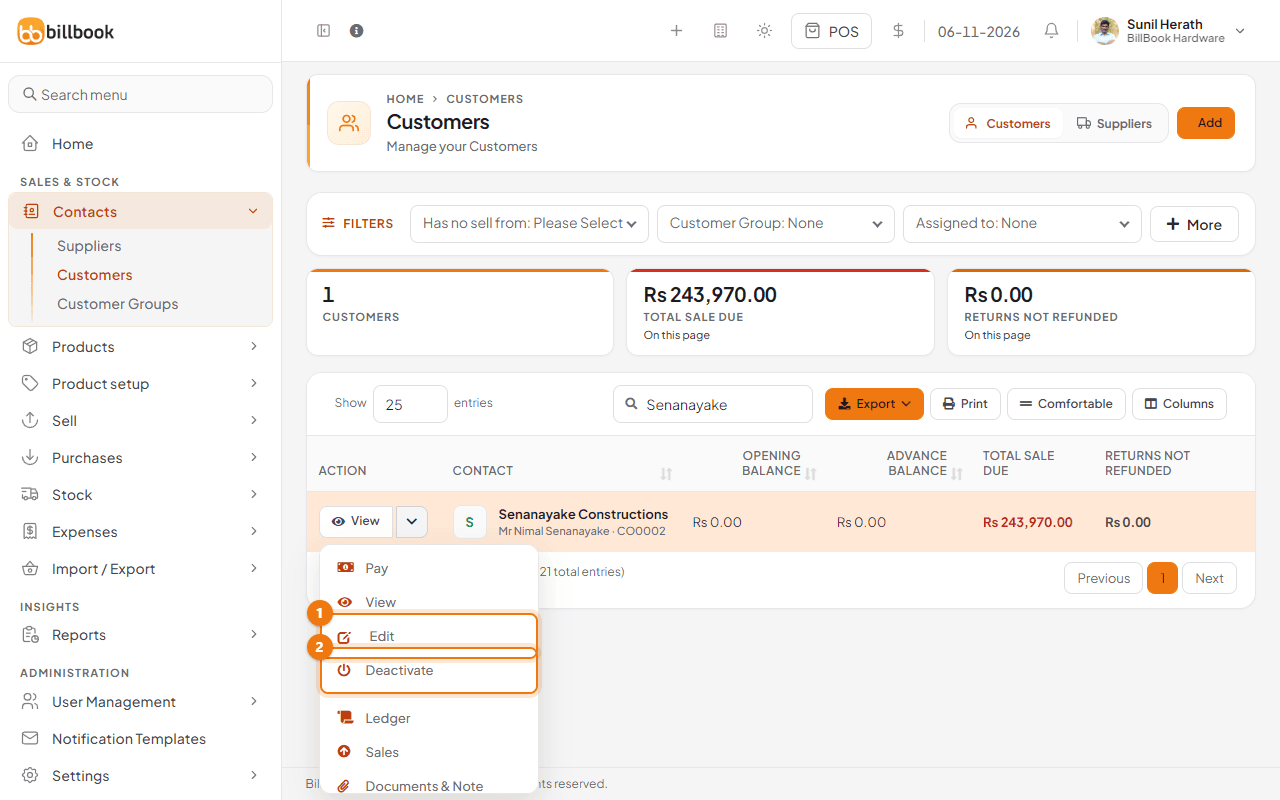
The same menu has Pay, View, Ledger, Sales, Documents & Note and Delete. Suppliers work the same way, and their list shows Total purchase due instead of sale due.