
Invoice layouts
Last updated: 7 November 2026 · 7 min read
An invoice layout is the look of your printed invoice or receipt: the design, the logo, which details show, and the footer. Make one with your bank details for A4 invoices to customers who pay by transfer, and keep a slim one for the till receipt printer.
Before you start: You need permission to open Settings. A new business starts with one layout called Default. A layout does nothing until a location uses it, so finish with the Assign a layout to a location steps.
Create a layout#
- Go to Settings > Invoice Settings, open the Invoice Layouts tab and select Add.
- Enter a Layout name (1) that tells you what it is for, for example Hardware A4 - with bank details.
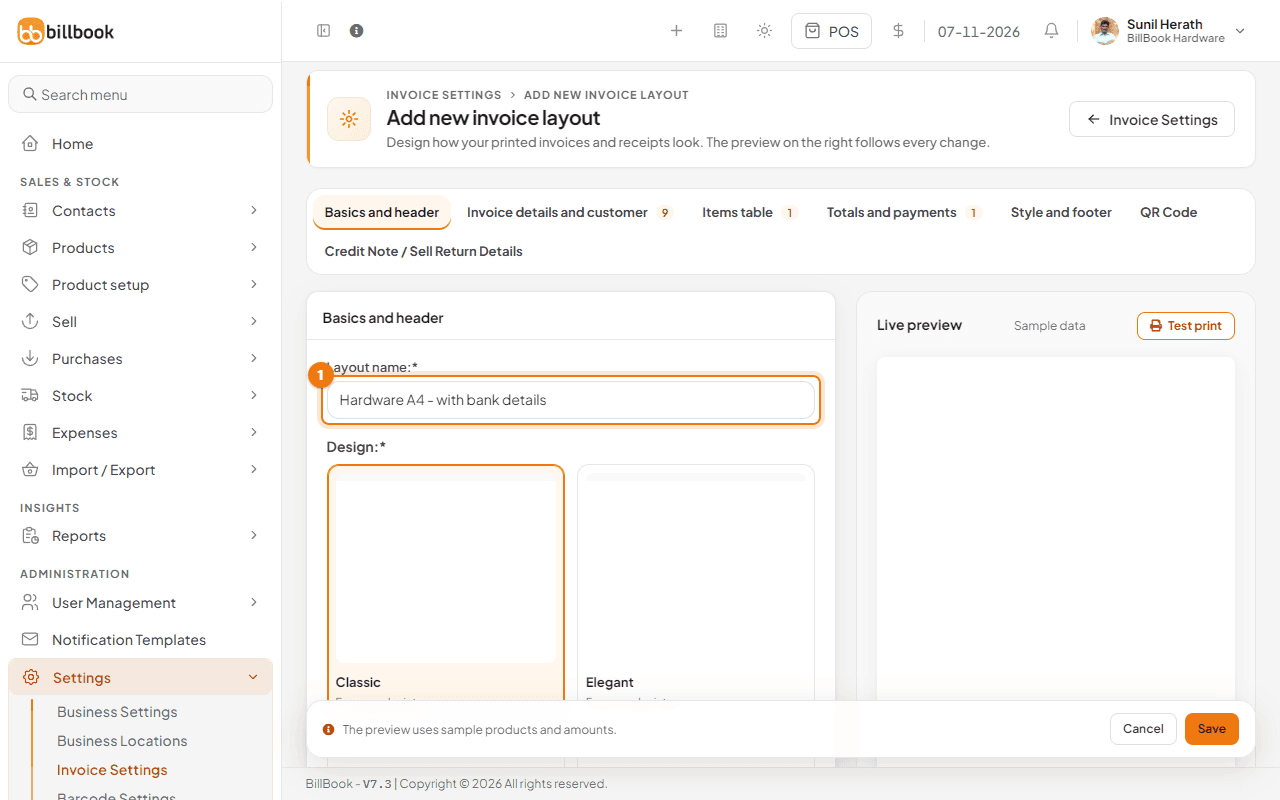
The form is split into tabs along the top: Basics and header, Invoice details and customer, Items table, Totals and payments, Style and footer, QR Code, Types of service module settings and Credit Note / Sell Return Details. A Live preview on the right redraws as you change anything, using sample products and amounts. Select Save at the bottom when you finish.
Choose a design#
On Basics and header, scroll to Design and select a card (1). The selected card has an orange outline.
- Classic, Elegant, Detailed and Columnize Taxes are for a normal A4 printer. Columnize Taxes shows each tax in its own column.
- Slim is for an 80mm thermal receipt printer. Slim 2 works on 80mm and 58mm paper.
- English-Arabic prints both languages and is meant for Saudi businesses.
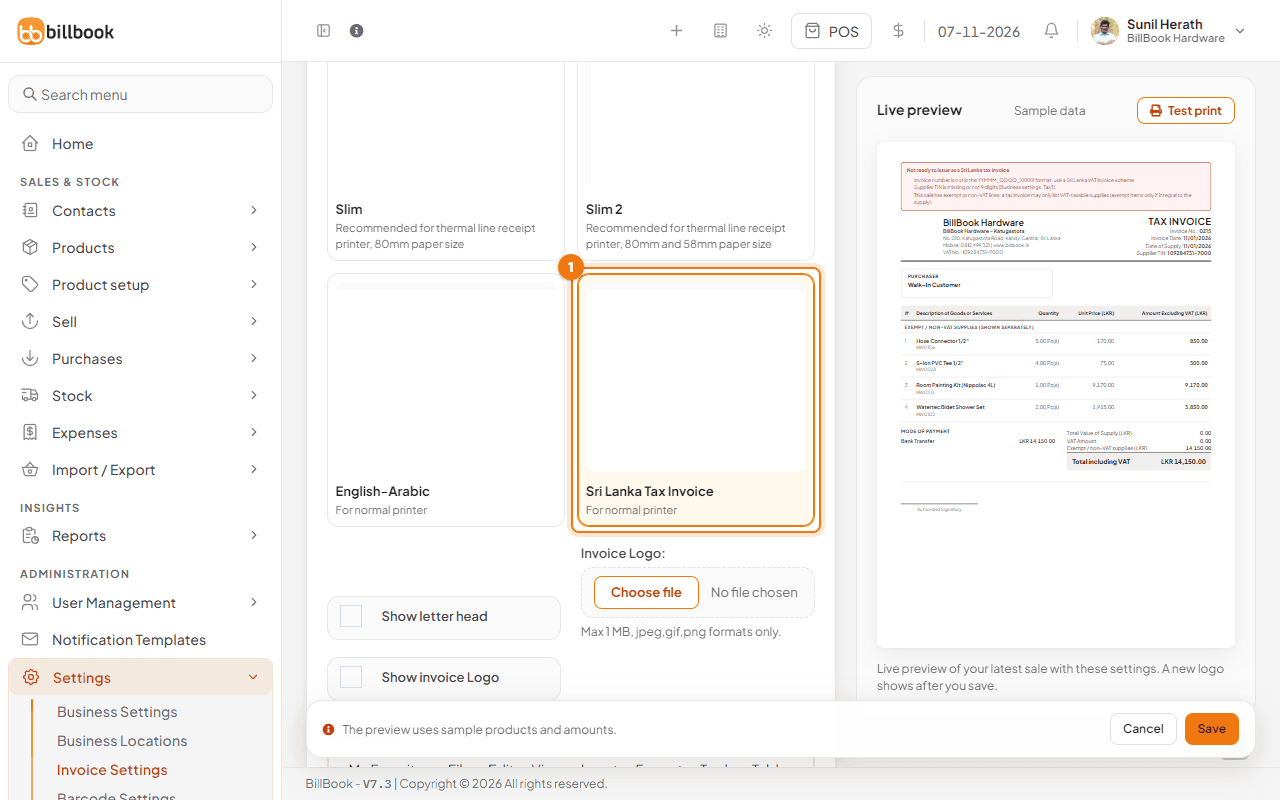
- Sri Lanka Tax Invoice is an A4 layout for VAT tax invoices. It is offered to businesses that use Sri Lankan rupees (LKR). See the next section.
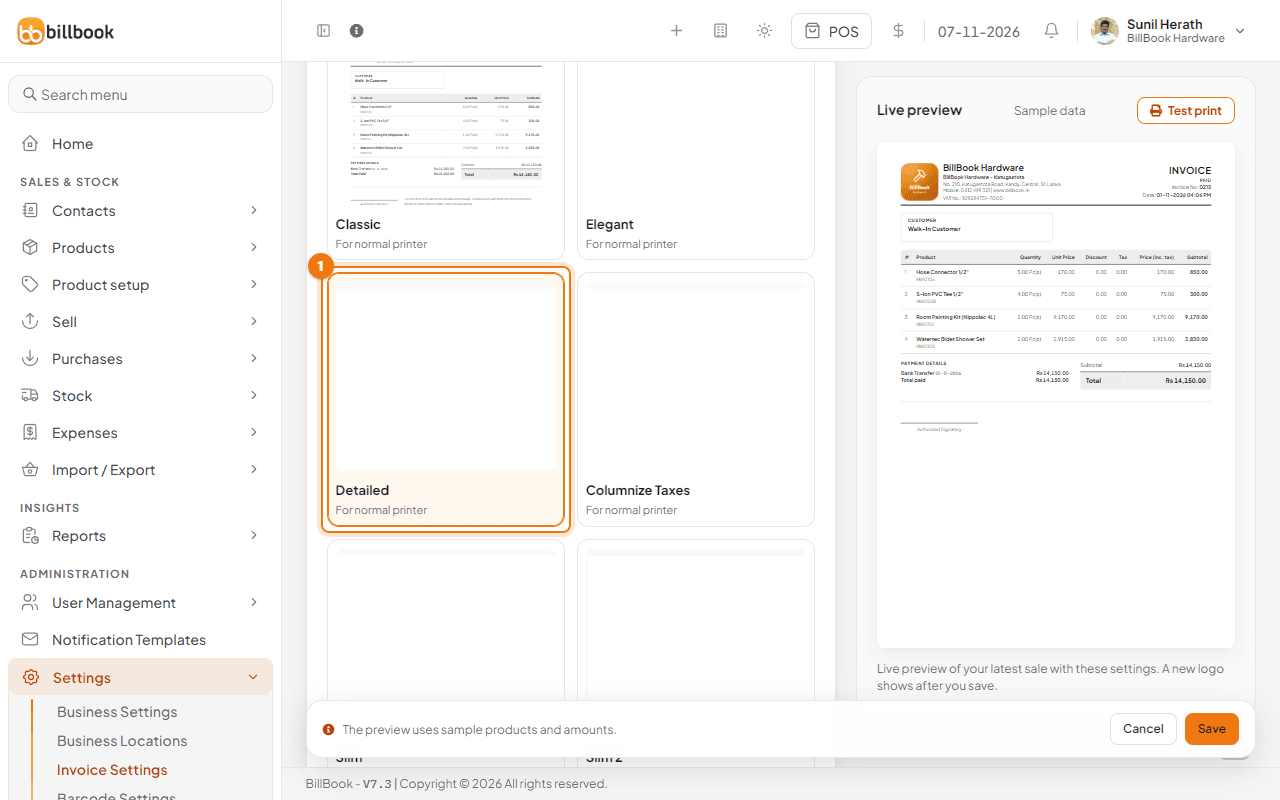
On the same tab you can upload a Letter Head or an Invoice Logo, and add Header text and up to five Sub Heading lines.
Sri Lanka tax invoice#
Select the Sri Lanka Tax Invoice card (1) when you issue VAT tax invoices. It prints on a normal A4 printer and lays the invoice out like this:
- The heading TAX INVOICE. A sale return prints as TAX CREDIT NOTE. Quotations, drafts and sales orders keep their own heading.
- Invoice Date and Date of Supply, written month/day/year, and your Supplier TIN.
- A Purchaser box with the customer's name, address and TIN when the customer is VAT-registered.
- The columns Description of Goods or Services, Quantity, Unit Price and Amount Excluding VAT (LKR), with every amount in rupees to two decimals.
- The totals Total Value of Supply, VAT Amount and Total including VAT, and the Mode of Payment.
- Lines with no tax group are listed apart, under Exempt / non-VAT supplies.
The layout needs a few things set up before an invoice is complete:
- Enter your 9-digit TIN as Tax 1 under Settings > Business Settings, on the Tax tab, and keep Tax 1 details ticked on the Invoice details and customer tab of the layout. If either is missing, BillBook adds a reminder to the Invoice layout added successfully message when you save.
- Use the Sri Lanka VAT numbering scheme so invoice numbers look like 26NOV_HW01_0001. See Invoice numbering.
- For a VAT-registered customer, tick VAT-registered on the contact and fill in the 9-digit Tax number and Address line 1. See Customers and suppliers.
In the live preview and the test print, a red box titled Not ready to issue as a Sri Lanka tax invoice lists whatever is still missing, for example the supplier TIN or a number that is not in the Sri Lanka VAT format. It shows on screen only and is never printed.
Show or hide fields#
Open Invoice details and customer. Each switch shows or hides one thing on the printed invoice. Select Show business name (1), Show Sales Person (2), Show counter (3) or Show Customer information (4) to turn it on or off, and the preview changes at once. Show counter prints the cash counter the sale was rung up on, as a Counter line on the invoice or receipt. It stays blank for a sale that was not made on a counter.
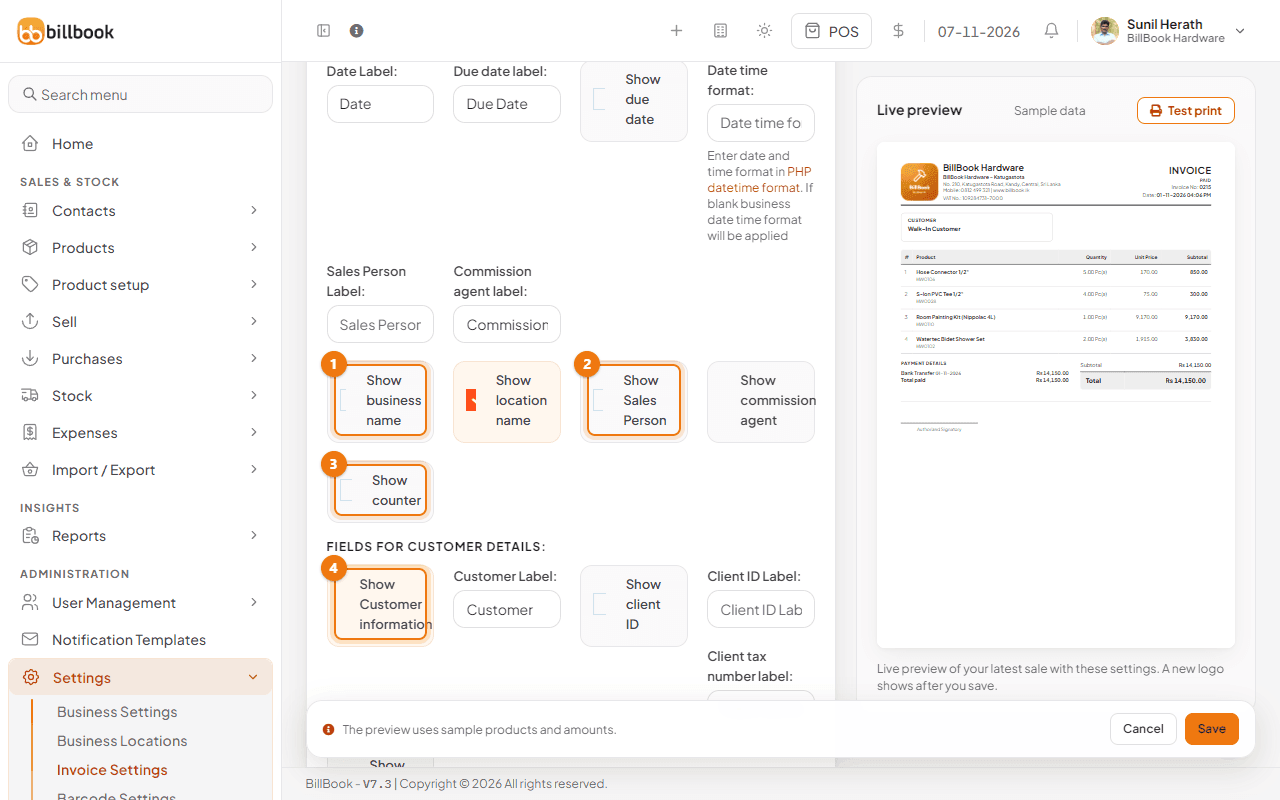
Other switches on this tab cover the due date, the location name, the commission agent, the customer's client ID and reward points, the parts of the location address, phone and email, and your tax numbers. The Items table tab does the same for brand, SKU, product description, expiry, lot number, product image and warranty. The Totals and payments tab shows or hides payment information, the barcode, the previous balance due and the total in words.
Token, table and waiter lines#
Restaurants that give each order a token number see it on the invoice too. There is no switch for this on the layout. When a sale has a token, every design prints a Token line under the invoice number and date. It adds a Table line when the sale has a table, and a Service staff line when it has a waiter. Slim, Slim 2 and the A4 designs all do this. A sale without a token prints exactly as before.
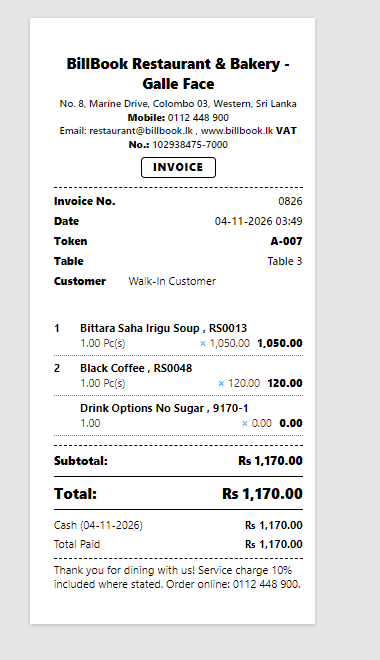
The token comes from the Restaurant slips settings on the location. See Kitchen order tickets (KOT) and token numbers.
Labels and footer text#
Every word on the invoice has a label box you can rename, such as Invoice heading, Invoice no. label and Customer Label. Leave a box empty to keep the standard word.
- Open Style and footer.
- Choose a Highlight color. It colours the title, table header and total bar on the A4 designs. Receipts for 80mm and 58mm paper always print in black and white.
- In Footer text (1), type what you want at the bottom of every invoice, for example Bank: Commercial Bank | A/C 1100 2233 44 | Branch: Colombo 06. You can also pick a sample such as Bank details, Return policy or Warranty below the box and edit it.
- Tick Set as default at the bottom of the tab only if this should be the default layout for new locations.
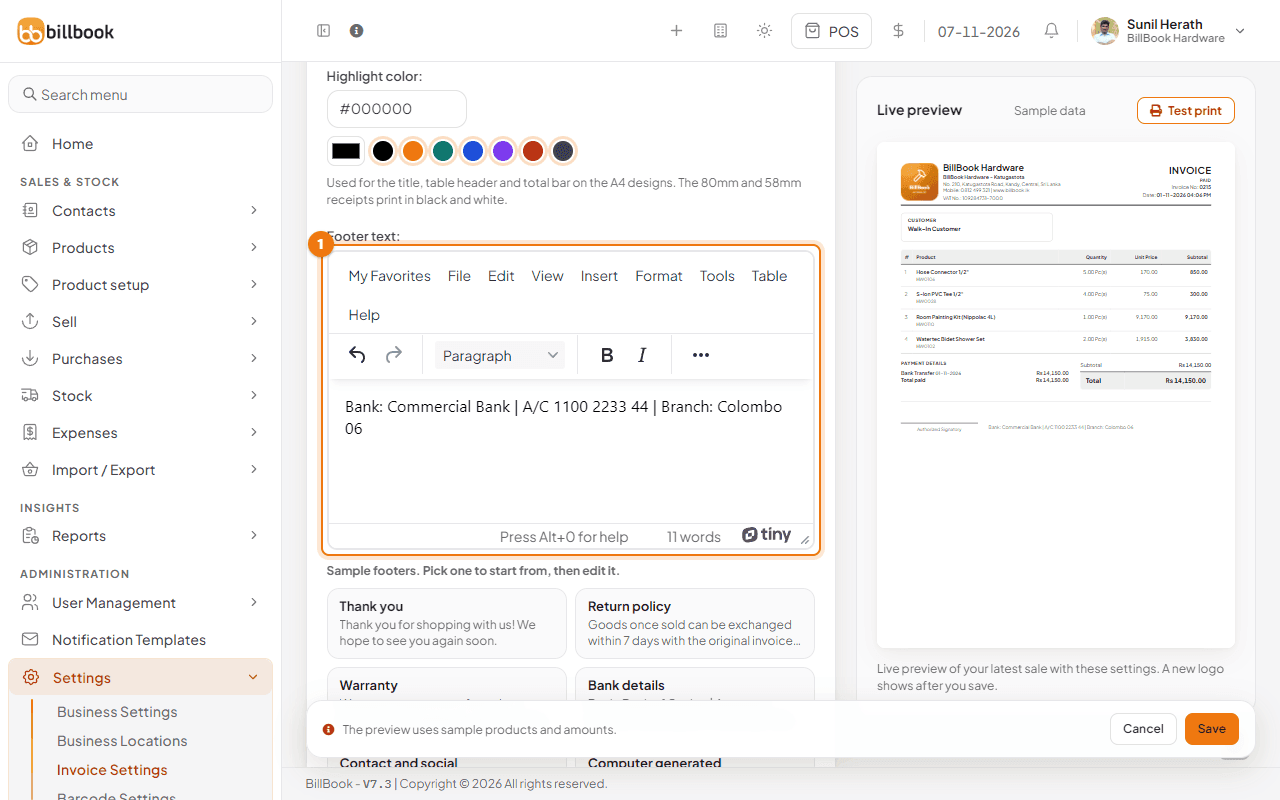
Note: Anything you type in the footer prints on every invoice that uses this layout, so check the account number before you save.
Test print#
Test print shows the layout exactly as a customer would get it, before you save.
- Select Test print at the top right of the Live preview. A new window opens with your latest sale printed in this layout.
- Check the header, the items, the totals and the footer.
- Select Print (1) only when you want paper. Select Close to leave without printing.
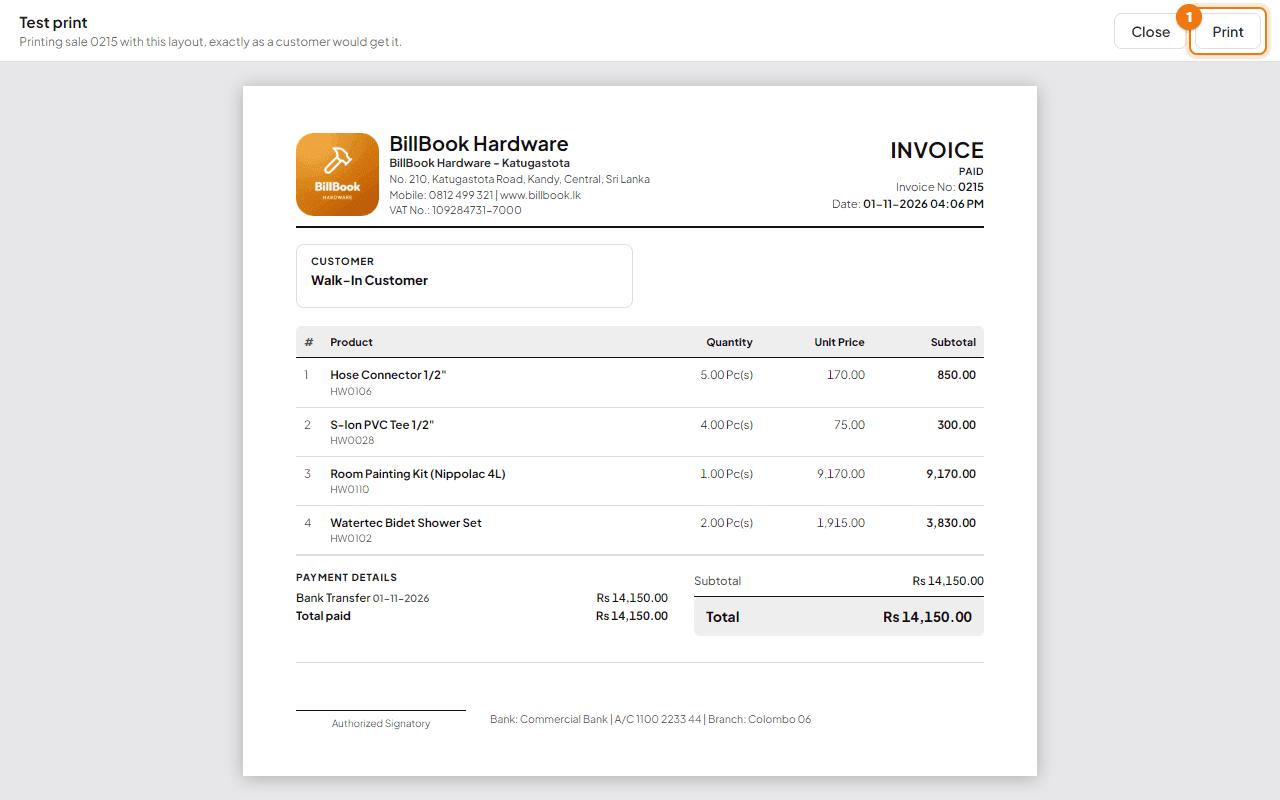
If you have no sales yet, BillBook tells you to make a sale first and the test print will use it.
Assign a layout to a location#
A saved layout appears in the Invoice Layouts list. To use it, give it to a location.
- Go to Settings > Business Locations, select the arrow next to Edit on the location's row and choose Settings.
- Choose your layout under Invoice layout (1), in the Invoice box. Invoice scheme is beside it.
- Select Update (2). BillBook shows Receipt settings updated successfully.
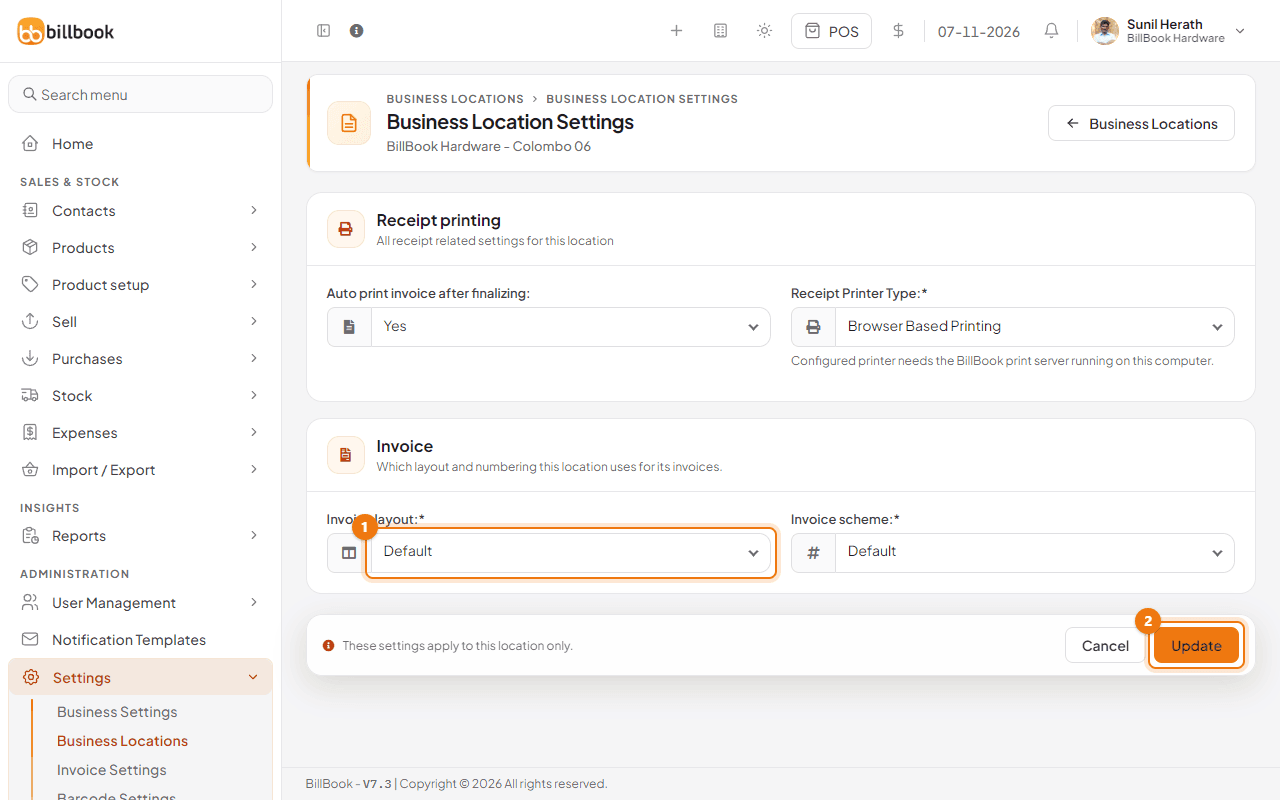
The location form also has Invoice layout for POS and Invoice layout for sale, so you can use one layout at the till and another for A4 invoices. See Set up business locations.