Import and export products
Last updated: 7 November 2026 · 4 min read
If you are moving from another system or adding a whole supplier's price list, typing each product is slow. Import lets you load many products from one spreadsheet. Export lets you take your product list out, for example to check it or send it to your accountant.
Before you start: The Unit of each product must already exist, for example Pieces. Brands, categories and sub-categories are created for you if the file names one that does not exist yet.
Import products#
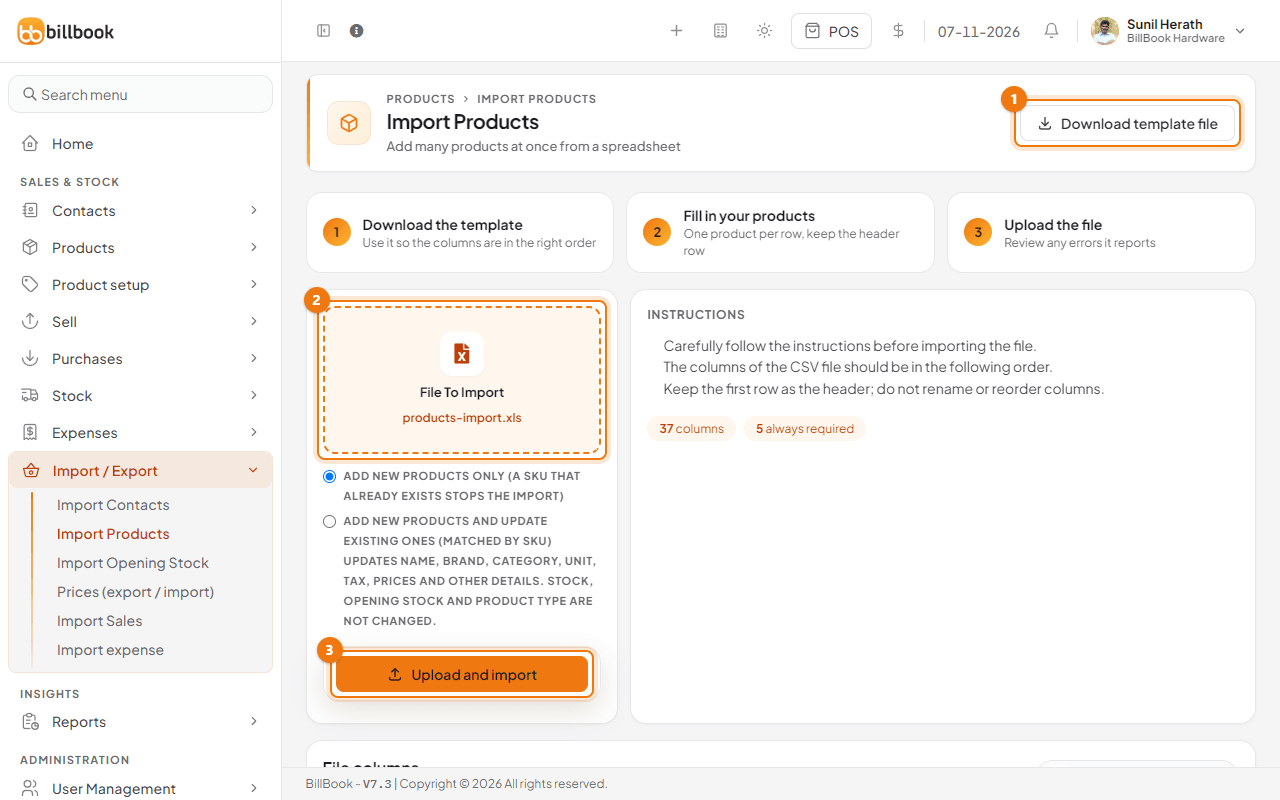
- Go to Import / Export > Import Products.
- Select Download template file (1). Open it in Excel. The first row has 37 column headings. Do not rename or reorder them.
- Add one product per row. Five columns are always required: Name, Unit, Manage stock, Selling Price Tax Type (inclusive or exclusive) and Product Type (single or variable). You also need a purchase price, either including or excluding tax. Leave SKU empty to let BillBook number it.
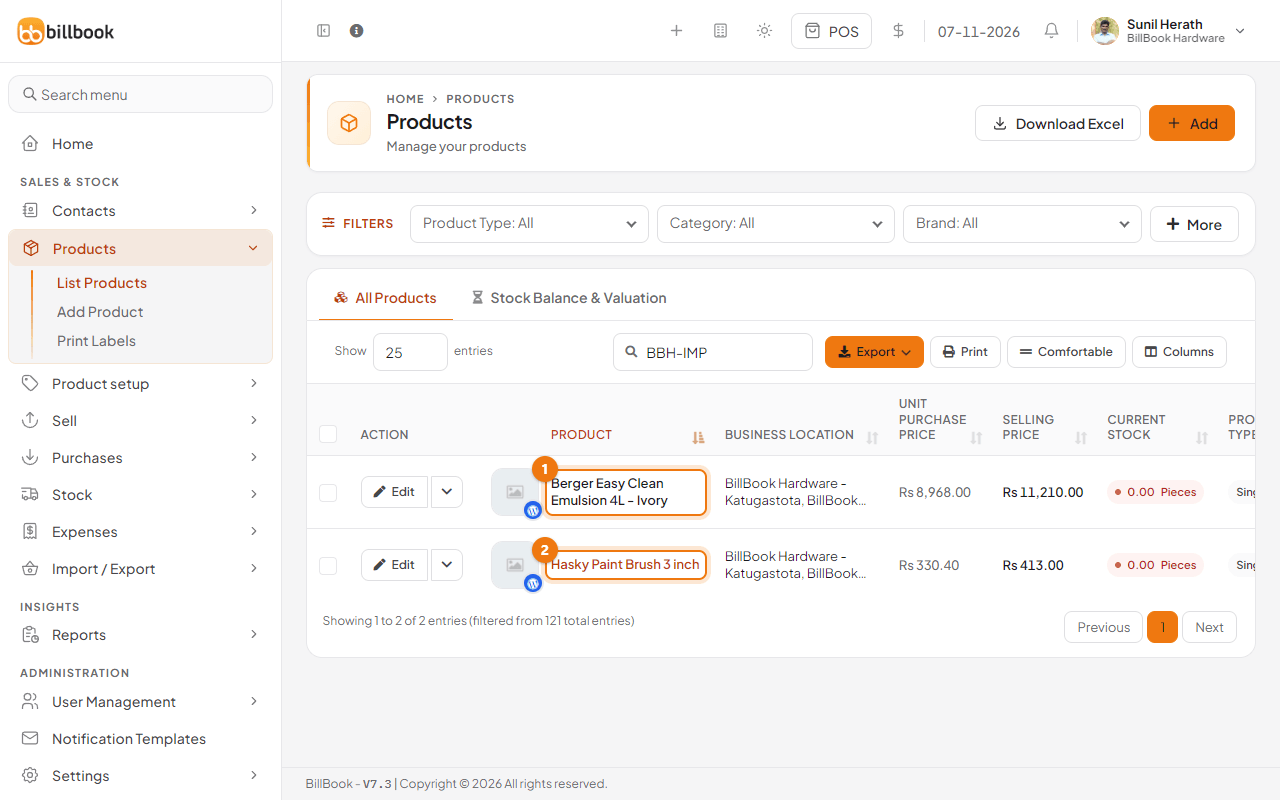
- For example, a row for Berger Easy Clean Emulsion 4L - Ivory has the brand Berger Paints, unit Pieces, category Paints, manage stock 1, tax type exclusive, type single and purchase price 7600 excluding tax. With the default 25% margin BillBook works out the selling price Rs. 9,500.00.
- Save the file as .xls, .xlsx or .csv. Under File To Import (2), choose the file. The box shows its name.
- Choose what to do with SKUs that already exist. Add new products only stops the import if a SKU is already in BillBook. Add new products and update existing ones matches by SKU and updates name, brand, category, unit, tax, prices and other details. It does not change stock, opening stock or product type.
- Select Upload and import (3). BillBook shows File imported successfully.
The new products appear in Products > List Products, at the locations named in the Product locations column.
Tip: To add opening stock at the same time, fill in Opening stock and Opening stock location. To add stock to products that already exist, use Opening stock.
Fix common import errors#
BillBook checks every row before it saves anything. If one row has a problem, it stops, saves nothing, and shows a red message with the row number. Fix that row in your file and upload it again.
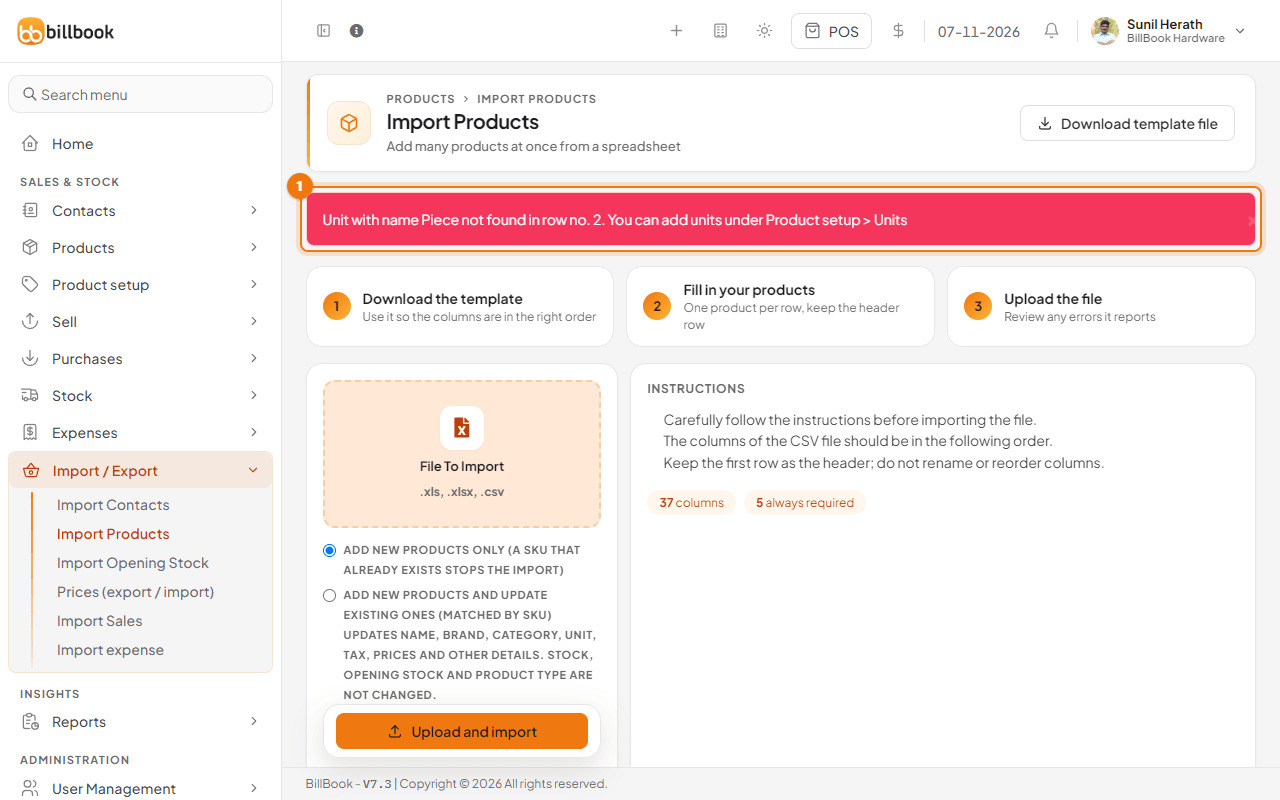
For example, if the unit in row 2 is typed Piece but your unit is Pieces, BillBook shows this message:
Unit with name Piece not found in row no. 2. You can add units under Product setup > Units
Fix the unit name in your file, or add the unit under Product setup > Units, then upload the file again.
Other messages you may meet, and what to do:
| Message | What to do | |---|---| | Some of the columns are missing. Please, use latest CSV file template. | Download the template again and paste your rows under its headings. | | Product name is required in row no. 3 | Fill in the Name column for that row. | | UNIT is required in row no. 3 | Fill in the Unit column. | | Invalid value for MANAGE STOCK in row no. 3 | Type 1 for yes or 0 for no. | | Invalid value for Selling Price Tax Type in row no. 3 | Type inclusive or exclusive. | | Invalid value for PRODUCT TYPE in row no. 3 | Type single or variable. | | PURCHASE PRICE is required in row no. 3 | Enter the purchase price including or excluding tax. | | HW0082 SKU already exist in row no. 3 | That SKU is already in BillBook. Use a new SKU, or choose the option that updates existing products. | | HW0082 SKU appears twice in the file | Give each row its own SKU. | | Tax with name VAT in row no. 3 not found | Type the tax rate exactly as in Settings > Tax Rates. | | No location with name 'Colombo' found in row no. 3 | Use the full location name, for example BillBook Hardware - Colombo 06. | | VARIATION NAME is required in row no. 3 | For a variable product, fill in the variation name and the values, separated by |. |
Export products#
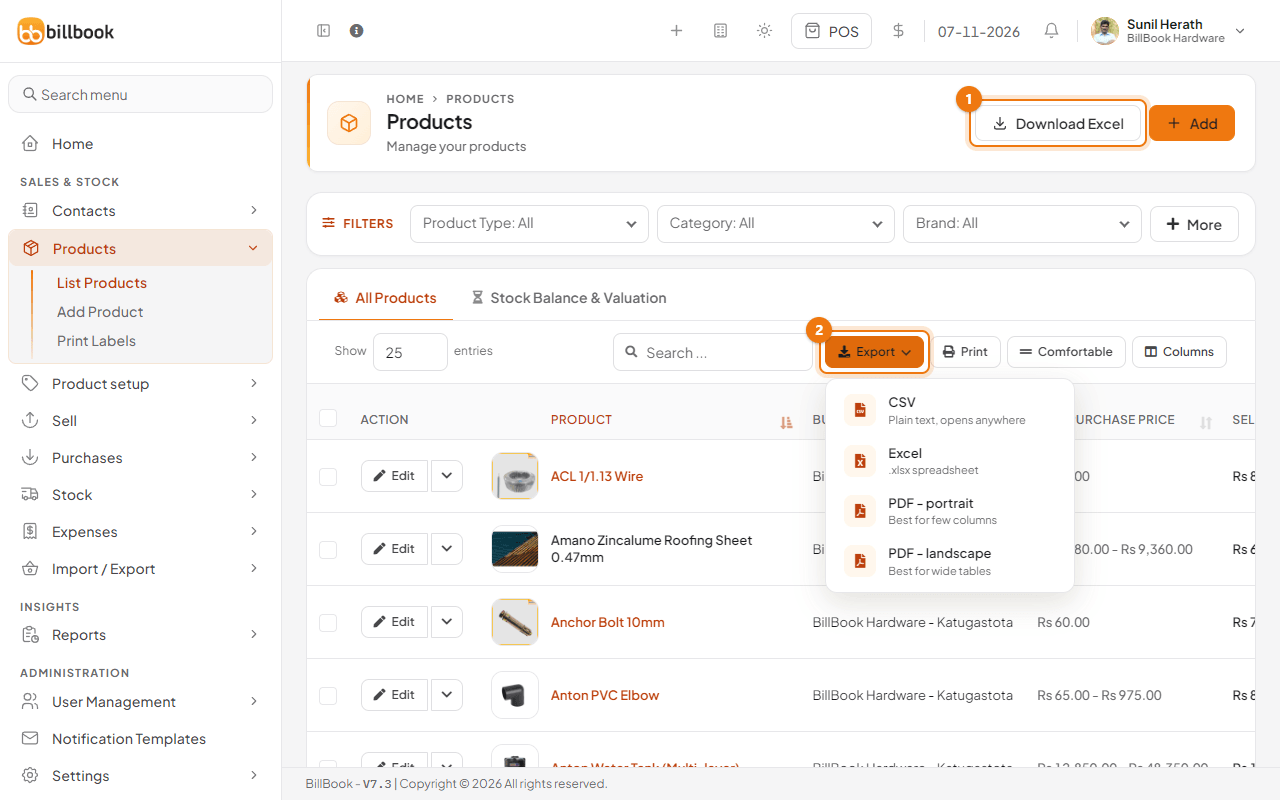
- Go to Products > List Products.
- To save every product in one go, select Download Excel (1). BillBook downloads products-export- followed by today's date as an .xlsx file. The columns are the same as the import template, so you can edit the file and import it again. Only an owner or admin sees this button.
- To save only what you see in the table, filter or search the list first, then select Export (2) and choose CSV, Excel, PDF - portrait or PDF - landscape. Choose PDF - landscape for wide tables.