
Barcode label printer
Last updated: 31 October 2026 · 3 min read
Print barcode labels for your shelves, cartons and small items on a label printer. BillBook prints labels through your browser's print window, so you set up the printer on your computer and tell BillBook the size of your labels.
Supported printers#
BillBook works with any barcode label printer that your computer can print to, including direct thermal printers from Zebra, TSC, Dymo, Brother and other makers. Direct thermal printers print without ink or ribbon, so they suit small shops. You can also use a normal A4 sticker sheet on an ordinary printer.
Printer setup#
Install the printer#
- Connect the printer to your computer by USB, Ethernet or Bluetooth, and install the maker's driver if it needs one.
- Load the label roll or sheet.
- Print a test page from the computer to check the printer works.
BillBook has no printer list of its own for labels. You choose the printer in the browser print window when you print.
Tell BillBook your label size#
A sticker setting stores the size of your labels and how they sit on the paper.
- Go to Settings > Barcode Settings (1). The list shows each setting with its description. The demo business has 38 x 25 mm roll for small roll labels.
- Select Add new setting (2), or Edit on an existing setting.
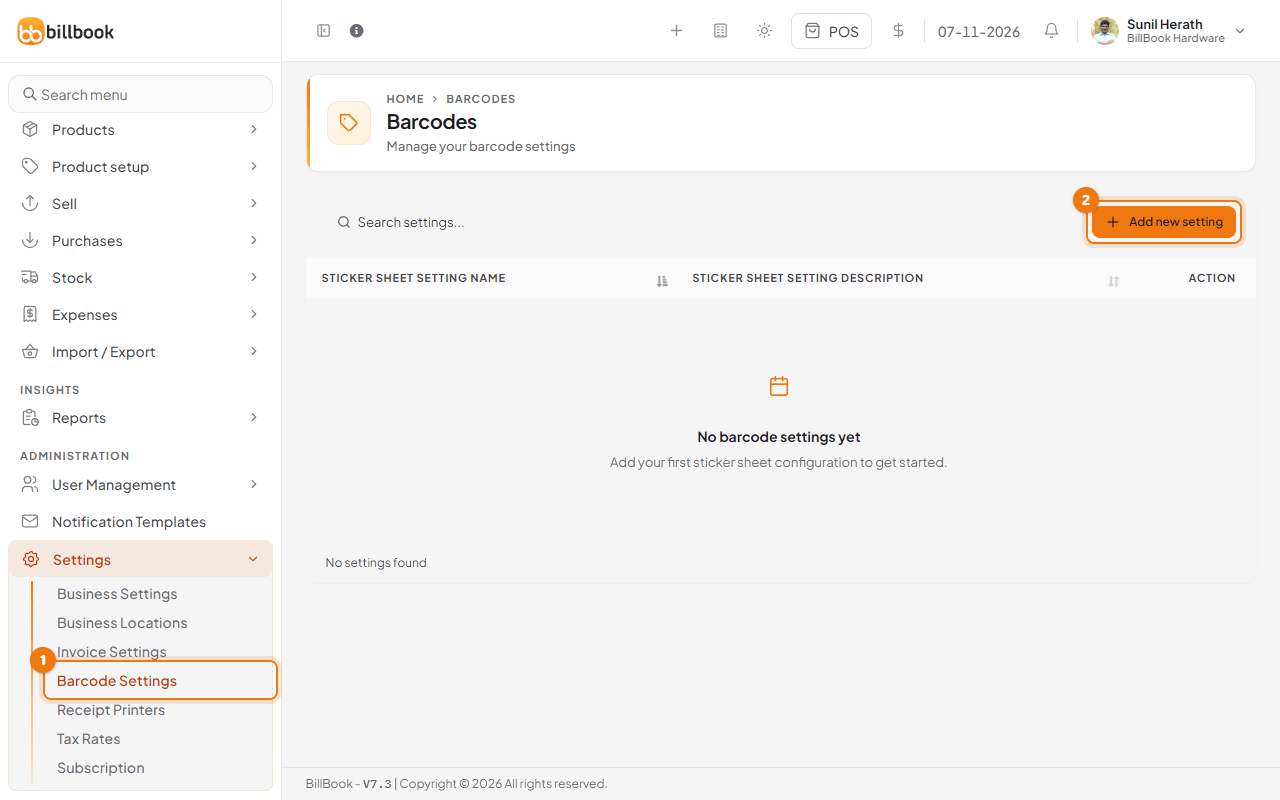
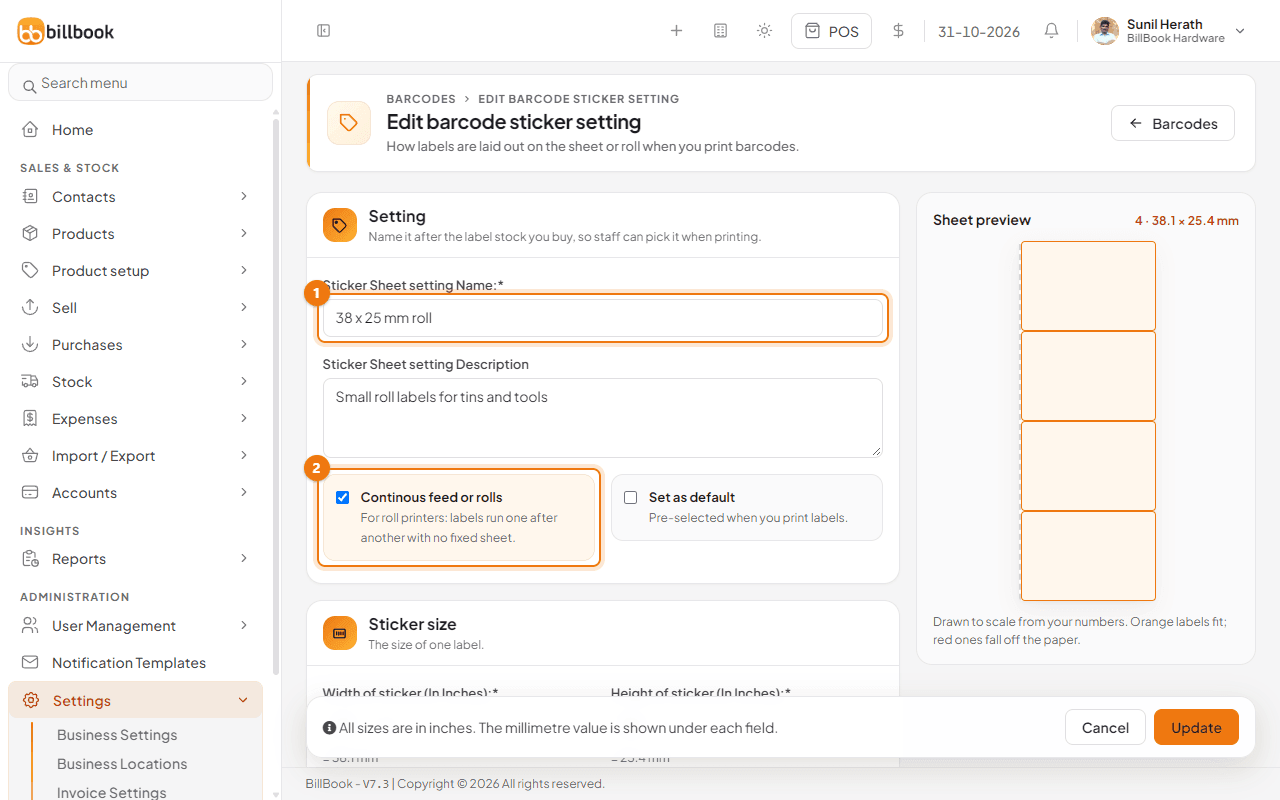
- Enter a Sticker Sheet setting Name (1) that matches the labels you buy, for example 38 x 25 mm roll, and an optional description.
- Tick Continous feed or rolls (2) if you use a roll printer, where labels run one after another with no fixed sheet. Leave it unticked for sheets of stickers.
- Tick Set as default if you want it pre-selected when you print labels.
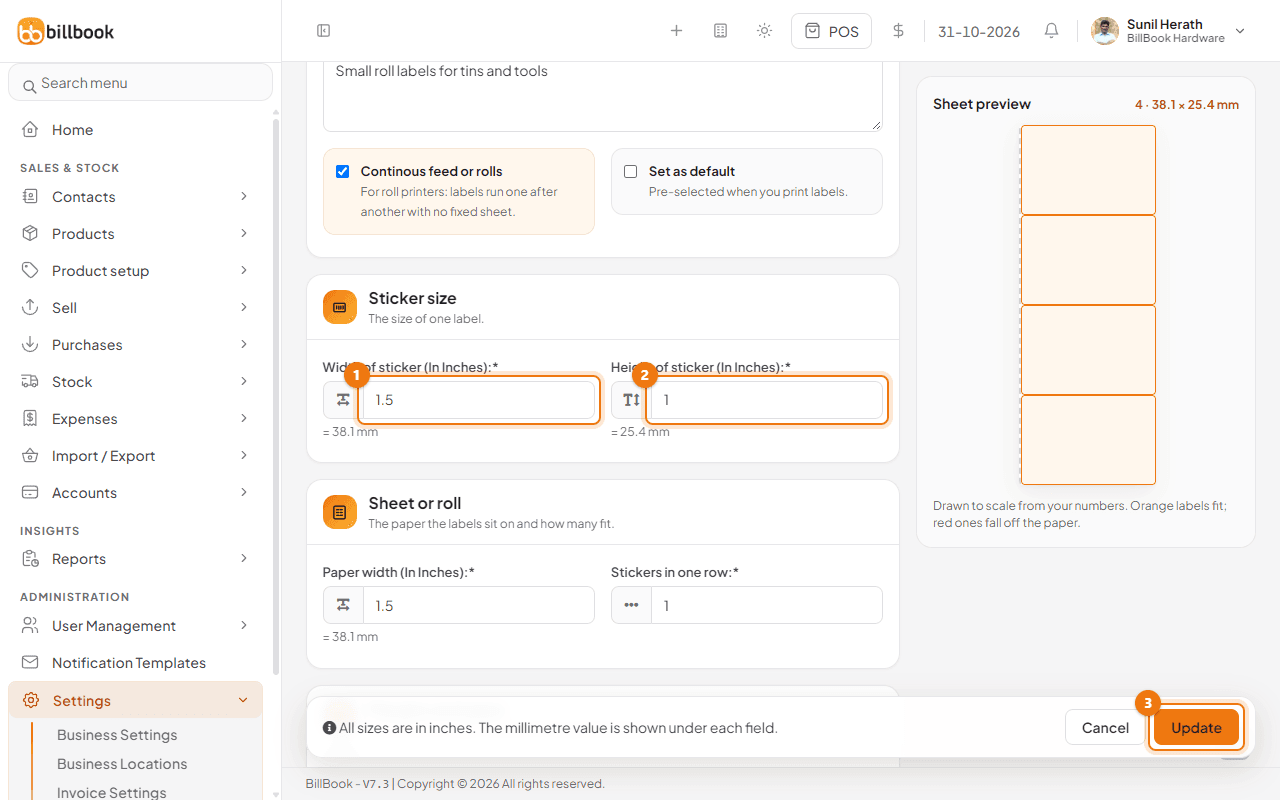
- Enter the size of one label under Sticker size: Width of sticker (In Inches) (1) and Height of sticker (In Inches) (2). BillBook shows the millimetre value under each field. A 38 x 25 mm label is 1.5 x 1 inch.
- Under Sheet or roll, enter the Paper width (In Inches) and Stickers in one row. For a roll with one column, use the label width and
1. Sheets also need the paper height, the margins and the gap between rows and columns. - Check the Sheet preview on the right. Orange labels fit on the paper, red ones fall off it. Fix the numbers until all labels are orange.
- Select Save (or Update when editing).
Print the labels#
- Go to Products > Print Labels.
- Choose the products and the sticker setting, and print. See Print barcode labels.
- In the browser print window, choose your label printer and set the paper size to your label size. Turn off headers, footers and scaling.
Tip: Print one sample label before you print a whole roll, to check the alignment and that the barcode scans.