
Categories, brands and warranties
Last updated: 7 November 2026 · 2 min read
Categories, brands and warranties help you find products fast, filter reports and tell customers what is covered. Set them up once, then pick them when you add a product.
Before you start: Enable Categories, Enable Sub-Categories, Enable Brands and Enable Warranty must be on under Settings > Business Settings > Product. Warranties do not show on the product form until Enable Warranty is on.
Categories and sub-categories#
- Go to Product setup > Categories (1). Each row is a main category with its sub-category and product counts. Select the arrow on a row to see its sub-categories, or use Expand all.
- Select Add (2).
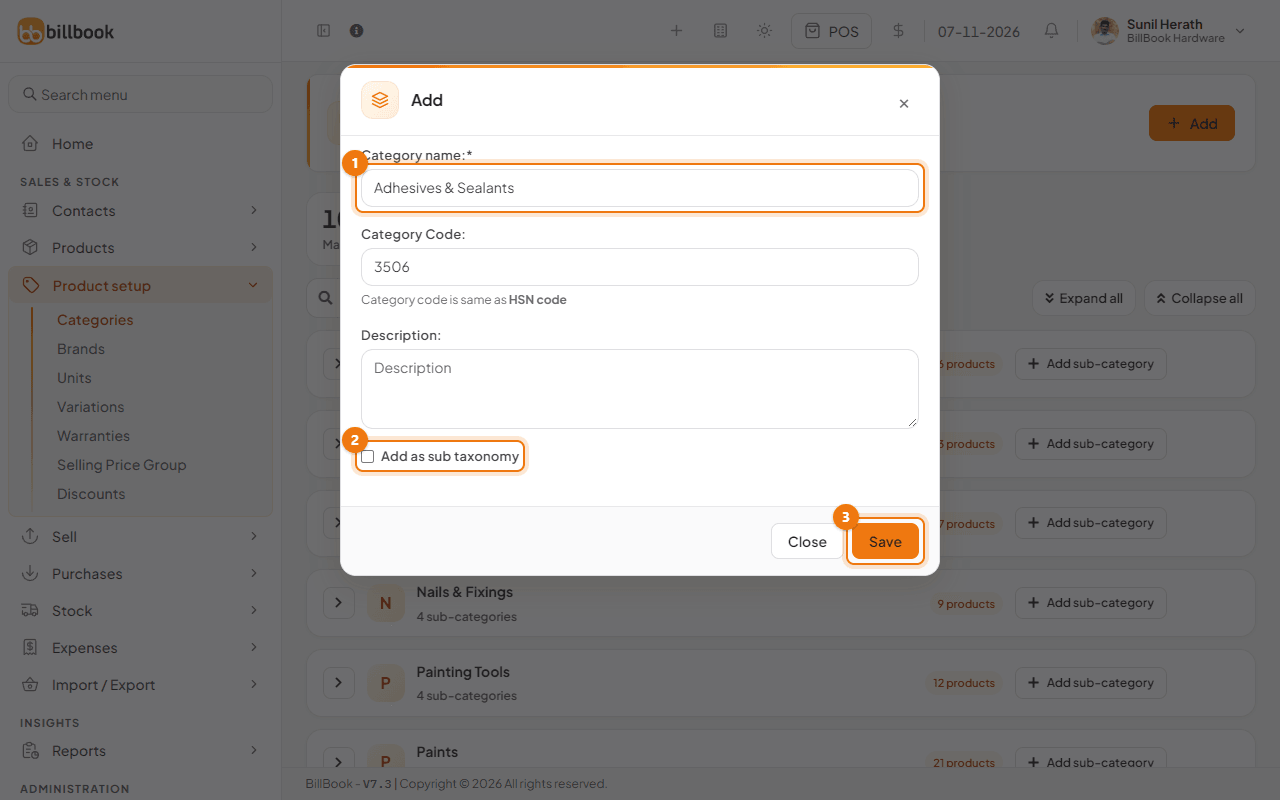
- Enter the Category name, for example Adhesives & Sealants. The Category Code is optional and is the same as the HSN code. Add a Description if you wish.
- Select Save. The new category appears in the list.
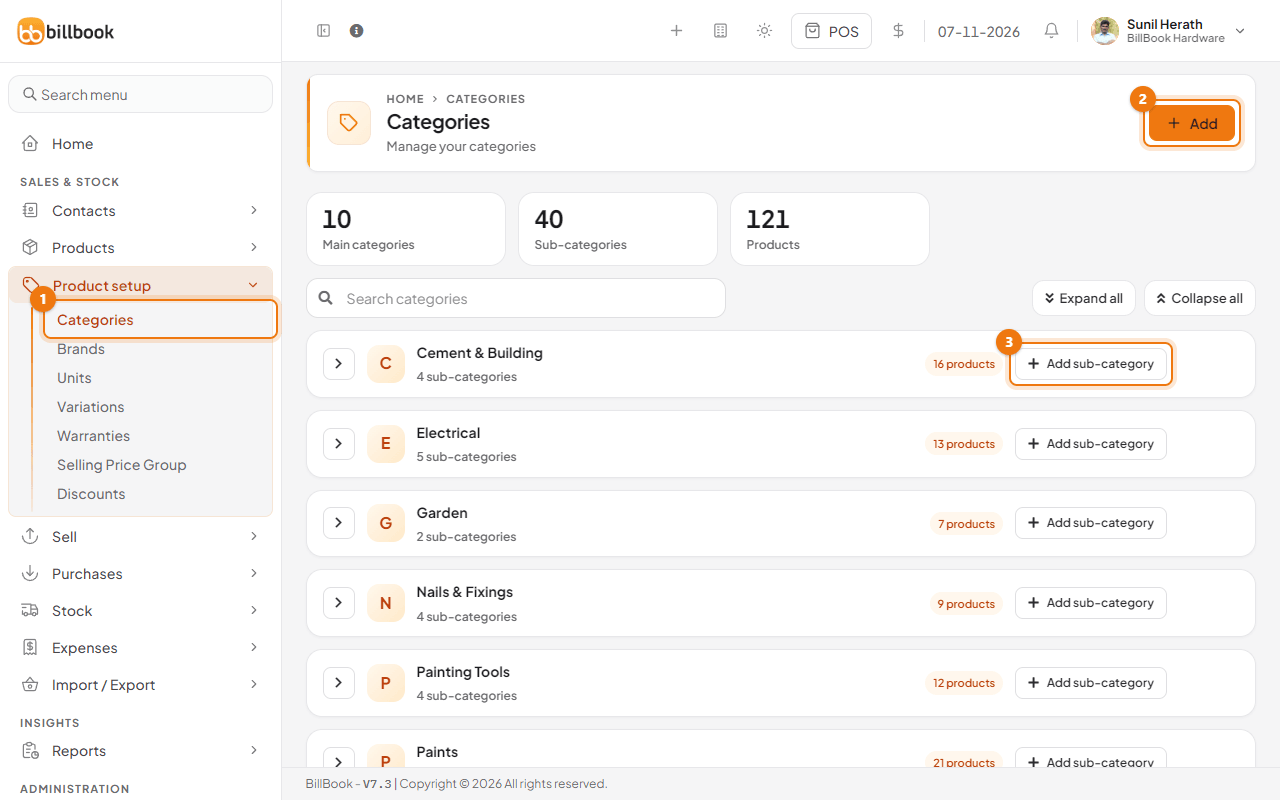
To add a sub-category, select Add sub-category (3) on the row of its main category. You can also tick Add as sub taxonomy (2) in the Add pop-up and choose the main category.
You choose the category and sub-category on the product form under Organise. See Add a product.
Brands#
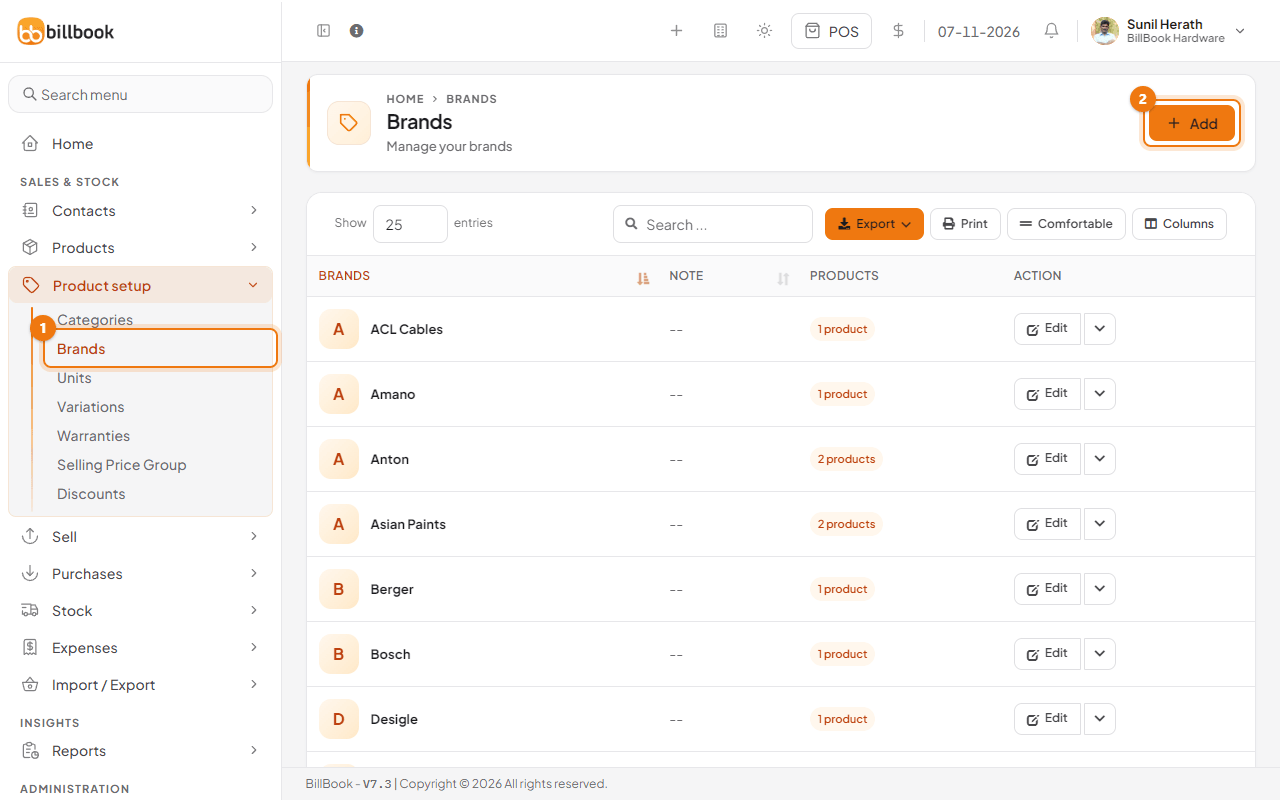
- Go to Product setup > Brands (1). The list shows each brand and how many products use it.
- Select Add (2).
- Enter the Brand name and, if you like, a Short description and a Logo.
- Select Save.
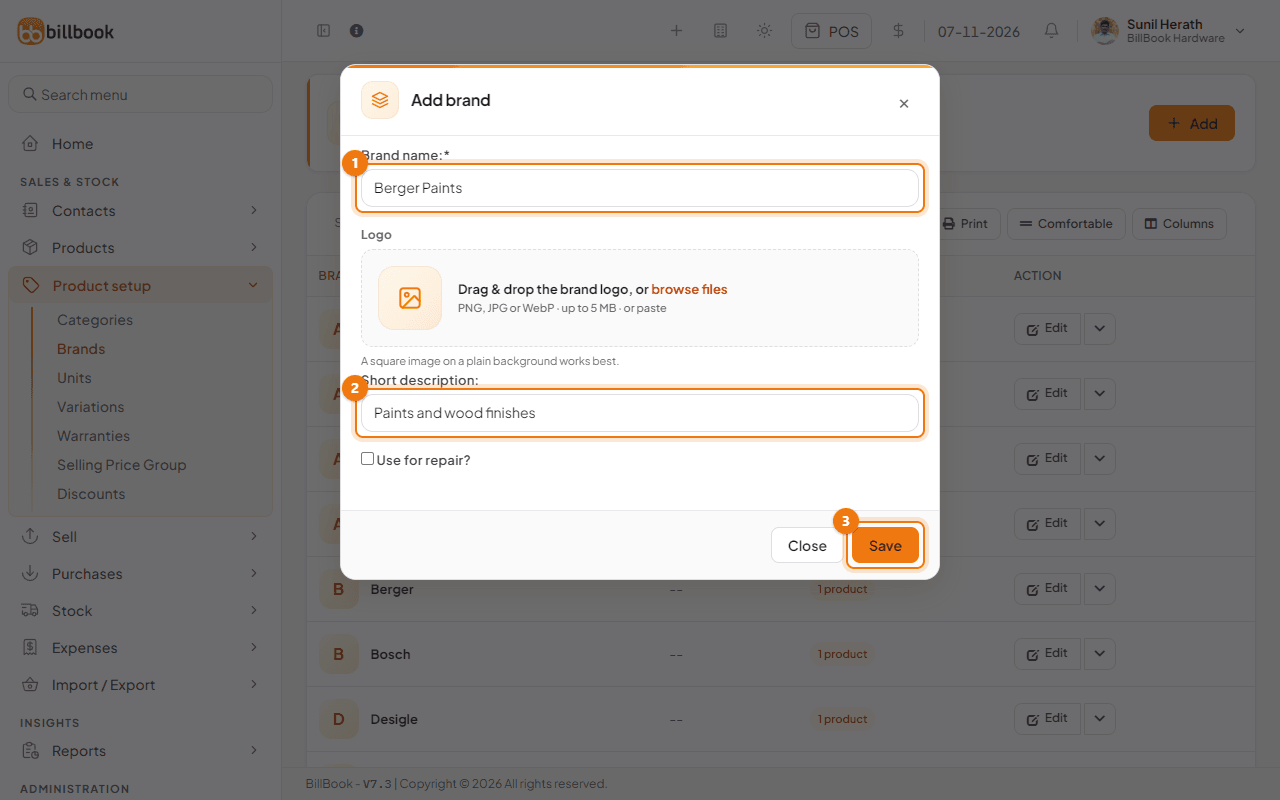
Note: The brand pop-up also has a Use for repair? box. Leave it unticked unless you use BillBook repair features.
Warranties and printing them on invoices#
A warranty is a name and a length of time, such as 1 Year Manufacturer Warranty.
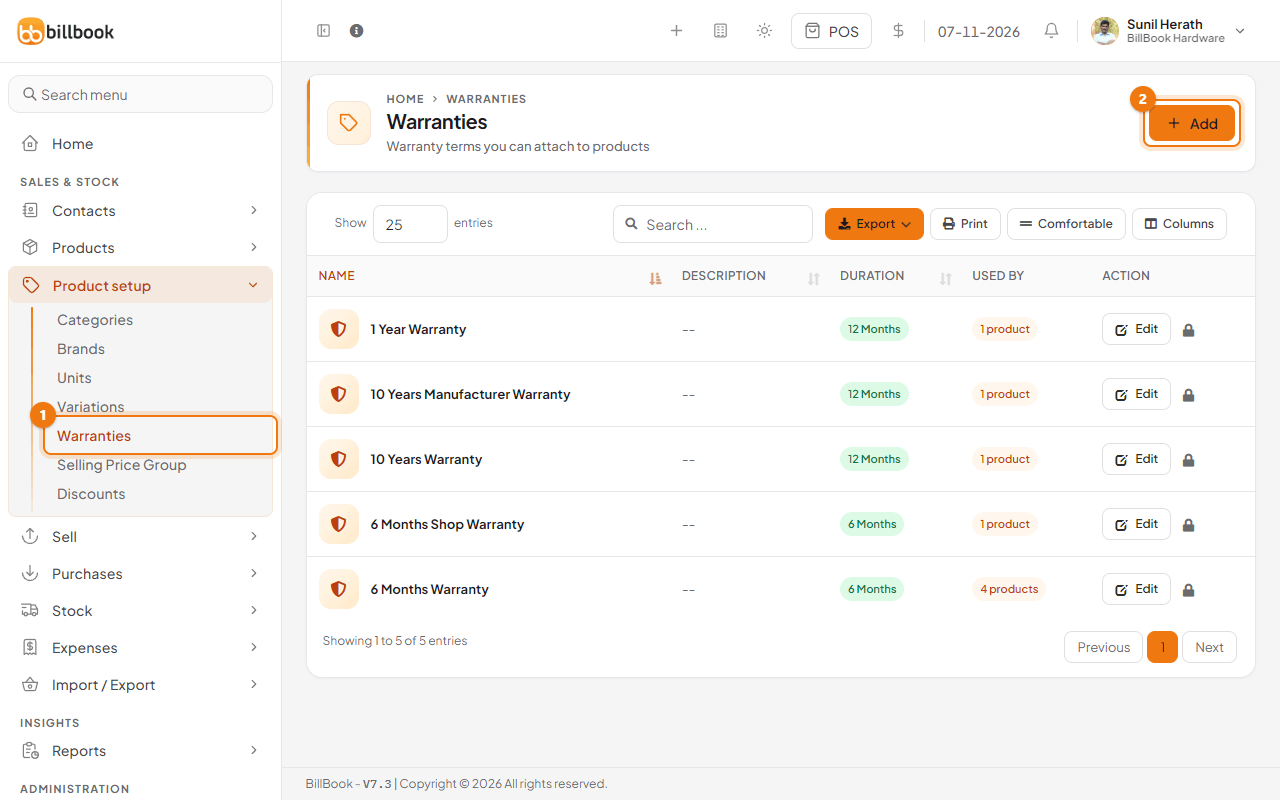
- Go to Product setup > Warranties (1). The list shows each warranty with its length and how many products use it.
- Select Add (2).
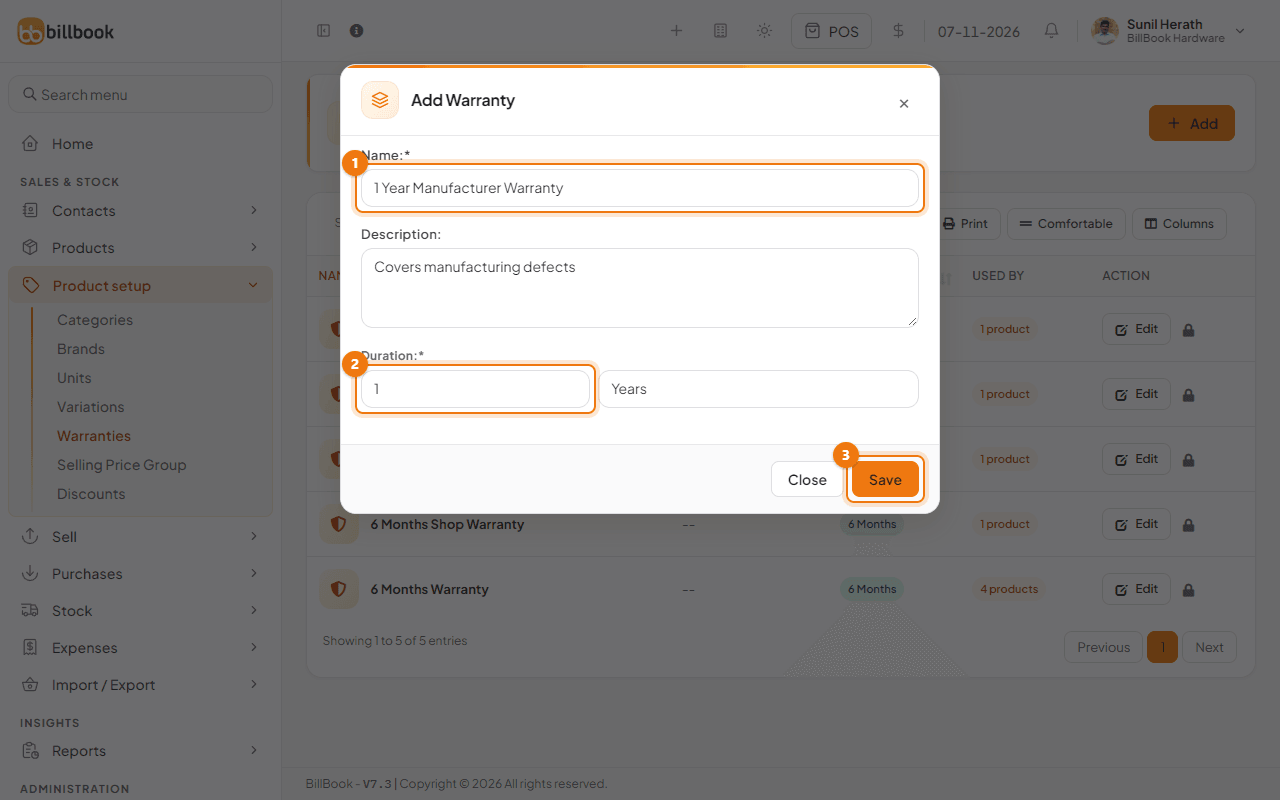
- Enter the Name and an optional Description.
- Enter the Duration as a number and choose Days, Months or Years. For one year, enter 1 and choose Years.
- Select Save.
To attach a warranty, open the product with Edit, choose it under Warranty in More details and save.
To print it, go to Settings > Invoice Settings, edit the invoice layout and tick Show warranty name, Show warranty expiry date or Show warranty description.