
Customer groups and group pricing
Last updated: 6 November 2026 · 4 min read
A customer group lets you treat a kind of customer the same way, such as wholesale buyers, staff or regular contractors. The group can lower or raise the selling price automatically when you make a sale.
Before you start: To link a group to a selling price list, create the list first under Product setup > Selling Price Group. A customer can be in only one group at a time.
Create a customer group#
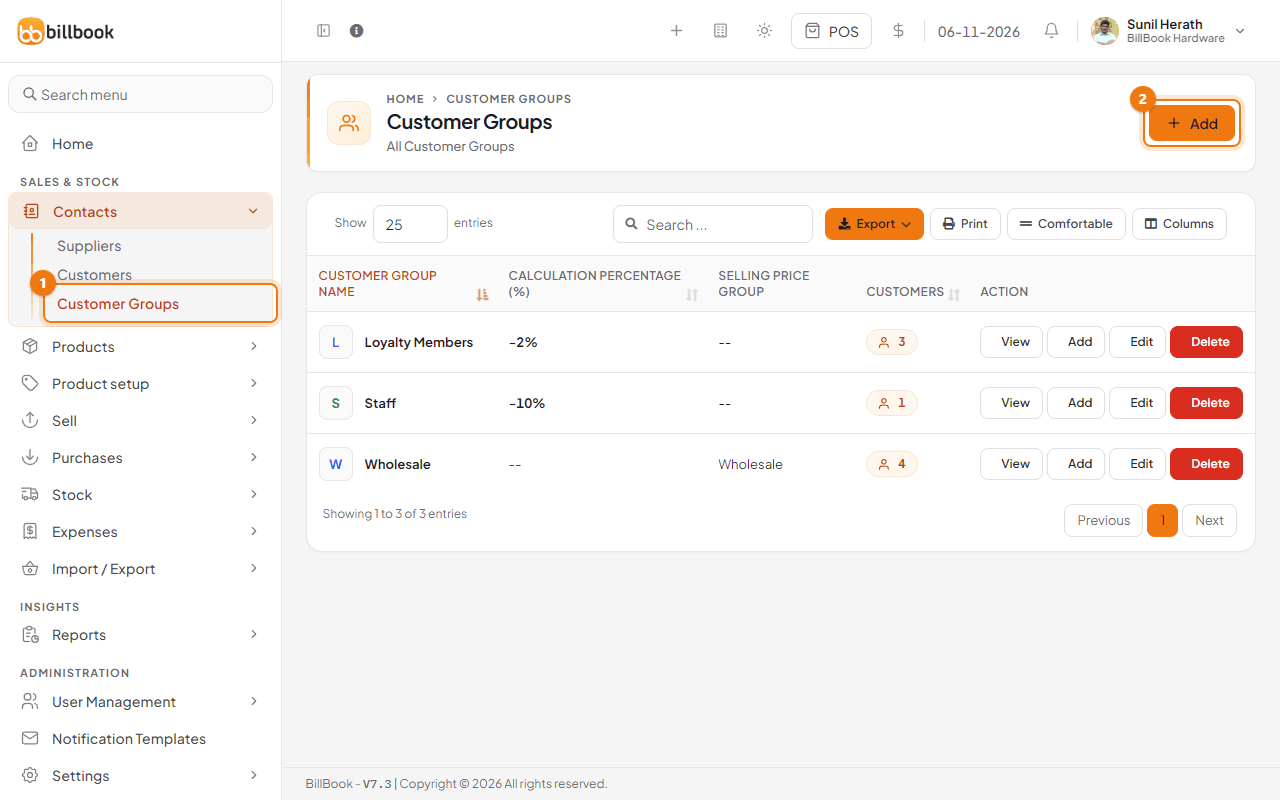
- Go to Contacts > Customer Groups (1). The list shows each group with its Calculation Percentage (%), Selling Price Group and number of customers.
- Select Add (2).
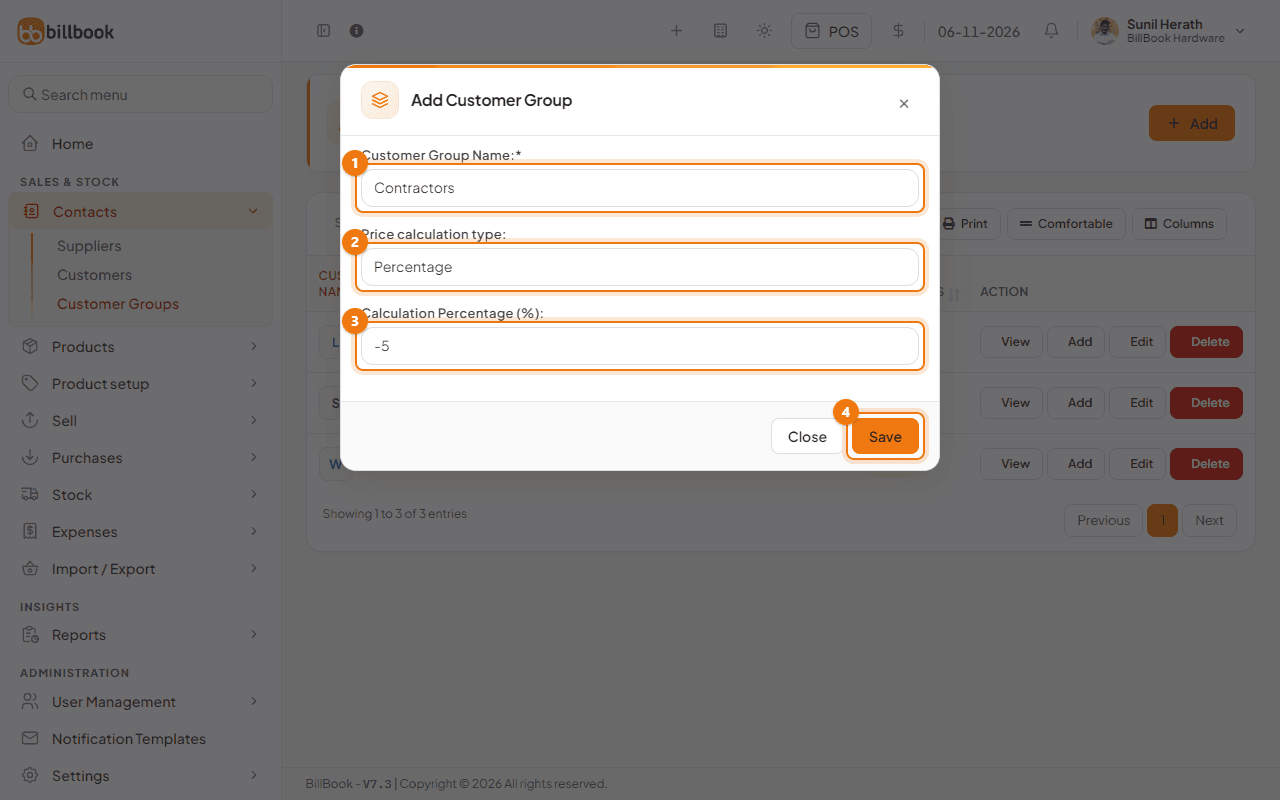
- Enter the Customer Group Name (1), for example Contractors.
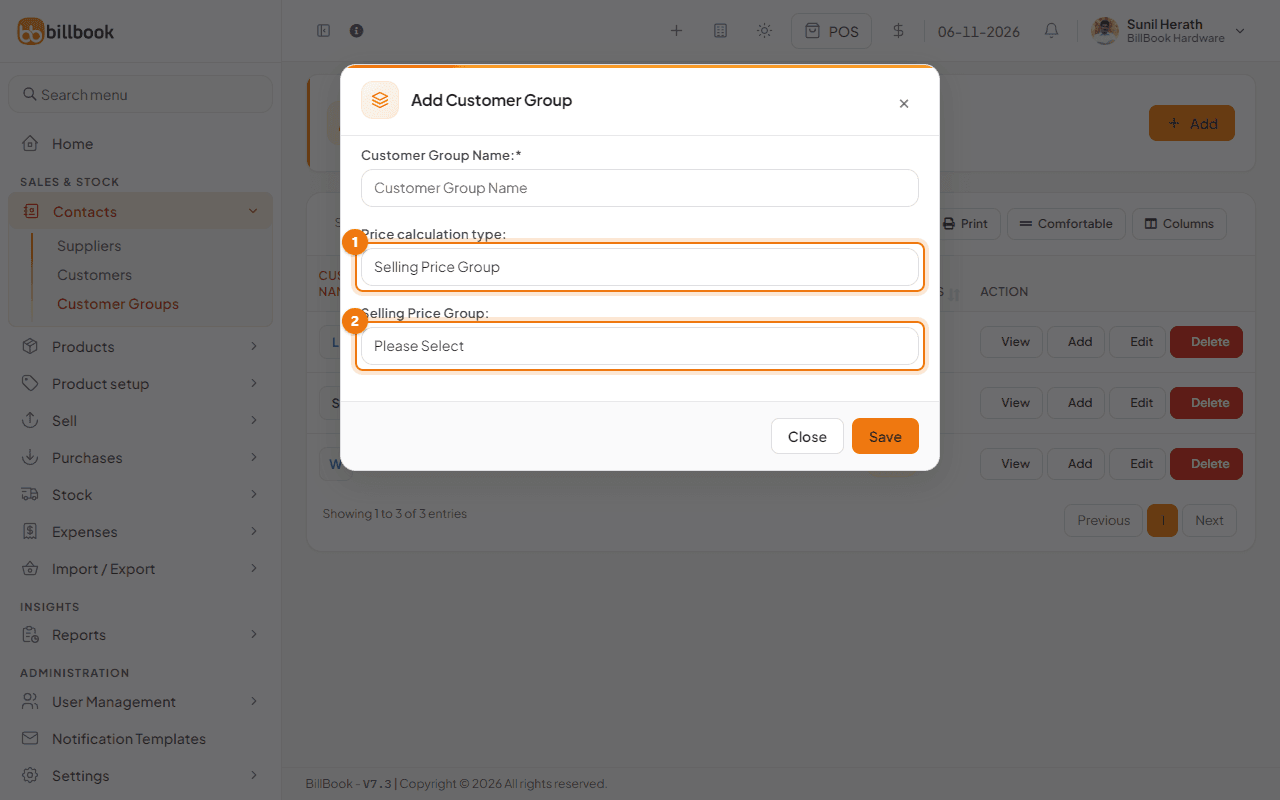
- Choose the Price calculation type (2): Percentage or Selling Price Group. The next section explains both.
- For Percentage, enter the Calculation Percentage (%) (3), for example -5.
- Select Save (4). BillBook shows Success and the group appears in the list.
To change a group later, select Edit on its row.
Group discount or selling price group#
Each group works out prices in one of two ways:
- Percentage: the selling price is the product's normal price plus the percentage. A negative number lowers the price and a positive number raises it. Staff at -10% pay 10% less, and Loyalty Members at -2% pay 2% less. A Contractors group at -5% pays 5% less.
- Selling Price Group: the group uses one of your own price lists, such as Wholesale, instead of a percentage. Choose the list in Selling Price Group (2).
To put a customer in a group, choose it in Customer Group on the customer's form (see Customers and suppliers), or add them from the group page as shown next.
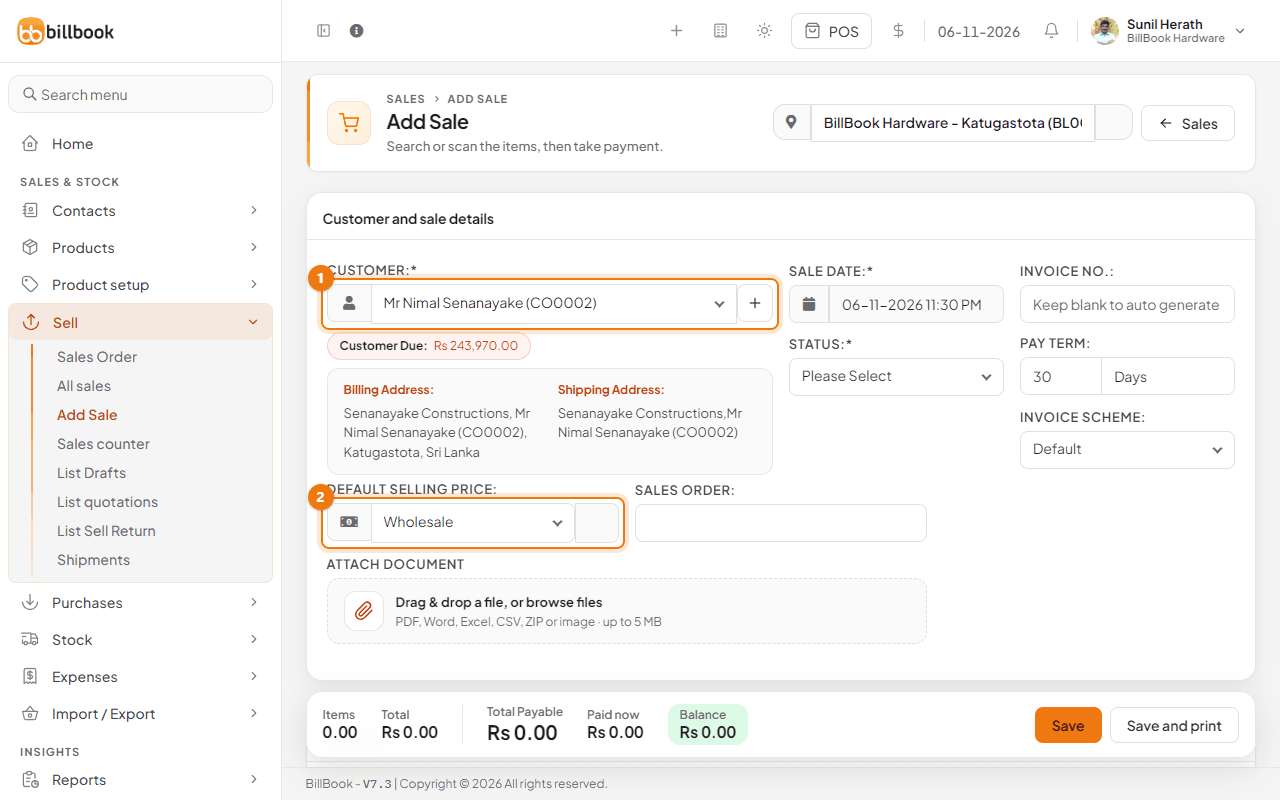
On Sell > Add Sale, choosing a customer fills in the group's price automatically. Here Mr Nimal Senanayake (1) belongs to Wholesale, so Default Selling Price (2) switches to Wholesale, and the pay term from his contact (30 days) is filled in too. A red Customer Due note under the name reminds you what he already owes.
Add or remove members#
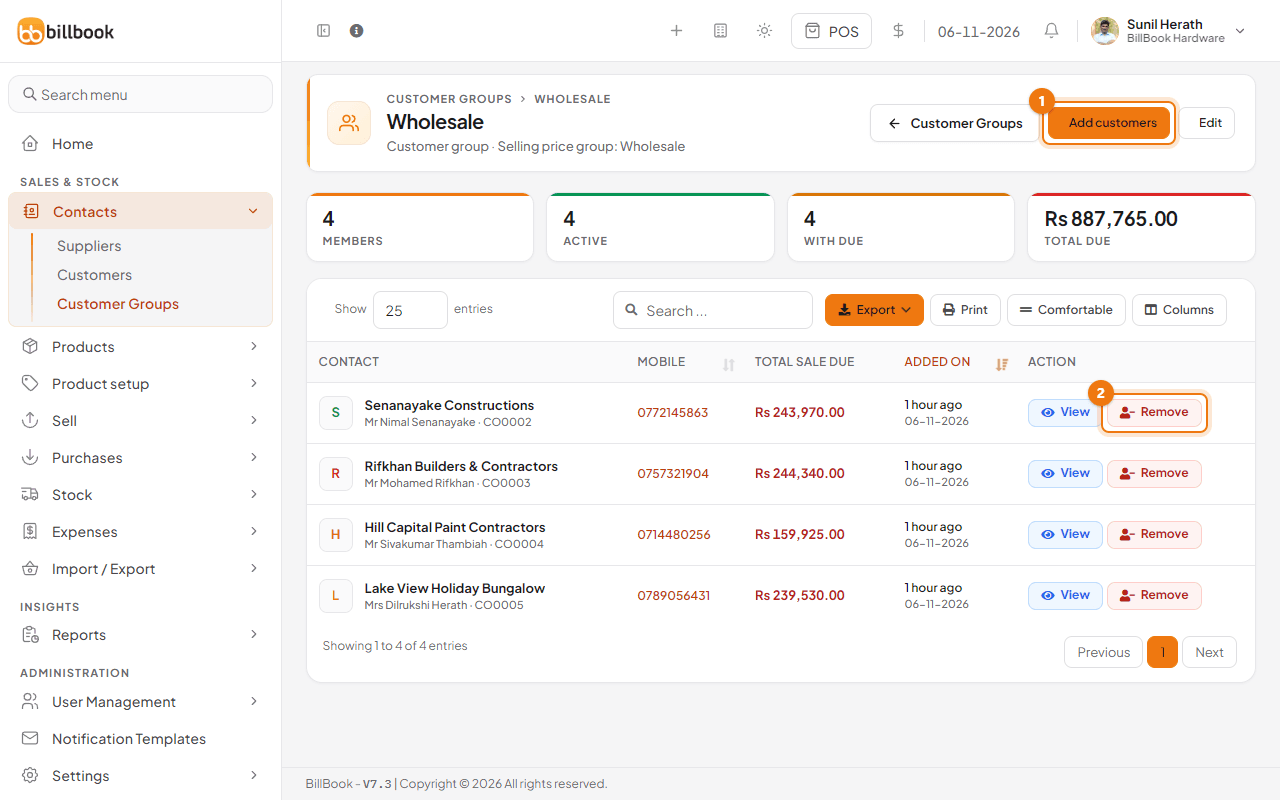
- On the Customer Groups list, select View on a group's row, or the customer count. The group page lists its members, with cards at the top for Members, Active, With due and Total due.
- Select Add customers (1).
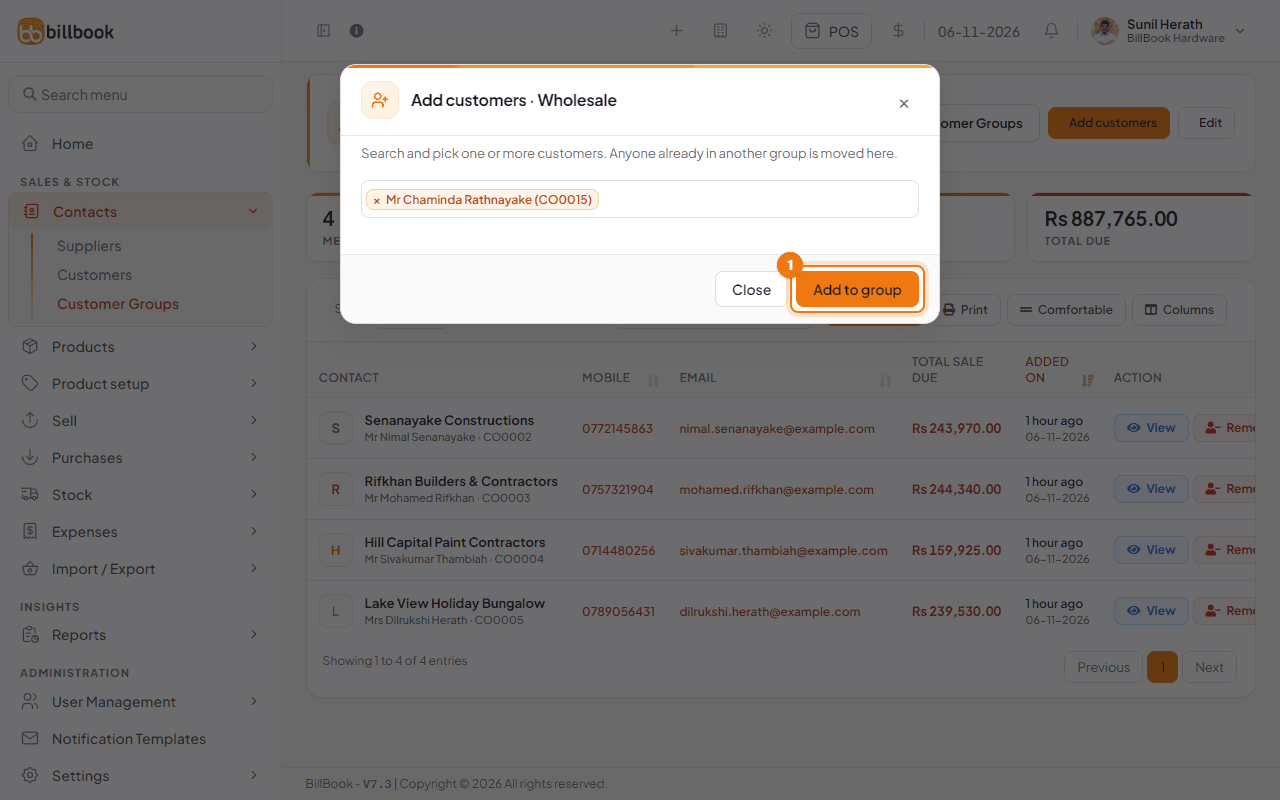
- Search for a customer by name, business, ID or mobile number and pick one or more. Customers who are already in another group show Now in and the group name. They are moved to this group.
- Select Add to group (1).
To take someone out, select Remove (2) on their row and confirm with OK. BillBook asks Remove from group? and explains that the customer is not deleted, only left without a group.
Tip: On the list, Add on a group's row opens the same Add customers window straight away.
Customer Groups report#
Go to Reports > Selling > What sells best and select the Customer Groups Report tab (1) to see which kinds of customers your sales come from. Choose a Business Location and a Date Range. Each group shows its invoices, customers, sales, returns, net sales, average invoice and share of sales, and the cards at the top show Net sales, Top group and Customers in groups. Sales made without a group are listed as No group (2).
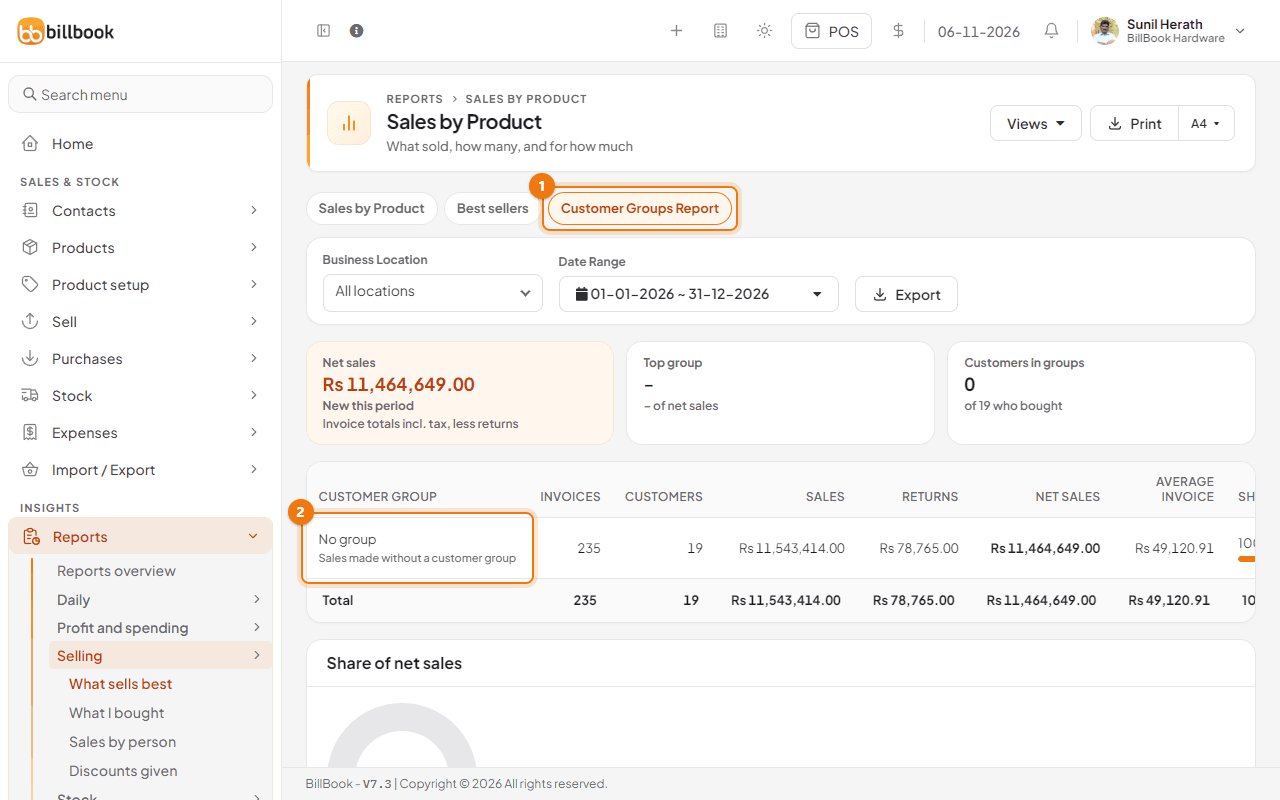
Each sale counts under the group it was made with, even if the customer later moves to another group. Select a group name to see what it bought.