Track expiry and lot numbers
Last updated: 7 November 2026 · 4 min read
Paint, adhesives, sealants and other products go off or must be sold by a date. Switch on expiry and lot numbers so each purchase records which batch it was and when it expires. BillBook then warns you before the batch becomes dead stock.
Before you start: You need permission to open Settings. Lots and expiry dates are entered on purchases and opening stock, so set up Purchases first.
Turn on expiry and lots#
Two settings control this. Both are in Settings > Business Settings.
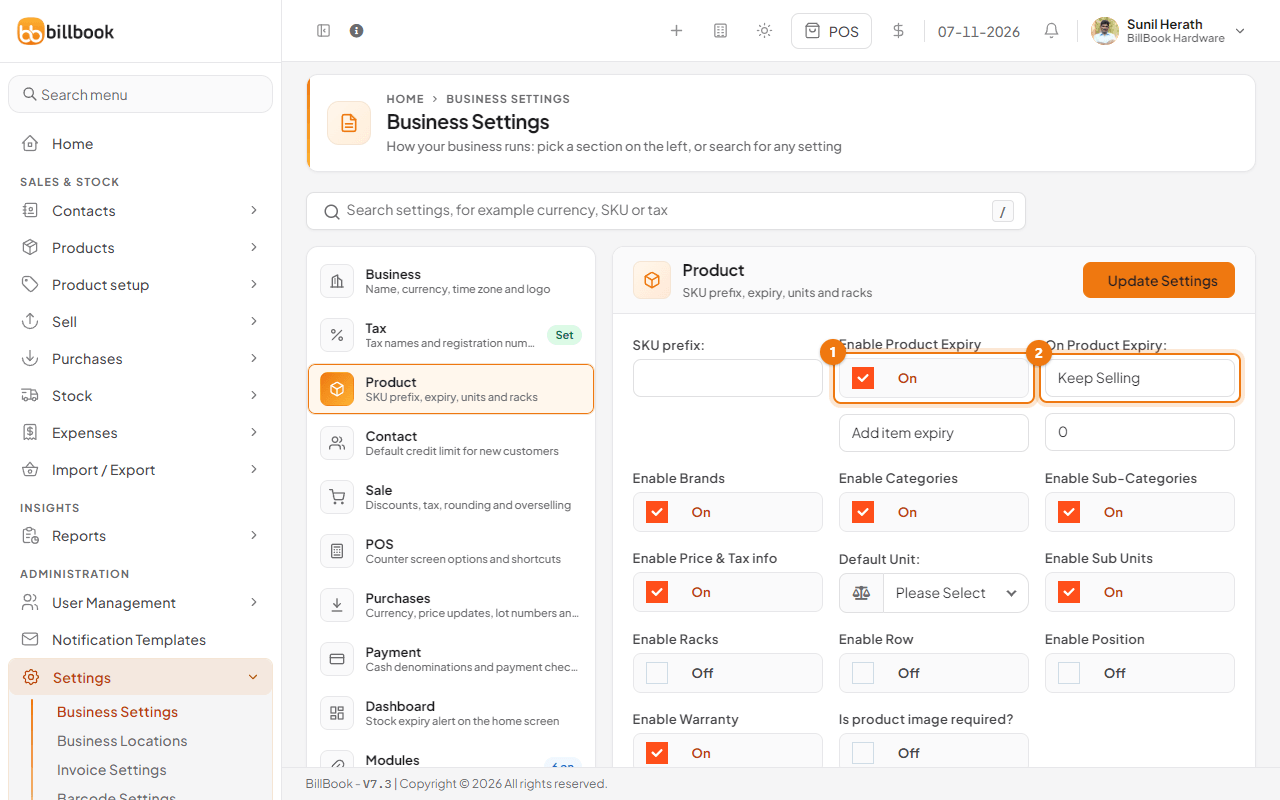
- Open the Product section and tick Enable Product Expiry (1).
- Under On Product Expiry (2), choose Keep Selling to keep selling expired stock, or Stop Selling n days before and enter the number of days. BillBook then stops selling a batch that many days before its expiry date.
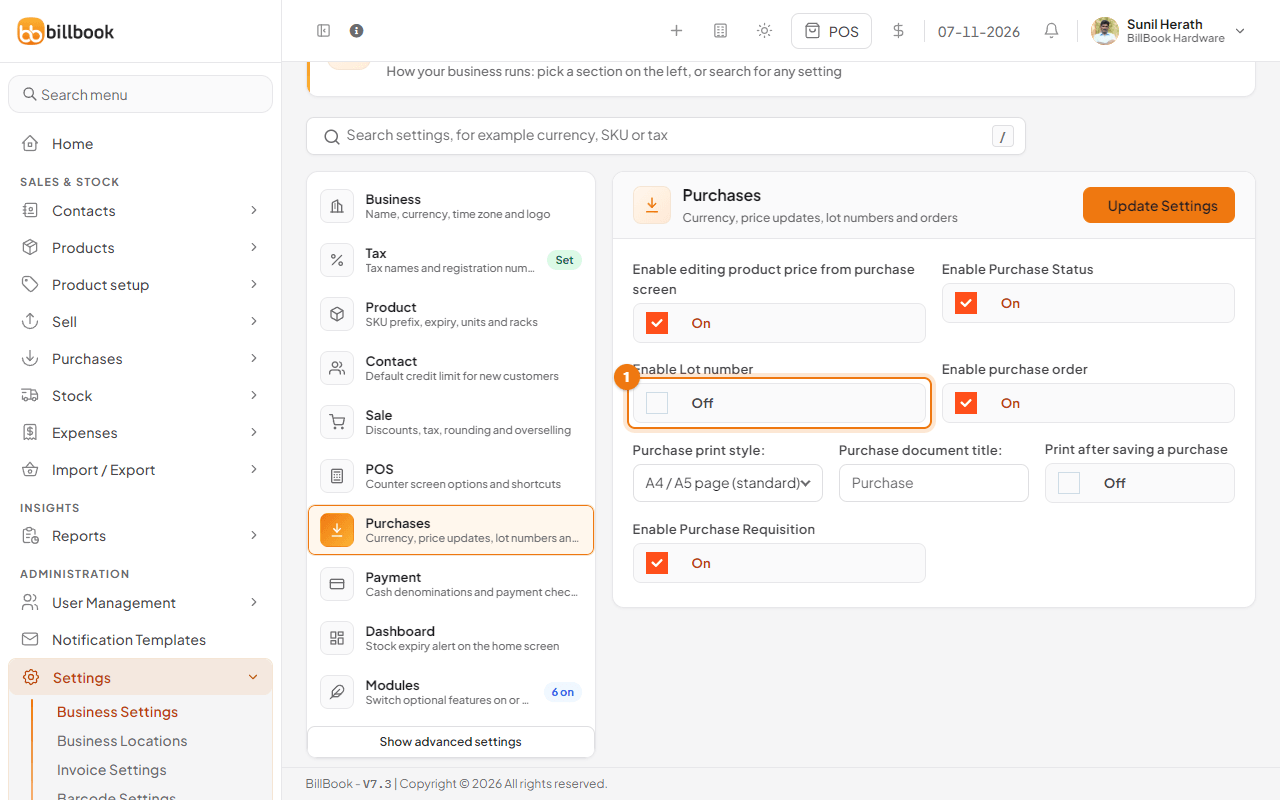
- Open the Purchases section and switch on Enable Lot number (1).
- Select Update Settings.
Now every purchase line has a Lot Number box and an EXP Date box.
- Go to Purchases > Add Purchase and fill in the supplier, location and status as usual.
- Add the products. On each product's line, enter the Lot Number (1), for example the batch number printed on the tin.
- Choose the EXP Date (2) from the calendar.
- Select Save.
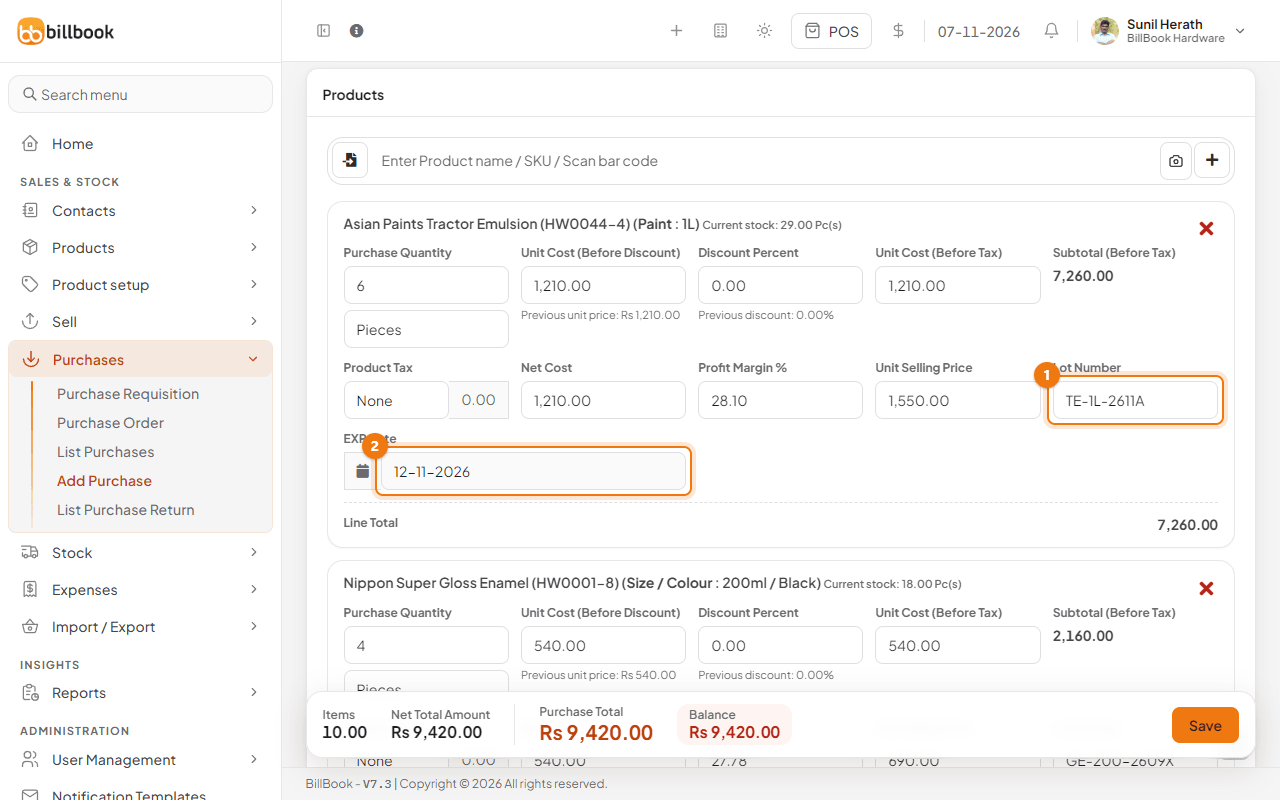
The stock you bought now carries that lot number and expiry date. When you sell or transfer the product, the Lot & Expiry box on the line lets you pick which batch you are taking from.
Dashboard expiry alerts#
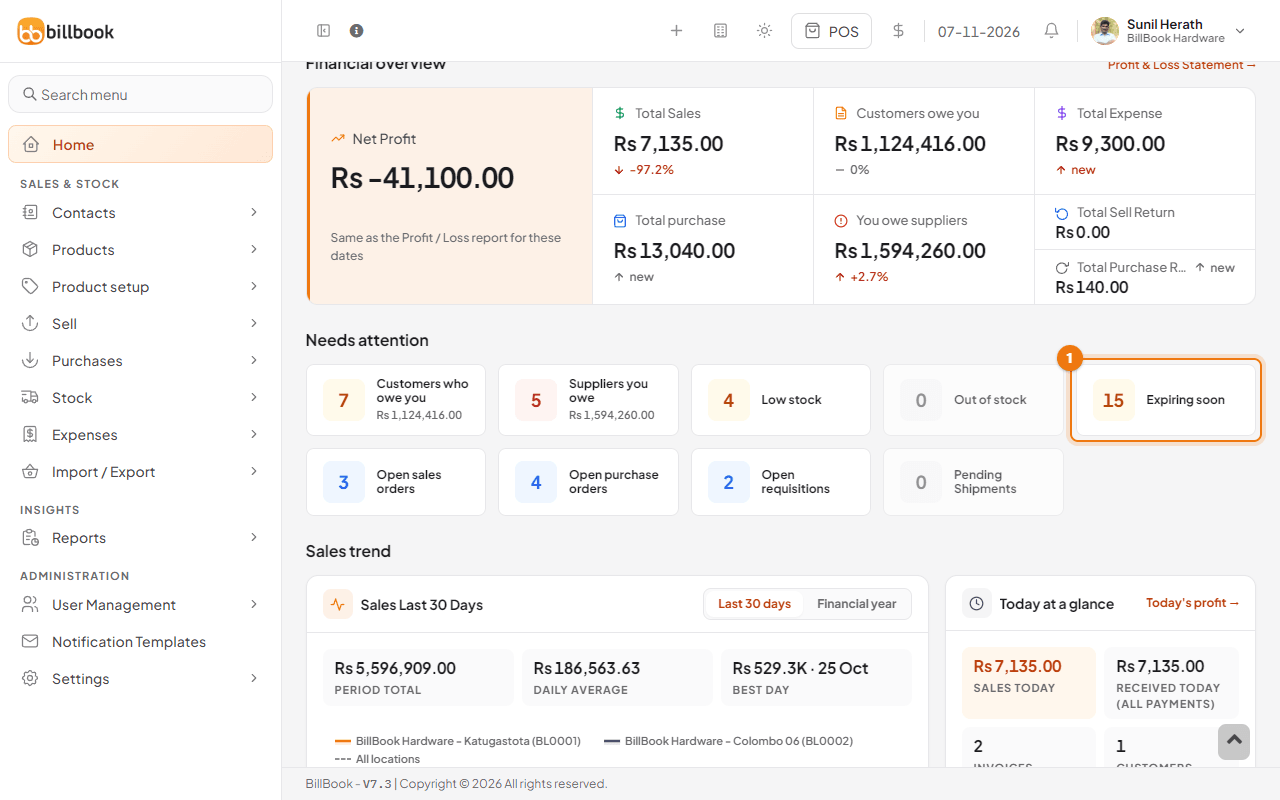
On the home screen, Needs attention has an Expiring soon tile (1) with the number of batches that have expired or are about to. It only shows when Enable Product Expiry is on. Select it to jump to the Stock Expiry Alert panel further down the page.
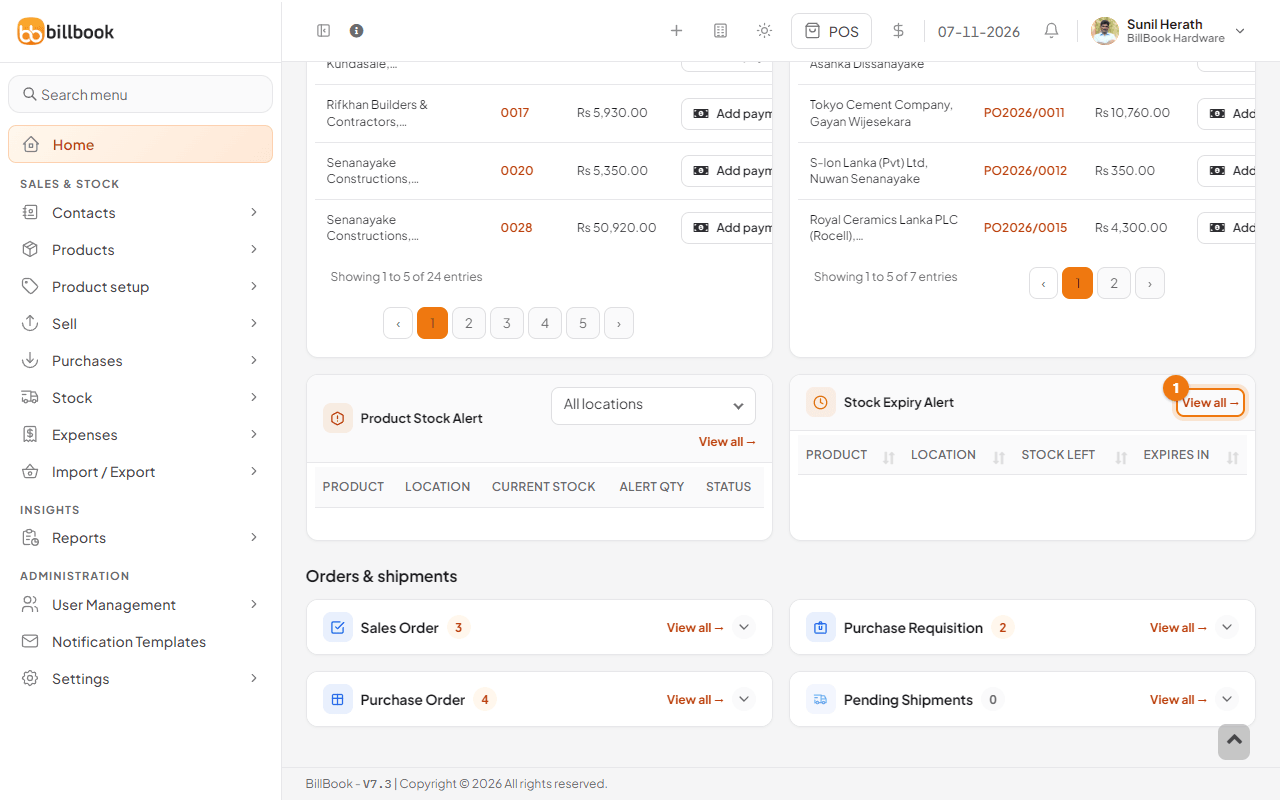
The Stock Expiry Alert panel sits beside Product Stock Alert under Activity & alerts. It lists each batch with its product, location, stock left and a note such as Expired 11 days ago or 5 days left. Select View all (1) to open the full report.
To change how far ahead the alert looks, open Settings > Business Settings > Dashboard and change View Stock Expiry Alert For (a number of days).
Stock Expiry report#
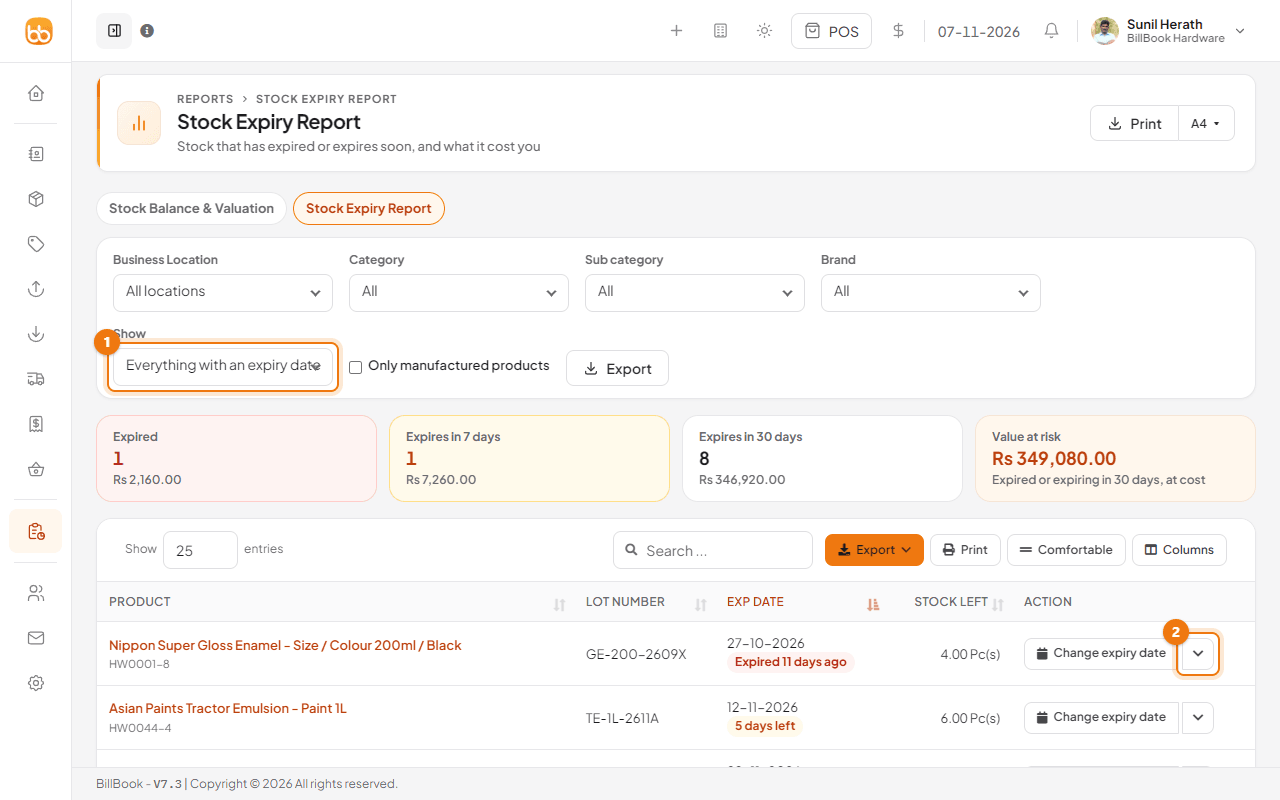
Go to Reports > Stock > Stock on hand and select the Stock Expiry Report tab. It shows only when Enable Product Expiry is on. The cards at the top show Expired, Expires in 7 days, Expires in 30 days and Value at risk (what the expired or soon-to-expire stock cost you).
- Use Show (1) to list Everything with an expiry date, only Expired stock, or what Expires in 7 days, 30 days or 90 days. You can also narrow by Business Location, Category, Sub category and Brand.
- The table shows each batch with its Lot Number, EXP Date, Stock Left and value at cost. Use Columns to show or hide columns such as Location or MFG Date.
- Select Change expiry date on a row if the date was entered wrongly. Select the arrow (2) for View purchase or Remove from stock.
Tip: Use Remove from stock to write off an expired batch. See Stock adjustments and write-offs.
Lot report#
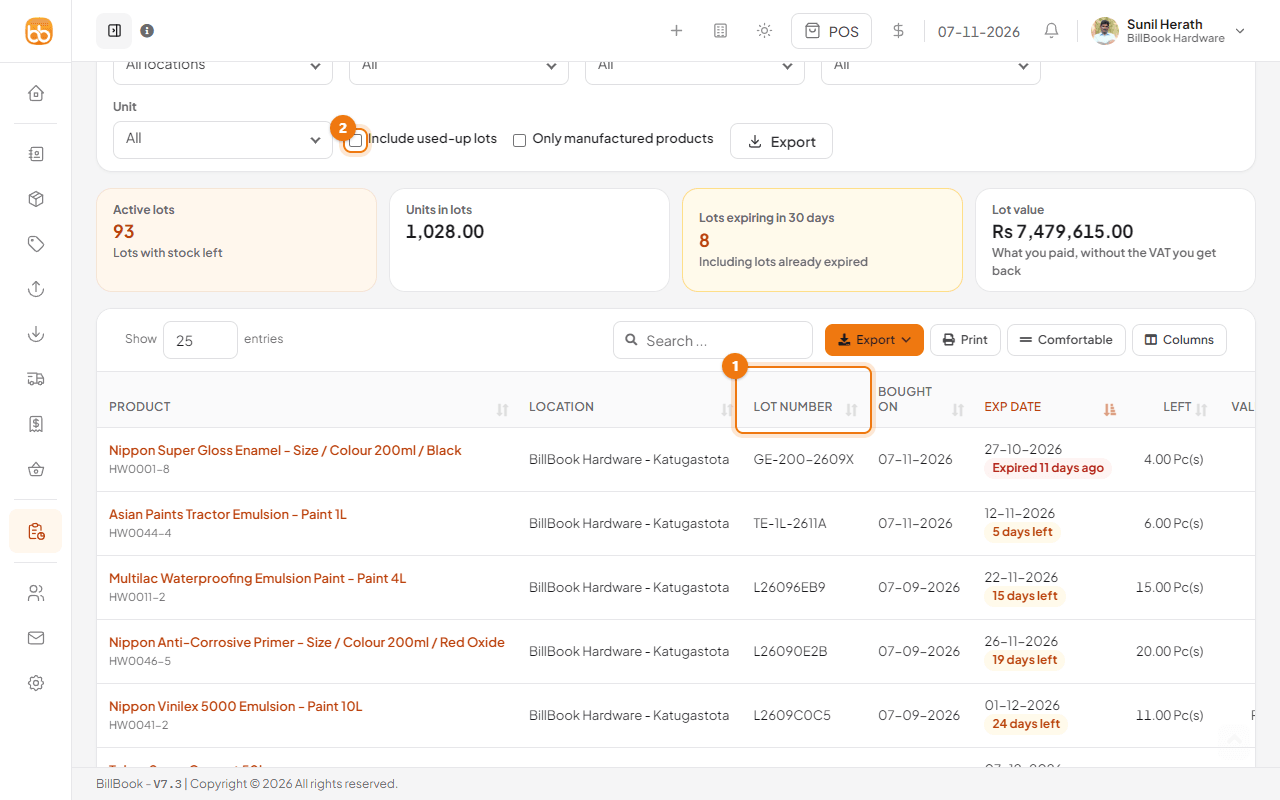
Go to Reports > Stock > Stock on hand and select the Lot Report tab (it shows only when Enable Lot number is on) to see how much of each batch is left, where it is and when it expires. The cards show Active lots, Units in lots, Lots expiring in 30 days and Lot value.
Each row has the product, location, Lot Number (1), the date it was bought, EXP Date, how many are Left and the value at cost. Tick Include used-up lots (2) to also list batches that have run out.