
Pay suppliers
Last updated: 7 November 2026 · 4 min read
Record every payment you make to a supplier so BillBook always knows what you still owe. You can pay one purchase in full, pay in parts, or pay a supplier a lump sum that covers several purchases.
Payment statuses#
Each purchase has a payment status in Purchases > List Purchases. Use the tabs above the list (All, Paid, Partial, Due, Overdue) to show only one kind.
- Paid: you have paid the full amount.
- Partial: you have paid some of it and the rest is still due.
- Due: nothing has been paid yet.
- Overdue: the pay term has passed and the bill is not fully paid.
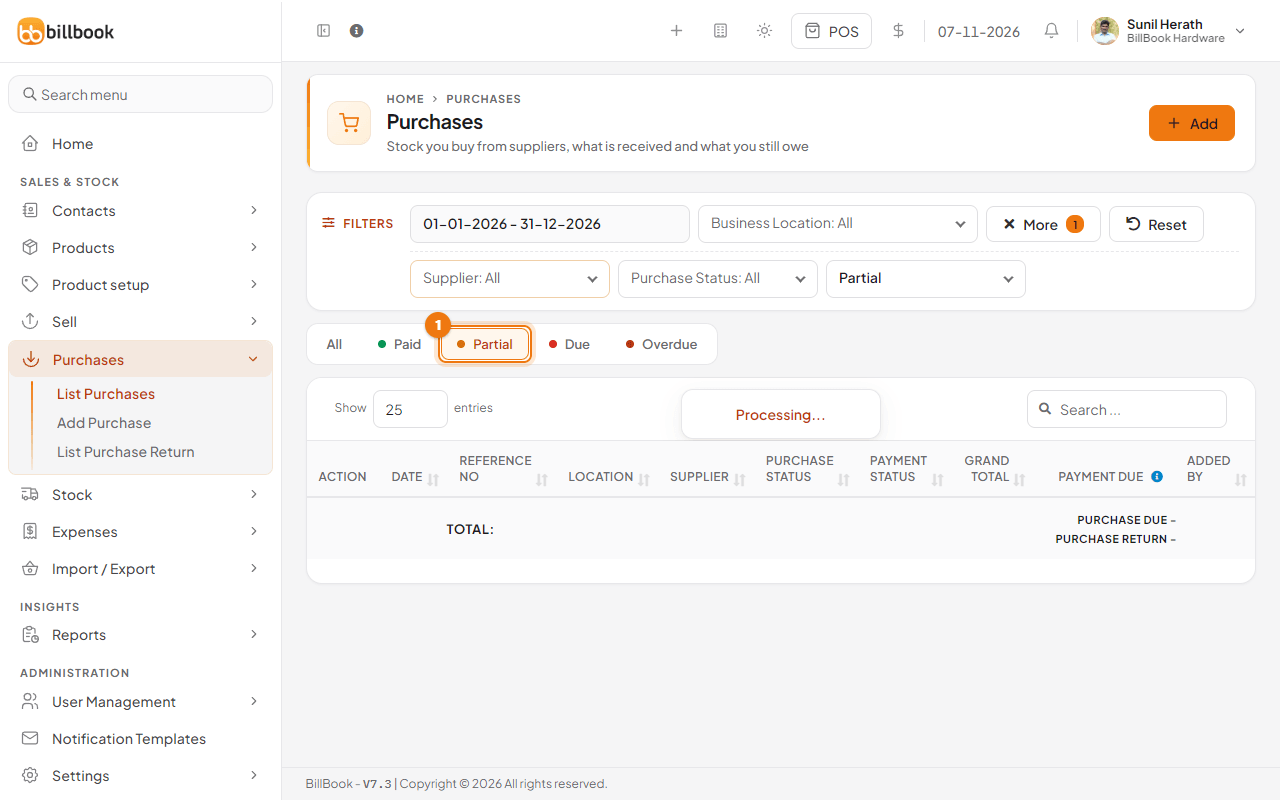
Select the Partial tab (1) to see the purchases you have part-paid.
Pay while recording a purchase#
- On Purchases > Add Purchase, fill in the supplier and products as usual (see Record a purchase).
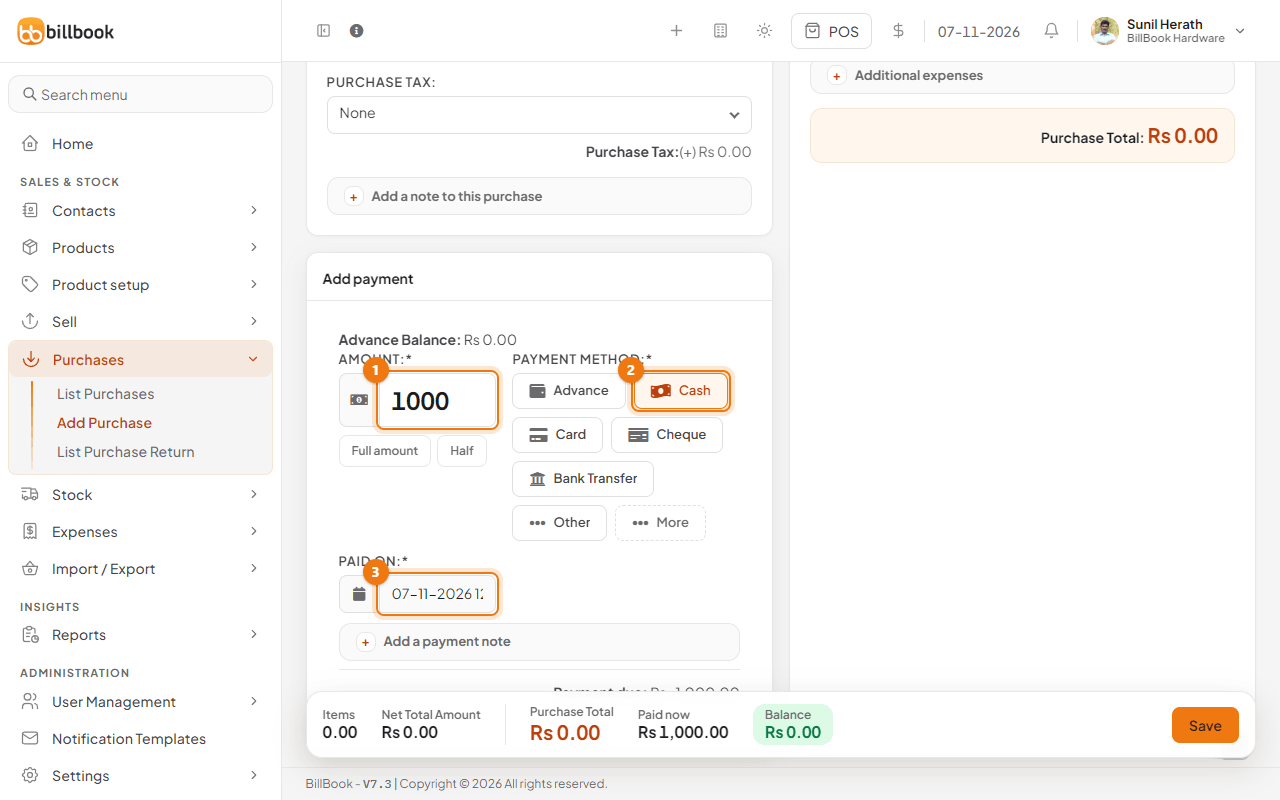
- In Add payment, enter the Amount (1). Select Full amount or Half to fill it in for you.
- Choose the Payment Method (2) by selecting its button: Cash, Card, Cheque, Bank Transfer or Other. Select More for the custom methods. Advance uses money you already paid the supplier in advance.
- Check the Paid on date (3). Select Add a payment note if you want one.
- Select Save.
The balance at the bottom shows what is still due. Leave the amount at 0.00 to pay later. The payments can't add up to more than the purchase total: BillBook stops the save and shows Payment is more than the amount due on this purchase.
Pay from the purchase list#
- Go to Purchases > List Purchases.
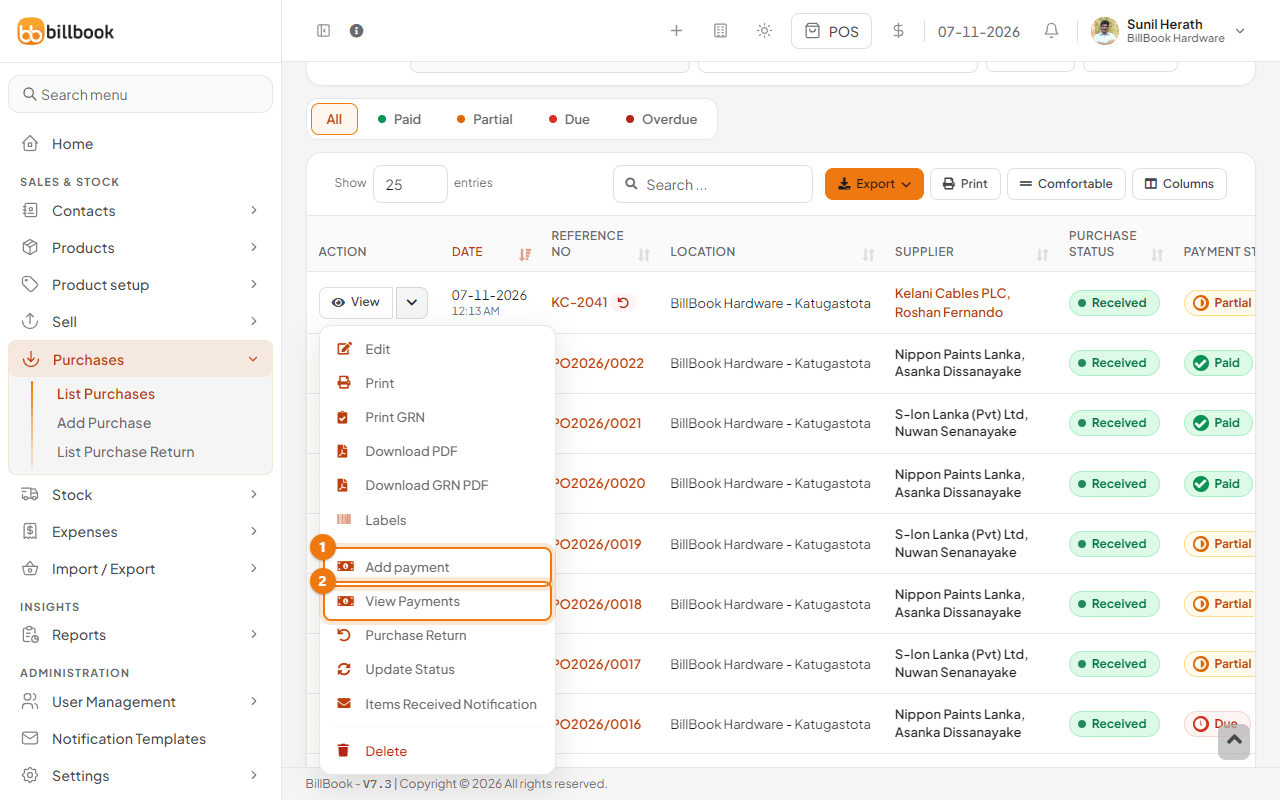
- Select the arrow next to View on the purchase's row, then Add payment (1).
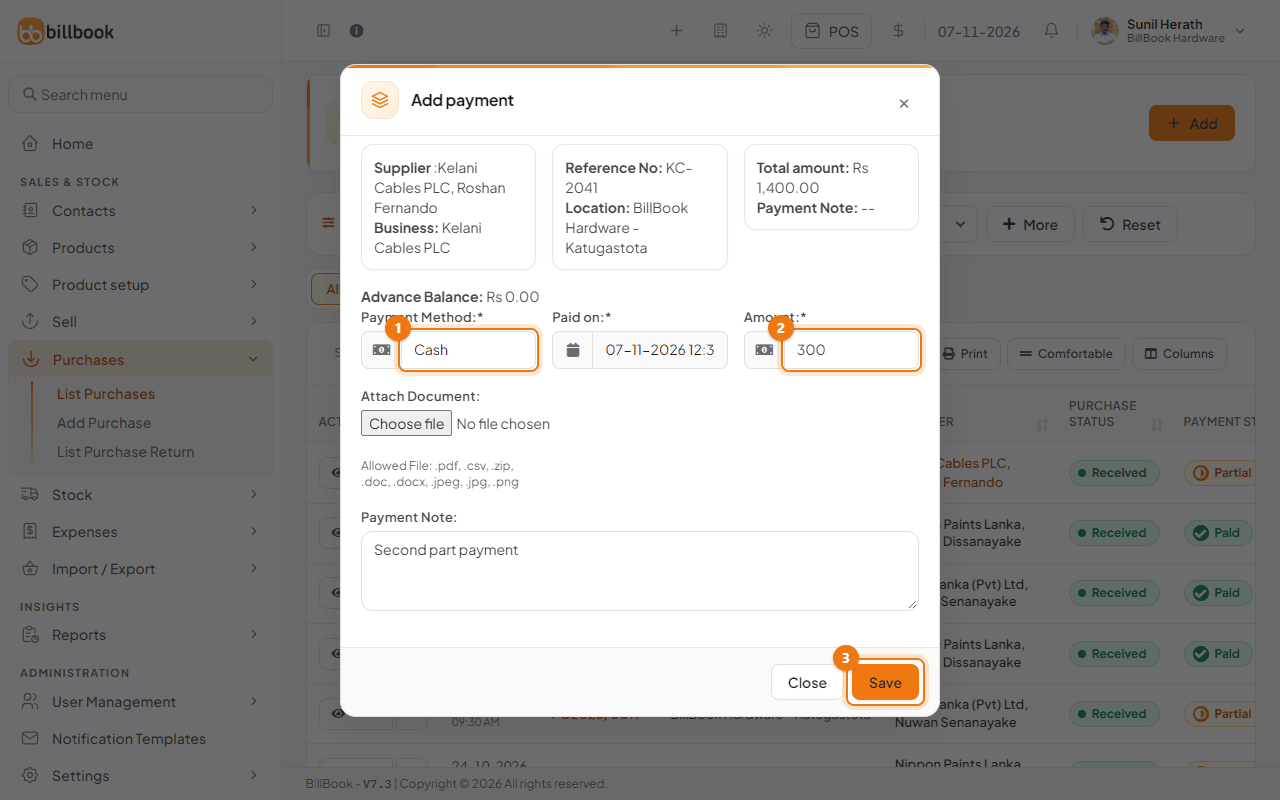
- Choose the Payment Method (1), check the Amount (2) and the Paid on date, and add a Payment Note if you want. The window also shows the supplier, the reference number and the total amount.
- Select Save (3). BillBook shows Payment added successfully and the payment status changes to Partial or Paid.
The amount starts as the full balance of the purchase. Change it to pay only part; a higher amount than the balance is refused with Payment is more than the amount due on this purchase. If payment accounts are turned on, a Payment Account list shows too, starting with the default account of the payment method (see Set up payment accounts).
You can also select Add payment inside the purchase's View window.
Pay from the supplier#
Use this when you give a supplier one payment for several bills.
- Go to Contacts > Suppliers.
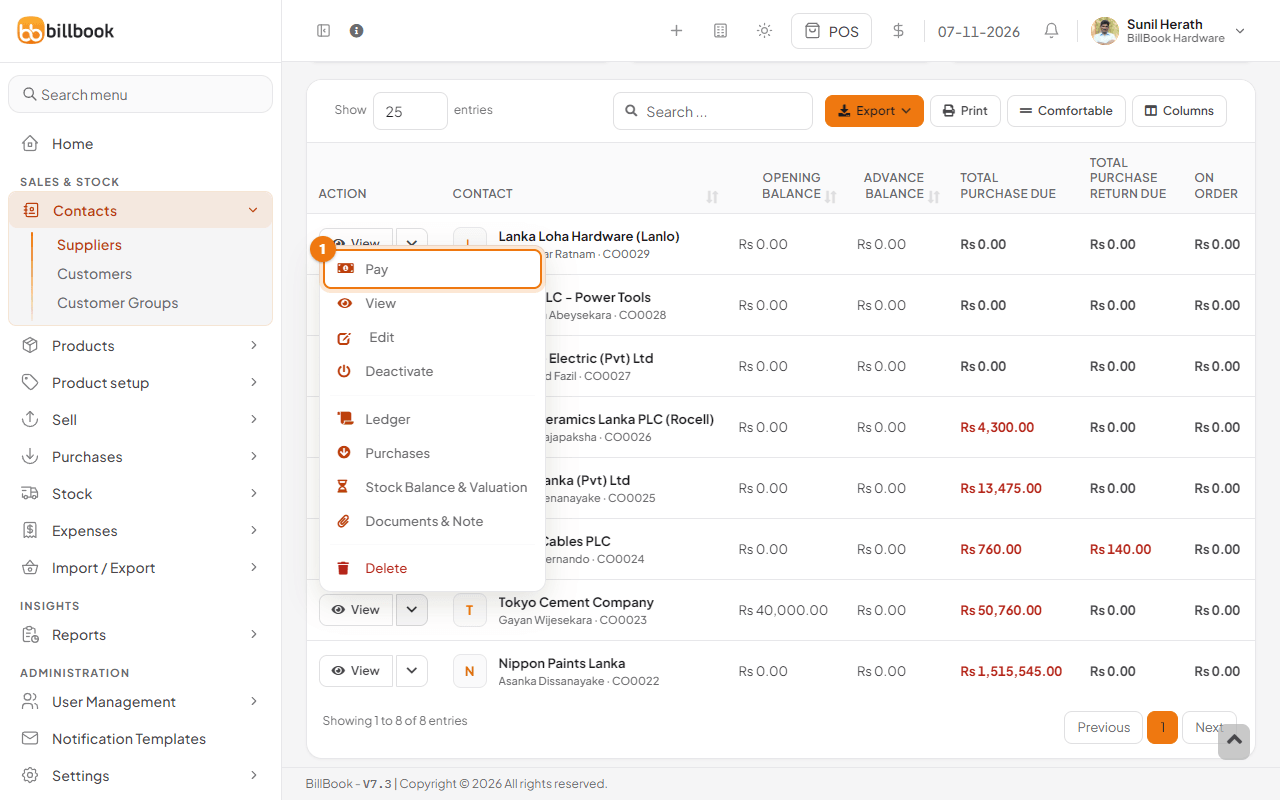
- Select the arrow next to View on the supplier's row, then Pay (1).
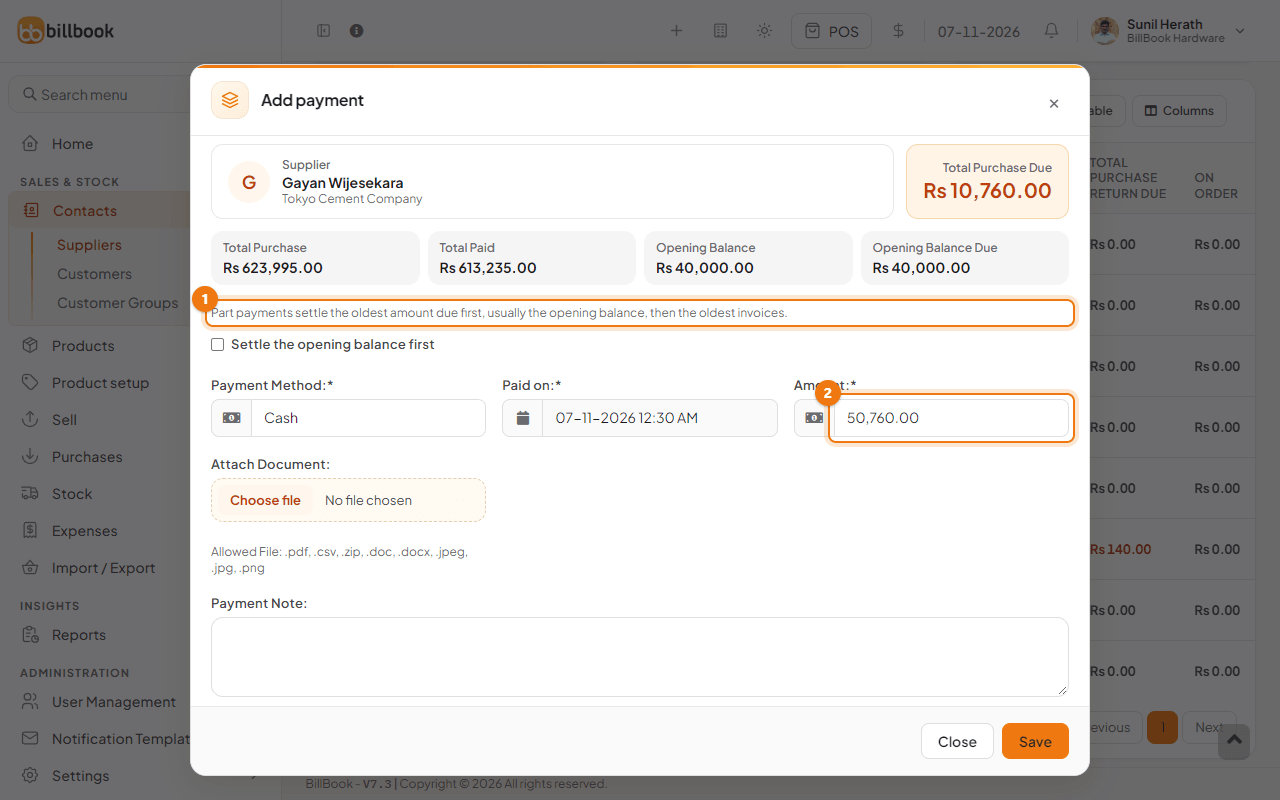
- The window shows the supplier's Total Purchase Due, Total Purchase, Total Paid, Opening Balance and Opening Balance Due. Enter the Amount, choose the Payment Method and select Save.
A part payment settles the oldest amount due first. The window says so (1): Part payments settle the oldest amount due first, usually the opening balance, then the oldest invoices. If the supplier has an opening balance due, you can tick Settle the opening balance first to clear it before any purchase. The Amount (2) starts at everything you owe the supplier, for example 50,760.00 (Rs. 10,760.00 of purchases plus Rs. 40,000.00 of opening balance).
Edit a payment#
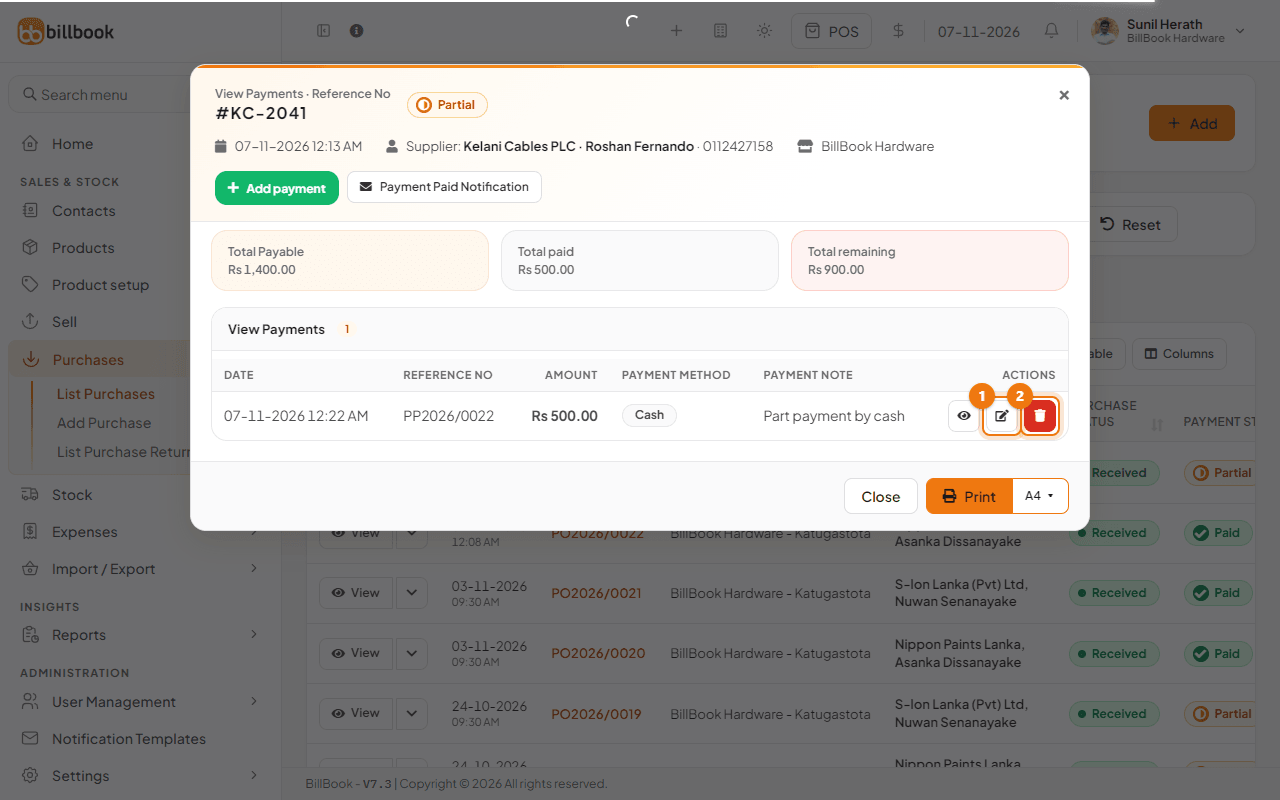
- On Purchases > List Purchases, select the arrow next to View and then View Payments (2 in the row menu picture above).
- The window lists every payment with its date, reference number, amount, method and note. Select the pencil button, Edit (1), on the payment you want to change. The eye button next to it only shows the payment.
- Change the Amount, Payment Method, date or note, then select Update. BillBook shows Payment updated successfully and the totals are recalculated. You can lower an amount at any time, but raising it above what is still due is refused.
- To remove a payment you entered by mistake, select Delete (2) on its row.
Select Add payment at the top of the same window to add another payment. At the top you also see Total Payable, Total paid and Total remaining for the purchase.
Note: You can attach the supplier's receipt to a payment with Attach Document when you add or edit it.