Share invoices and take online payments
Last updated: 2 November 2026 · 3 min read
Instead of printing an invoice or sending a PDF, you can send your customer a link. They open it on their phone, see the invoice and, if you have set up online payment, pay what is due. Use it for credit customers such as contractors who settle at month end.
Before you start: You need permission to view sales. To take payments online you also need a Stripe or Razorpay account. BillBook does not hold your keys for you, and you never enter them to share an invoice or quotation link.
Invoice link#
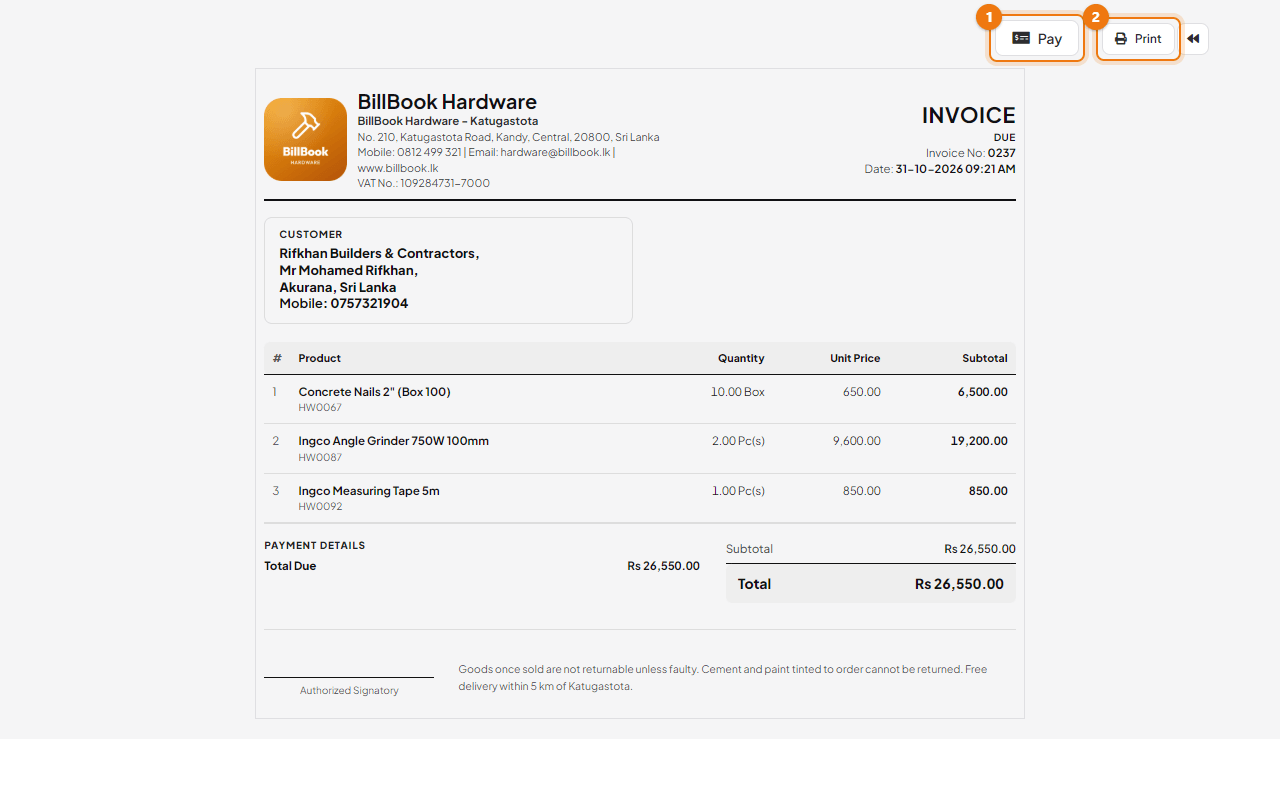
- Go to Sell > All sales and find the invoice. See Find, edit and reprint sales.
- Select the arrow next to View on its row, then select Invoice URL (1).
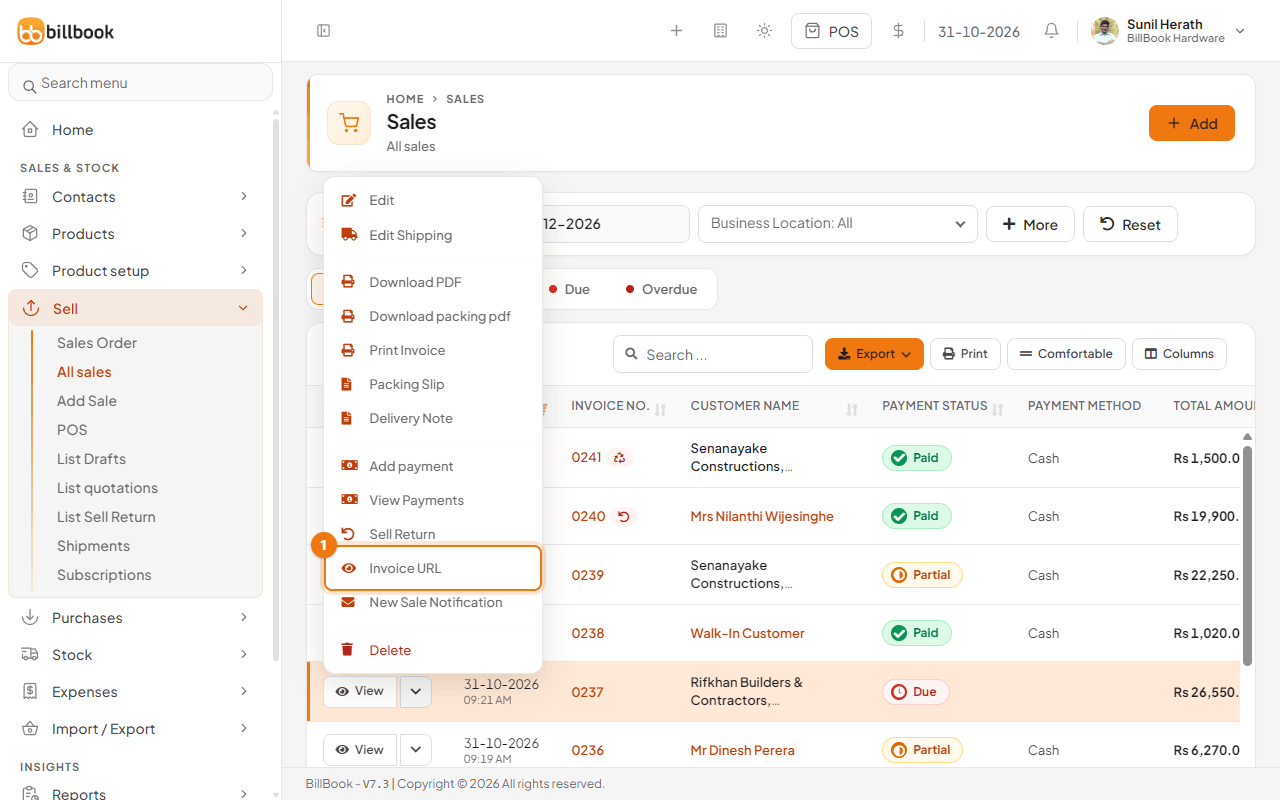
- The Invoice URL window shows the link (1) with the note "Link to view the invoice without login". Select the link text and copy it, then paste it into WhatsApp or an email yourself.
- Select View (2) to open the same page in your browser.
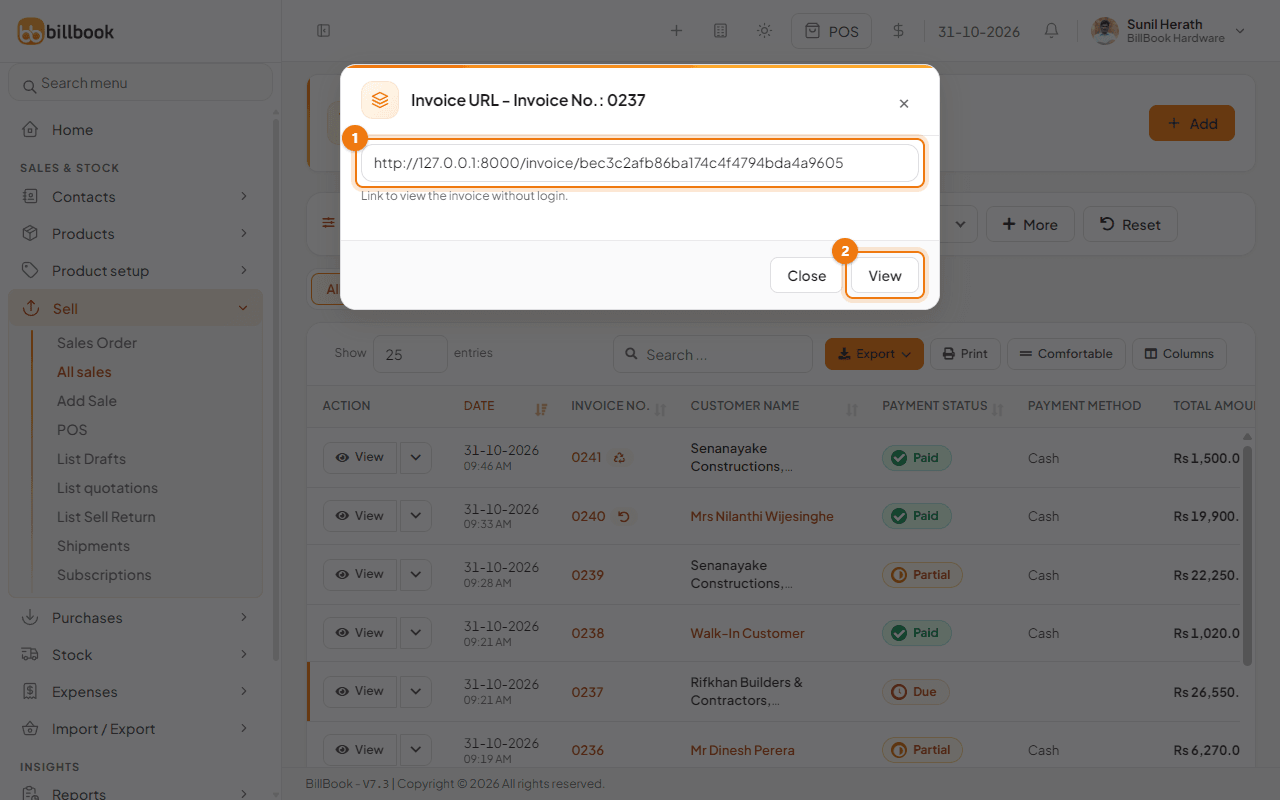
The public invoice page shows your business details, the customer, the items and the total, with Print (2) for the customer. Anyone with the link can open it, so share it only with the customer. The page needs no sign-in.
Quotation link#
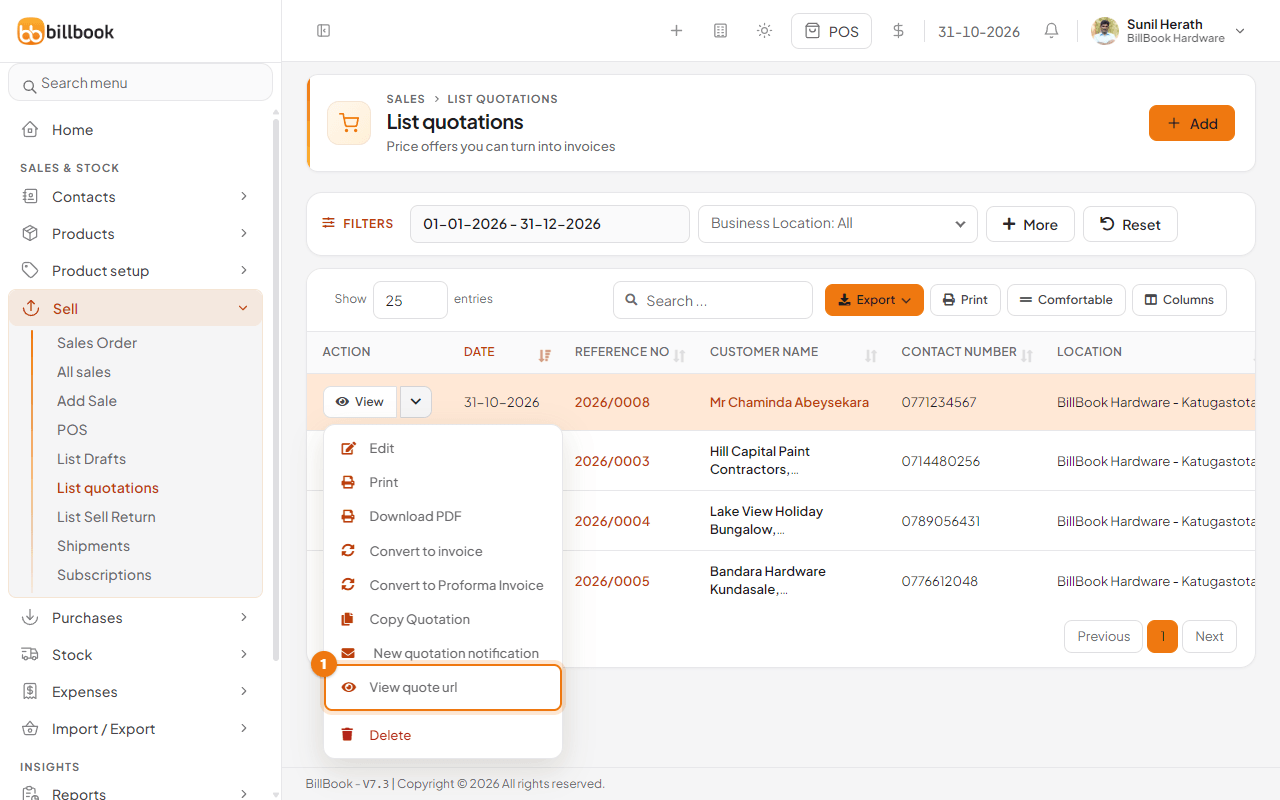
- Go to Sell > List quotations.
- Select the arrow next to View on the quotation's row, then select View quote url (1).
- Copy the link from the window, or select View to open it, exactly as for an invoice.
See Drafts, quotations and suspended sales for how to make a quotation.
Payment link#
When the payment link is on, the public page of a Final invoice that still has money due shows a Pay button (1 in the picture above).
- Save a Stripe or Razorpay key first (see Connect Stripe keys below).
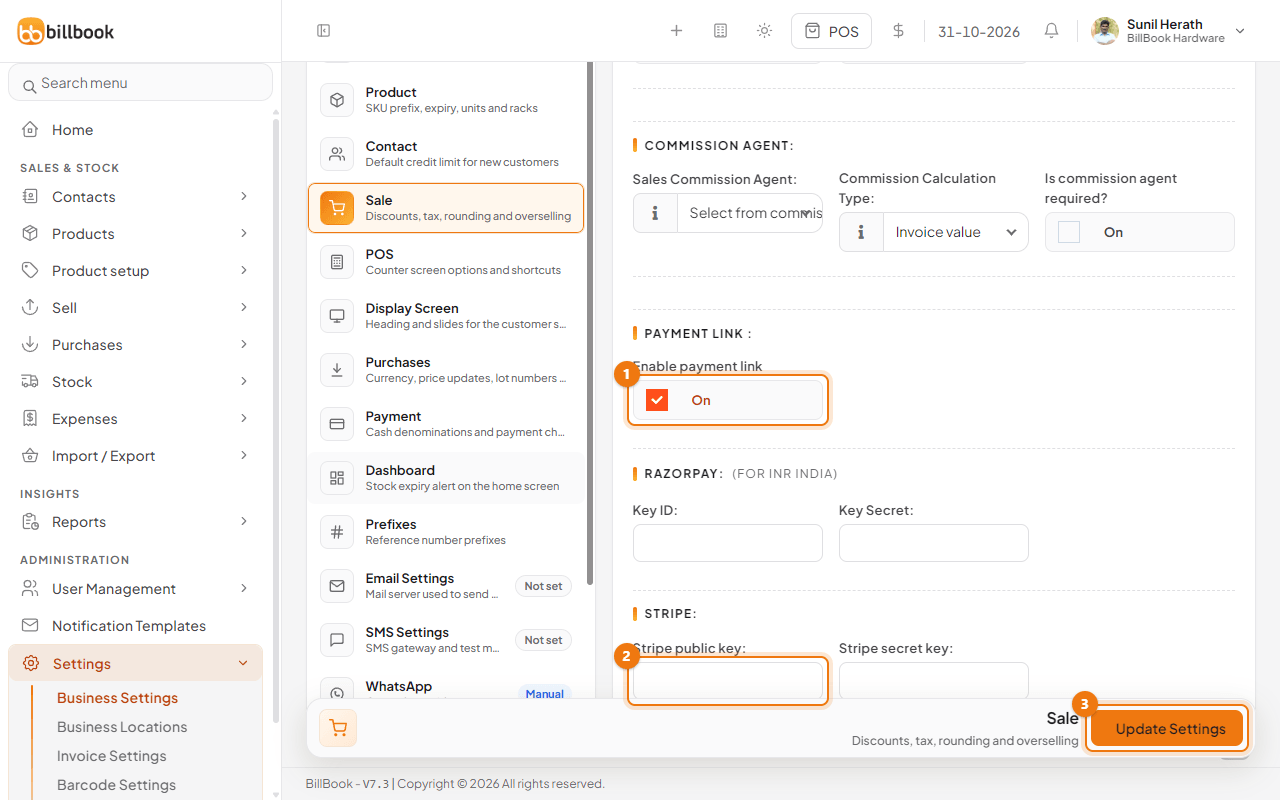
- Go to Settings > Business Settings and open Sale.
- Under Payment link, tick Enable payment link (1).
- Select Update Settings (3).
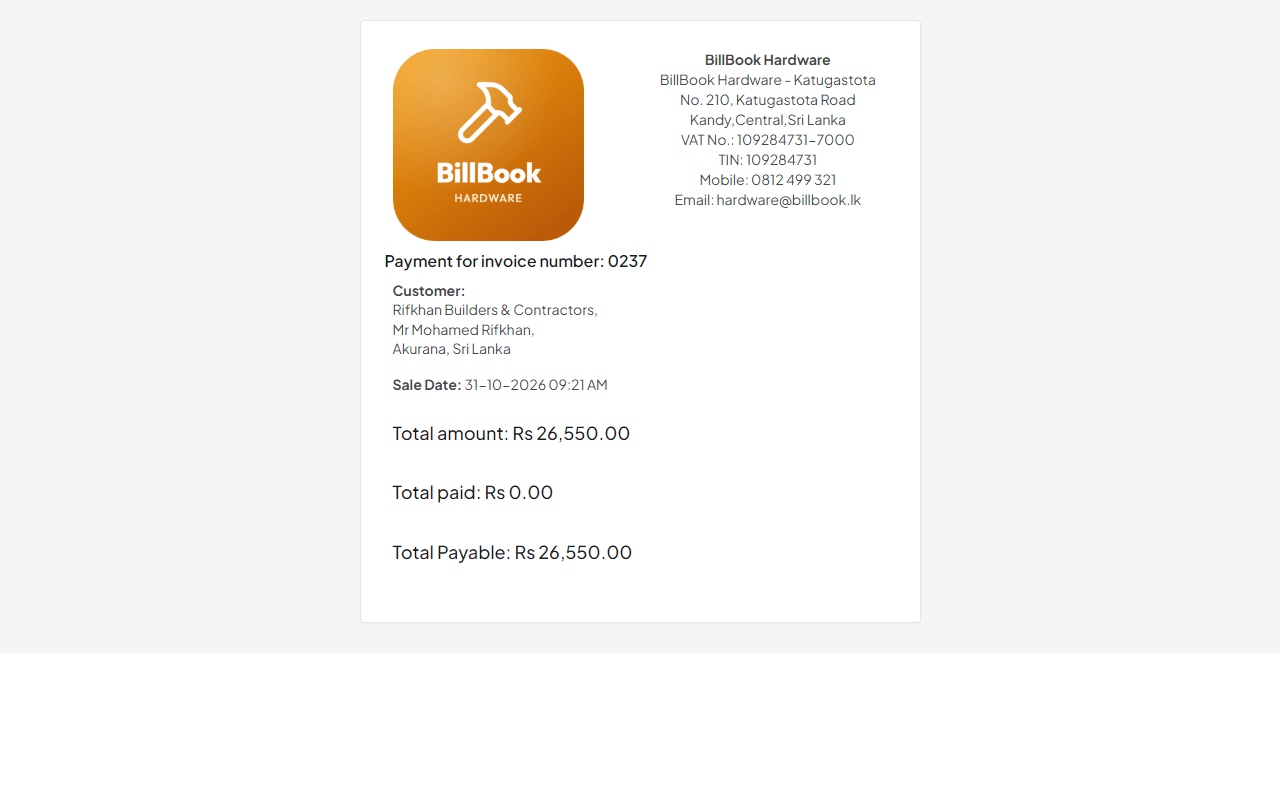
Selecting Pay opens the payment page at an address that starts with /pay/. It shows the Total amount, Total paid and Total Payable. The customer pays the amount still due, and BillBook records the payment on the invoice.
Note: Enable payment link cannot be turned on until a Stripe or Razorpay key is saved. The screen says "Save a Stripe or Razorpay key below, then come back to turn this on." If the keys are missing when you save, BillBook turns the payment link off. If no gateway is set, the public invoice page says "Online payment is not available for this invoice. Please contact" followed by your business name. Draft invoices and quotations have no payment page.
Connect Stripe keys#
- On the same Sale screen, scroll to Stripe and enter your Stripe public key (2) and Stripe secret key. Copy both from your Stripe dashboard.
- If you charge in Indian rupees, you can enter the Key ID and Key Secret for Razorpay instead.
- Select Update Settings (3), then turn on Enable payment link as shown above.
A Stripe payment button shows on the payment page once both Stripe keys are filled in. The secret key lets BillBook take money into your Stripe account, so keep it private and never post it in a chat.