
Cash flow and account reports
Last updated: 7 November 2026 · 4 min read
Use Cash Flow to see money coming into and going out of your accounts, and the Payment Account Report to find payments that are not tied to any account yet. Together they show where your money is and what still needs sorting out.
Before you start: You need payment accounts turned on and set up. See Set up payment accounts.
Cash flow#
- Go to Accounts > Cash Flow.
- The three boxes at the top show Money in, Money out and Net change for the dates chosen, with the number of entries. Under them, a line shows Transfers between accounts and the Opening balances of your accounts. Neither is counted as money in or out.
- Select Money in (1) or Money out to list only one direction, or All for both.
- Narrow the list with the date range and the Account filter (2). Select More for further filters, and Reset to clear them.
- The table lists each entry with its Account, Description, Payment Method, Money out, Money in, the Account Balance after it and the Total Balance across accounts. Use Export or Print to take it away.
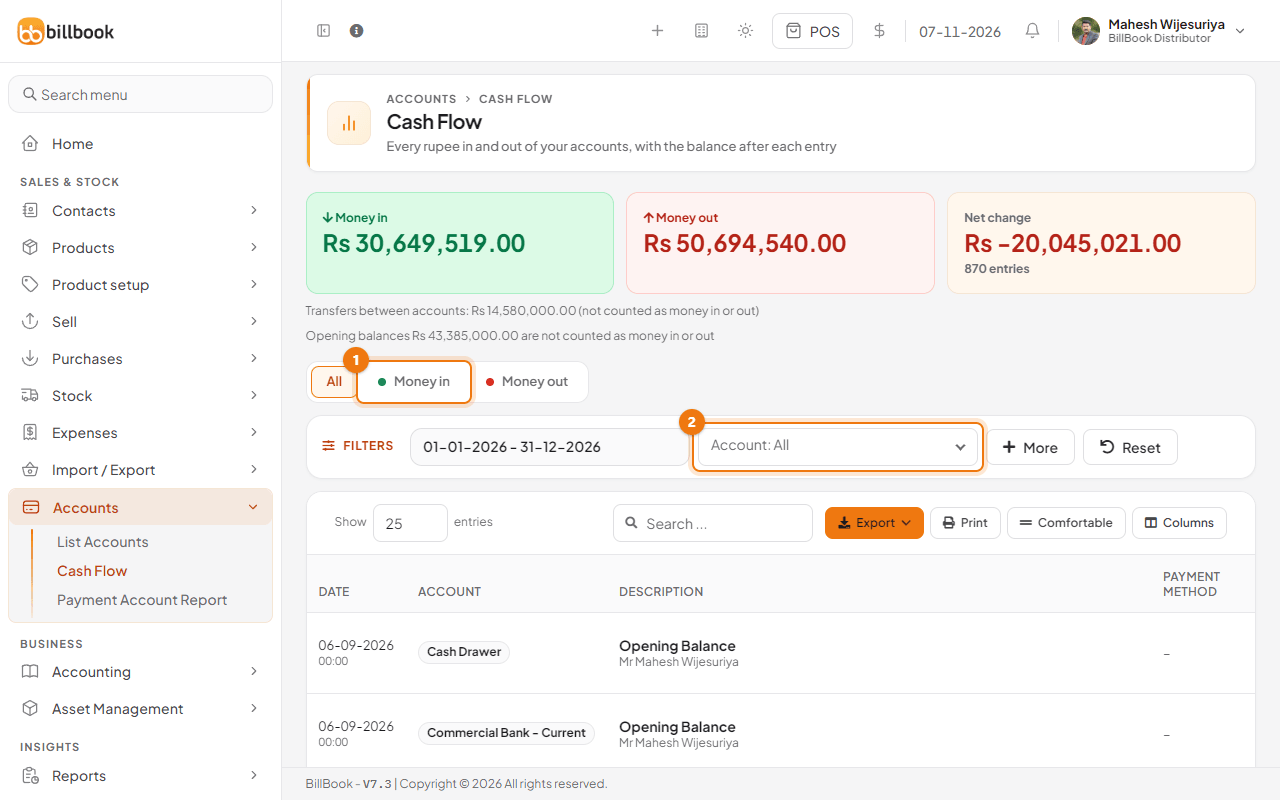
Note: A transfer between your own accounts is listed as two entries, Fund Transfer out of one account and into the other, so the table shows both. The boxes at the top do not count it, because the money has only moved. For example, moving Rs. 100,000.00 from Commercial Bank - Current to Sampath Bank - Savings adds nothing to Money in or Money out. The line under the boxes counts it in Transfers between accounts. Filter by Account to see one account on its own.
Payment account report#
This report checks every customer and supplier payment against your accounts.
- Go to Accounts > Payment Account Report.
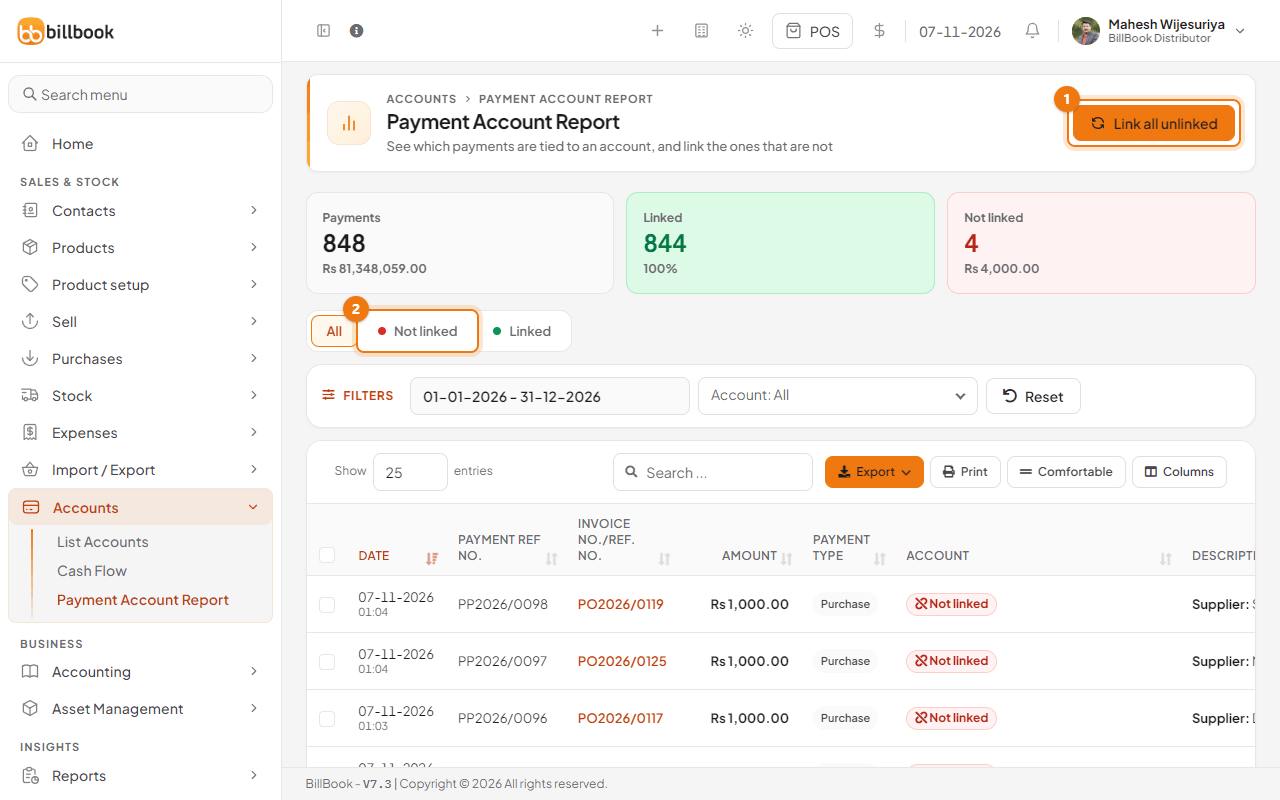
- The boxes show how many payments there are, how many are Linked to an account and how many are Not linked, with their amounts.
- Use the Not linked tab (2) to list only payments that still need an account, or Linked for the others.
- Use the date range and Account filter to narrow the list. The Account filter also has None for payments with no account.
Link a payment to an account#
Payments made before you set up accounts, or without a default account for their method, show Not linked. You can link them one by one, a few at a time, or all at once.
One payment
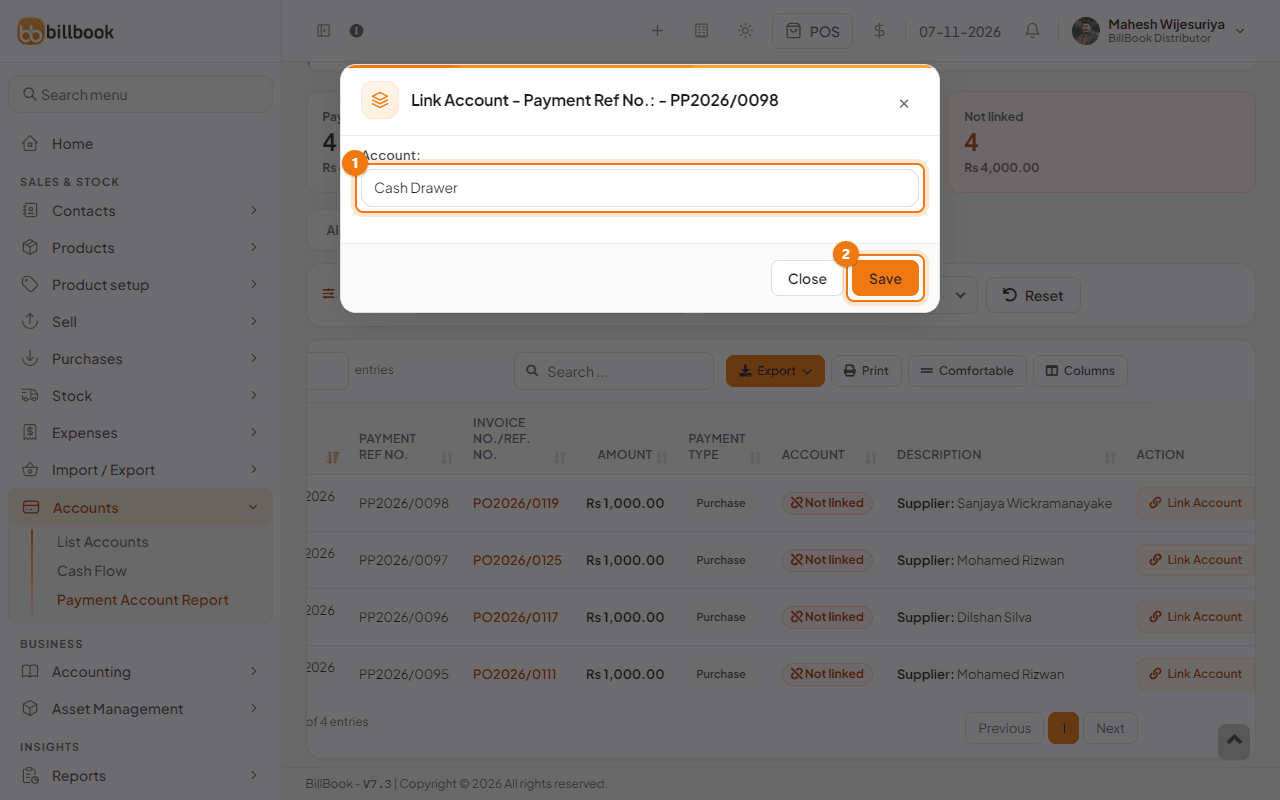
- On the payment's row, select Link Account. A payment that already has an account shows Change account instead, and works the same way.
- Choose the Account (1), for example Cash Drawer.
- Select Save (2). BillBook shows Account linked successfully, and the row shows the account name.
Several payments
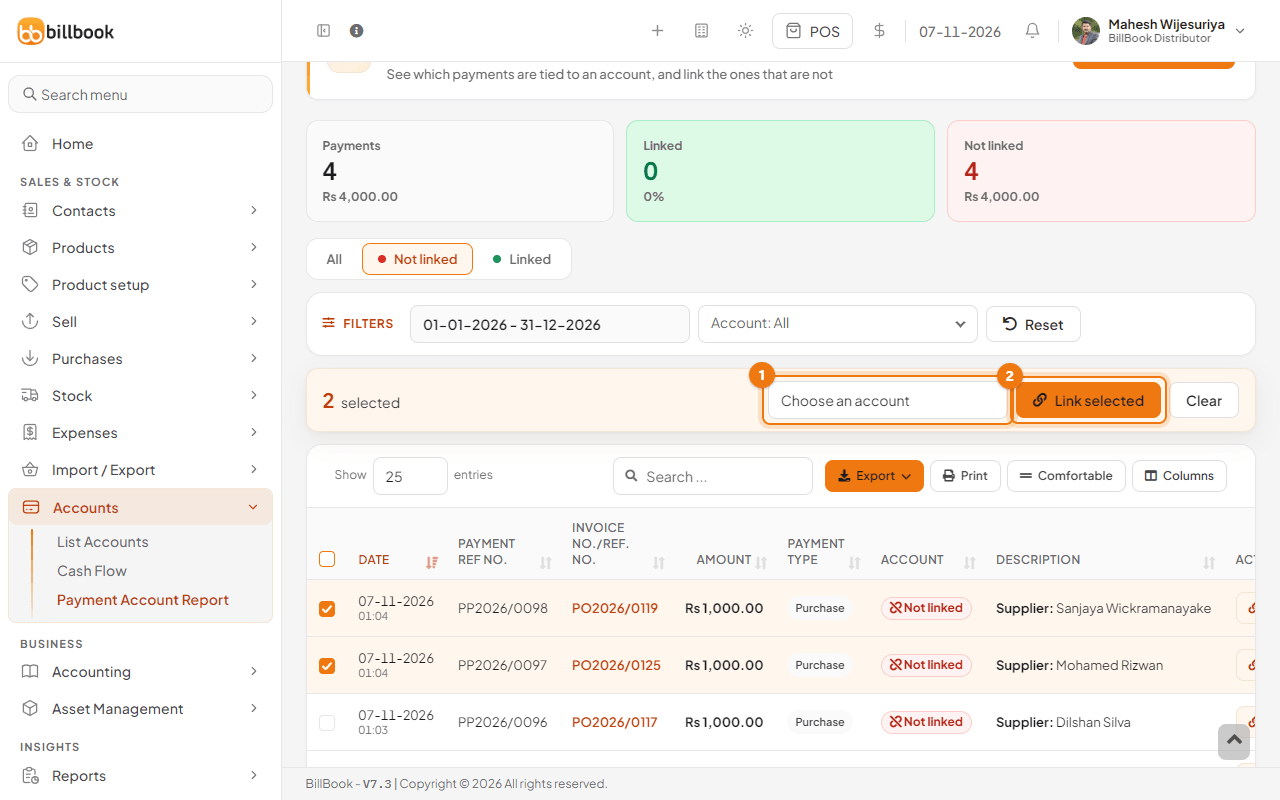
- Tick the box at the start of each row. A bar shows how many are selected. Tick the box in the column heading to select every row on the page.
- Choose an account in Choose an account (1).
- Select Link selected (2). Use Clear to untick everything instead.
All unlinked payments
- Select Link all unlinked (1 in the picture of the report above) at the top right of the page.
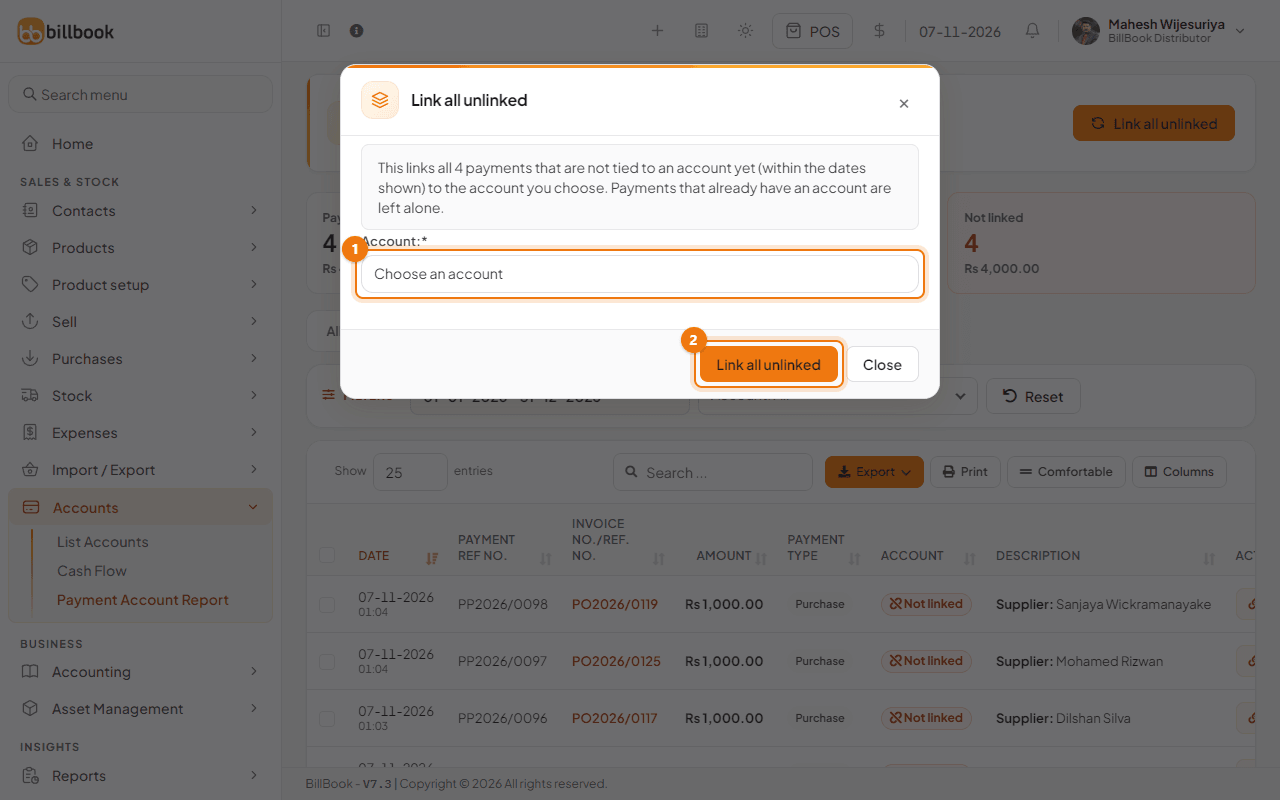
- Read the message. It tells you how many payments will be linked, within the dates shown. Payments that already have an account are left alone.
- Choose the Account (1) and select Link all unlinked (2).
Tip: Linking all payments puts them in one account, so use it for a single drawer or bank account. If you take payments in several ways, set a default account for each payment method first and link the rest by hand.
For the balance sheet and trial balance, see Money reports.