With BillBook’s Warranty Feature, you can assign, track, and display product warranties, ensuring better customer support and post-sale service. 🚀🔧
🔹 Enabling Warranty #
✅ Go to → Settings → Business Settings → Products
✅ Enable “Warranty” ✅
✅ Click “Save” 💾
Once enabled, you can assign warranties to products and display them on receipts.
📌 Using Warranty in BillBook #
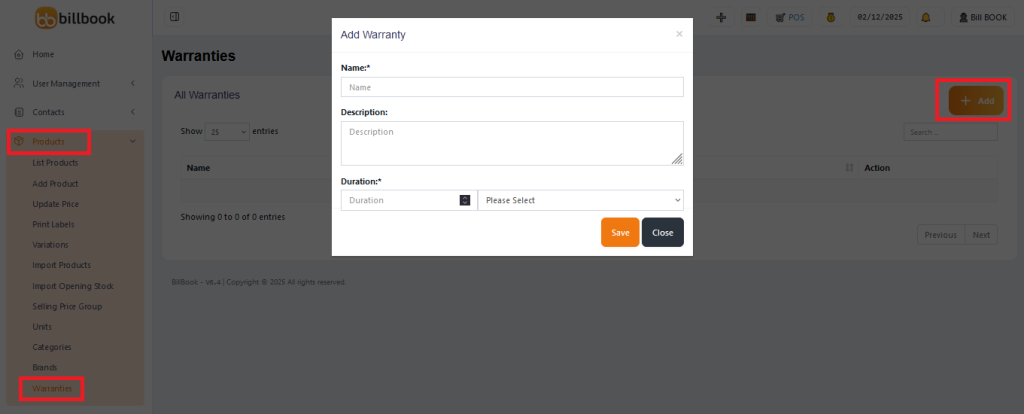
1️⃣ Adding Warranty Types #
✅ Go to → Products → Warranty
✅ Click “Add Warranty”
✅ Enter the Warranty Name & Duration (e.g., 6 Months, 1 Year, 2 Years)
✅ Click “Save” 💾
📌 Benefit: Helps standardize warranty options for different products.
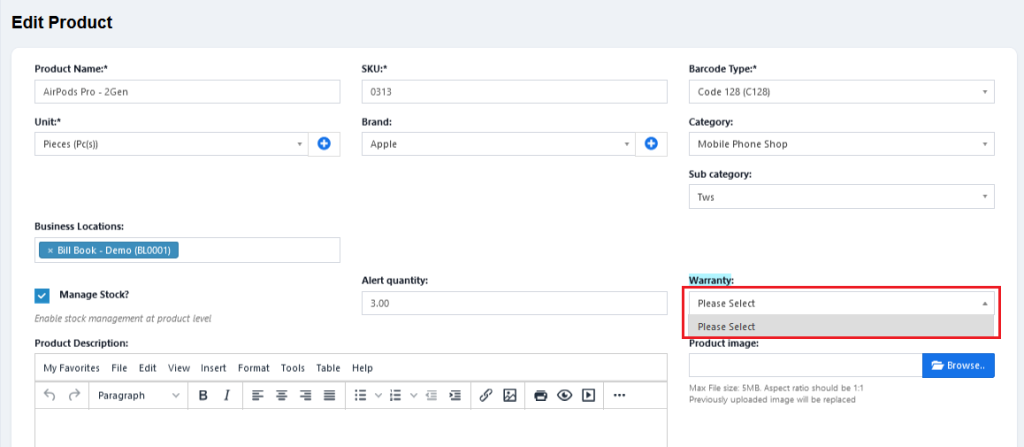
2️⃣ Assigning Warranty to Products #
✅ Go to → Add/Edit Product
✅ Select the appropriate Warranty Type from the dropdown menu.
✅ Click “Save” 💾
📌 Now, when this product is sold, it will automatically include the assigned warranty!
3️⃣ Selling Products with Warranty #
✅ When selling a warranty-assigned product, the system automatically:
- Uses the transaction date as the start of the warranty 📆
- Tracks the warranty period for future reference
✅ To display the warranty on invoices & receipts:
- Go to → Invoice Layout
- Enable “Show Warranty” ✅
📌 Now, receipts will show warranty details for customer reference! 🧾
🚀 Why Use BillBook’s Warranty Feature? #
✅ Automates warranty tracking for sold products.
✅ Ensures customers receive warranty details on invoices.
✅ Reduces disputes by keeping a clear transaction record.
✅ Improves after-sales service by tracking warranty claims.
With BillBook’s Warranty Management, tracking product warranties is easier than ever! 🚀🔖
Let me know if you need any refinements! 😊