The Import Sale feature in BillBook allows businesses to bulk upload sales data using an Excel file, making sales entry faster and more efficient. 🚀📊
📌 Steps to Import Sales in BillBook #
✅ Step 1: Go to → Sell → Import Sale
✅ Step 2: Click “Download Template” 📥 to get the Excel file.
✅ Step 3: Open the Excel template and enter the required sales data.
✅ Step 4: Follow the instructions on the Import Sale page while filling in the details.
✅ Step 5: Save the Excel file and upload it by clicking “Choose File” → “Submit”.
📌 If an error occurs, check the data format and correct any mismatches.
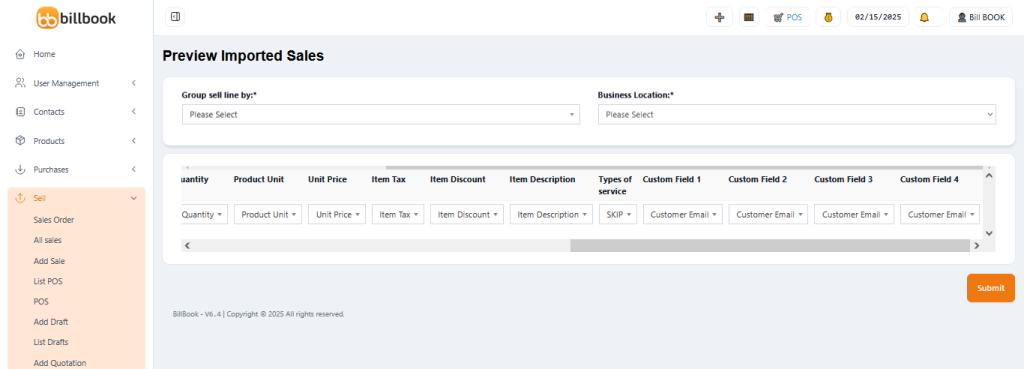
🔹 “Group Sell Line By” Field in Import Sale #
This option helps the system identify which rows belong to the same sale.
📌 Example:
- If multiple products are part of one sale, they should have the same Invoice Number in the Excel file.
- When importing, select Invoice_Number in the “Group Sell Line By” dropdown.
- This ensures all rows with the same Invoice Number are grouped under one invoice.
❌ “You Cannot Select a Field Twice” Issue & Solution #
🔹 This error occurs when the same column is selected multiple times in the import table.
✅ Solution:
- Ensure that each column name is unique when mapping fields.
- If the issue persists, re-upload the file with proper field selections.
🚀 Why Use Import Sales in BillBook? #
✅ Saves time by bulk uploading sales transactions 📋
✅ Reduces manual data entry errors ✅
✅ Ensures quick & organized sales data import ⏳
✅ Supports grouped sales entry for multi-item invoices 🔄
With BillBook’s Import Sale feature, businesses can process high-volume sales effortlessly! 🚀📥
Let me know if you need any refinements! 😊