Managing users in BillBook is simple and efficient! You can add new users, assign roles, set permissions, and even restrict discounts or access. Follow these steps to add users and assign them to specific business locations.
👤 Adding Users #
To add a new user:
✅ Go to → User Management → Users → Add
✅ Fill in user details (Name, Email, Contact Info) 📧📱
✅ Select the user role (Admin, Manager, Salesperson, etc.) 🎭
✅ Set a unique username 🔑
💰 Sales Commission Percentage (%) #
- If the commission agent feature is enabled, enter the commission percentage for this user.
✅ Activate or Deactivate the User #
- Use the “Is Active?” option to enable or disable the user account.
✏️ Editing or Deleting Users #
- You can edit or remove users anytime from the User Management section.
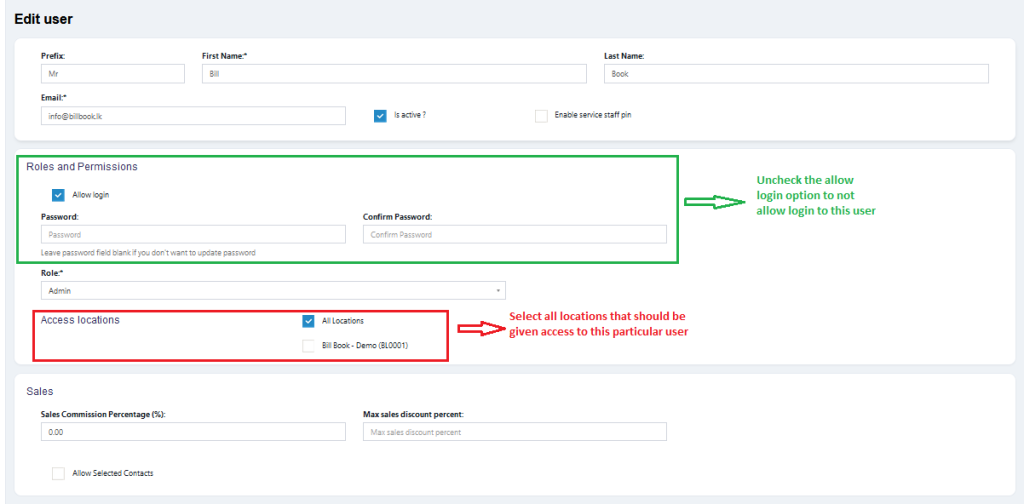
📍 Assigning Locations to Users #
Each user can be assigned to specific business locations for better access control.
✅ Go to User Management → Edit User
✅ Select the locations this user can access 🏬
✅ Save Changes 💾
📌 Why Assign Locations?
- Helps manage multi-location businesses effectively
- Ensures users only access authorized business locations
🔖 Max Sales Discount #
- Define the maximum discount a user can apply on sales. 💲
- If you don’t want any restrictions, leave this field blank.
🚫 Disable Login #
- If you want to restrict a user’s access without deleting their profile, you can disable their login.
- This keeps their data intact while preventing them from signing in.
With BillBook’s user management, assigning roles, permissions, and locations is quick and hassle-free! 🚀
Let me know if you’d like any refinements! 😊